


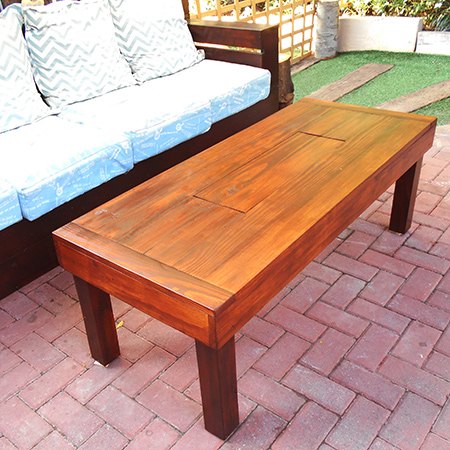
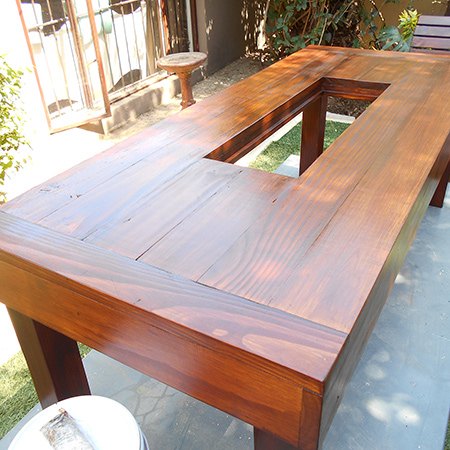
Outdoor Table With Ice Cooler Box
Here's a great project you can do in a weekend using supplies that you will find at your local hardware store. This outdoor table has a built-in ice cooler to keep all your summer refreshments cold on hot, hot days.

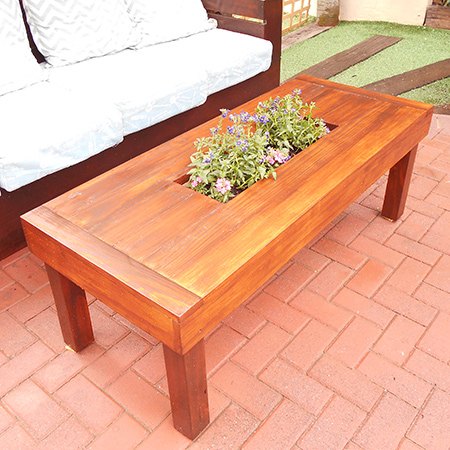
The rectangular, plastic plant containers are perfect as ice boxes for your summer refreshments outdoors on the patio or by the pool, and the table is designed that you can easily hide the ice box when not in use.

When you don't need to use the table for cold refreshments, buy two plastic plant containers and fill one with colourful plants.
YOU WILL NEED:
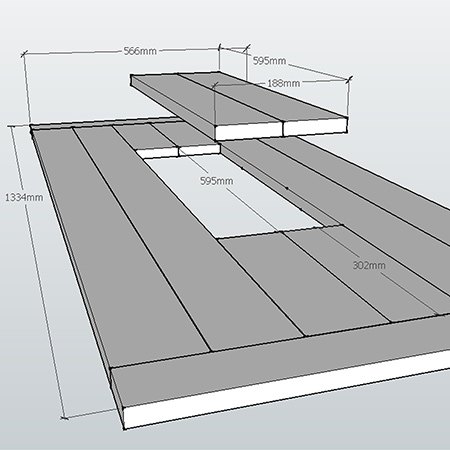
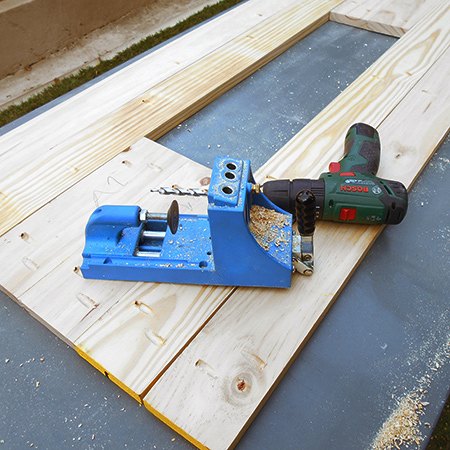
1. It is surprisingly easy to join the slats together using a Kreg pockethole jig. Simply use the jig to make holes along the length of each slat, approximately 6 holes per slat with one hole about 50mm from the edges.
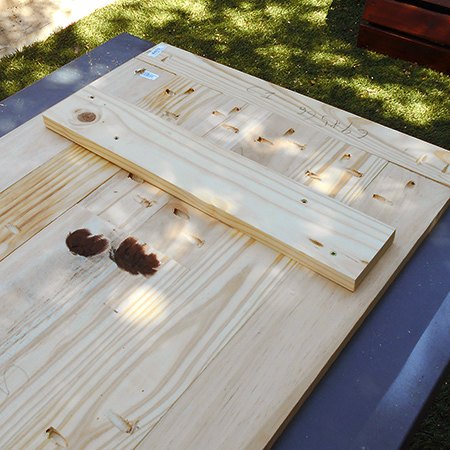
4. The two slats that make up the lid are also joined using a pockethole jig. To disguise the holes fill with wood filler. Select a colour that matches the finished colour of the table.
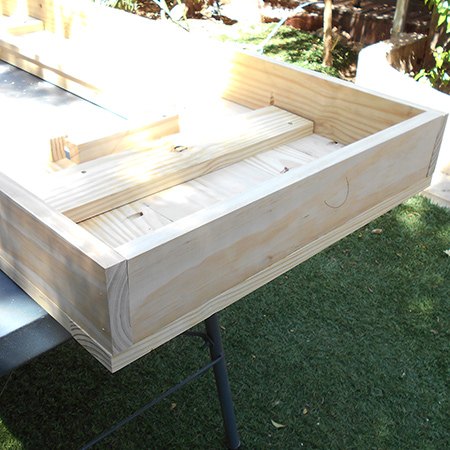
5. Screw the slat supports over the width of the joined slats using 30mm screws. Although not essential, these supports will add extra support - you never know who might want to sit on the table !
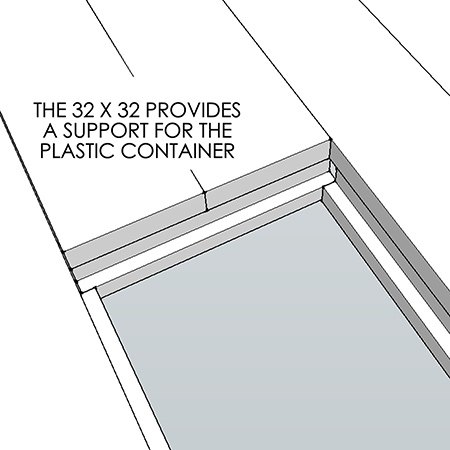
6. The next step involves adding a support frame for the plastic (plant) container. As mentioned previously, if you are unable to source a container that is the same size you can either modify the two centre slats, or change the size of the supports that hold the container. To make the support frame using the 32 x 32mm pine I used my router table to cut a rebate that is equal in height and width as the top of the plastic container. This will allow the container to sink below the surface of the table and the lid be placed on top.

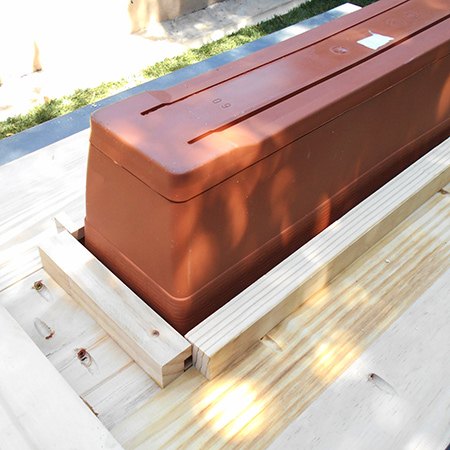
7. The support frame is mounted to overhang inside the opening and is attached underneath the table top. Test fit the container within the supports and then mount the support frame to the underside of the slatted top using 40mm screws along the length.
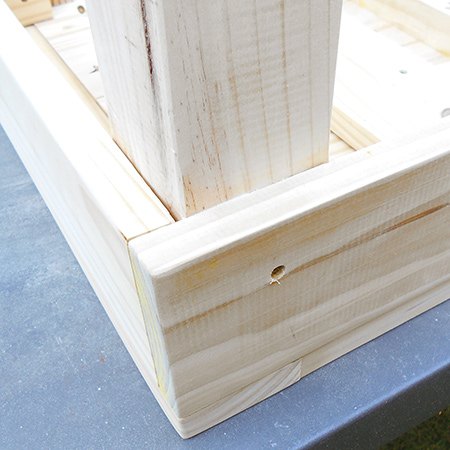
8. Now you can complete the table top by adding the long and short aprons. Unfortunately both the side planks were slightly warped - one more than the other. To remedy this I added a few more pocketholes along the length to be able to pull the planks straight. It made it easier to screw the two end holes in place first and then have someone push the warped boards straight while I secured the remaining holes.
10. Make sure the legs are exactly the same length... measure twice and then again for a table that doesn't wobble! Secure the legs using the small blocks. Screw the blocks to the underside of the top and to the leg.
Finishing
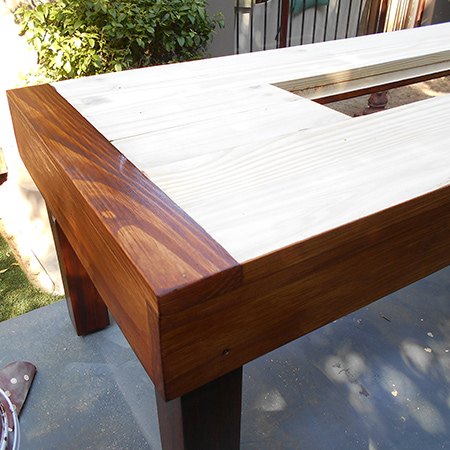
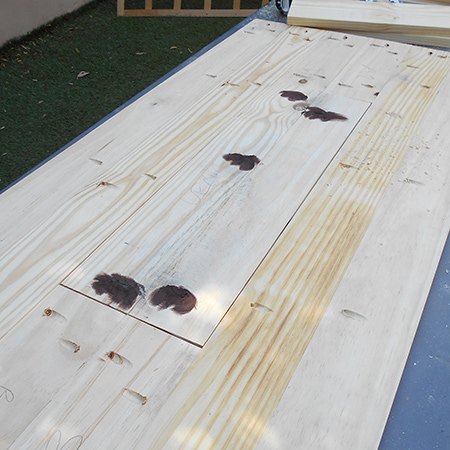
When applying to the support frame use a dabbing motion on the edge to prevent staining the top. Smooth along the grain to even out.

Want more details about this and other DIY projects? Check out my blog post!
Comments
Join the conversation
2 of 36 comments
-
This is wonderful! I would even use it indoors and the center compartment could hide the remotes.
-
Wonderful idea and beautiful as well! Hugs


Frequently asked questions
Have a question about this project?
Is there a way to convert this to inches???