


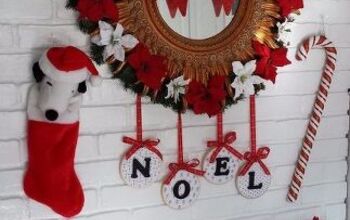
JOY Embroidery Hoop Ornaments + Christmas Mantel
2 Materials
$15
1 Hour
Easy
I LOVE Christmas and all things Christmas - family, parties, decorating, cookies. The works! But I don't go for the mellow and classy Christmas. Give me COLOR! So as I planned my Christmas mantel this year, I wanted to incorporate color and some new elements but not break the bank. Here's my ! Plus, how to make your own JOY Embroidery Hoop Ornaments.
These JOY Embroidery Hoop Ornaments were SOOO easy to make and involve no sewing. They are different from the typical wreath, but colorful, easy to make, and pretty inexpensive. And if you didn’t notice, they are upcycled from my BOO Halloween Wreath!
Check out the finished product and full tutorial here: http://www.oneprojectcloser.com/joy-embroidery-hoop-ornaments-christmas-mantel/
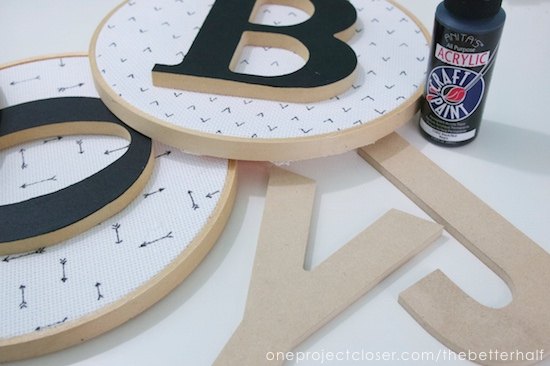
Most of the supplies I used I bought at Walmart and I think I spent around $15, give or take. You could also pick up these supplies in any craft store. 3 embroidery hoops 3 wooden letters (J, O, Y) Embroidery fabric, two packages Black Acrylic paint Red Ribbon with wire Hot Glue
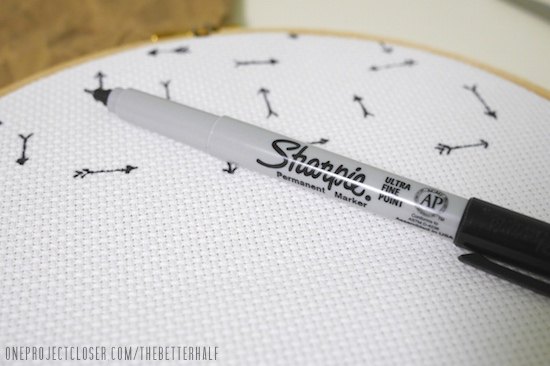
Step 1: Paint the Letters I used a foam brush to lightly paint black just on the front of the letters. I liked the idea of having the side wood exposed, highlighting the exposed wood of the embroidery hoop. Step 2: Sharpie Design Probably the most difficult step for my was putting the embroidery fabric into the hoop. Seriously not easy. haha Then, after I had trimmed the fabric I realized that the lines of the fabric were not lined up straight with the fastener of the embroidery hoop. So take it from me – do that first! Once the fabric was in the hoop, I free-handed some simple geometric shapes with a fine-tip Sharpie onto the fabric. It was by no means perfect, but way easier than sewing the design. Step 3: Glue Next I glued the letters onto each hoop and the red ribbon onto the back. I cut the ribbon extra long and then trimmed any excess after I hung them. About 2 inches above the embroidery hoop on the ribbon, I glued a bow, just to make it a little more festive and bright.
Step 4: Hang & Enjoy Super simple, right? Maybe you didn’t need that step by step since it was pretty self-explanatory, but I thought why not show you just how easy it is!
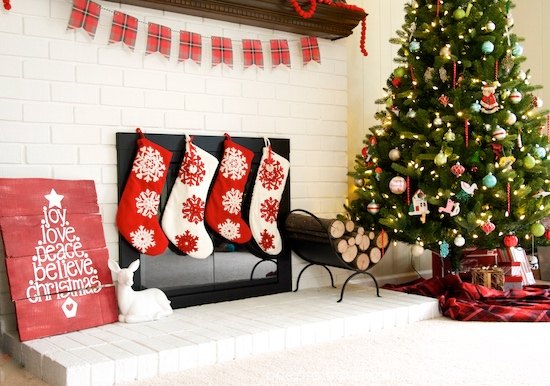
This DIY hand-painted Christmas pallet is an "oldie but goodie" project! You can sorta see that the bottom plank broke off in our move last year, but I glued her back on and she's looking good!
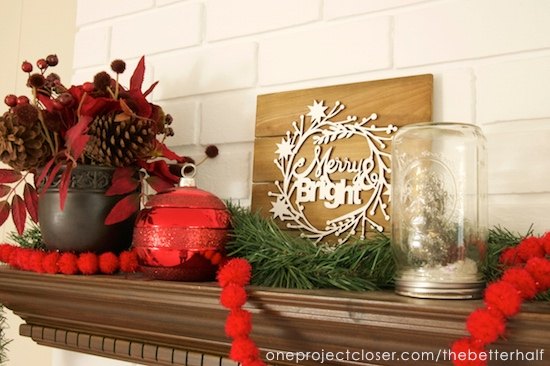
This little Merry & Bright pallet is a new project this year and didn't deserve a post because it was so easy! I bought a prefinished pallet and the wood cut-out from Michael's and just glued the cut-out to the pallet. But super cute, right?
My tree skirt is new this year and I LOVE IT! I bought some cheap $5 fleece from Walmart and gathered it under the tree. Cheap. No sew. So pretty.
You may also notice one of my most popular projects of all time - my Plastic Spoon Christmas Trees!? Of course, I couldn't leave them out of my Christmas Mantel. A few spoons feel off in the move and are waiting for me to glue them back on, but overall they have stood up really well over time! So there it is - my mantel and JOY Embroidery Hoop Ornaments. Click on the link to my blog for the original post and lots of other great Christmas projects, including DIY Christmas Pallet and how to make Plastic Spoon Christmas Trees!

Want more details about this and other DIY projects? Check out my blog post!
Comments
Join the conversation
2 of 29 comments
-
Entire fireplace.
-
Can't wait to try this with the kids


Frequently asked questions
Have a question about this project?