


How To Make a Valentine Love Light
$5
2 Hours
Medium
I saw something like this online, and thought that it would be fun to try. I always love to make crafts out of other things that would normally just get thrown away. With this, if you have a blown out bulb (that hasn't left it's mark), you can turn it into something fun for Valentine's day - or any other day, with however you finish it up!
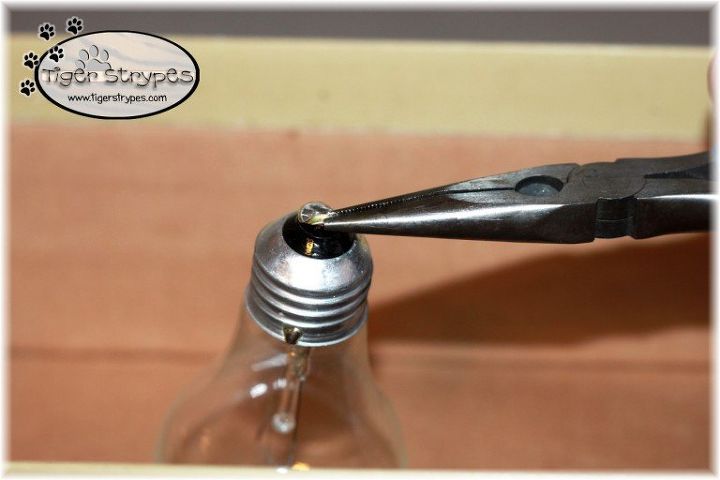
I started by using some pliers to remove the little seal at the bottom of the bulb. I did this in an old shoe box to catch all of the pieces and not have them scatter around the craft room. Also, as a just in case, if I messed up and broke the bulb. Still using the pliers, I broke up the plastic portion that was below it. Making sure to shake all of the pieces out into the box. Once that part is done, using a small screwdriver, I broke the fill tube. This takes a bit of gentle force, so be careful!
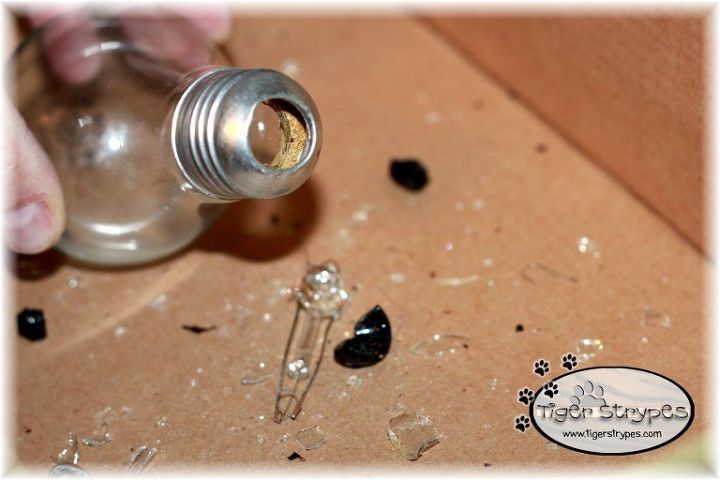
After that was broken, I shook out all of the loose pieces, and pulled the broken part of the bulb out. I made sure to use my small screwdriver to clean up the edges and make sure that all of the broken glass was removed. Be careful not to cut yourself.
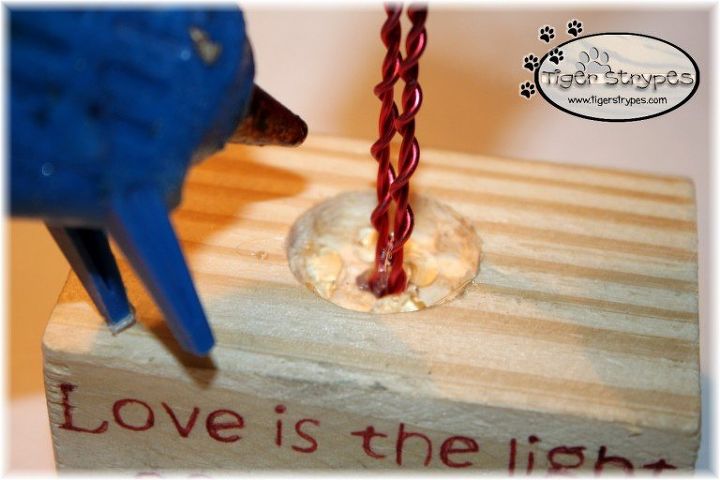
I then cut a couple of pieces of craft wire to create some "hearts" (for full details - see my main blog post). The length of wire that you use, will just depend on how tall you want them after the wire is folded in half. Don't worry about it being perfect, you can always trim the ends to make them shorter. I glued the "hearts" into the hole at the bottom to secure them.
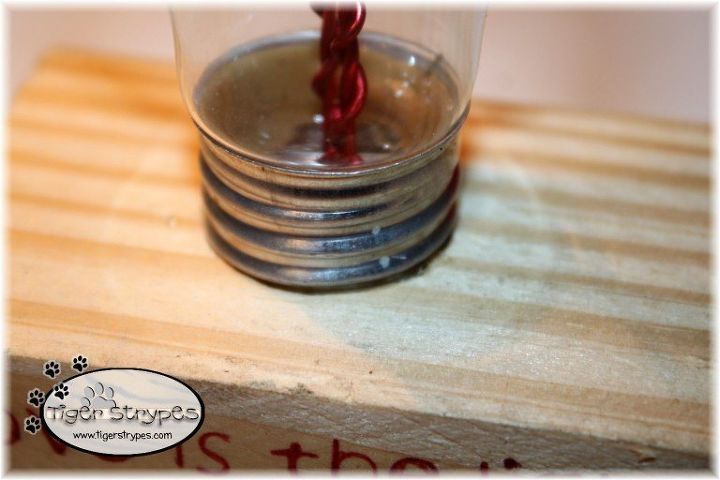
Using more hot glue, I then put the bulb over the top of the hearts and held it until it was dry.
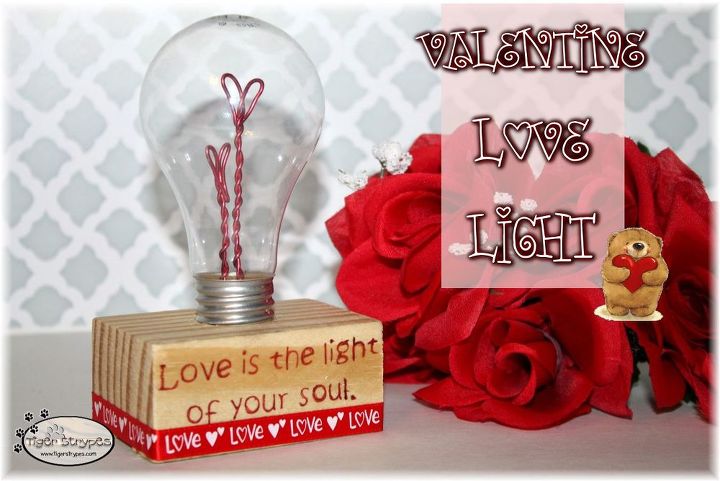
Here's the finished piece. For the full instructions, take a look at the full post...link below.

Want more details about this and other DIY projects? Check out my blog post!
Comments
Join the conversation
2 of 37 comments
-
Thank you! So cute and easy
-
That is too cute


Frequently asked questions
Have a question about this project?