


In The Frame - No.4
Easy
Another "In The Frame" post and another frame makeover...
This time the story involves 2 castaway frames that I found last summer at Put&Take. These twin sisters had nothing of significance, and in fact they looked pretty worn out. Lucky for them that I happened to be at the right place at the right time, so they got the chance to enjoy "the good days" ahead.
This time the story involves 2 castaway frames that I found last summer at Put&Take. These twin sisters had nothing of significance, and in fact they looked pretty worn out. Lucky for them that I happened to be at the right place at the right time, so they got the chance to enjoy "the good days" ahead.
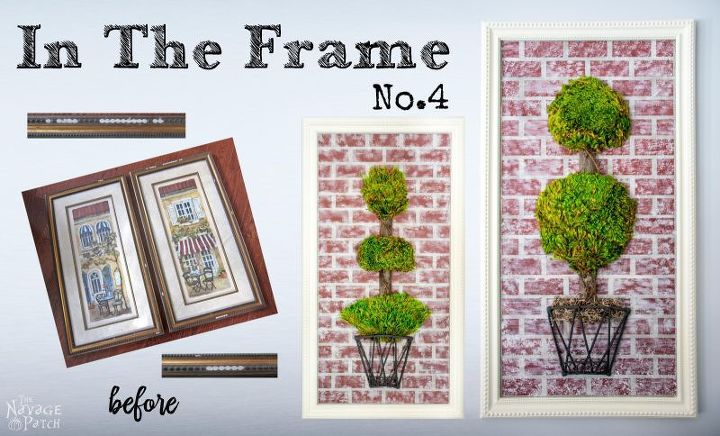
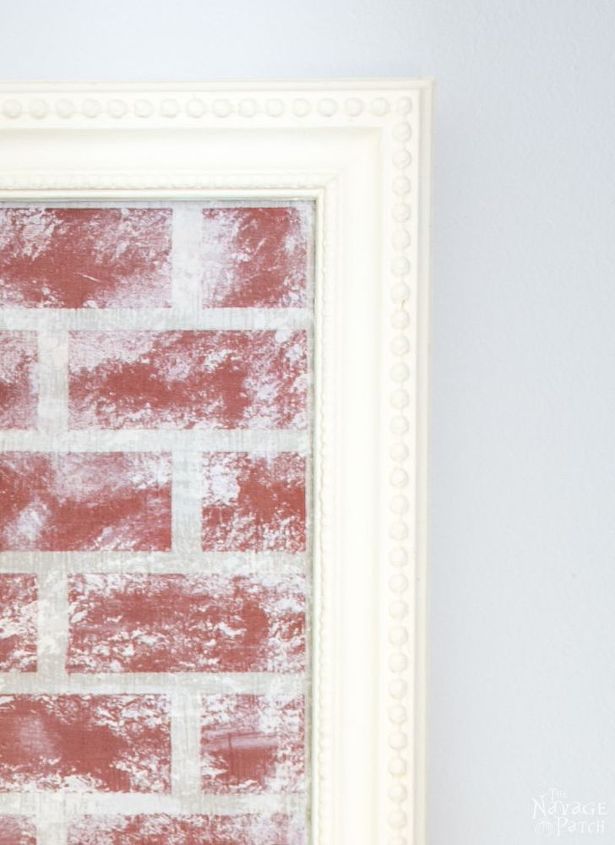
Last weekend, these twin ladies were chosen to be married with my topiary wall art. They weren't in their best shape, but they were the perfect size for the wall art I made. All they needed was a bit of TLC, which I was ready to give.
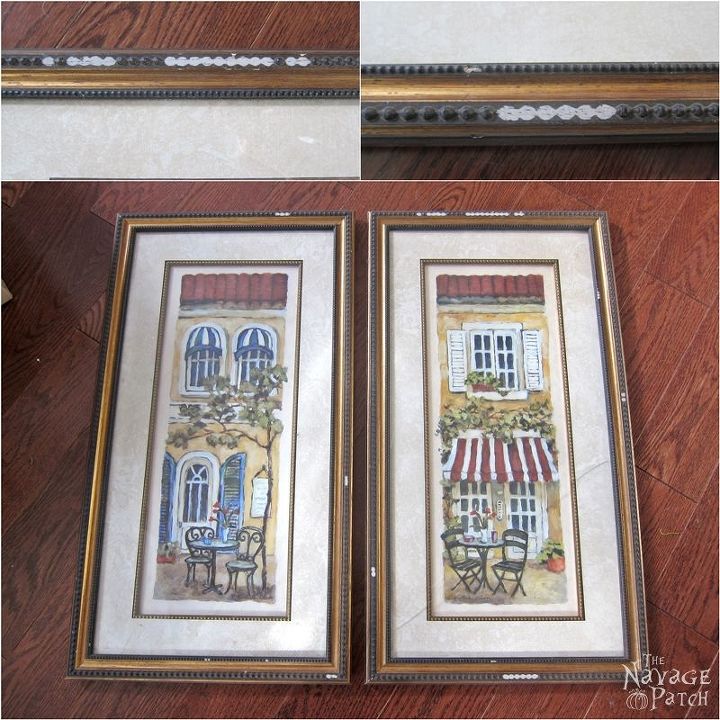
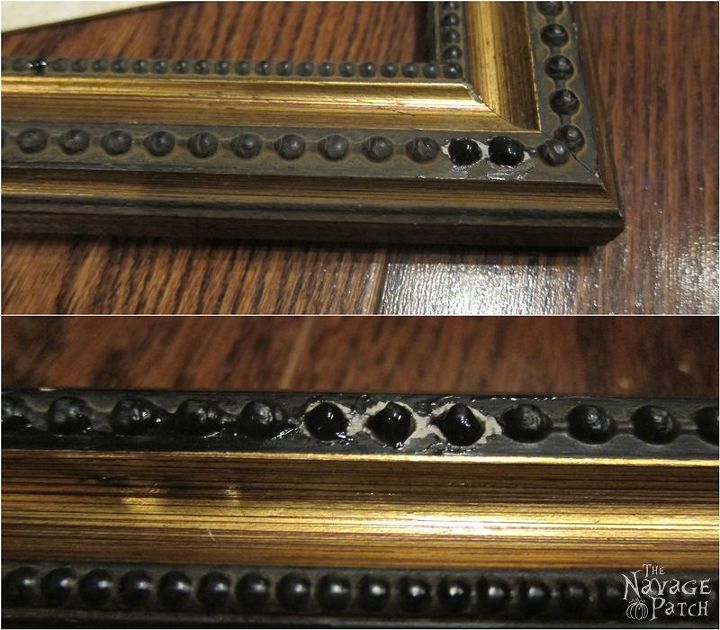
First, I needed to re-create the missing beads, and to do so I either had to sand all the outer beads down, or go to a framing shop and get some bead strips and glue them on. But who wants to drive to a framing shop in this cold weather or spend time for that kind of intricate sanding? I am too lazy for any of it! Or should I say I am too practical for any of it?
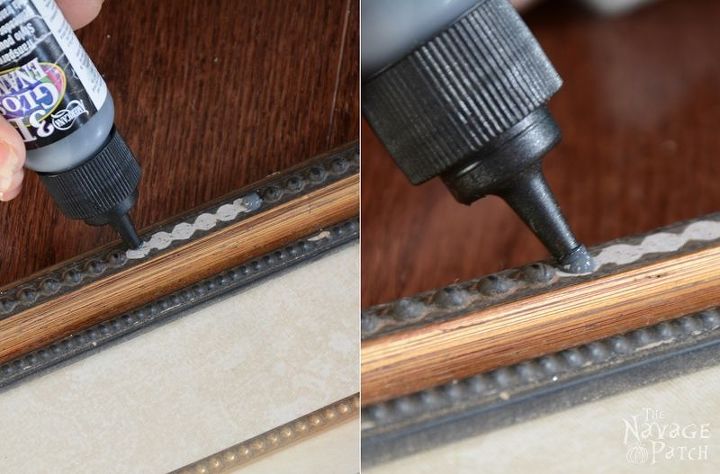
As it is so easy to apply the Glass Writer, I finished re-creating the beads in a breeze. I put a dab in every spot where there was a missing bead and perfected the bead shape with a toothpick before the paint dried.
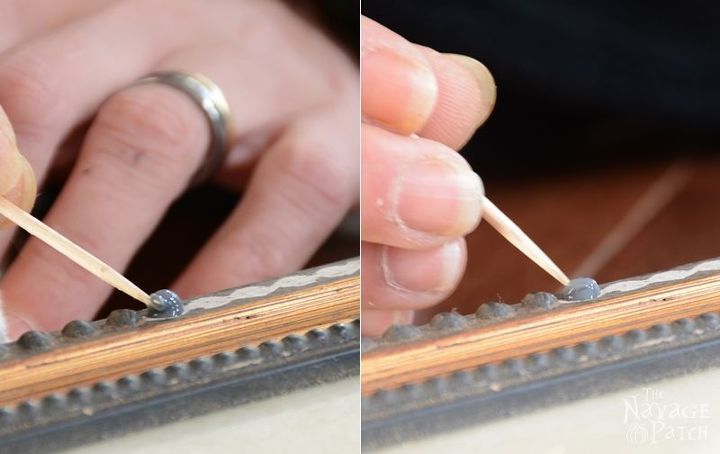
It takes around 10-15 minutes for the paint to start drying. That gave me more than enough time to perfect the shape I was trying to replicate. Also I made sure I made my beads a tiny bit bigger knowing that the paint shrinks a bit while drying. That way I managed to reach the same size beads when the paint was dry.

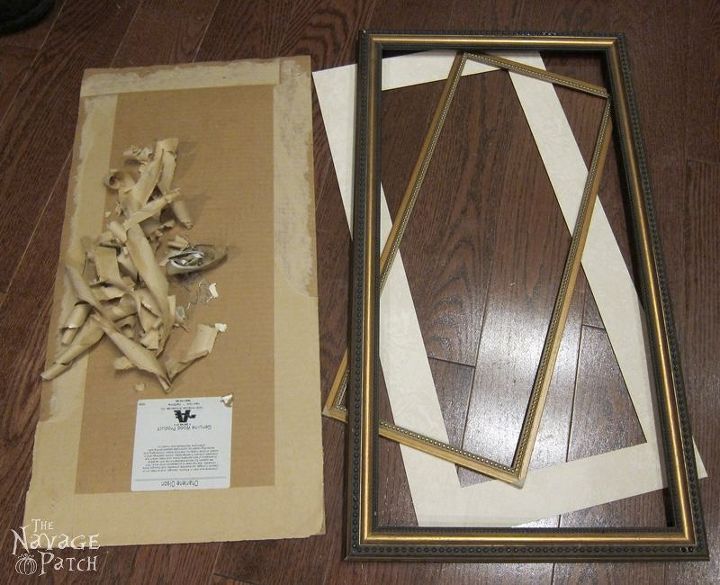
Once I re-created the beads, I put the frames aside for a night to let the Glass Writer paint fully dry and harden. Next day, both frames were ready for their final prep and painting session.
First I started taking the frames apart. One of the glass faces was broken, so that got thrown away, but I kept the other one for possible future use. Then I gave them a good cleaning before painting.
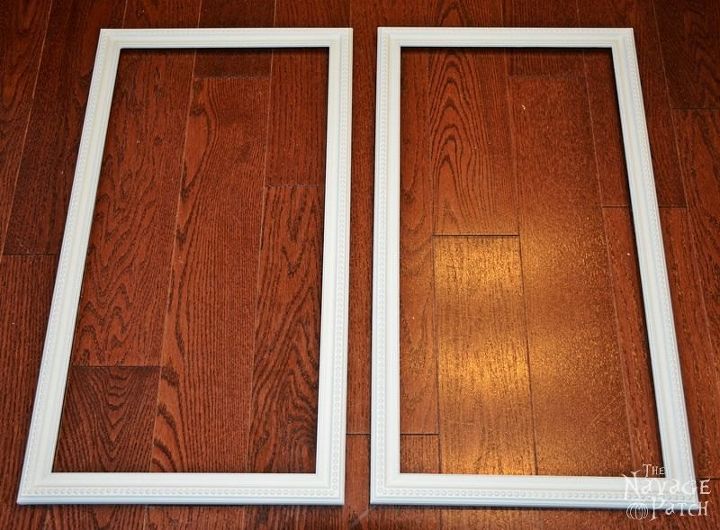
I decided to finish the frames with simple paint and with no distressing or antiquing. Otherwise, busy art with a busy looking frame wasn't going to do justice for the art nor for the frame. I prepared some homemade chalk paint custom matched to Annie Sloan's Old White color and painted the frames with 2 coats of homemade chalk paint. You can find my homemade chalk paint recipe on our blog.
I enjoyed every minute spent bringing these twin girls back to life. I am sure the feeling is mutual, as they seem very happy their journey didn't end up in a landfill, but instead up on our walls.

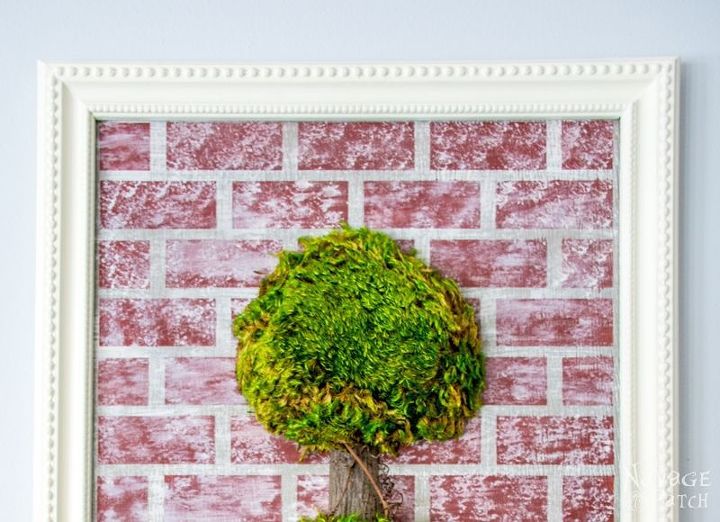
Would you like to see how I did the Topiary Wall Art?
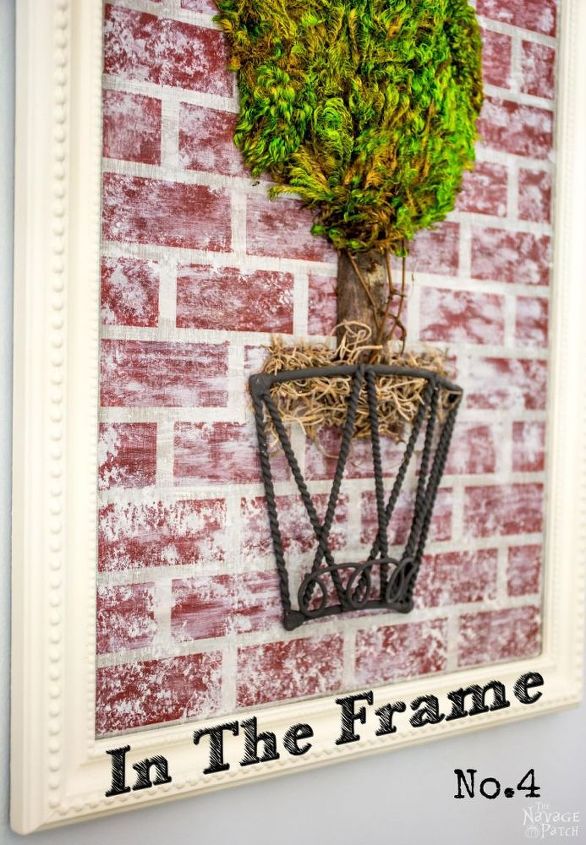
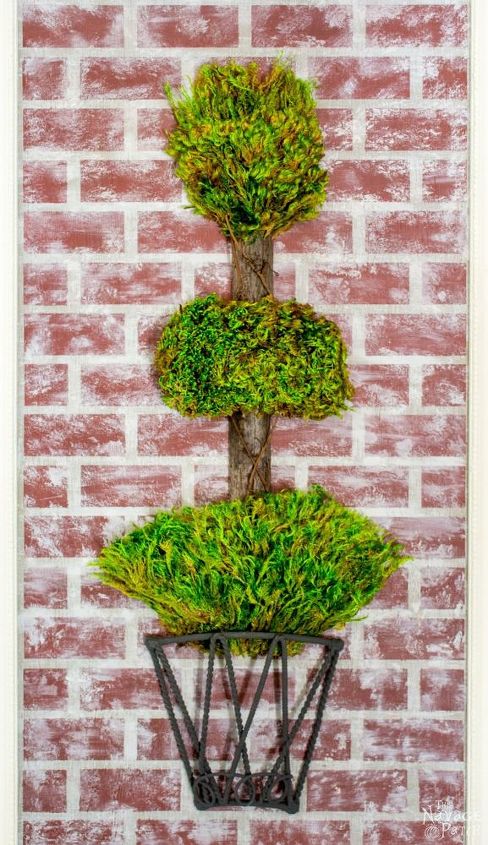
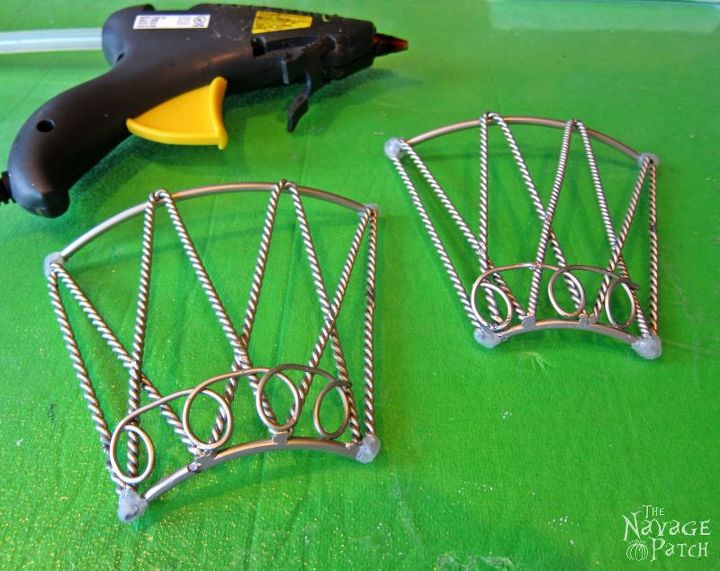
It all started with this salvaged metal. I am not sure what this is (looks like the top tier of a 2 or 3 tiered metal fruit basket) nor do I have any idea why I would pick this broken thing from Put & Take.
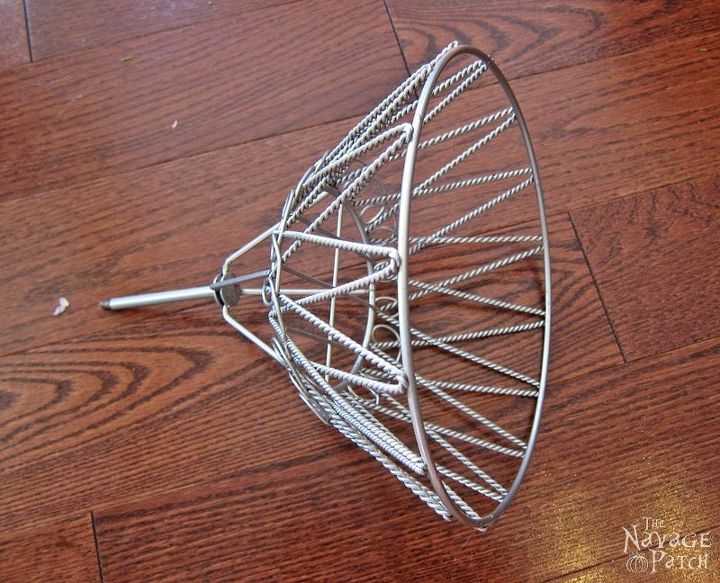
Using heavy duty wire cutters, I cut it to the shape I wanted, then I hot glued all the sharp edges so it wouldn't hurt anyone when touched. Also, the hot glue blobs on the corners would look the welded areas which would add to the realistic look I was going for.
Whoopsy daisy! Looks like I reached my picture limit again... Oh well, if you'd like to see all the details of the Topiary Wall Art and the frame makeover, come and visit our blog.

Want more details about this and other DIY projects? Check out my blog post!
Comments
Join the conversation
3 of 30 comments
-
Beautiful art! Nice creation! Hugs
-
HERMOSOS TUS ARREGLOS......( BEATIFUL).......aLICIA


Frequently asked questions
Have a question about this project?