


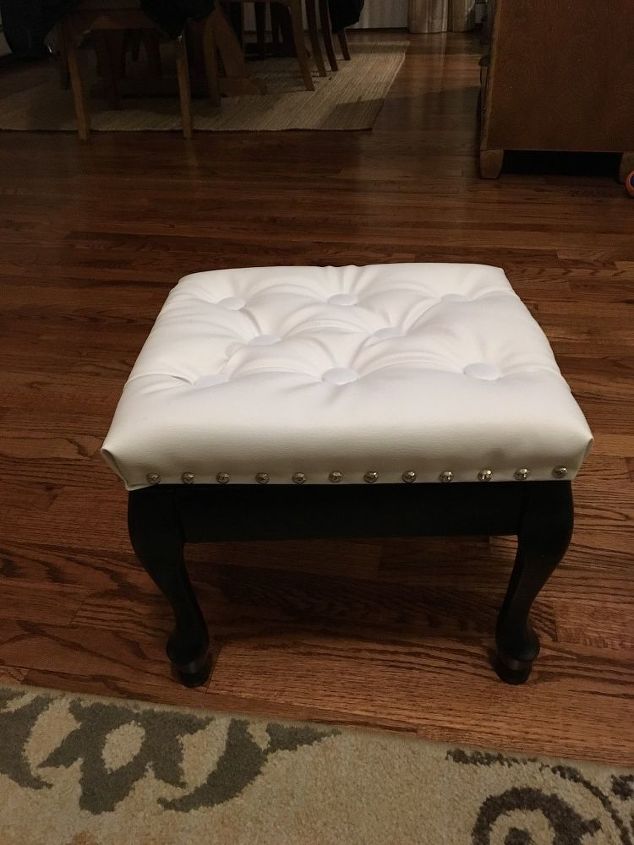
Breathing New Life Into an Old Foot Stool My #30dayflip for March
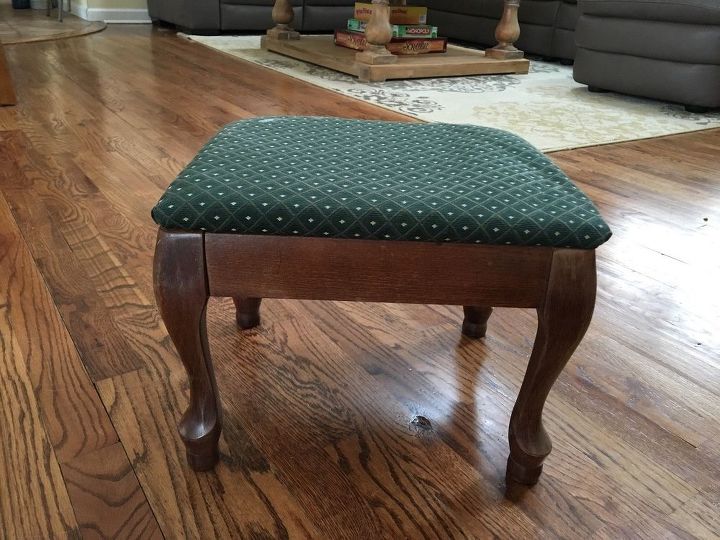
Have you ever just seen a piece of furniture out at the curb and had a clear vision of what it could look like?? Well that's exactly what happened when I spied this foot stool. And I couldn't wait to get her home and get started. First I gave her a really good cleaning with a TSP mixture ( follow the directions on the label).
After a good cleaning she was looking good
After she was good and dry, I took out the screws that held the top to the base. I carried the base outside and gave it three light coats ( allowing it to dry for a few minutes between each coat) of paint. I used Rustoleum Painters Touch 2X Ultra Cover Satin finish, the color is Black. I didn't even use the whole can. And did you happen to notice the special spray handle that I used??!! Coolest invention ever!!! I never ever spray paint without it. I no longer have to worry about getting the spray paint off of my hands . While the base was drying I started taking the gazillion staples out that were holding the fabric to the seat.
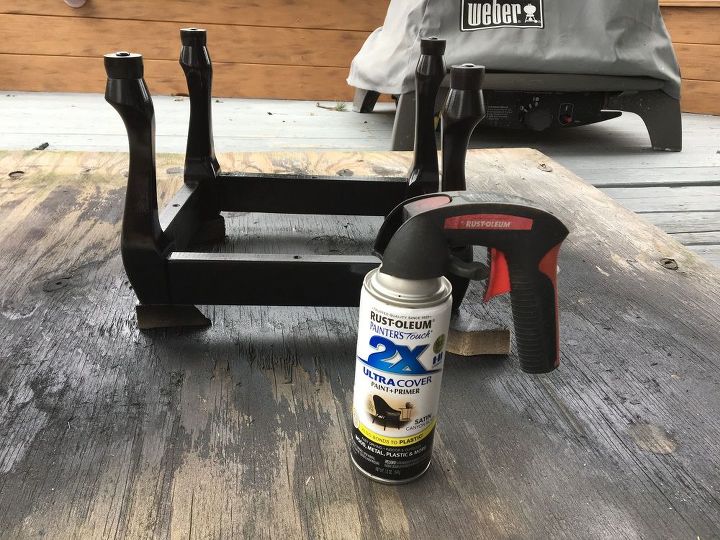
Base and Rustoleum paint and handle
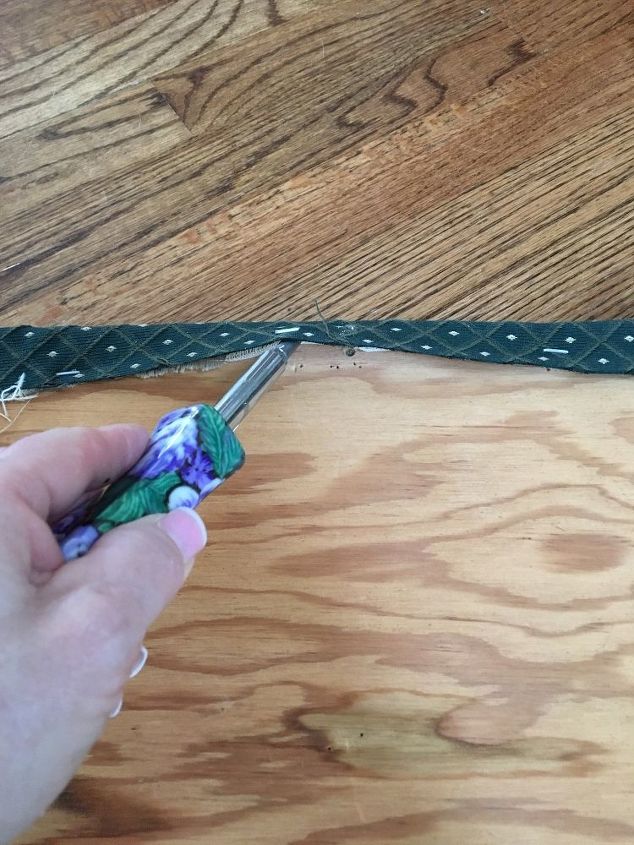
Removing a gazillion staples!!
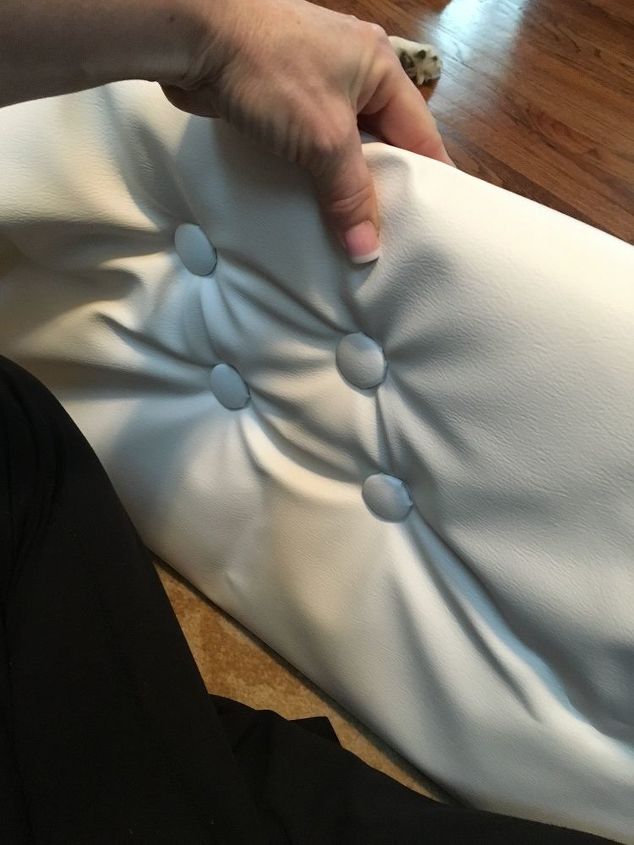
Once that was finally done, I cut out a piece of foam and laid it onto my material. For the material I used a leftover piece of white vinyl. I knew that I wanted it to be tufted, so I got out my button making kit. After figuring where I would place them and how many I would use, I cut out the circles and pressed them into the buttons.
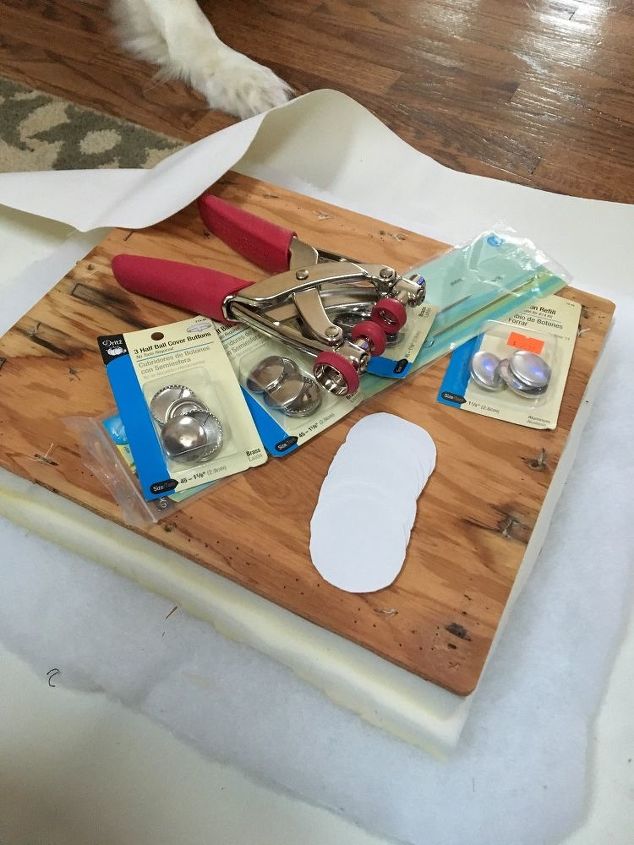
Button making supplies
In order to secure the buttons I needed to drill holes into the wood.
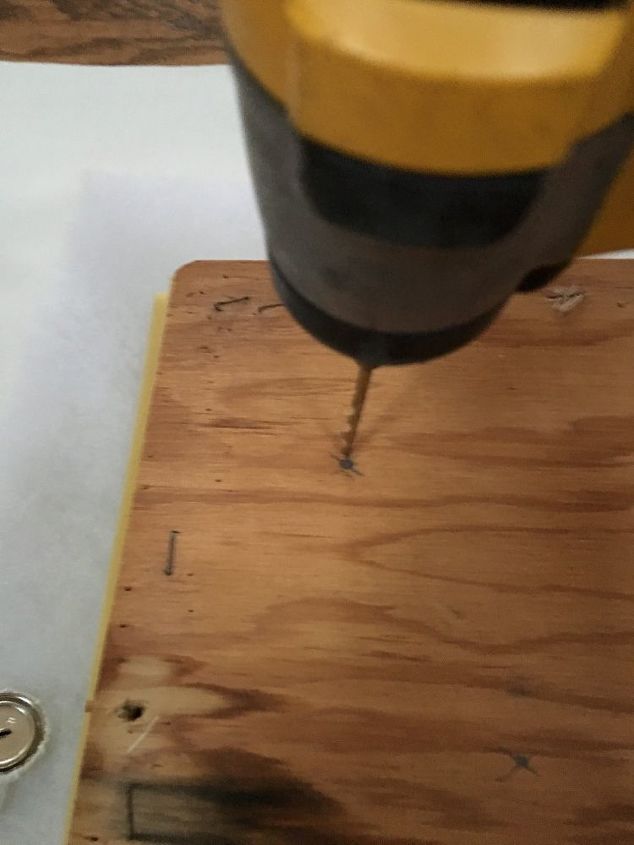
After the holes were all drilled I started threading the buttons through. It's helpful if you have another person at this point (which I didn't) It's not impossible to do by yourself, just a little awkward. Now I needed to press the button deep into the material with one hand while pulling the string ( I used a waxed thick string) on the underside with my other hand. Once I had the button as deep as I wanted, I pulled the string tight and held it while I brought my hand around to the bottom and secured it with a staple gun.
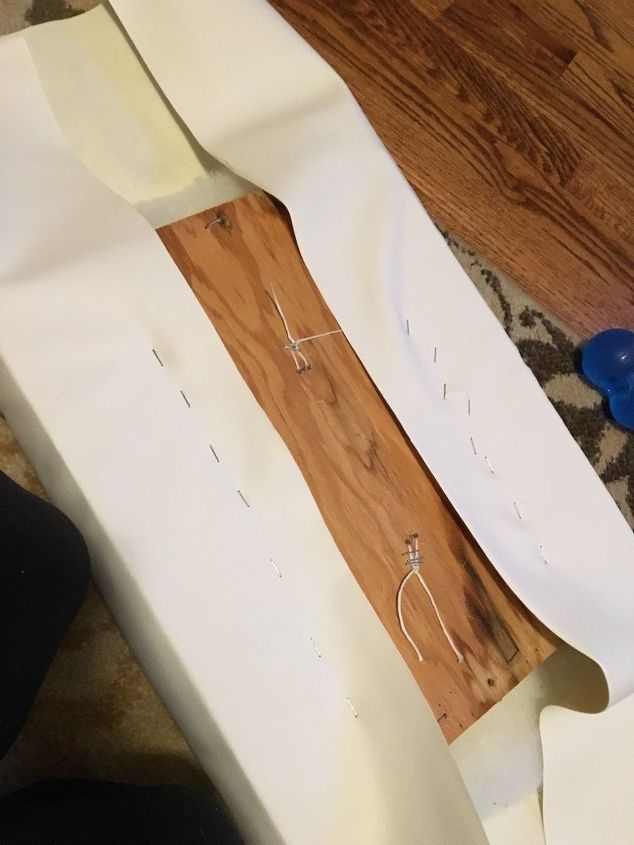
Once the buttons are done it's was time to staple down the material. I always start on the longer sides. I folded the material over the sides and onto the wood. I gave the material a little tug and stapled it down. I repeated this process until I was a couple of inches from the corners. I then stopped and went to the opposite side and did the same thing. Now when I was doing the short ends, I used hospital corners. So I tucked my edges in like I was wrapping a gift and then I folded the flap over the edges and stapled it down underneath.
Now I was ready to reattach it to the base.
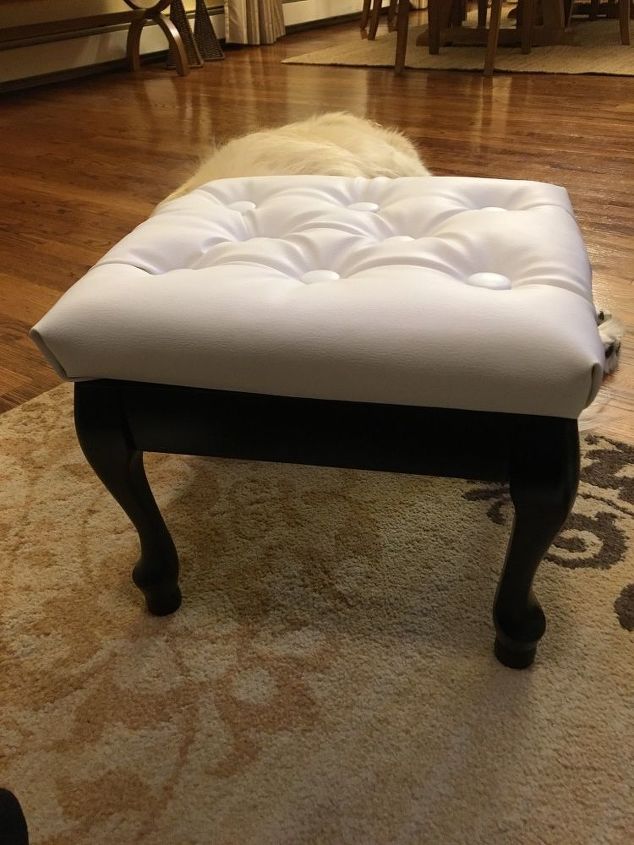
It looked a little plain to me so being a total crafting DIY nut, I went into my stash (my husband calls it the bottomless pit, he just doesn't understand). I pulled out some leftover nail heads and added them which was exactly what it needed.

Want more details about this and other DIY projects? Check out my blog post!
Comments
Join the conversation
2 of 81 comments
-
So cute!
-
Thank you Cathy 😊


Frequently asked questions
Have a question about this project?