


DIY Easy Rustic Farmhouse Style Wood Sign
6 Materials
$10
2 Hours
Easy
I've got an easy farmhouse style sign that you can do for your home or to give as a gift. And all you need is your wood, stain, a printer and some contact paper! Get the complete DIY here!
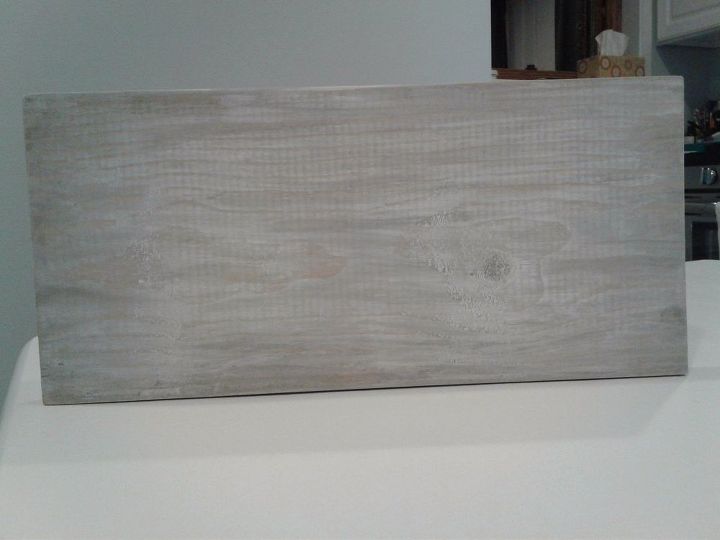
First you need to stain your piece of wood. I used a piece of leftover pine wood that I had from a previous project, but you can use whatever you have. I used Minxwax Classic Gray - it is my new favorite stain color! I applied 2 coats of stain and then it dry completely.
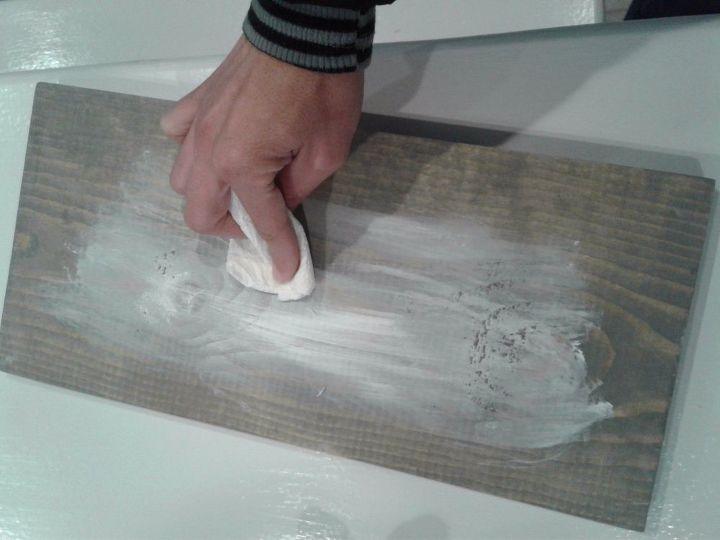
Once your stain is dry, I rubbed on some white acrylic paint with a paper towel. This coat does not have to be a thick coat of paint, just rub it in all over. It is basically to help give the wood a more weathered and dimensional look. Take a new piece of paper towel and rub over it all again to sort of rub off the excess and make the paint dry up faster.
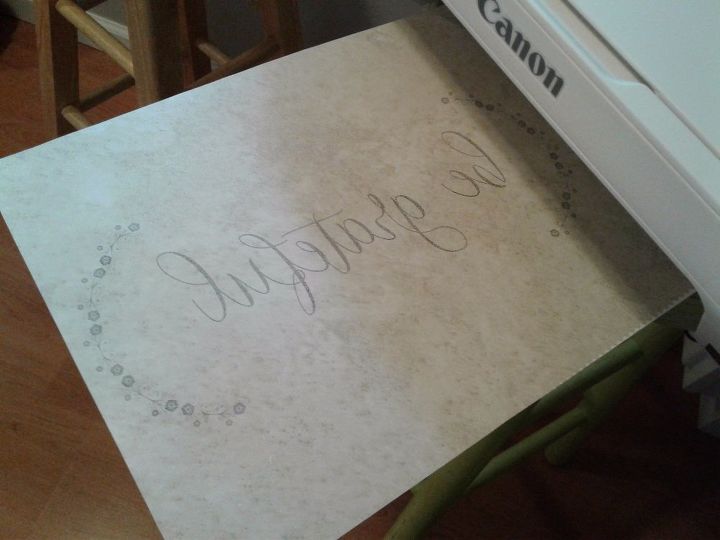
Next you need to get your paper ready. Peel the backing off of your contact paper and stick a piece of regular printer paper to the back of it so one side is paper and the other side is contact paper. Once it's stuck on good, trim off the excess contact paper so that it fits in your printer.When you are ready to print off your image, be sure to print the mirrored version of it, so that it looks backwards when it comes out of your printer and print your image onto the contact paper side. Be careful removing your paper from your printer - the ink will be wet!
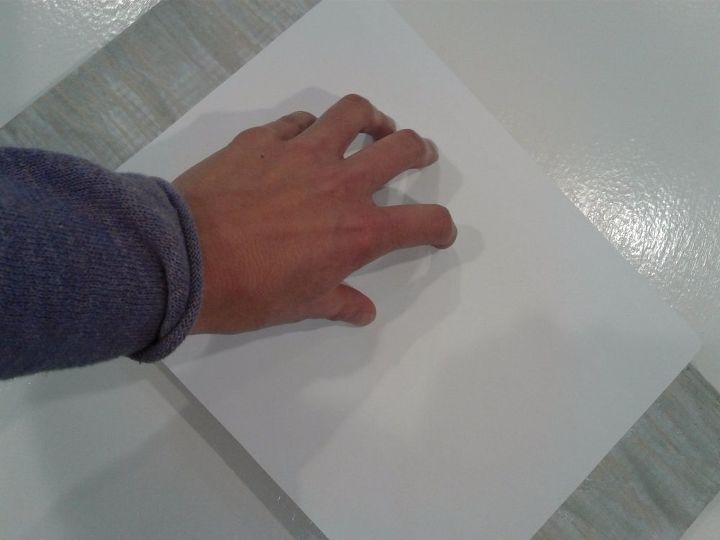
Now, very carefully, apply your image to your piece of wood. Be extremely careful not to move the paper around on the wood or your ink will smear. Line it up where you want it and carefully set it onto the wood. Then with one hand always holding the paper in place, rub on the back of your paper to transfer the ink from the contact paper to the wood. You can use the back of a spoon, a ruler, credit card, anything you want to transfer the image. I just used the heel of my palm. Keep rubbing with a good amount of pressure over the image, but using care not to move the paper itself. You can peel up an edge and take a peek to see how the image is transferring or if there are spots you need to rub on a little more.
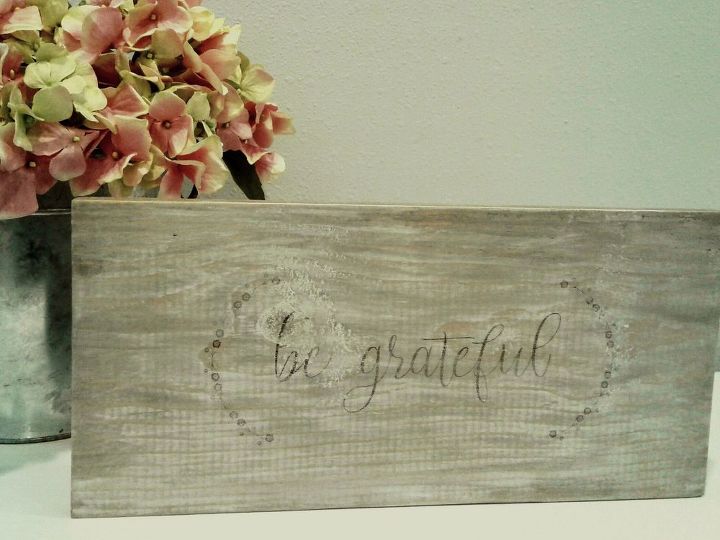
Once your image has transferred, let the ink dry completely and then spray it with an acrylic sealer to help protect the ink a little bit more.Then display your beautiful sign or give it as a gift!To get more DIY's like this, visit us online at CrazyDiyMom.

Want more details about this and other DIY projects? Check out my blog post!
Comments
Join the conversation
4 of 23 comments
-
Nifty work, looks great !
-
Thanks, brilliant idea, thanks for sharing


Frequently asked questions
Have a question about this project?
Love it ! You could use decoupage method also for. Your word or phrase couldn't you? I am planning on making this for sister, it's adorable. Thanks so much for sharing with us :)
What kind of contact paper did you use and where would I find the contact paper you used?
How do I get my printer to print mirror image format?