


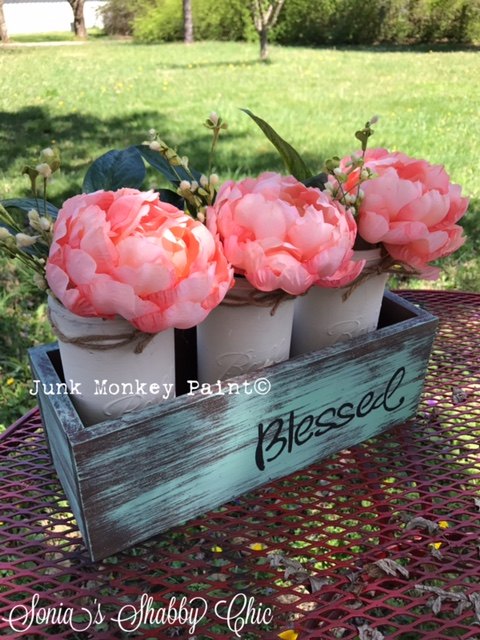
Beautiful Mason Jar Box Centerpieces

A centerpiece that will make all your friends jealous! All you need is wood, jars, paint and your favorite flowers!
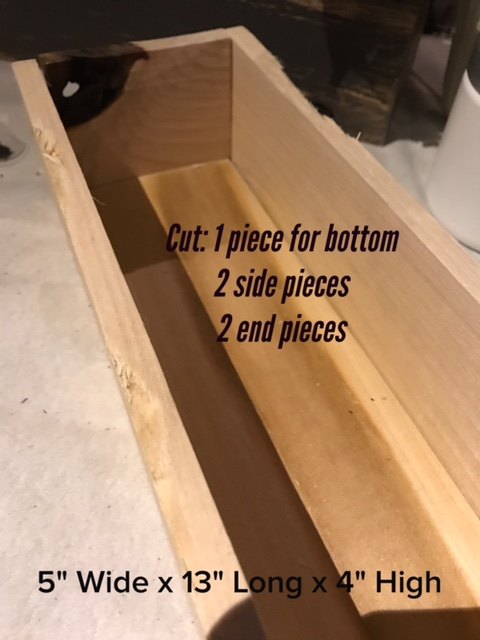
Let's put the wood pieces together to shape a box! The size I'm using below is the perfect size for the standard size jars. (The 16 Oz ones).
In the end you just want to make sure your box isn't too hide! You don't want it to be hiding those sweet jars you are about to paint!
NOTE: If you don't want to build the boxes, find them pre-made at local craft shops OR use an old dresser drawer! Find a small one OR use a sewing machine drawer!
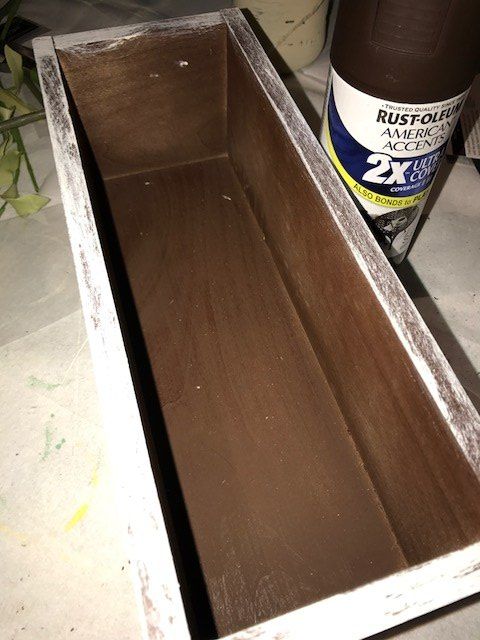
Now let's make that new looking box look even older by adding some brown spray paint all over it, inside and out! You could always use a brown stain too if you have some! Let dry and get ready to make some distressed magic happen!
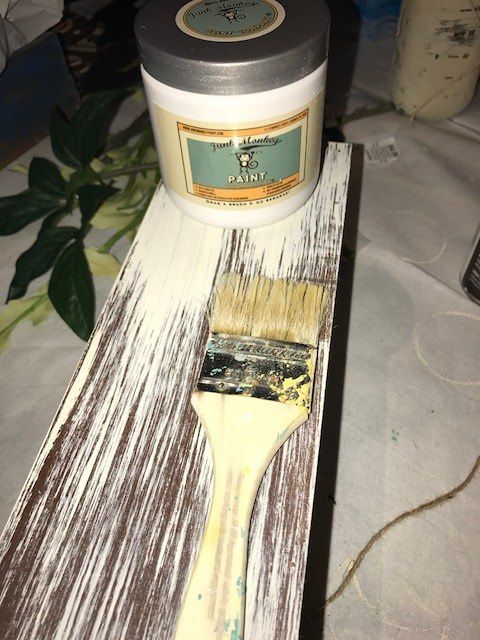
This old look is the result of dipping my chip brush in some Junk Monkey Paint (it seriously sticks to everything! No priming, sanding, stripping needed!) And the way it lays on so matte makes this box look like its been around forever!
You just need a little bit on your brush and then pull it lightly in the direction of you wood grain! Do this for all sides! Don't worry about the inside as you will be filling this space with your jars!
Time to paint those jars! Same brush! Pick your favorite colors! Find some jars from loved ones, friends or go look in the cellar!
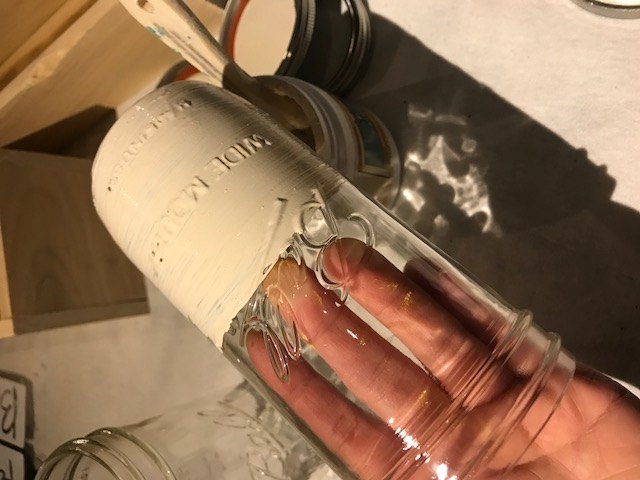
Biggest tip here, go around the jar with the Junk Monkey Paint! It will give you a beautiful finished result. Paint one light layer. Let dry. Add a second coat. Done!
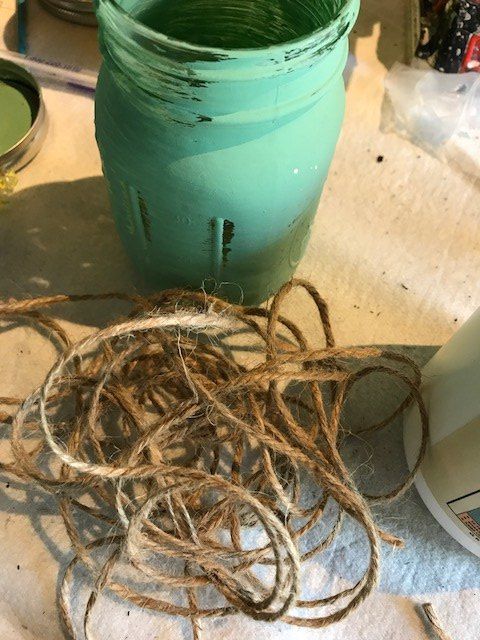
Grab your twine and tie a little bow around the top of each jar!
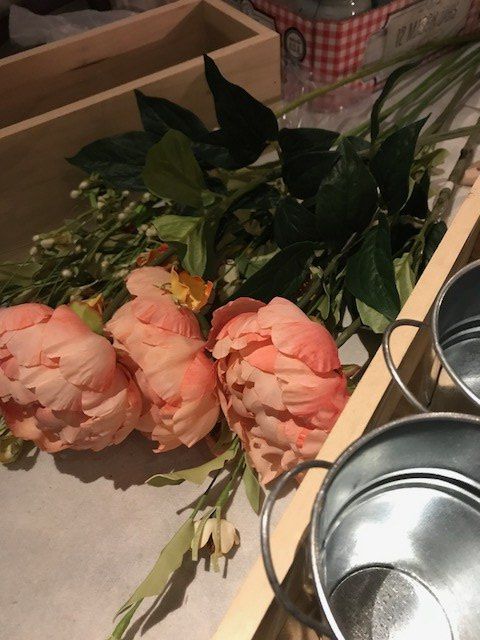
Did you find your favorite flowers yet? Have them on standby. Use wire cutters to shorten them to just the perfect height when they are standing in your jars!
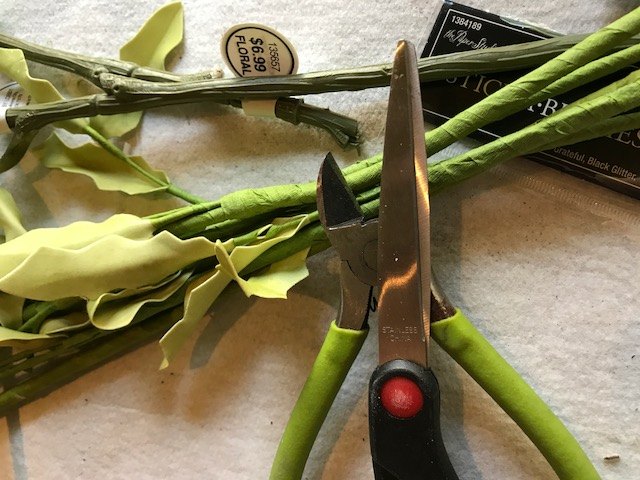
Scissors and wire cutters are the two tools you'll need for the decoration part.
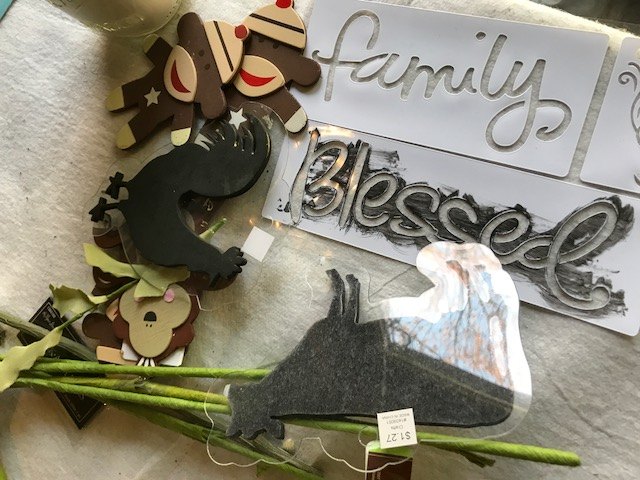
Jazz up your box by adding stencils, wooden appliques, vinyl letters or foam stamps!
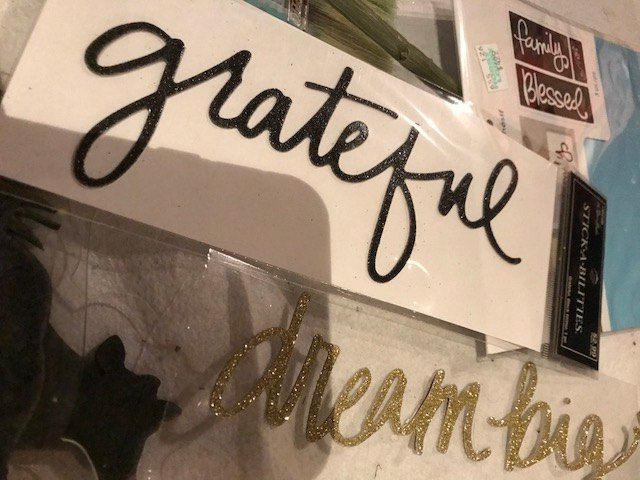
Find some pre-made at your local craft shop OR make some yourself!
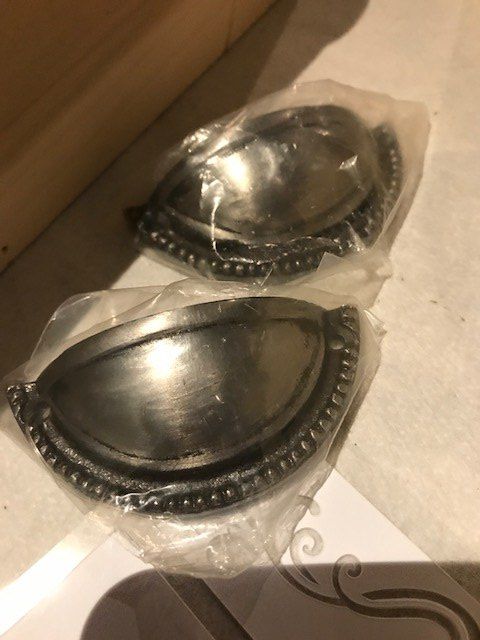
I decided to even add some drawer pulls to the ends of my boxes! Just screw them right on!
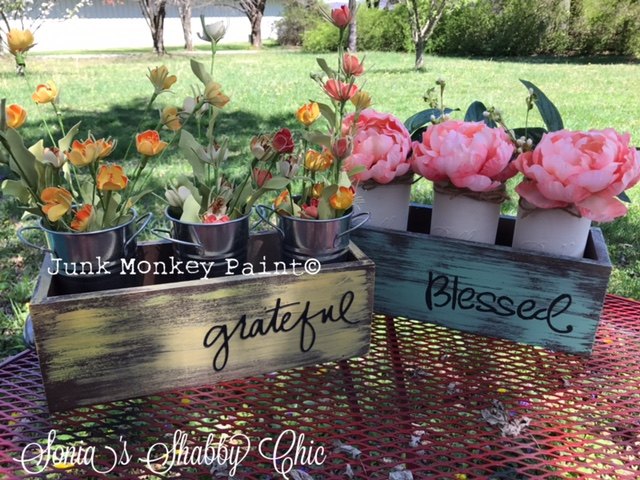
And here we go! Two different styles! Use tins, cups, mason jars, small pots, whatever you choose!

Now time to decorate with them!
Table, bathroom vanity, desk.....where would you display yours?
If you liked this DIY be sure to follow me over at Sonia's Shabby Chic - Junk Monkey Paint on Facebook! Giving you lots of daily DIY inspiration!
More blogging happening here.
Comments
Join the conversation
-
Very pretty and the handles are a great idea!

-
Thank you so much for the prompt reply. We are going to try to make these for a church fair. One question, did you glue these or use nails.
Thank you again.
Debbie


Frequently asked questions
Have a question about this project?
No questions, just a comment. Using cup pulls as handles is so clever. I'm going to use that idea the first chance I get!
What is junk monkey paint??
About how long would you guess to do this project for this first time?