


DIY Mahogany Counter Tops Out of Plywood!
This is a tutorial on how I built the mahogany counter tops in the little house out of plywood. I was in a real pickle when it came to what I wanted to do with the counters in the little house. Normally I would have just run to Menards (or Lowes or Home Depot) and purchased stock laminate counter tops that they have on hand. But, because I chose to put cabinets back to back I had a span of 48×60 inches to cover so if I wanted laminate counter tops they would have to be custom ordered and thus: too much a splurge for this little house.
(To get up to speed on this old place you can check out my last posts all about it! The Little House: A remodel plan and timeline, getting organized and The Little House: When a remodel timeline meets with reality)
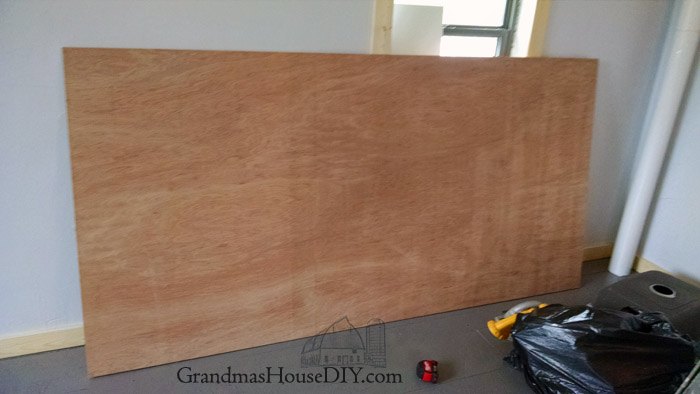
After I built the upper kitchen cabinets I headed to my local lumber yard to purchase cabinet doors and they didn’t have smooth pine plywood. Like, what?! Who doesn’t have sanded plywood made of pine?!?!?! All they had (in at least 3/4 of an inch) was plywood with a mahogany veneer so, I sucked it up.
Well seconds after bringing them in the door I knew I was already unhappy. Because I was leaving the pine trim as it was (plus a couple of coats of poly acrylic) I did the same with the upper kitchen cabinets to keep the whole house looking cohesive. And then I slapped those red mahogany cabinet doors on them and it was pretty weird.
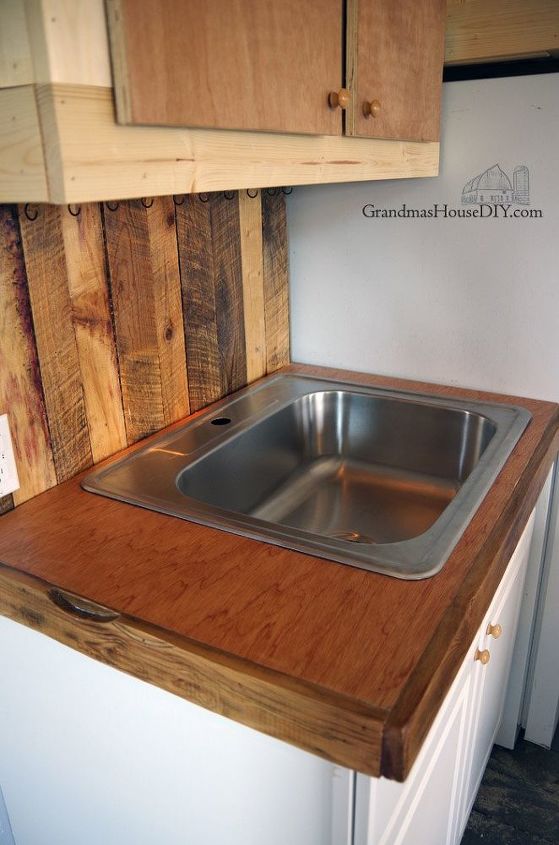
I put up the barn wood back splash behind the sink crossing my fingers that the multiple different shades of wood and patina there would help. It did help and everyone else said it all looked great but, of course, they still bothered me.
And then the light bulb went off.
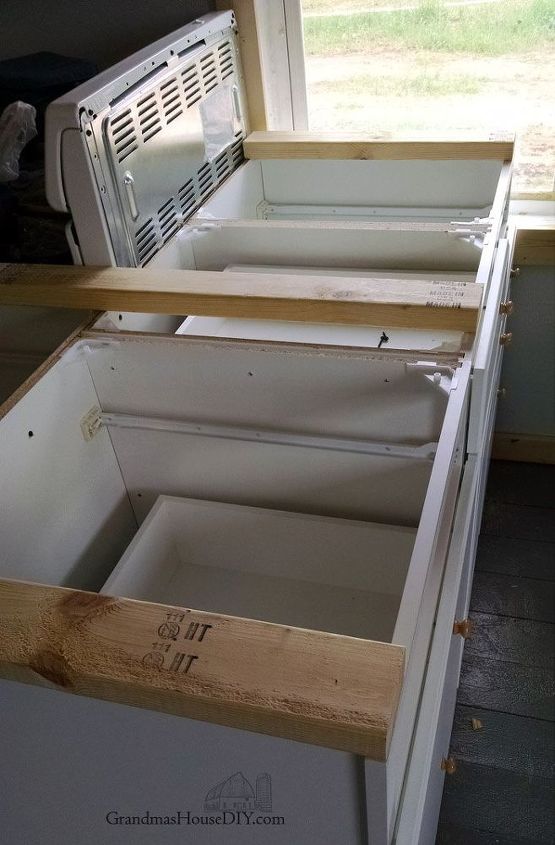
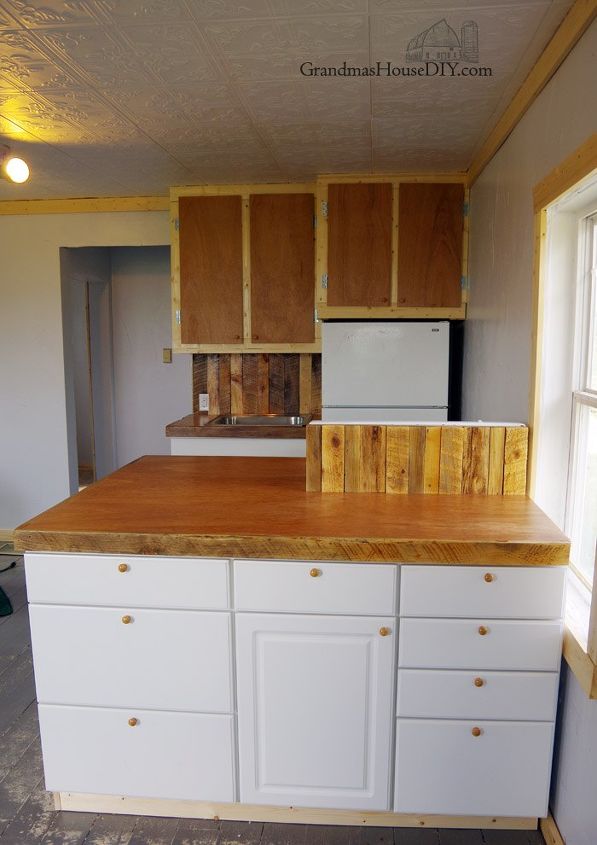
See, we have quite the clash going on anyway because of the brand new white stock base cabinets we installed in the kitchen. Even after trimming around the bottom edge of the cabinets (the toe kick) in the same pine I used to build the uppers there was still a feeling of hard core difference between them. So, I needed a flat surface for a counter top that we could build ourselves: why not use the same mahogany plywood I had used for the upper cabinet doors?!
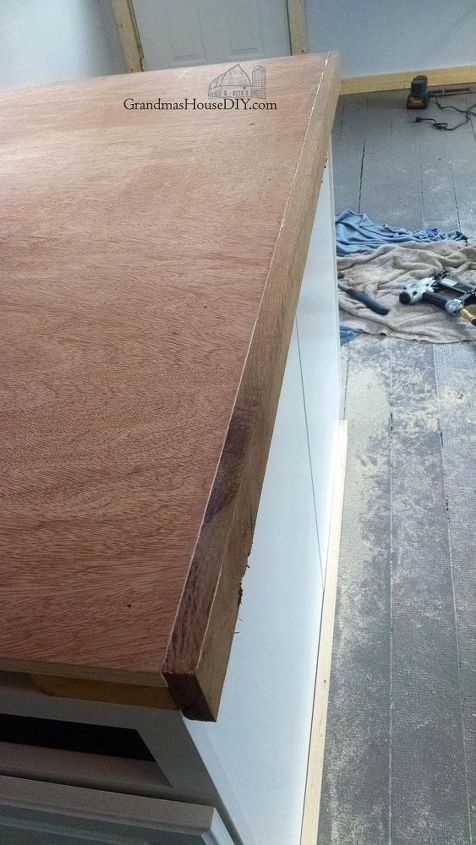
The idea was born for mahogany counter tops and a friend helped me one weekend go pick up a full sheet, bring it back and cut it to size using a skill saw. One sheet managed to (just barely) provide me with the big L shaped piece and the small piece for the kitchen sink.
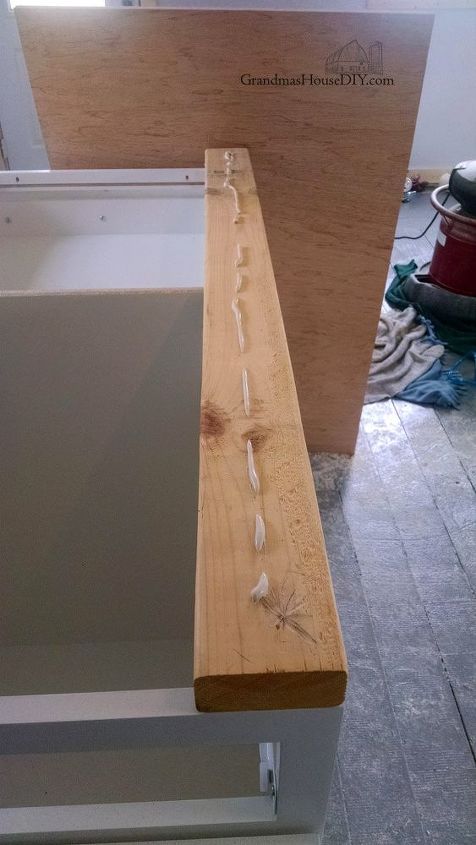
I used 2x4s run across the tops of the cabinets to provide support but to also pick it up so I could trim out the outside and make it look much thicker then it was. (I also wanted to cover that ugly plywood edge.) I tacked it down with brad nails and liquid nails
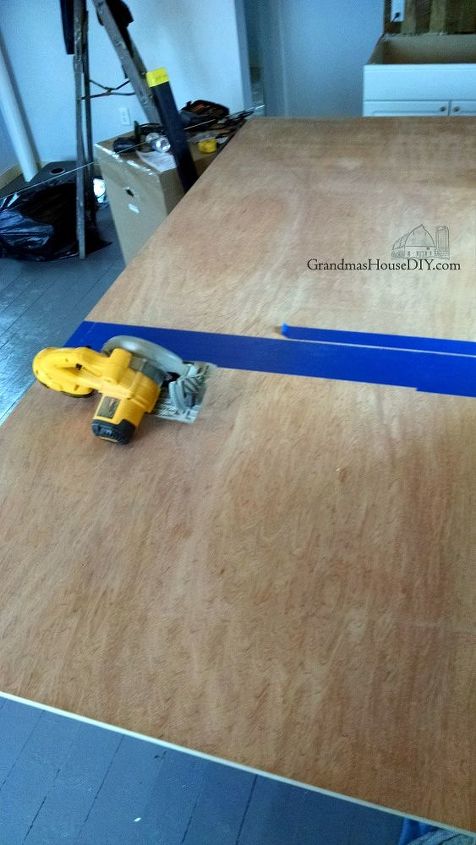
NOTE: I used a lot of liquid nails and only a few very strategically placed brads in the top of the counter top, I knew the glue, the weight of the plywood itself and the trim would hold it in place. I trimmed it out in barn wood also using brad nails and liquid nails and sanded it using my DeWalt orbital sander.
Another note: when I say I sanded it I mean I really just VERY CAREFULLY sanded the barn wood, this plywood is veneer and could take almost no sanding whatsoever before I went through the mahogany top. It was difficult because I really couldn’t hit it at all even where it met the barn wood trim. I filled in the nail holes and any gaps with mahogany wood filler and carefully hand sanded the mahogany top before wiping it all down with a damp paper towel.
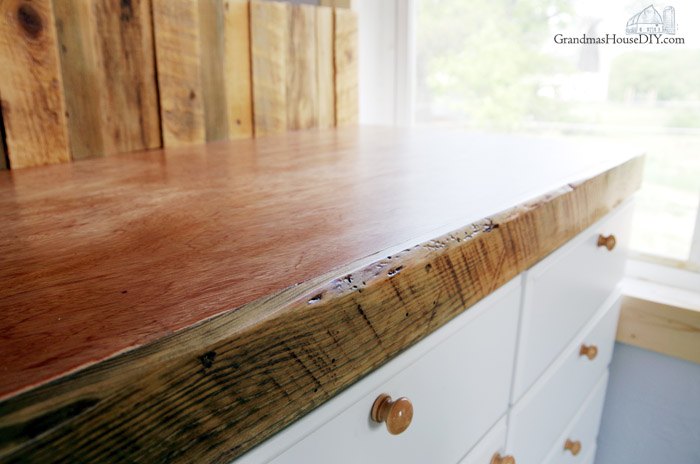
From there I put on five separate coats of poly acrylic. Why did I choose a water based poly acrylic? Well, honestly, I chose it for the same reason everyone ends up choosing the water based: It dries faster by literally hours, it doesn’t yellow and its not nearly so toxic to the person who is applying it
I really ALMOST headed for the really hardcore polyurethane (the type they make specifically for floors) but I’ve finally got enough experience under my belt that I knew that the oil based would only perform a little bit better and thus: not worth the cost or the time to me.
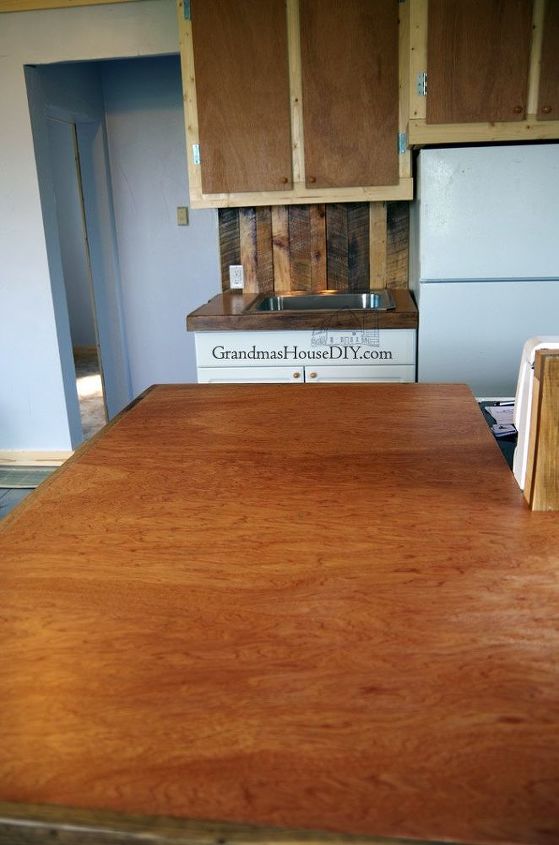
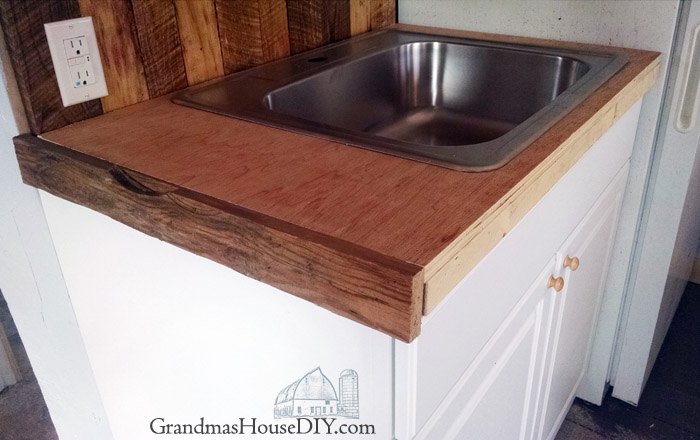
So, I went with a semi gloss poly acrylic by Minwax and did five coats over a few days. I hand sanded after the first two coats with 220 grit sand paper and right before the last coat. (I have not installed the sink yet, just set it in place for pictures but when I do I will also caulk between the countertop and the backsplash)
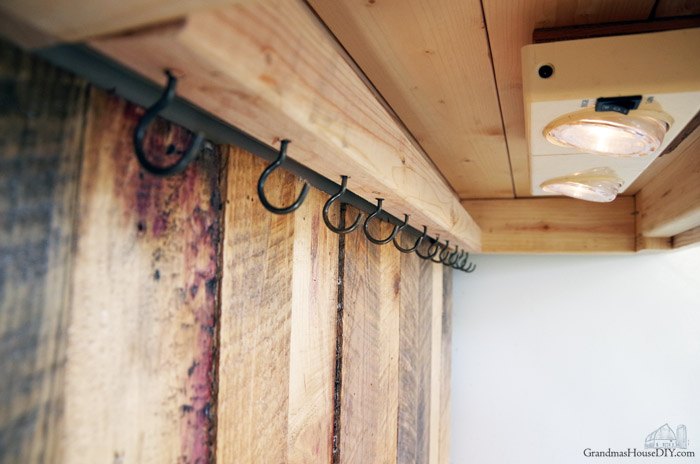
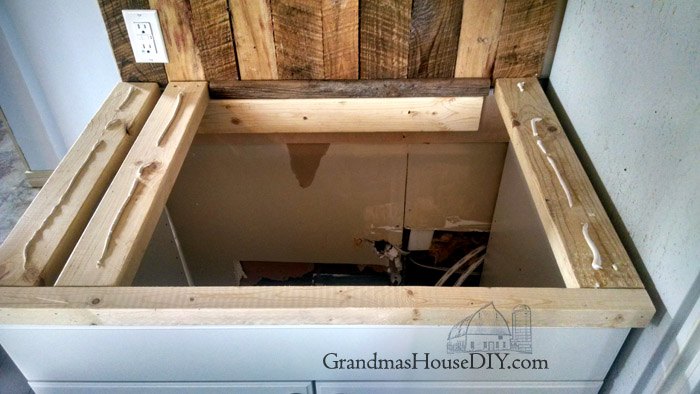
You can see I also built a little “backer” to cover up the ugly back of the stove using 2x2s and barn wood that also got the sanding and poly treatment. It is wide enough to be used for spices, salt and pepper etc. I think it helped tie the the sink area to this area nicely. Not to mention those adorable wood knobs! Aren’t they just precious? They’re like little wood buttons! I purchased them from Amazon for only $8 for 20 of them!
All in I am extremely happy with how the counter tops turned out. They’re smooth, you can spray them with water and wipe them down etc. Of course, you will never be able to put a boiling hot pan on them but, really, there are few counter top surfaces you can actually do that with anyway. So now, how do I feel about the clash of the uppers in pine and their red mahogany doors? I feel this counter top tied the whole kitchen together and I can finally say that YES, I am happy with it!

Comments
Join the conversation
-
Nice job!
-
Great look! Good job!


Frequently asked questions
Have a question about this project?