


Installing Rigid Vent Duct for a Bath Fan
1 Material
$20
1-4 Hour
Medium
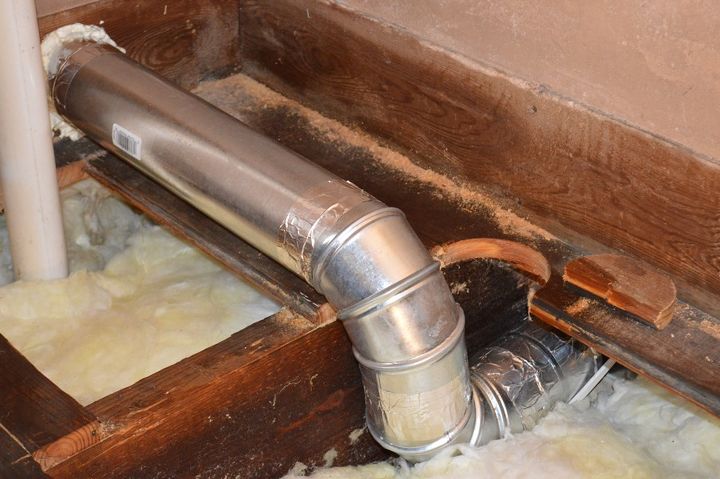
While we installed a master bath a few years back, our contractor never sufficiently installed the bath fan venting. A fewweekends back, I used 4” rigid duct (*always* preferred) to vent this bath fan tothe outside.
Here are the basic steps with installing through a side wall:
1. Probe the selected location using a 12” probe bit. (Actuallyyou may notice I had to correct my placement because ofa stud in our attic’s side wall.)
2. Use a 4 ½” hole saw to drill through the exterior surface.
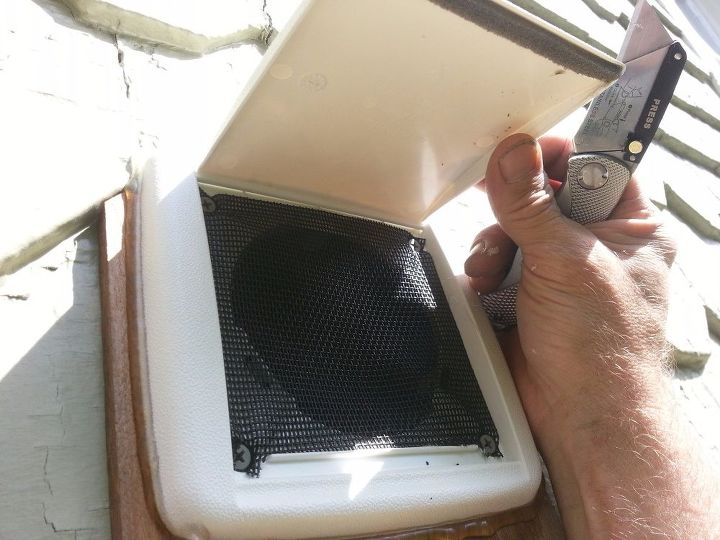
3. Assemble bath vent wall cap + extension & place inhole.
4. Lay out & “dry-fit” rigid duct - any required cutscan be made with “tin snips”. Adjustable elbows can be very handy here(Note: Each elbow used reduces the maximum allowable run by 4-5 feet, each).
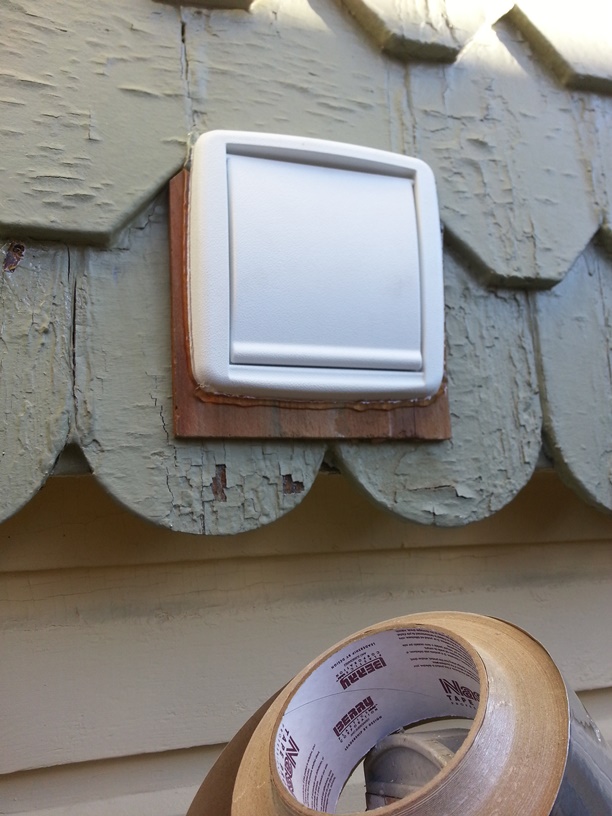
5. Mount wall cap using exterior-rated screws. Caulk aroundthe wall cap’s perimeter.
6. Assemble rigid duct and connect to the bath fanconnector.
7. Use Foil Tape to seal all seams (over longer runs ½”self-tapping sheet metal screws are also recommended.)
8. Seal the penetration using expandable spray foaminsulation.
9. Removal all price stickers from the assembly. Whoops! ha!
In colder climates, it may be wise to additionally wrap this kind of pipe with insulation (and especially in an unconditioned space).
For more, important information about Bath Ventilation,please see my post linked below. Thanks & cheers ... and oh, the paint in my gable - getting to it. ~ jb @BuildingMoxie
Probe Location
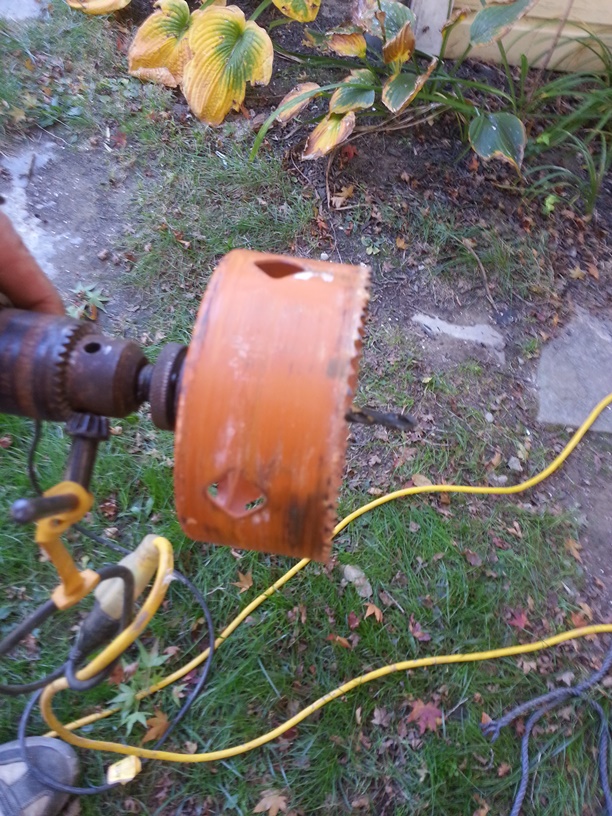
4 1/2" hole saw

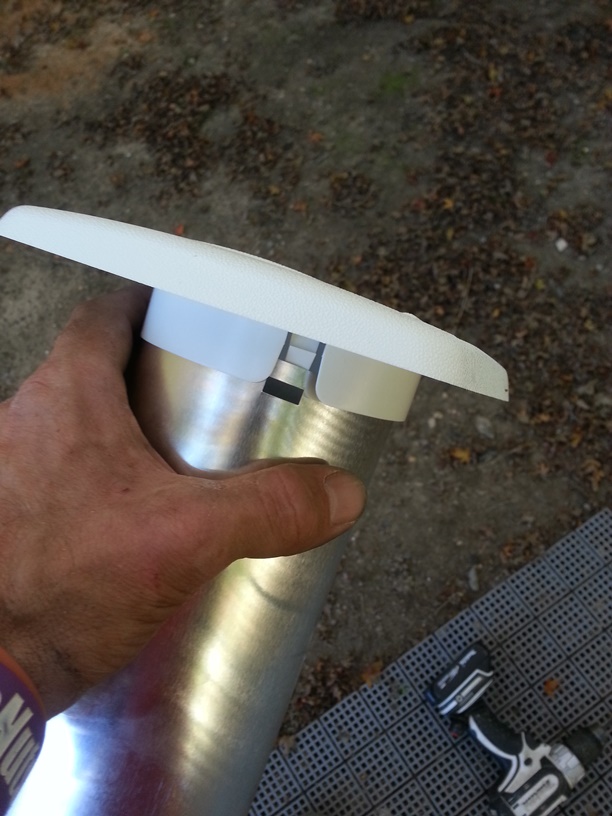
Assemble wall cap
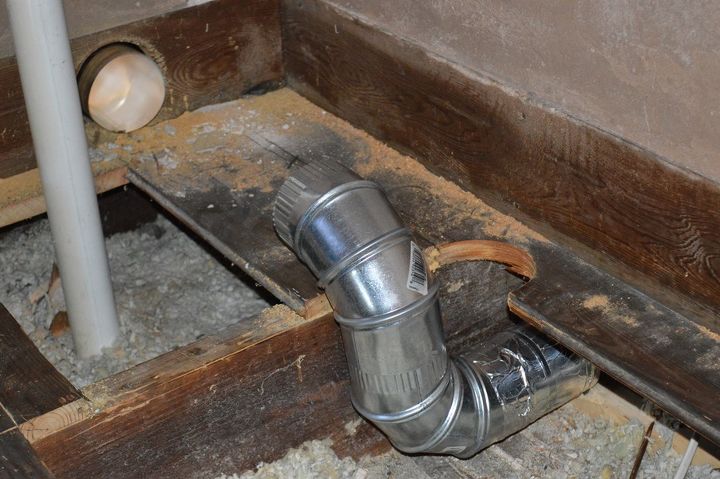
Layout piping.
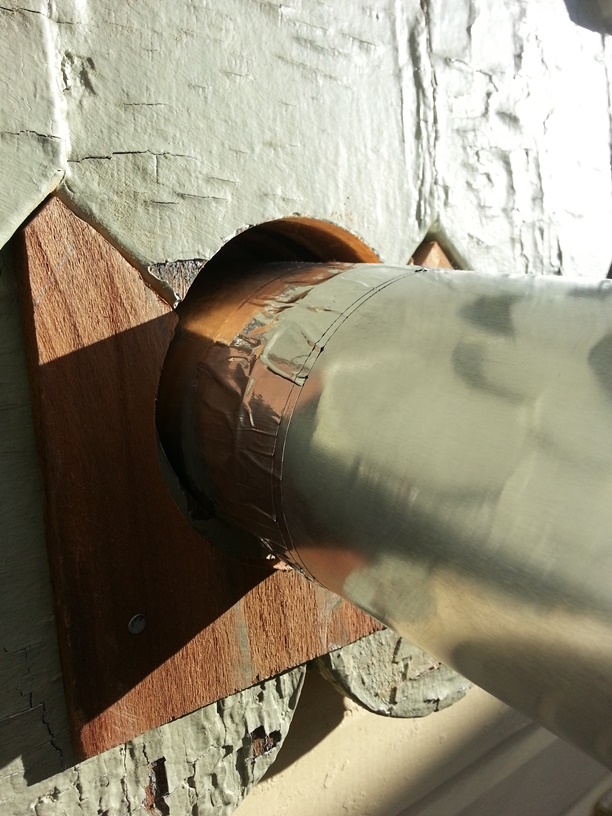
Install Wall Cap
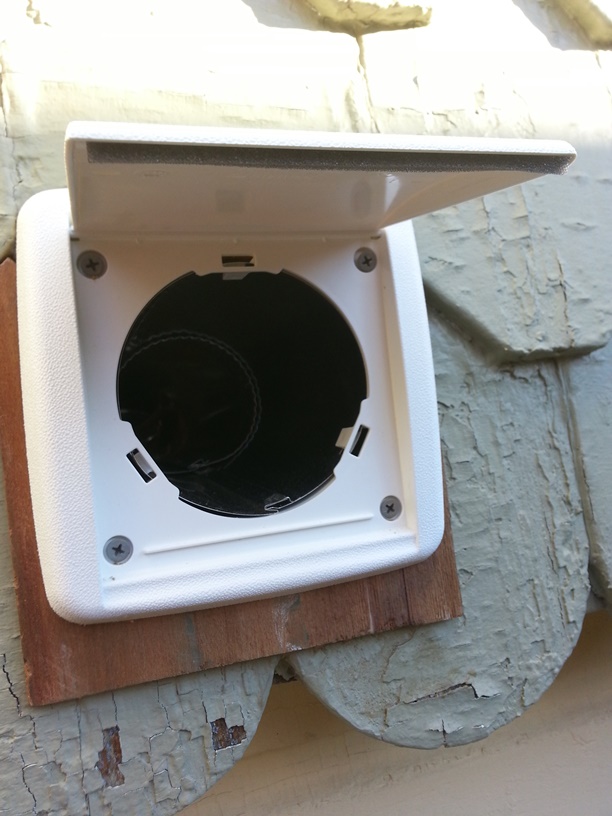
Mount Wall Cap
Caulk at Wall Cap

Want more details about this and other DIY projects? Check out my blog post!
Comments
Join the conversation
2 comments
-
Great advice on getting the moist air out. To add just a few additional thoughts as well. If your vent Is going through an unconditioned space such as an attic. Be sure to insulate the pipe if you do not use pipe that already is. When drilling the hole, be real careful when using a large hole saw bit such as this. If it binds and your up high on the ladder, it could throw you off. Use the small handle that comes with the drill to help you. Lastly I like the fact that the hole is drilled on the side of the house and not through the soffit as many are. New standards suggest that this is the way it should be done. Soffit style venting can fail and wind can back up into the pipe because of wind being trapped under the soffit area. On a wall its much easier for the bath fan to vent on a windy day!


Frequently asked questions
Have a question about this project?