


DIY Dog Gate From a Bench - A Tutorial

by
Tyesha T
A week ago I got sick of our temporary gate that we keep at the bottom of our stairs for our cocker spaniel (similar one here). We wanted a gate there to keep her from going into our daughters room and finding those tiny Barbie shoes and what-not and chewing them to pieces. We are nervous that one day she just might swallow one of those bad boys.
Every time that I go upstairs, I have to climb over it because I don't feel like removing it and latching it back. It has become an Olympic sport, climbing over that gate with a basket full of laundry and not falling over it and breaking my neck.
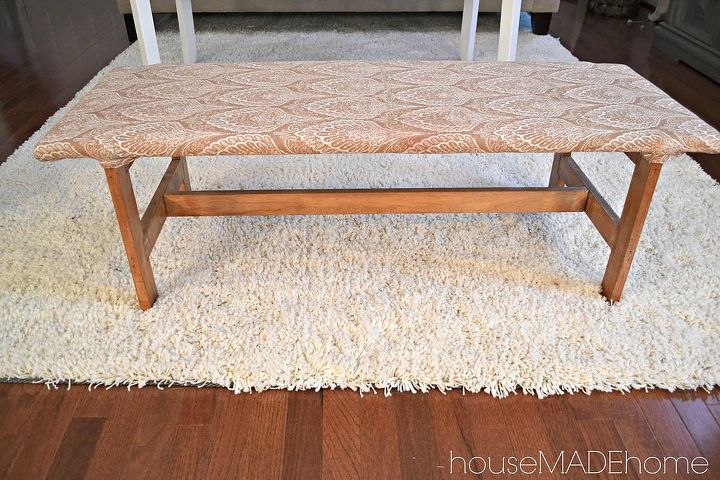
So, we took a trip to Lowe's and purchased some wood to get started. But when we came home, I decided to clean out the attic and realized that I had this bench that I wanted to get rid of. Well duh...I could use the wood from our bench and save a few bucks on materials!
My husband some measurements and he gave me the nod that means my bright idea would work.
Every time that I go upstairs, I have to climb over it because I don't feel like removing it and latching it back. It has become an Olympic sport, climbing over that gate with a basket full of laundry and not falling over it and breaking my neck.
So, we took a trip to Lowe's and purchased some wood to get started. But when we came home, I decided to clean out the attic and realized that I had this bench that I wanted to get rid of. Well duh...I could use the wood from our bench and save a few bucks on materials!
My husband some measurements and he gave me the nod that means my bright idea would work.
We removed the top of the bench and used the remaining parts to construct our gate.
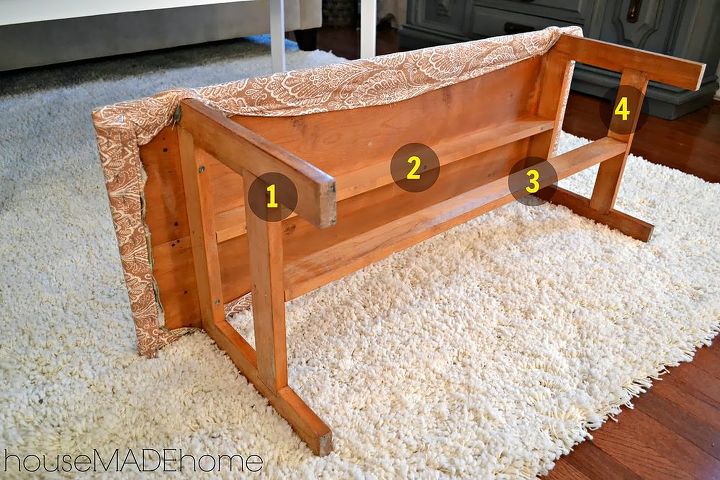
Parts (1 & 4) were used for the main pieces to the gate and parts (2 & 3) closed the gaps to each side of the gate. We cut parts (2 & 3) in half to use on both sides of the main pieces as you will see below.
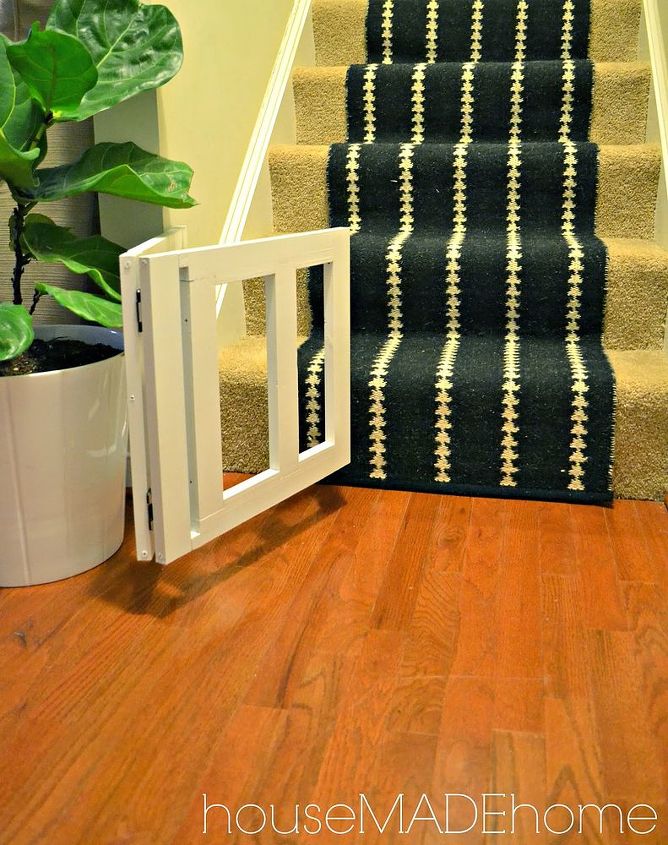
We screwed the pieces together using 3" screws and filled with wood glue. Once the gate was constructed, we gave it a good sanding and primed and painted it using Rust-Oleum's gloss white spray paint.
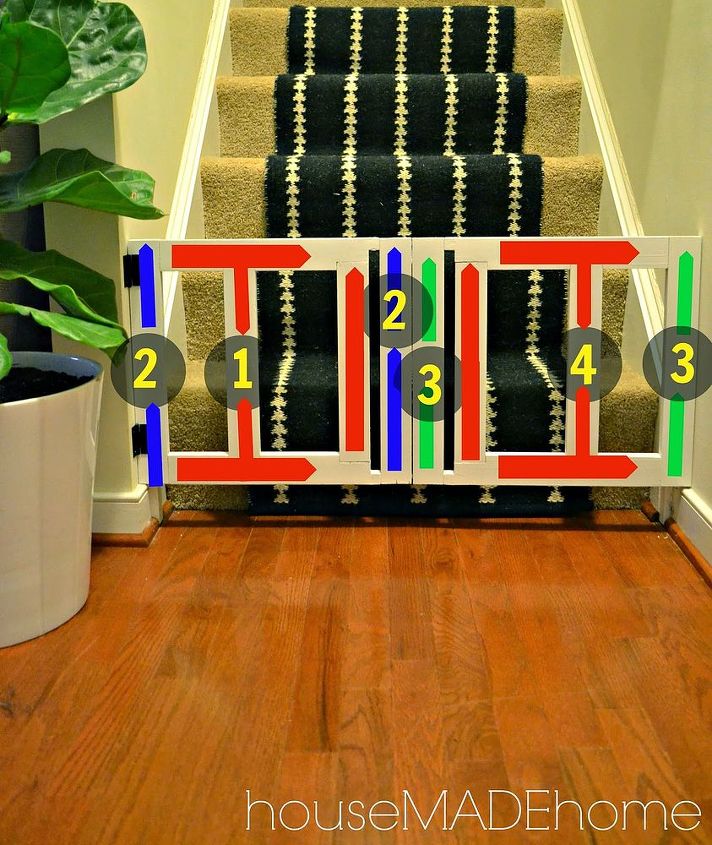
We fastened the two main parts of the gate with simple hinges that we also spray painted using Rust-Oleum's flat black paint, which gave the hardware a nice matte finish. The remaining hinges were fastened into the wall (in a stud of course) and to the front side of the gate.
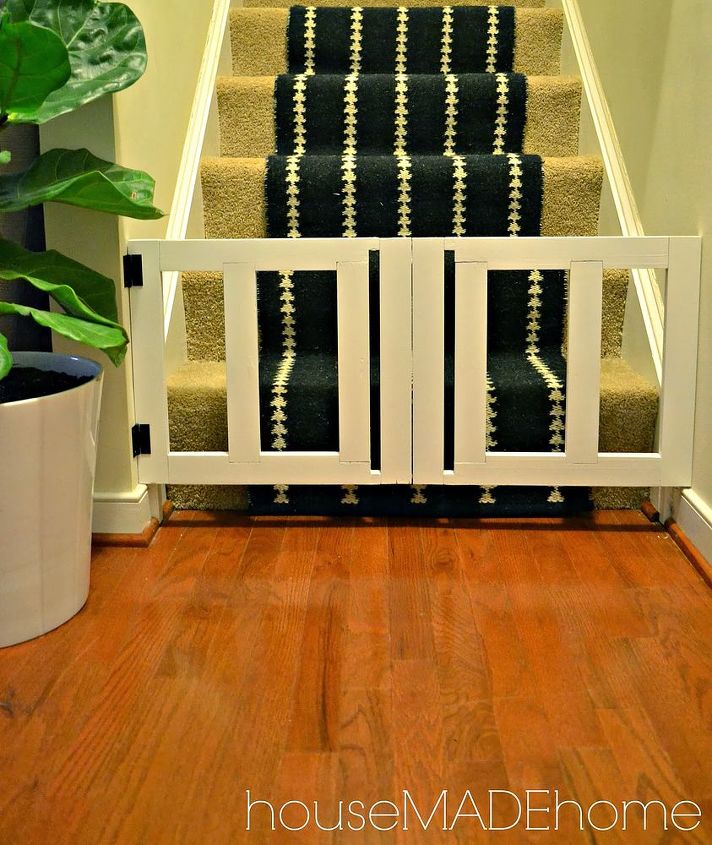
Pretty simple and it serves its purpose.
Want more details about this and other DIY projects? Check out my blog post!
Comments
Join the conversation
2 of 10 comments
-
Great job! I love it!!!
-
we used the end of cribs, if u have a jumper put one end above the other like stable doors.


Frequently asked questions
Have a question about this project?