Foam Embroidery Gives Raised Effect to Embroidery Designs

Alex Kutler
by Alex Kutler
Foam embroidery is also known as 3D-Puff. It is same like embroidery with only one difference. The difference is of satin stitches.
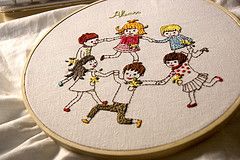
Touching higher levels of creativity remains a challenge for the designers and the digitizers alike. In fact, it is true for people engaged in almost all creative pursuits. If you are a designer or closely involved with digitizing, you must be aware of the new 3D forms of embroidery or foam embroidery. This method brings out a three dimensional effect to your designs. As you incorporate this mode of designing, a piece not only looks more creative, but also displays more of an original look.


3D or Foam Embroidery


The technology involved in the foam embroidery and that of appliqué is almost similar with only a few differences. The difference is that in foam embroidery, it is mandatory to include a high-density Satin stitch. In case of embroidery digitizing service, you should remember that the kind of foam used plays a key role. This is because the excess foam has to be removed after the stitching is done. In case the foam is stiff in nature, it might be really difficult to remove that extra foam. At times, the effect of digitized embroidery may even go for a toss. As far as the color of the foam is considered, it is better to choose a color that is compatible to the embroidery threads being used. It’s advisable not to use something that opposes the color of the threads completely. While choosing the foam for embroidery digitizing, it is important to check whether the foam is washable or not. However, in most cases, foam embroidery is done on the caps, which aren’t washed often.


Foam Embroidery gives raised effect to embroidery designs


Marshmallow effect is a popular form of foam embroidery. It is most commonly used in caps. One of the major reasons for it is that foams do not perform well if they are exposed to wash. The marshmallow effect gives a puffed up look to the embroidery designs.


Get puff on by 3D Digitizing


There are a few ways best suited to digitize embroidery. Some of them are:


1. At first, the embroiders try to digitize the design that has been provided by the client.


2. A placement guide is then created with the help of a run stitch inside the boundary of the shape where you would prefer a foam embroidery.


3. Next, the foam is kept on the placement guide.


4. The following steps involve putting tacking stitches so that the foam stays in place while the designer carries out the foam embroidery.


5. The narrow columns are digitized next so that the excess foam can be easily removed at the end of the process.


6. Next, you might create a zigzag stitch so that the foam can be held down.


7. The last step involves digitizing the Satin cover stitch. In this step, you have to increase the density by 40 to 60 percent as compared to the ordinary embroidery stitch.


Expert tips that you could use to give a raised effect to your embroidery digitizing are:


• Foam embroidery is best suited on stable fabrics like caps or bags. In case you plan to use them on softer fabrics, it is wise to use a heavy backing. In fact, trying out a few samples could be a good idea to check if the fabric chosen is suitable for this work.


• It’s equally significant to have a file that is adequately digitized for 3D or foam embroidery.


• Last but not the least, having threads matching the foam colors is highly recommended in case of embroidery digitizing.


So, let your creativity run loose as you stick to these techniques while dealing with foam embroidery.
Frequently asked questions
Have a question about this project?
Comments
Join the conversation
Next