


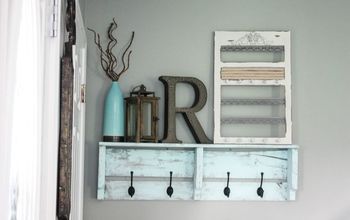
Easy DIY Modge Podge Pallet Sign
$6.00
30 Minutes
Easy
Well friends, this project has already went in a million directions, and to be honest with you, I am not 100% sure that I am finished, even now! Let me explain. I had this wonderful idea that I wanted to take some pallet boards that I had on hand and attach modge podge letters to spell my last name. I had some vintage papers that I had recently gotten, and they were going to be the perfect combination for my letters. So, I got to work!

I laid my letters out in a line and had my papers out, ready to get these bad boys covered.

I thought it had a really cool look to it, so I attached the boards by hot gluing them together. They were VERY sturdy, so I proceeded with hot gluing each of my letters to the boards.

After I had modge podged the paper on all of the letters, I took my scissors and cut the letters out. After I had them cut, I took a piece of sand paper and sanded the edges down to give them a rugged look. (Since the pallet itself was somewhat rugged, I liked the idea of having my letters “not perfect”.)

I think it turned out SO cute!! I still haven’t decided if over my bed is the perfect spot for this, but there is no doubt that if it isn’t, there is somewhere for it! I just love it! (And for a mere $6.00!!!)


To see more creative ideas, as well as room renovations and an occasional deep thought, go to http://www.re-fabbed.com

Want more details about this and other DIY projects? Check out my blog post!
Comments
Join the conversation
2 comments
-
Adorable! I'd love to make this for my brother's baby that's on the way- Frankie!


Frequently asked questions
Have a question about this project?