


Project Guide: Stenciling Walls
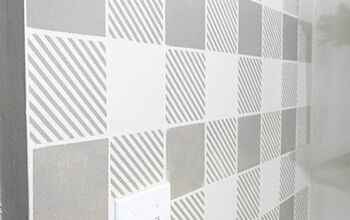
Adding a stencil to an empty wall is an easy and effective way to give it some color and style. Stenciling has become a popular trend in the DIY community, but it's not quite as fool-proof as it sounds. Before planning your next stencil makeover, avoid any do-overs by checking these quick tips.


1. Buy the right medium for your project
2. Prepare Your Work Space
- Cover all baseboards, window and door frames, and the edges of any vents in painter's tape
- Open windows to increase ventilation and speed up your drying time
- This project will not be a messy one, but if you're concerned about paint droplets or spills, lay down a drop cloth next to your wall(s)
3. Prepare Yourself for Working
- Dress in clothing you won't mind marking up with paint
- Tie back hair
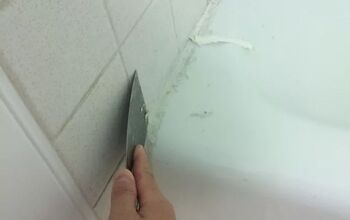
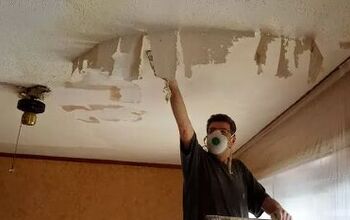
4. Prepare Your Surface
- Clean your surface well with a microfiber rag, or another cloth that won't leave behind threads or fluff
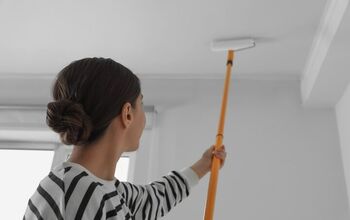
- If your surface doesn't seem flat or smooth enough, lay down a layer using your base coat
Basic Tools Include:
- Microfiber cloth (to clean surface)
- Stencil
- Stencil brush
- Dense Foam roller
- Painter's tape
- Base color paint
- Accent color paint
- Paper towels
- Level
- Palette (or plate)
- Ruler
- Baby wipes (for cleaning or touch-ups)
- Ladder

1. Securing Your Stencil
- Pre-cut or tear pieces of tape, so you can immediately secure your stencil without needing a hand
- As you work, line up each painted area by the edges of the last one, so that your partially filled-in design is viable at the edges or your new area
- Use your ruler or level to make sure that your stencil is properly aligned before you start painting
2. Painting
- If using a roller, load up your paint slowly, making sure that it coats your foam surface evenly on all sides
- Before you start painting, roll excess paint off of your roller onto a folded paper towel until your roller looks fully coated, but almost dry
- Roll your paint over your stencil with medium pressure, going over sections multiple times to cover them fully
- If you press too much on your roller, you risk the paint bleeding underneath your stencil
- A brush will make your job take much longer, but it will come out cleaner, with crisper edges
- Use a brush for the corners or smaller details of your design, or to touch up areas that may not have gotten enough paint
- Dip just the tip of your brush in the paint and then, like the roller, unload the excess on a paper towel until your brush looks dry
- When filling in your stencil, paint in a pouncing motion, lightly dotting the design, or try gently swirling your brush in small circles over your stencil
- Make sure to apply pressure along the open edges of your design to get crisp lines
- Don't brush in a regular back and forth motion, or paint will build up on the open edges of your stencil and will likely bleed under
- Even though your stencil will be covered in paint, if you're making sure to get rid of the excess paint before you fill in with your brush or roller, you won't need to wash your stencil in between areas
- Leave edges (like the space right above your molding) and corners for last, so that you can cut your stencil to fit those tighter spaces
- Make sure that you've finished painting the larger areas before cutting your stencil

Cleaning Up
- As you're working, feel free to carefully lift a small corner of your stencil to make sure the design is coming out well without major bleeding
- Though bleeding is a natural side effect of stenciling, you can quickly clean up and messy edges or areas with a baby wipe while the paint is still wet
- If the ares is too tight to clean with a wipe, or if it's already dried, use your base coat to touch up stray marks or fuzzy edges
Projects to Look At

Want more details about this and other DIY projects? Check out my blog post!


Frequently asked questions
Have a question about this project?