


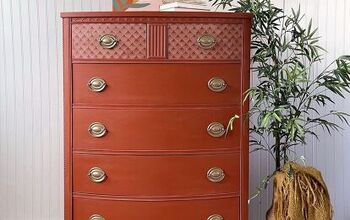
How to Give an Old Chest of Drawers a Fresh & Modern Makeover
I recently took on a thrilling project to give an old chest of drawers a fresh and modern makeover. Join me in this step-by-step tutorial as I share how I transformed this dresser by adding stylish legs and updating its look. Let's start and give new life to this chest of drawers!
Tools and materials
- Campaign style dresser
- Circular saw
- Screwdriver
- Sandpaper (various grits)
- Cleaning supplies
- Painter's tape (optional)
- Spray primer
- Spray paint (Milange Paints Restoration Bronze)
- Measuring tape
- Drill with drill bits
- Screws
- Patience and creativity!

Chest of drawers makeover

1. Remove the old base
I began with an outdated campaign-style dresser. I decided to take off its old base. Using a screwdriver, I carefully removed the front trim and then turned to my trusty circular saw to create even sides.
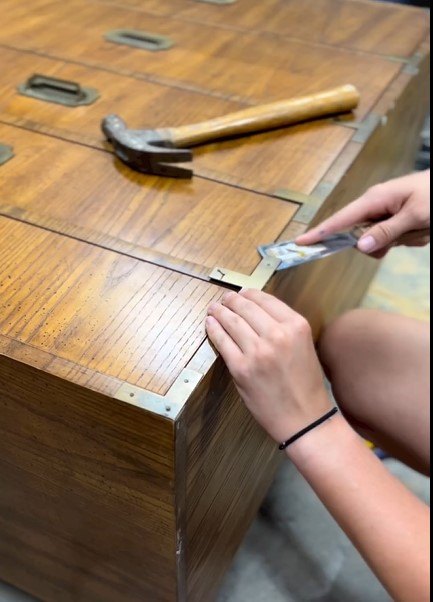
2. Preserve original hardware
Since I had a soft spot for the original hardware, I took the time to remove it before diving into the transformation. This step ensured that the hardware stayed in pristine condition and didn't get damaged during the makeover process.
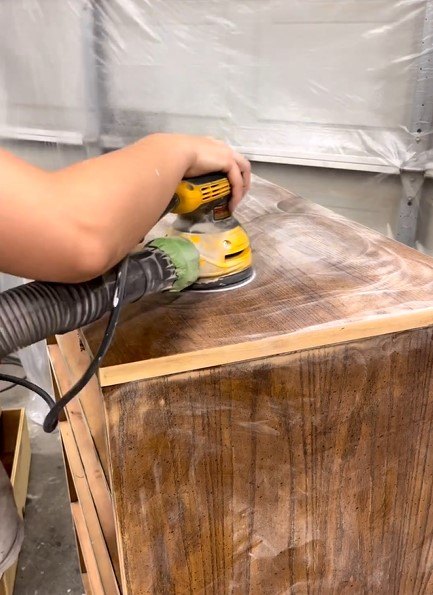
3. Prepare for paint
Before I could add the legs and update the dresser's look, I needed to prepare the surface. I gave the dresser a thorough scuff, sand, and cleaning session. This step was vital to ensure that the paint adhered smoothly and provided a lasting finish.
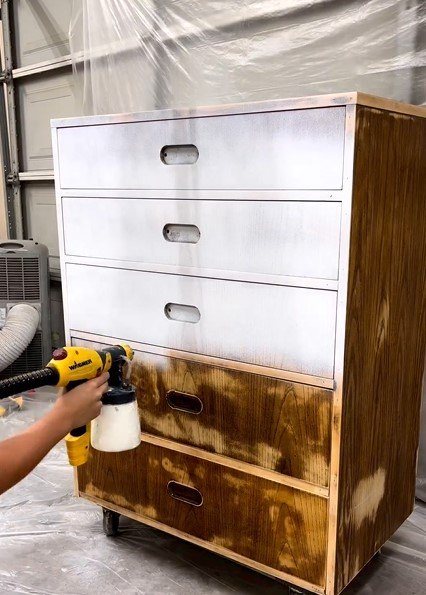
4. Prime the canvas
With a clean and prepped surface, I grabbed my favorite spray primer and generously coated the dresser. The primer creates an ideal base for the paint and helps achieve a professional finish.

5. Add a fresh base color
I opted for Milange Paint’s Restoration Bronze as my chosen base color. I sprayed the body of the dresser, instantly breathing new life into it.
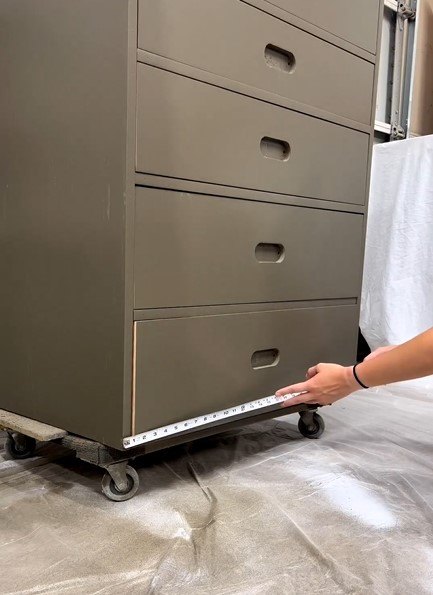
6. Plan and prep for legs
I decided to add legs to the dresser for a stylish touch. To begin, I measured the length and depth of the dresser. I wanted a recessed look, so I subtracted a few inches from each side to determine the ideal leg placement.
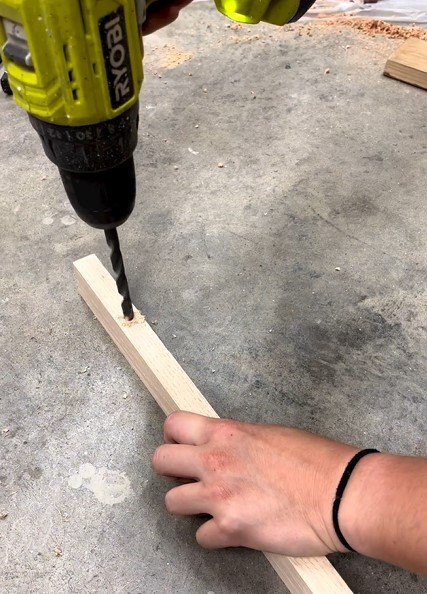
7. Drill pilot holes for legs
To ensure a secure attachment, I drilled pilot holes where the legs would be placed. These holes provided a guide for the screws and prevented any mishaps during the leg installation.
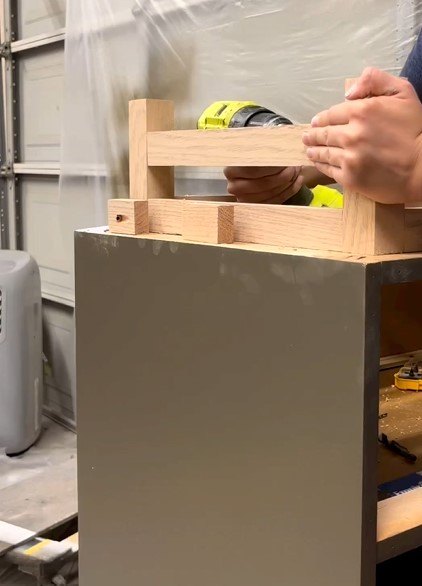
8. Add legs
With the pilot holes in place, I attached the legs to the bottom of the dresser using screws.
Chest of drawers makeover
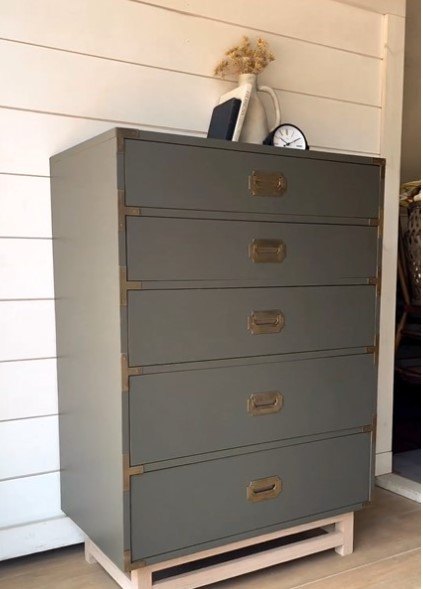
Here’s the remarkable transformation–from the outdated campaign style to this chic and elevated piece.
With a touch of creativity and a dash of DIY magic, I successfully transformed a tired campaign-style dresser into a statement piece with stylish legs. This makeover showcased the power of imagination and a little bit of elbow grease.
Let me know your thoughts in the comments about how you like this chest of drawers makeover.
Follow @rhettsrefinishes on Instagram for more DIY ideas.


Frequently asked questions
Have a question about this project?