


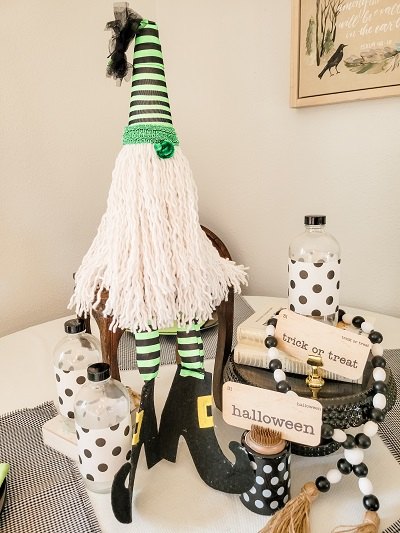
Make An Adorable No Sew Halloween Gnome
I have a better use for a mop and bucket than cleaning something! Make an adorable no sew Halloween gnome. This gnome DIY uses supplies from the Dollar Tree and can be done in less time than it takes to watch any of Hallmark’s Fall Harvest Movies! The new fall movies start September 11th, not that I’ve been checking the Hallmark schedule or anything. Do you have your movie picked out? Let’s get to creating a gnome – here is what you’ll need!
Gnome Supplies

- Dollar Tree Witch legs – they have these in purple and black stripe, orange and black stripe or a green and black stripe. I chose the green because I’m thinking I can pull Nonny the Gnome out at St. Patrick’s Day.
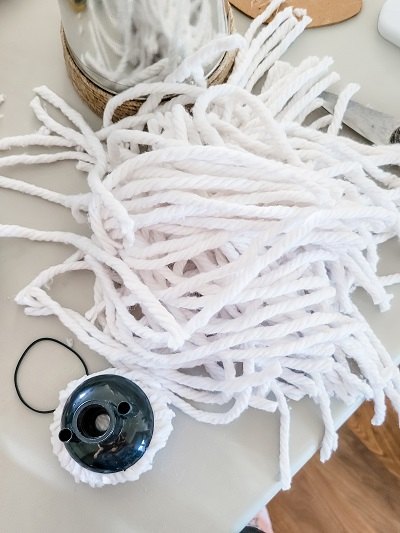
- Mop Head – also from Dollar Tree
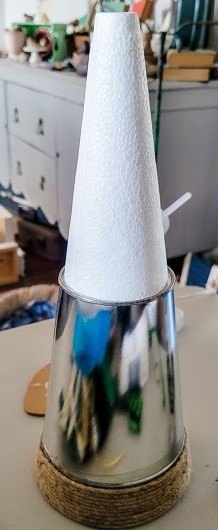
- Metal Bucket with Rope, 5.5 in.- Dollar Tree
- Floral Foam Craft Cones, 3×7 in – Dollar Tree
- Pipe cleaner and a wooden bead or a pompom
- Black yarn, string or twine
- Black rubber band
- Hot Glue and Scissors
Gnome 1-2-3
1. An Adorable Gnome Body
Remove all the strings from the mop head cutting as close to the black part or head of the mop. These will be for your gnome beard.
Using the hot glue adhere your floral cone to the bottom of the bucket.
Start hot gluing the mop strings to your bucket about a third of the way up the bucket. These will be the start of your gnome beard. Use a skewer or the wooden end of a foam brush to push the mop strands into the glue so they stick well. And you don’t want to burn yourself. That would be totally distracting from the fact that the Hallmark characters are in wine country and whether she going to fall for small town boy or stay with the big city guy she left.
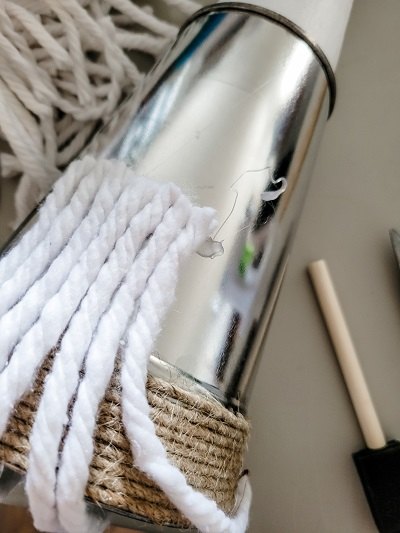
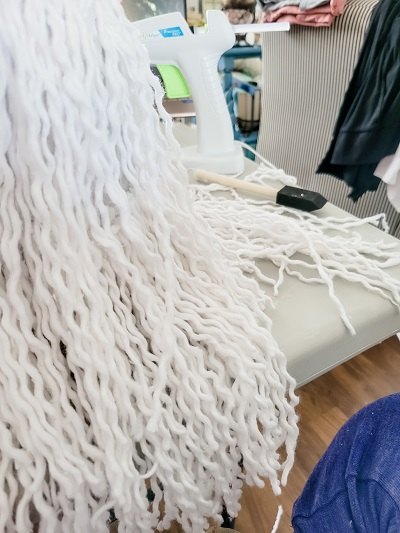
Attach another row of mop strings to the bucket at the bottom of the bucket (which is now the top) directly under the lip. After all the strings are attached start unraveling each string gently. Inevitably some strands will fall out. Use these to fill in any holes that you see after unraveling. You are so close to an adorable Halloween gnome and knowing who she picks in the Hallmark movie!
2. An Adorable Gnome Hat
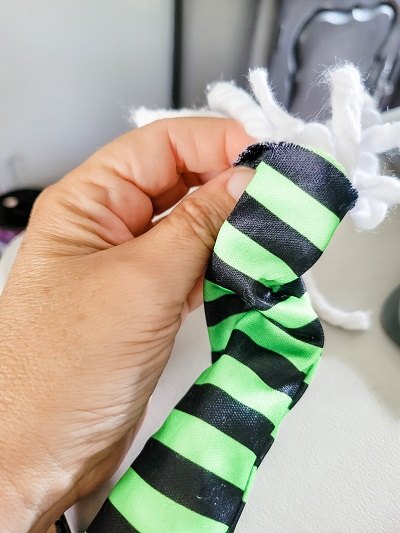
Cut your witch legs in half. Well that sounds horrible, doesn’t it? Set the feet aside. Cut the remaining “leg” from the ring.
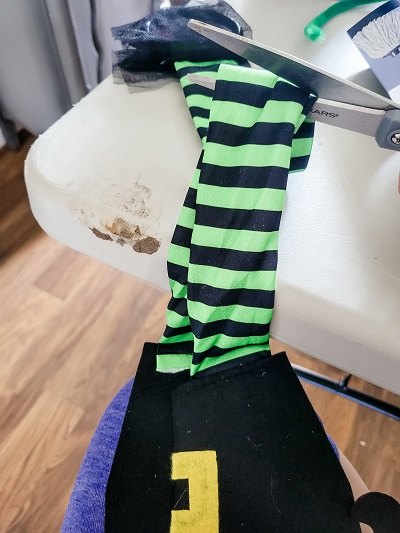
Pull one witch leg down over the cone. Pull the second one down over that tucking in the raw edge and letting the top hang off. I used green trim I had in my craft closet to cover the gap. You could also do another row of gnome beard!
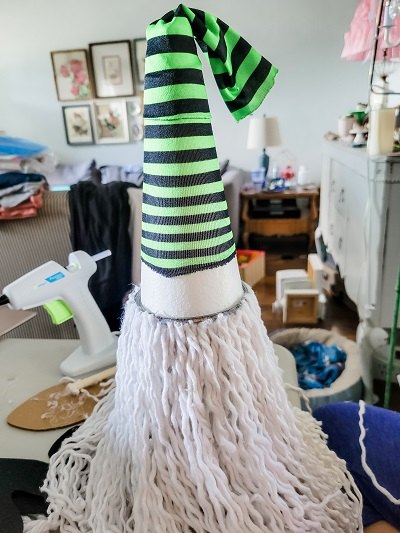
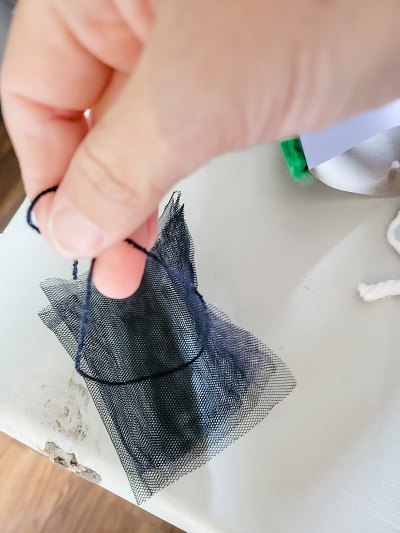
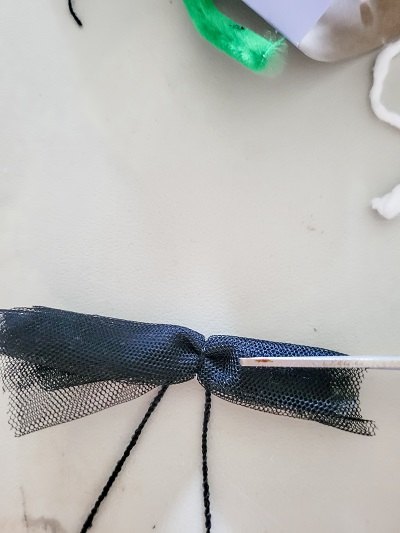
Using the piece of tulle at the top of the legs (because nothing goes to waste!) make a bow for your adorable gnome hat.
- Using a piece of string tie a knot around the center of the tulle.
- Snip twice on each side.
- Fluff.
Use the rubber band at the end of the hat to gather the material and tie your tulle bow on.
3. An Adorable Pair of Gnome Legs
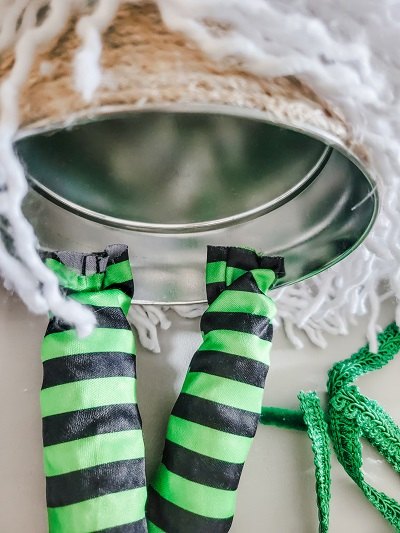
Hold up your legs to the inside of your bucket and determine whether you need a beard trim. I chose to cut about an inch off so you would be able to see the legs better. I held my gnome in the air and cut as evenly as possible just around the bottom.
Stuff each leg that’s attached to a foot with leftover mop pieces. If you do not have any pieces left over cotton batting or tissue paper will work too! Hot glue them closed. Has the Hallmark character decided to stay in the wine country and pursue her life long dream of being a winery owner?
Hot glue these to the inside of your bucket paying attention to which side you want the front to be.
An Adorable Gnome Nose
Use a pompom or wrap a wooden bead in a pipe cleaner to create a nose. Glue right below the hat edge.

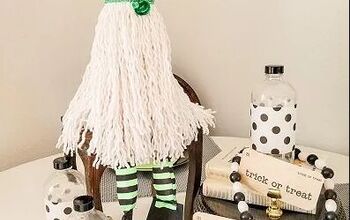
An Adorable No Sew Gnome In Less Time Than a Hallmark Movie
What’s black, white and cute all over? This Halloween table! Create it for yourself!
- Hocus Pocus Digital Print Flashcards are in my shop Twigs & Fluff!
- Thrifted bottles are wrapped with polka dot tissue paper.
- See my favorite cake stands on my favorite things page on the blog - Feather Your Nest!
- A dollar store votive, thrifted books, a stool and wood bead garland complete the look!
- Make setting a beautiful table easy with my 1-2-3 Formulas, get your copy here.
DIY Halloween crafts


Frequently asked questions
Have a question about this project?