


DIY Wood Risers (Farmhouse & Rustic Styles)

by
Staci Marie
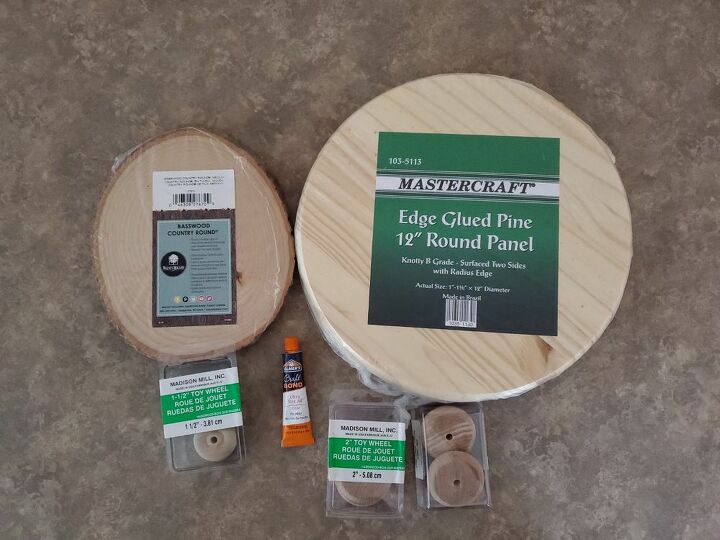
6 Materials
$15
2 Days
Easy
If you've scrolled Instagram or did a search for wood risers, you will see they are used in every style of home decor and are available everywhere. From online retailers and big box stores to small shops, the styles and finishes are endless. If you look at them closely you've probably said to yourself...I think I can make that, and you can!! This is an easy DIY project that is power tool free!
I decided since this project was so easy I would make 2 different styles of risers.
- Wood panel with bark
- 1.5 inch Toy Wheels (3 total) used as feet
- Elmer's Craft bond glue
- Minwax Water based Polycyclic in a Matte finish
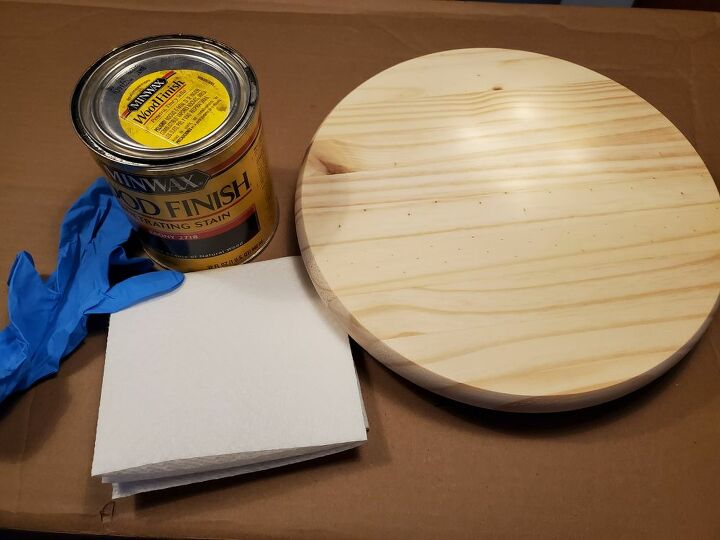
- 12" Round Wood Panel
- 2" Toy Wheels (4 total) used as feet
- Elmer's Craft bond glue
- Minwax Stain in Ebony
- White Paint
- Sandpaper
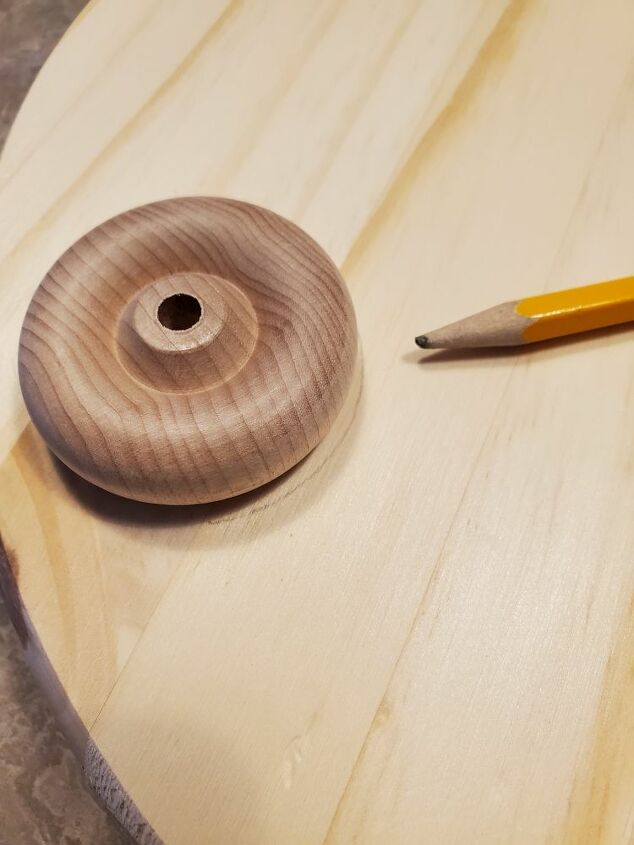
First I decided which side of the wood panel I wanted for the top and bottom. Then I set the wheels/feet where I wanted them. I trace around them with a pencil so I know where to put them after gluing.
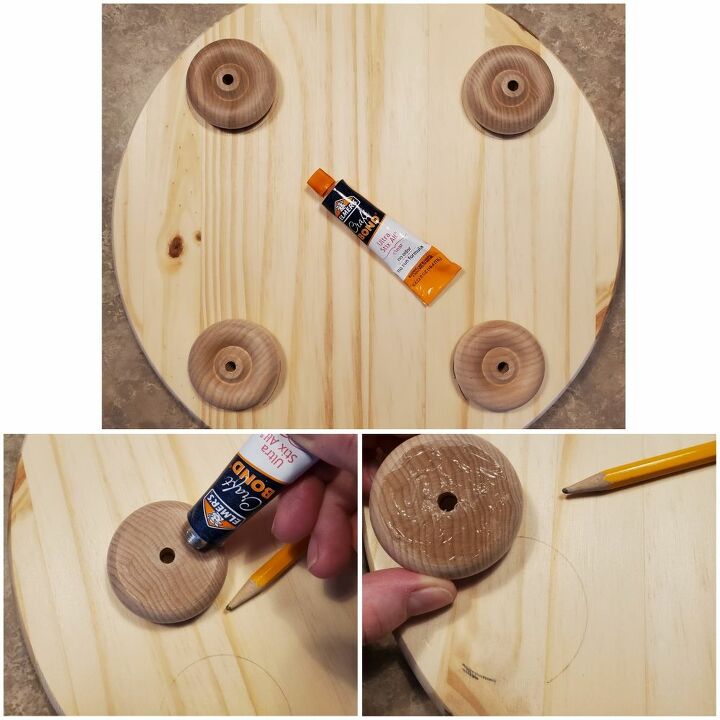
As you see these toy wheels are already drilled with a hole that you could use to screw your "feet" onto the riser. I decided to just glue mine. I completely covered the flat side of the wheel/foot with glue and then placed them back in the marked areas.
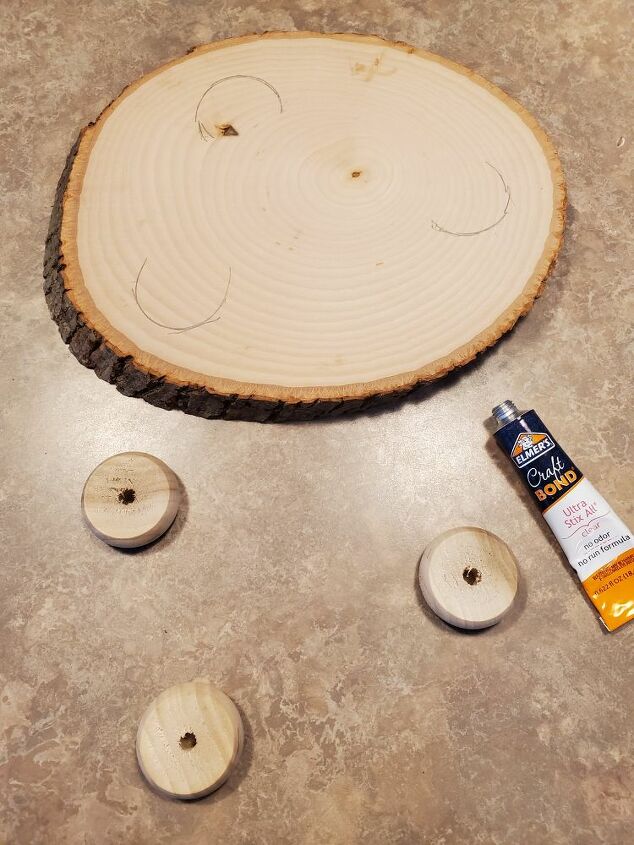
This photo shows how I placed the 3 feet on the oblong rustic riser. Again, I decided to glue the feet to the riser.
Once the feet are glued, carefully flip the risers over and set something heavy on top. I let mine setup overnight. Follow your glues specific directions.

The next day I finished the rustic riser by applying a clear matte polycyclic. I simply brushed a light coat on the top and bark sides. I let that dry completely. Before the 2nd coat I sanded the top lightly with sandpaper to smooth out the top. Wipe the dust off and apply a 2nd light coat. Once dry I applied a 3rd light coat.
Before staining my round riser I sanded the top and sides smooth. I stained the whole riser with the ebony stain using paper towels.
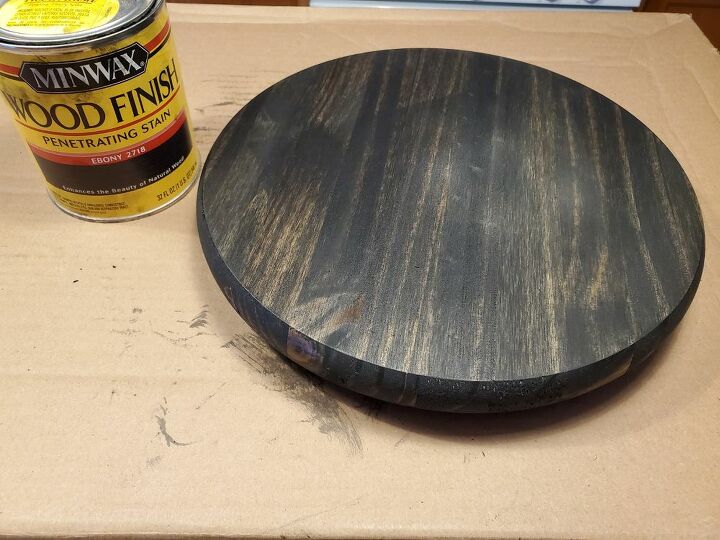
I knew I wanted a white chippy look and to achieve that look I was going to sand the project. I always choose to stain my wood projects first, that way when I sand down the paint, the black stain will show instead of the raw wood color.
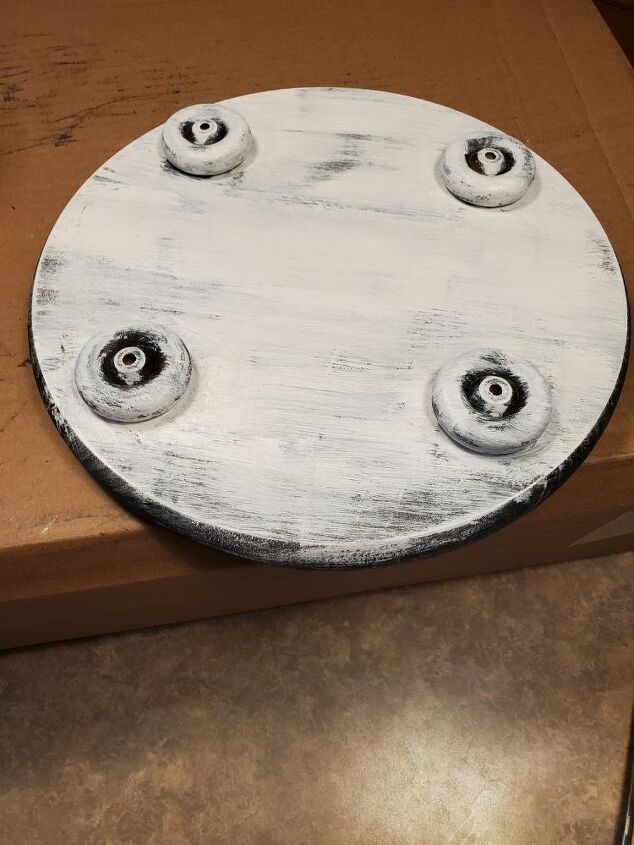
I didn't want to sand the bottom of the riser and feet, so when adding the white paint I did a dry brush technique to mimic the sanded/chippy look I wanted to have on the top.

Once the bottom was painted I flipped it over and painted a thicker coat of white on the sides and top.
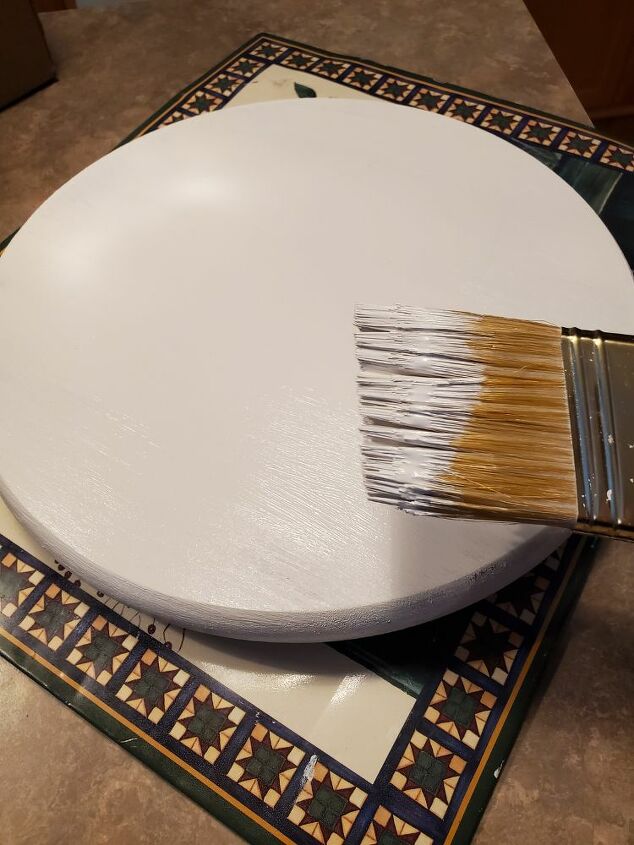
I use an angled brush when applying the paint.
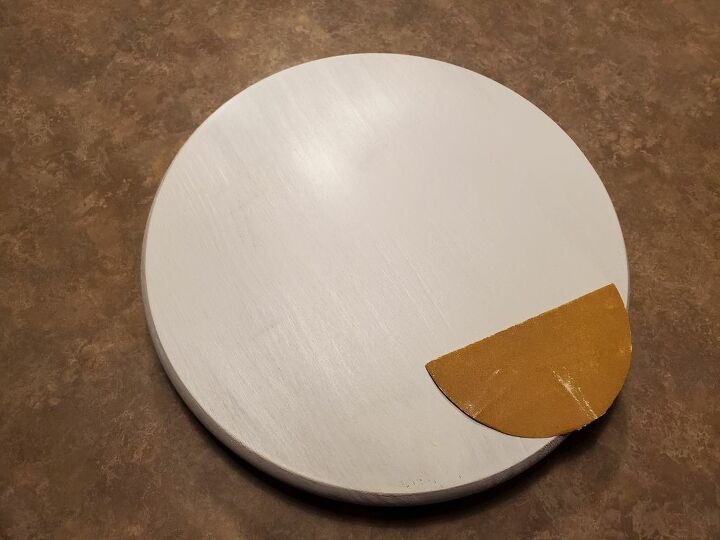
Once the paint dries take sandpaper and start sanding. I sand until I get the old chippy wood look I'm after. If more paint comes off than you like repaint and start over. You can't mess it up.
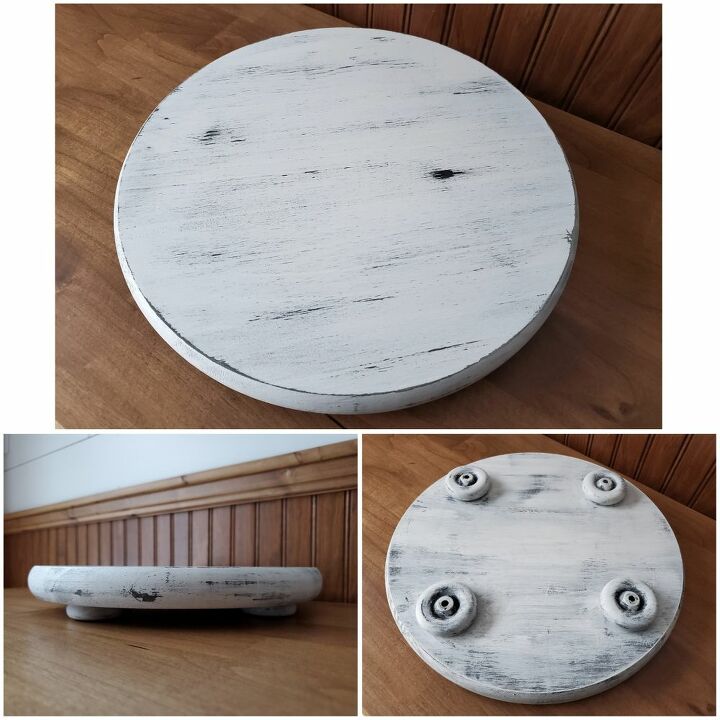
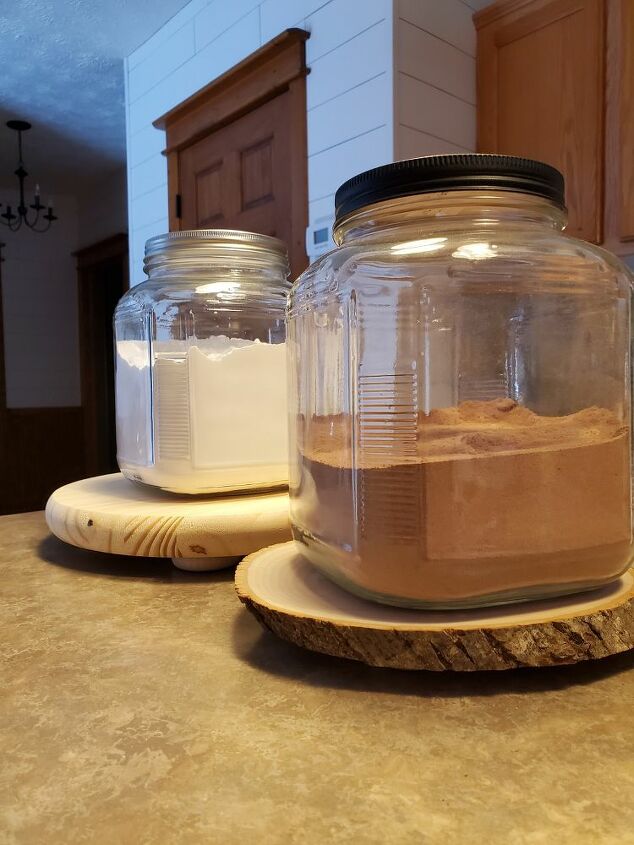
This is what the finished top, bottom and side looks like of the round riser.
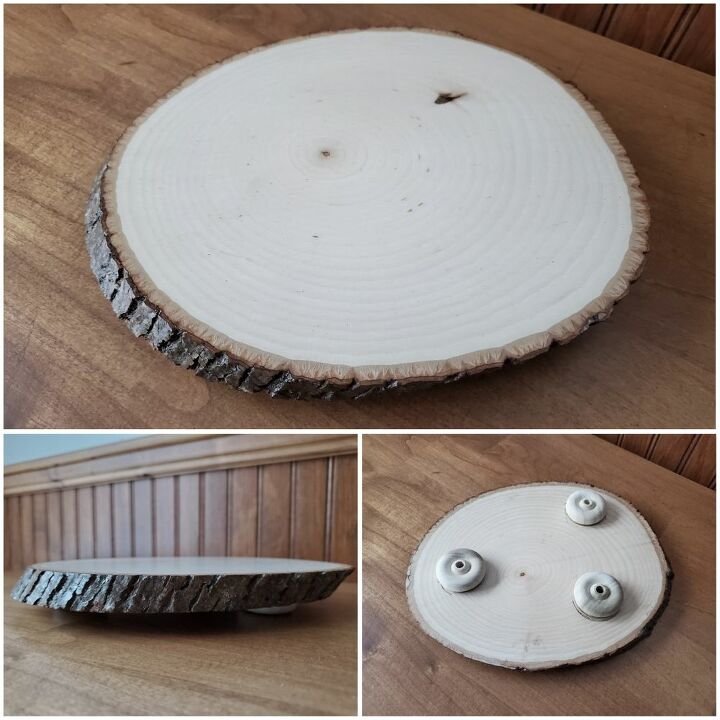
This is what the rustic riser looks like. I did not seal the bottom of the riser with polycyclic, but I think I'm going to go back and seal it up to protect it fully.
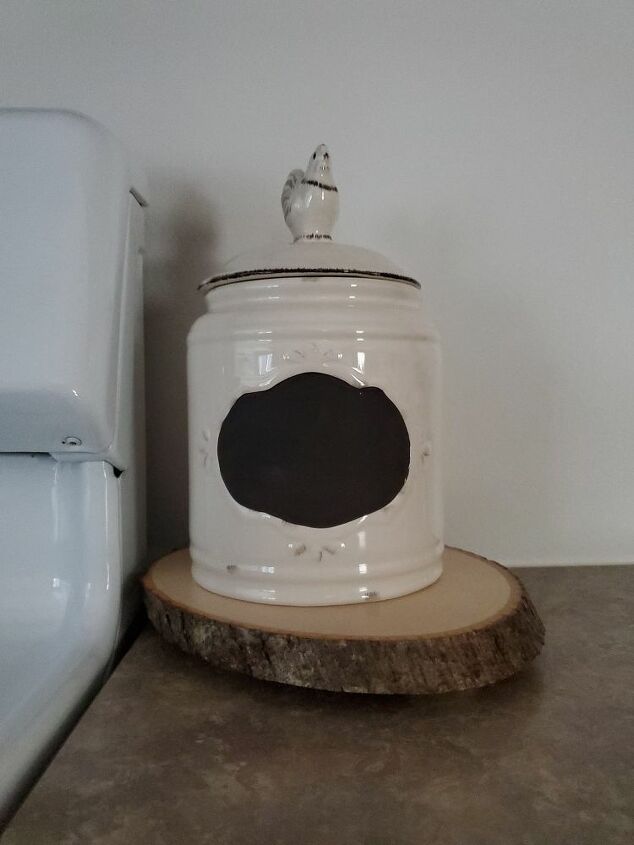
Rustic Wood Riser

12 inch Farmhouse Riser
Resources for this project:
See all materials


Any price and availability information displayed on [relevant Amazon Site(s), as applicable] at the time of purchase will apply to the purchase of this product.
Hometalk may collect a small share of sales from the links on this page.More info
Comments
Join the conversation
1 comment
-
I can't pick a favorite, I love em!


Frequently asked questions
Have a question about this project?