Updating 1980's Kitchen Cabinets for Only $120

Recently, I wanted to renovate this 1980s condo kitchen.
This was part of a condo flip currently underway which involved many cost saving DIY projects. You can view some additional condo flipping projects and the profit and expenses for a similar condo flip I took on at marciasocas.com. This kitchen cabinet painting project and the associated post were sponsored by Wagner. The opinions expressed are completely my own and are based on the results I achieved with the products used.
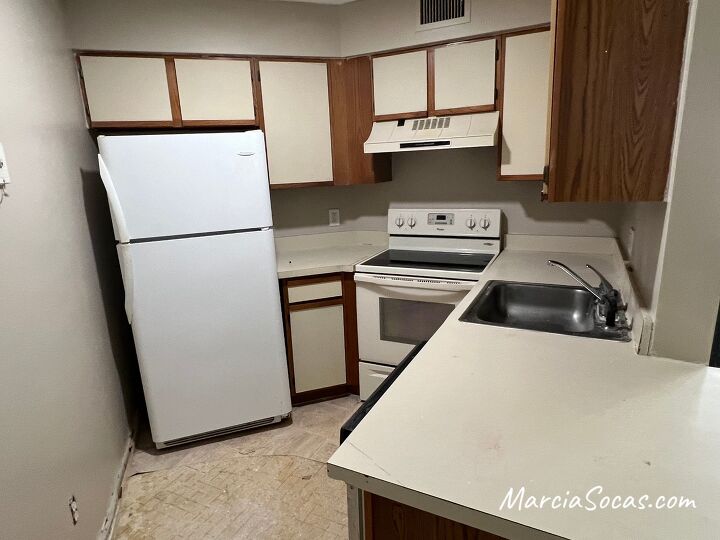
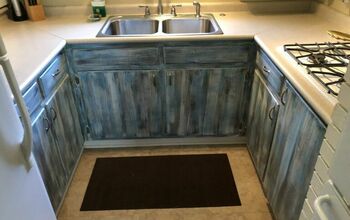
Here's my kitchen's starting point.
Here's another view. You can see the cabinet fronts aren't wood. They're kind of like a lightly textured laminate. I wasn't sure if this type of cabinet would paint well, but I wanted to try it and save a lot of money and time rather than redo all of the cabinetry.
These are the steps I took:
Step 1: Remove doors from cabinets. Remove old hinges and label doors (I labeled with that small piece of painter's tape you see stuck to the door) so that you'll know where each door goes when it's time to re-mount them at the end.
Step 2: Clean the cabinet boxes and also the door fronts. I used cleanser/degreaser and also a deglosser and made sure they were as clean as I could possibly get them.
Step 3: Prep the area. I taped off the area around the cabinet boxes to avoid any overspray getting onto the walls.
Step 4: Set up the paint sprayer. Wagner supplied me with the Flexio 3500 paint sprayer, and I used the detail spray nozzle for use on the cabinets. I set the flow to maximum, which provides for really smooth and even coverage.
I filled the reservoir cup, screwed it on, and I was ready to go. I tested the sprayer on a test sheet and played with the nozzle a bit. You can adjust it to provide a more horizontal spray, or a more vertical one, depending on your use.
The paint I used was bright white cabinet paint (oil enriched enamel) and the cost was approximately $52.
Step 5: Spray the cabinet boxes. Spraying was of course the most fun and quickest part of the project. I could immediately see the difference. The sprayer was light enough for me to use easily and I was able to reach into the cabinets and get all of the surfaces coated. I sprayed the boxes twice since I only applied a light coating each time.
Step 6: Spray the cabinet doors. I used a protective shelter set up in the condo in order to paint the cabinet doors inside without having to take the cabinet doors up and down the stairs to paint them outside. The shelter protected the condo from paint and also protected the doors from getting any dust or anything else on them while they were drying.
I used the turntable to spray some of the doors. It helped me to turn the door and get the sides covered evenly. Also, the turntable helped me to get the paint sprayed above and below the wood piece on the door front really evenly. I applied 3 light coats of paint onto the doors.
I am happy to report that the surface took the paint even better than I expected. This was my first time painting this type of lightly rough laminate, and I was worried about it and very pleasantly surprised with the result.
Step 7: Re-mount the doors and any hardware. I purchased new hinges ($30) and also added some large pulls ($40) that I really liked and that I thought helped modernize the look of the kitchen.
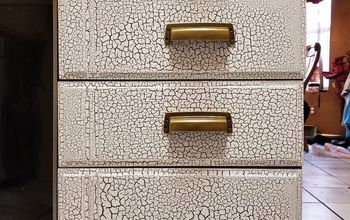
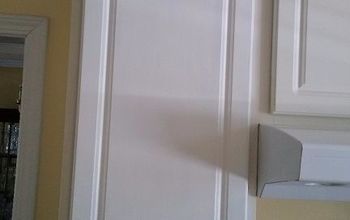
I wanted to provide a close up view of the cabinet door so you can zoom in and really see how smoothly they turned out.
Other updates:
There are other updates that I made to the kitchen that I should point out. We saved a lot of money by not having to redo the cabinets, so I did purchase a microwave and removed the old vent hood. I also installed a white dishwasher, added granite, a new faucet, and sink. I also installed a white subway tile backsplash in one day.
For more info on those projects, please visit the entire condo renovation webpage. I have links to the products used to make it easier for you to find them there.
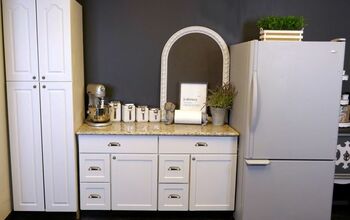
Here's the after photo of the kitchen taken from the same angle as the "before" photo so that you can see them directly contrasted.
And here's the second view. I hope you love this project as much as I did and encourage you to try it yourself!
Wagner provided the equipment for my project (Flexio 3500, protective paint shelter, and turntable). I loved the opportunity to work with these tools and was thrilled to receive such amazing results.
More Budget-Friendly Cabinet Transformations
Join us on a thrilling journey through 15 Easy Ways to Transform Your Kitchen Cabinets on a Budget and unlock the secrets to revamping your kitchen without spending a fortune!
Enjoyed the project?
Resources for this project:
See all materials
Comments
Join the conversation
-
 C. D. Scallan
on Mar 03, 2024
Great job! It looks beautiful.
-
-
 Katie Stahl
on Mar 04, 2024
You spent more then $120 technically. Companies donated things. That is what kept the cost down. I have those same cabinets and would love to do that, but I can't for $120.
-












Frequently asked questions
Have a question about this project?
Why didn’t you paint the end of the cabinet and wall?
Hi. I like the look, and I get the price for paint was $120.00, but if I may be so bold and ask what the total cost was for the project? You also mentioned you usually go to a granite yard, then have a granite person manufacture them - could you explain what that means? I am a newbie and getting ready to update my kitchen DIY - I have a bit of experience, but I never heard that sentence before. Thanks!
Love the white you chose. As well, the hardware makes it updated for sure. Does the vented micro vent if your cooking on the stove top. ??