


Thrifted Cabinet Makeover
I want to thank RZ Masks for sponsoring this thrifted cabinet makeover.
This thrifted cabinet makeover is an example of how thrift store finds can be made over to get the exact look you want in your home for less!
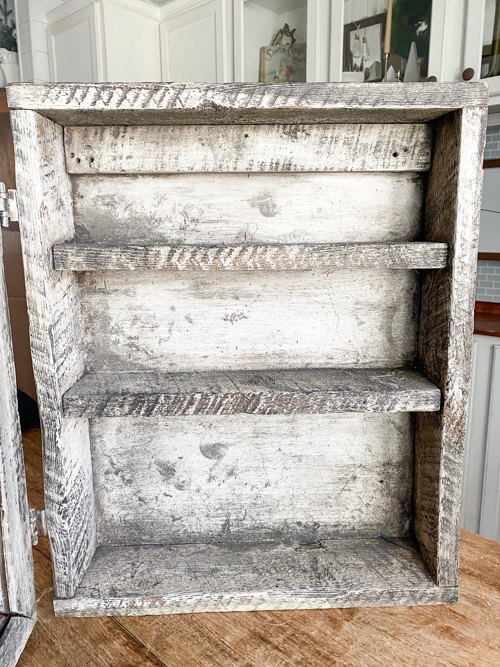
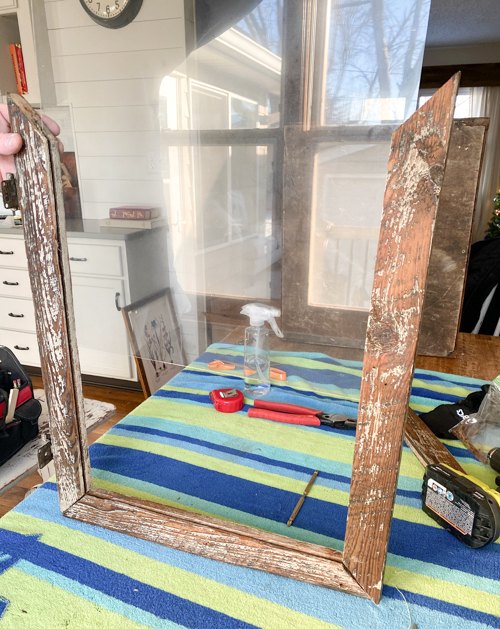
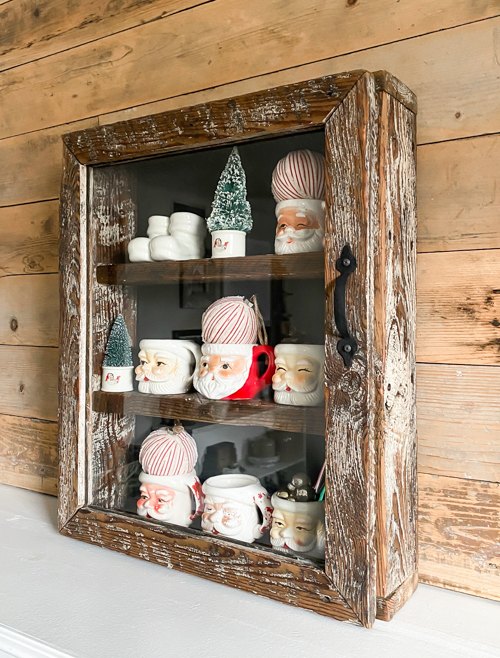
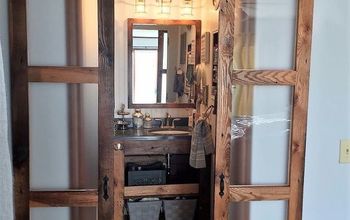
I never know what I am going to find when I am thrifting, but if I find something that has loads of potential and is super functional, I will be bringing it home. My latest find was this homemade cabinet made out of rustic wood.

The glass was missing from the door and it was pretty dark and dingy but it still had a lot of potential. I had to bring it home and give it a makeover.
Affiliate links are used in this post.
Supplies Used In This Thrifted Cabinet Makeover
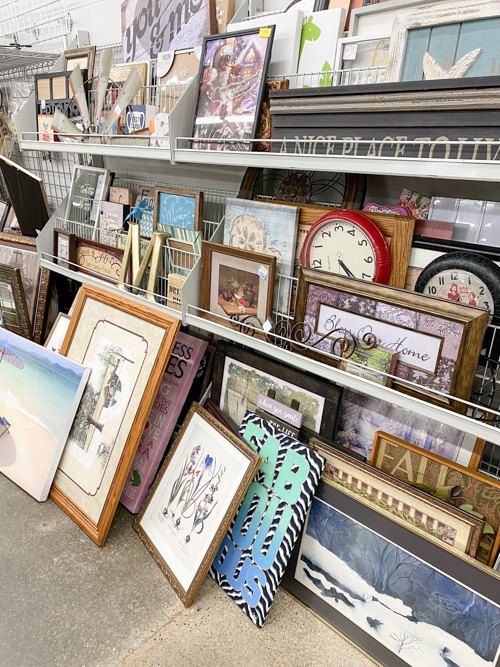
Thrifted Picture For The Glass
Steps To Make Over This Thrifted Cabinet
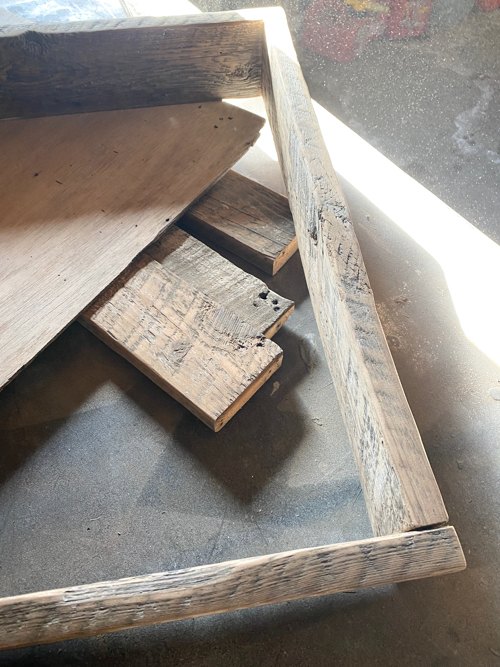
- The first thing we did was take the cabinet apart. We had to give it a really good sanding and taking the cabinet apart ensured we could sand in all the nooks and crannies.
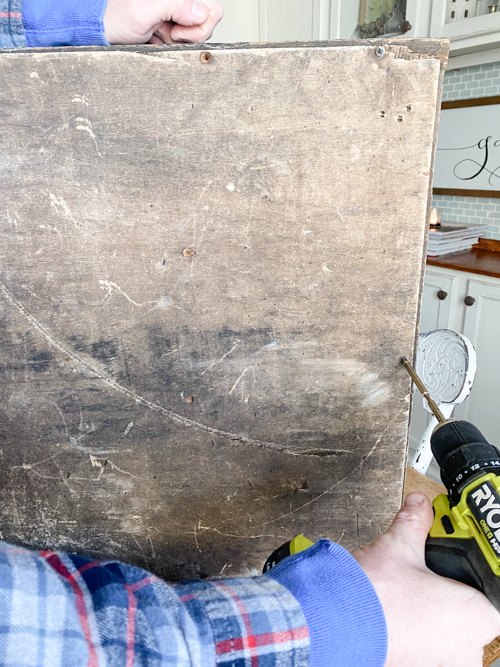
- Once we had the door off, the shelves removed, and the back off, it was time to sand.
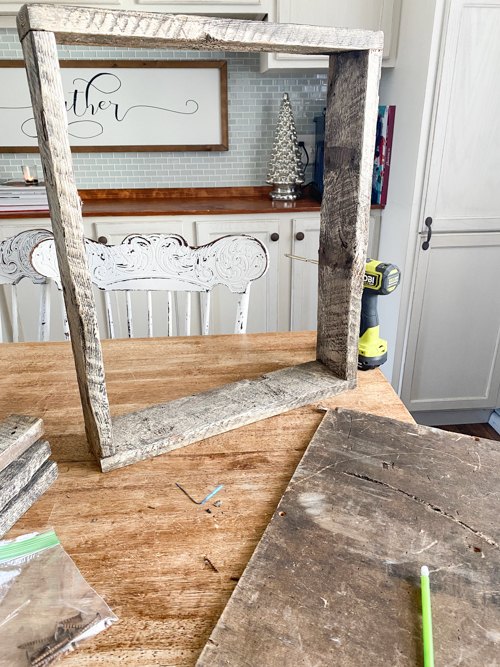
- This cabinet was made of rustic, old wood. We used 80-grit sandpaper on the orbital sander to cut through the dingy grime it had on it and to bring out the grain more.
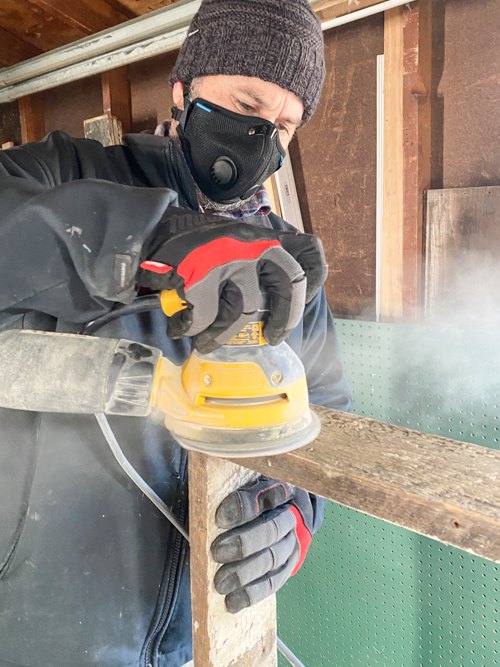
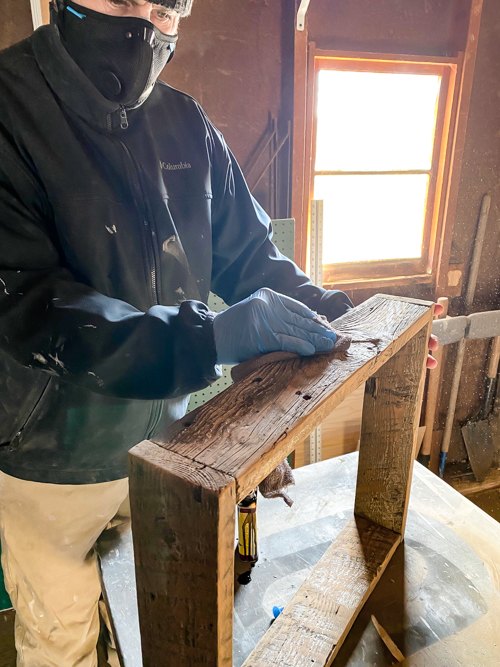
- You should wear a protective mask when you are sanding, spray painting, staining, etc.Whenever we use our orbital sander, we like to wear a mask. I have to sing my praises of the RZ Masks. Matt and I have used many masks over the years and the RZ Masks are a cut above the other ones we have used. They have many options for both masks and filters. I tried the single-strap mask for this project and Matt tried the double-strap. Their masks are reusable, breathable, durable, moisture-wicking, latex and BPA free, and have replaceable filters.
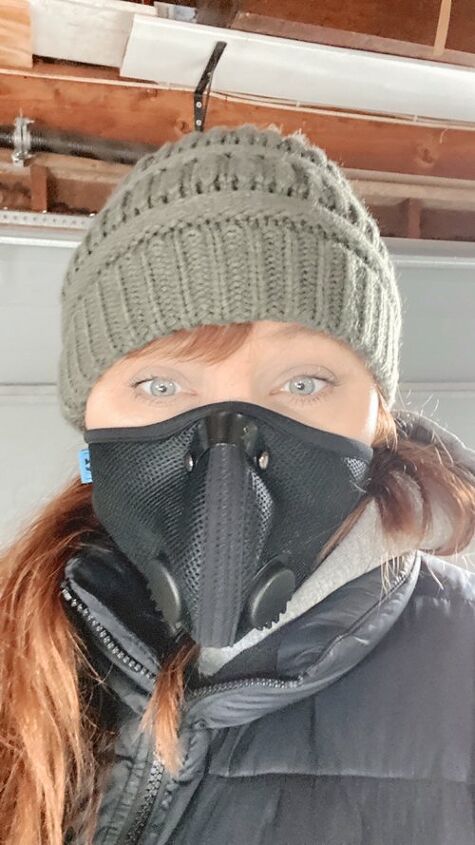
- We were working on this project in our garage in 19-degree weather. To keep the garage warmer, we closed the doors and got to work. When we put our masks on, we both said we could breathe so well in them! I have put on masks before and had a hard time breathing. Not the case with these. The mask also kept my face warm which was an added benefit on this day.
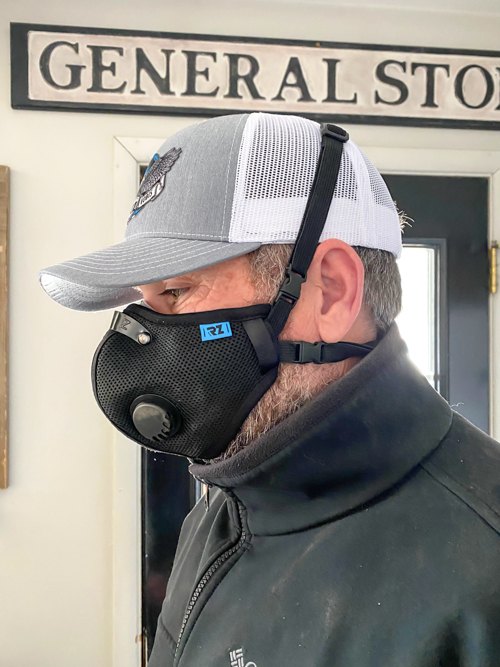
- We both thought they were so comfortable too. Matt loved that the double strap did not go around his ears at all. Other masks do that and after wearing them for a bit, it hurts his ears. He wore the RZ Mask with a baseball cap on and we both had on stocking caps with them as well. The masks stayed in place and were comfortable with both. We were blown away by these masks and will be using them from now on.
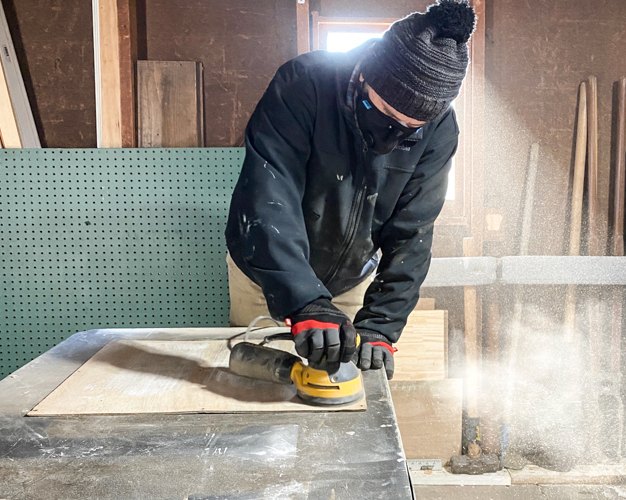
- With the garage doors shut to keep it warmer, we knew there would be a lot of sanding dust with the type of wood this cabinet had and using the 80-grit sandpaper. The RZ Masks were much needed with this project.
Back to the project.
- Once everything was sanded, I cleaned all the sanding dust off with a damp cloth. Then, we applied Resor-A-Finish to all the wood but the back piece.
- I am sensitive to strong smells and Restor-A-Finish does have a strong smell to me. It was another reason to wear my RZ Mask while working on this cabinet.
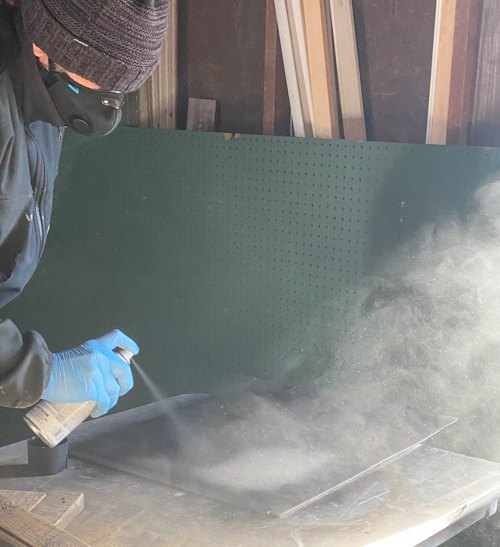
- While the Restor-A-Finish was drying, we spray-painted the back piece of wood black. I thought this would be a good contrast with the rest of the wood. Again, the RZ Masks were needed for this part of the makeover too. To be honest, we had the masks on the entire time we were working on this cabinet because they were that comfortable and we weren't bothered having them on at all. That says a lot. Masks usually aren't comfortable when you are working on projects.
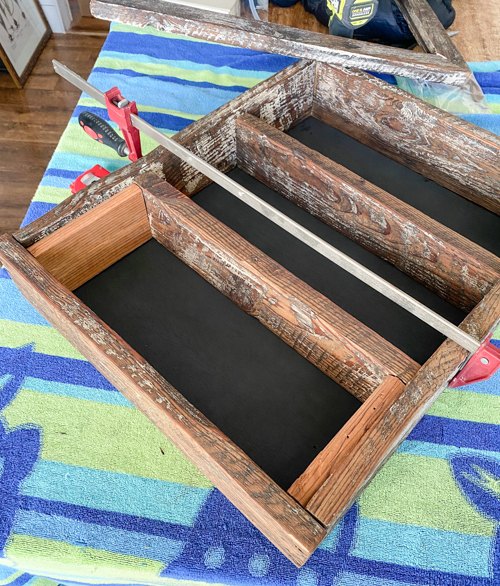
- Once everything was dry, it was time to put the cabinet back together. We put the back on first and then, I wanted to move the shelves so they were more even.
PRO TIP: Find out the measurement you need the shelves to be apart and cut scrap wood to that length. Then, use that scrap would as "spacers" for the shelves as you screw/nail them back in.
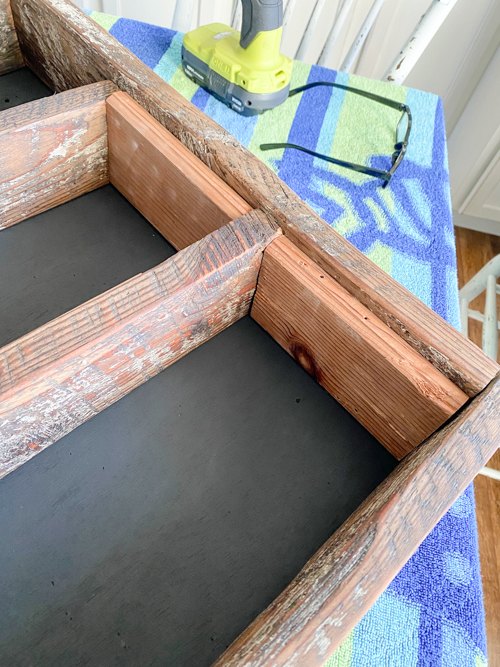
- Once we had the shelves where they needed to go, we nailed them in.

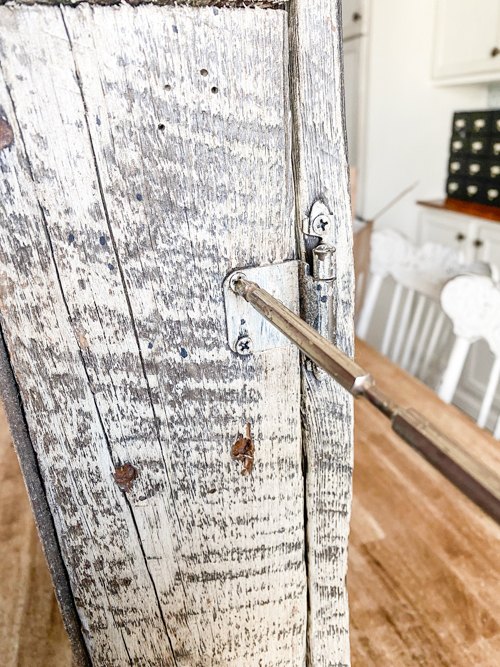
- Now, it was time to work on the door.
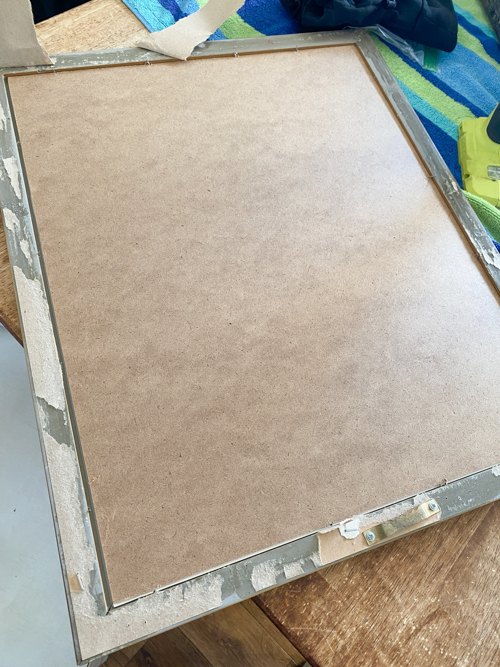
MONEY SAVING TIP: To save money on replacing the glass for the door, I went to a thrift store and found a picture with the same measurement so I could use that glass. It cost me $3.88.
- I removed the back from the thrifted picture.
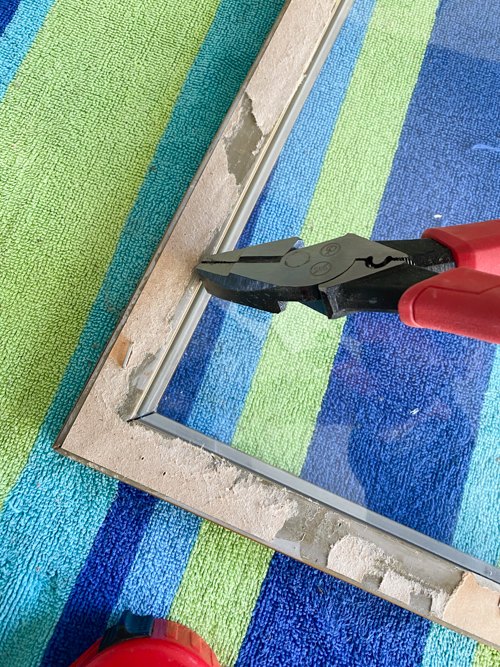
- Then, I removed the nails around the edge with compound pliers to get the glass out of the frame.
- We took the top portion off the door of the cabinet.
- Then, we added some caulk to the base to help secure the glass in the door.
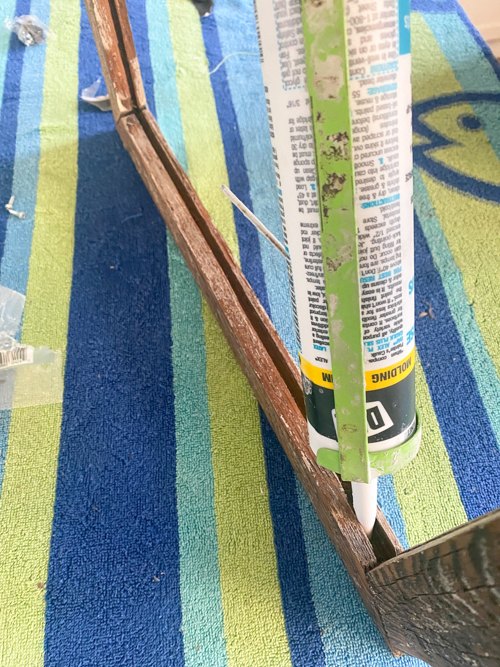
We put the top back on the door and added a few small screws at the corners to hold it all in place.
That is it!
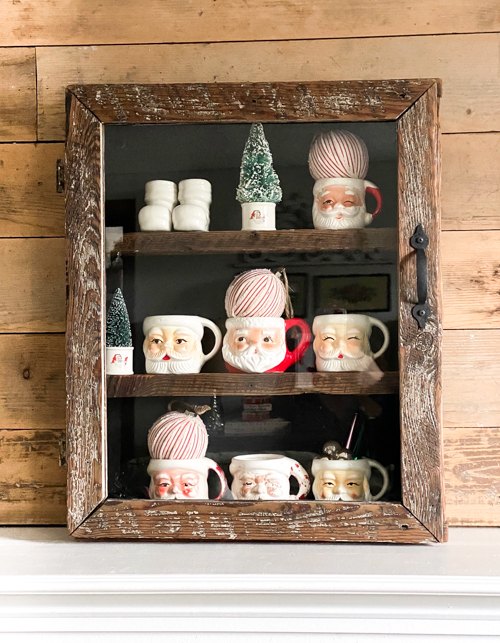
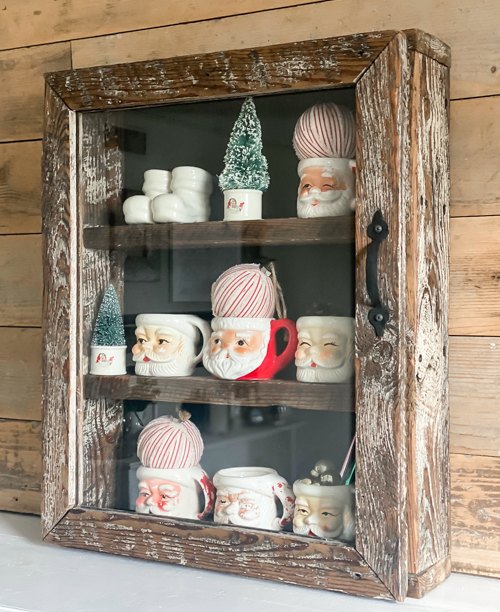
I love this cabinet so much now.
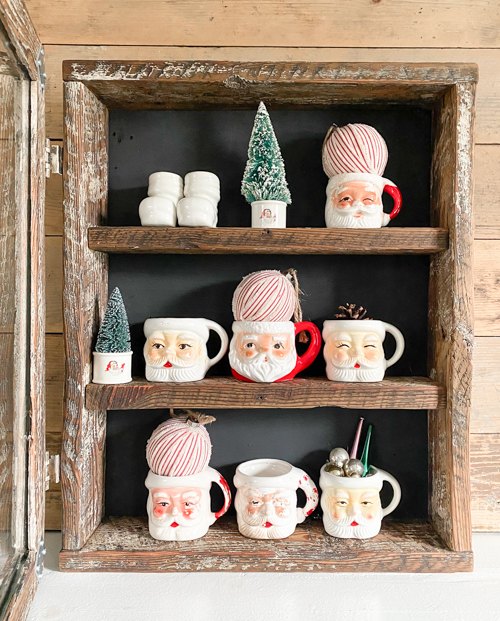
It is the perfect cabinet for so many things.
It still has the rustic vibe but in a more "clean" way.
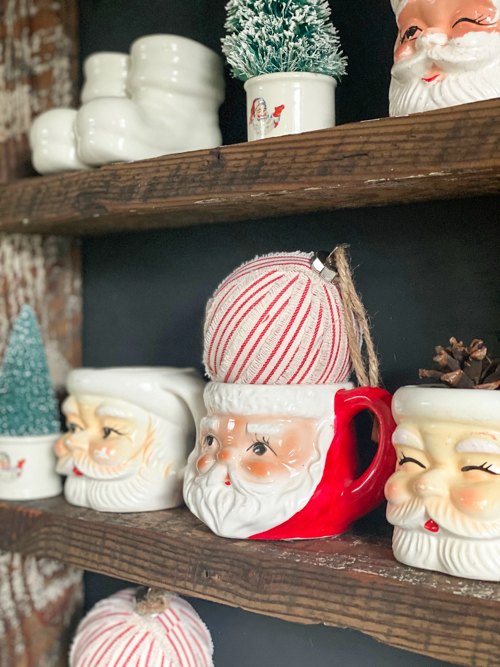
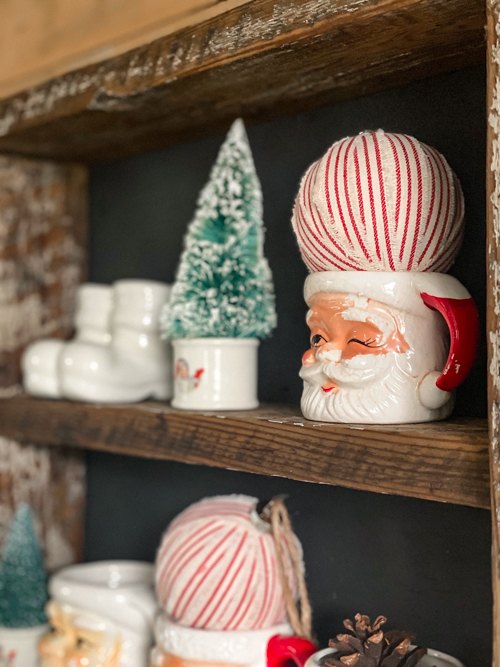
I love the black back.
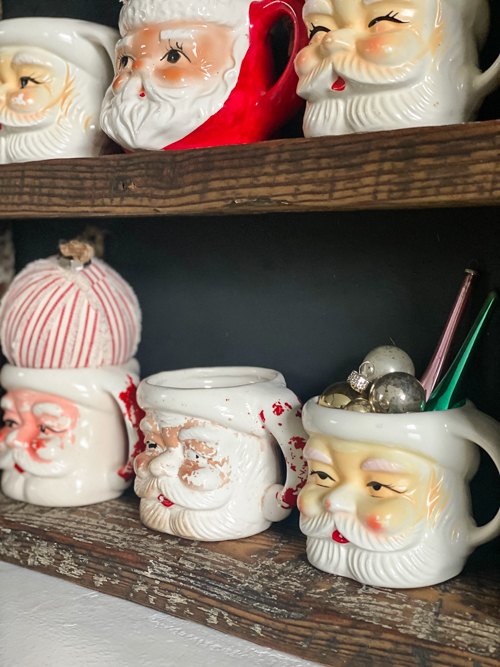
I had to fill it with my vintage Santa mugs for the final photos.
This would be fun in a guest bathroom full of the necessities in cute, glass jars.
A good thrifted makeover will never get old. I love finding pieces that still have a ton of potential and just need a little TLC to bring them back.


Comments
Join the conversation
-
Thank you!
-
You s/b wearing eye protection also.


Frequently asked questions
Have a question about this project?
What happened to the Texas star? I love this piece but I would have kept the star. GREAT JOB!