5 Camper Storage Hacks

I'm super excited to share these hacks with y'all! Rob's cousin, Sheri, came to me and was looking for a solution for some storage issues she had with her new camper. The camper she and her husband, Pat recently purchased is nothing short of amaaaaazing--totally modern and beautiful--but as anyone knows who has spent time in a camper, you have to get a little creative with your storage or you'll find yourself frustrated...with the quickness! I tried these 5 hacks out on Sheri and Pat's camper and I got 4 thumbs up! What's even better is not a nail was hammered and not a screw was screwed. 
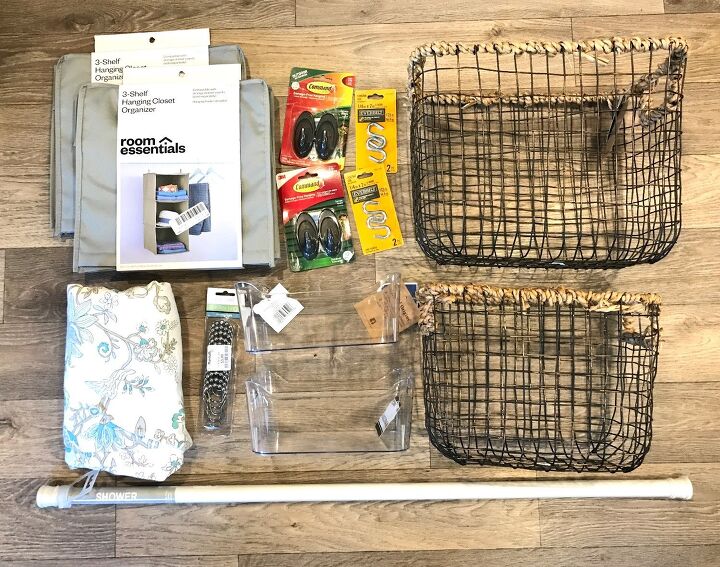
SUPPLIES:
-room essentials 3-shelf hanging closet organizers
-Command hooks
-Everbilt S hooks
-wire baskets
-clear plastic containers
-12 shower roller rings
-shower curtain
-expandable shower rod
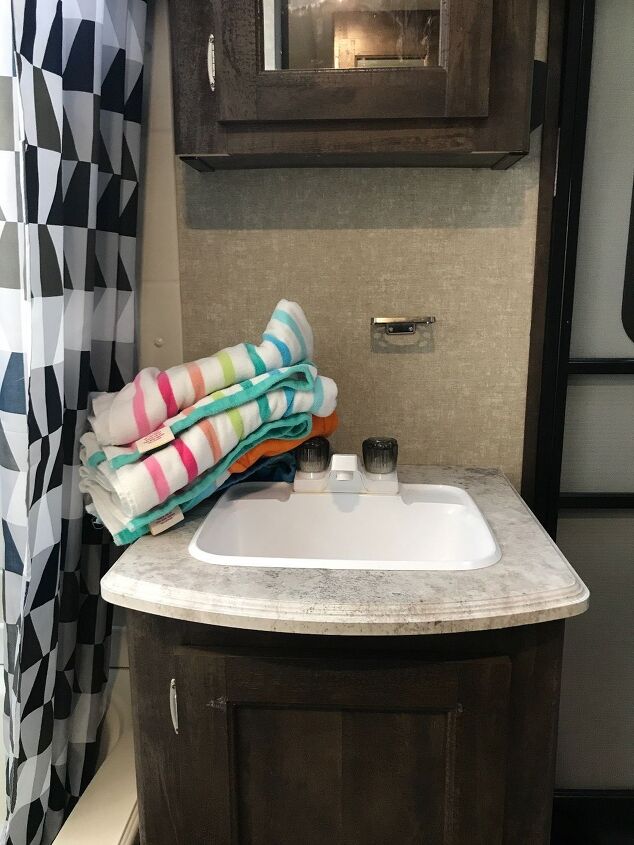
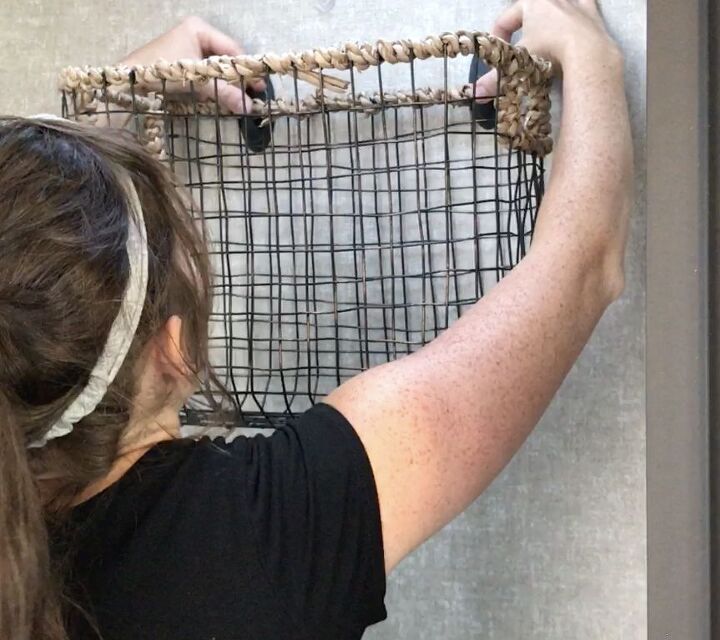
Hack 1: BATHROOM TOWEL STORAGE
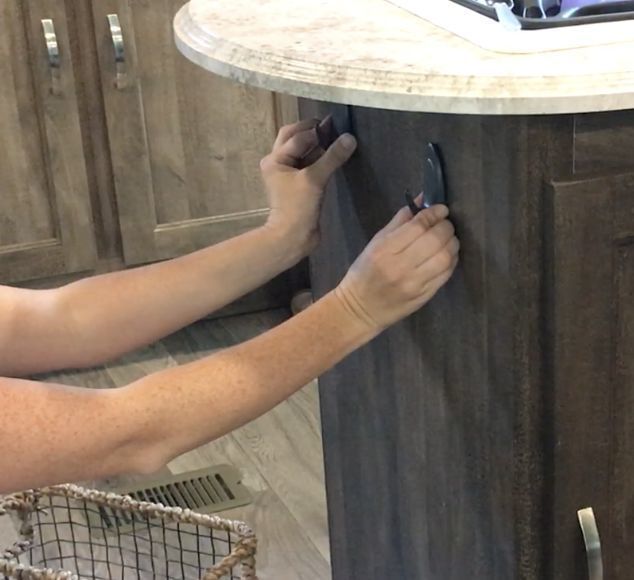
One of Sheri's requests was to have a place in the bathroom area for storing towels. Before, the only place to have them in the bathroom was sitting on the sink or the toilet seat and I think we all can agree that the latter doesn't sound so great.
To solve this problem, I used slate colored Command Hooks. These particular ones hold about three pounds each which was perfect for what I needed them for.
To solve this problem, I used slate colored Command Hooks. These particular ones hold about three pounds each which was perfect for what I needed them for.
Once I mounted the hooks on the wall as per the instructions on the packaging, I hung a wire basket that I snagged on Clearance at Marshall's.
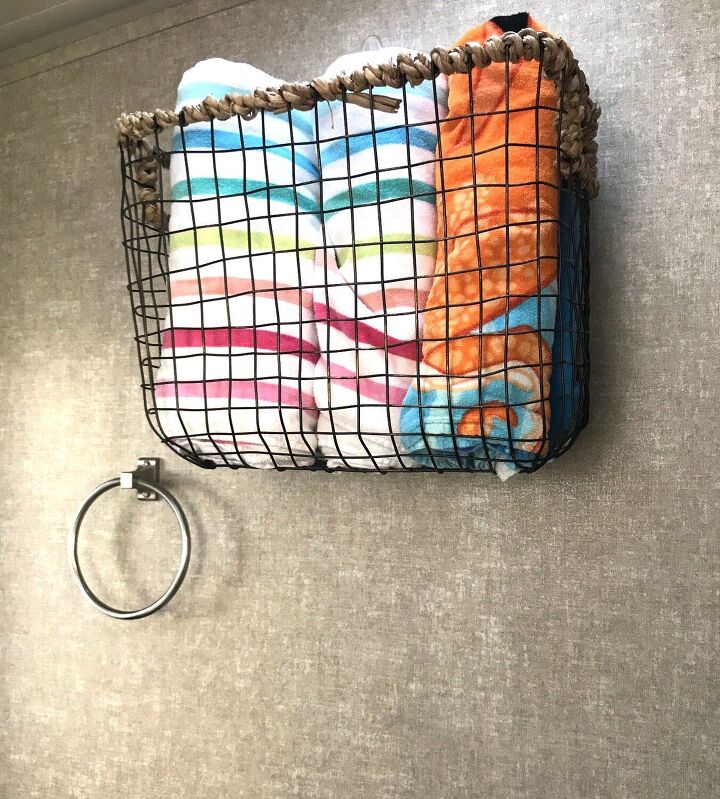
This was the perfect solution to store extra towels and keep them off the ground, and out of the shelving. Not to mention they look cute, too!

Hack 2: CABINET/FOOD STORAGE AND ORGANIZATION
A second issue Sheri was having was her food moving around when the camper was en route to or from wherever they were camping at. She mentioned that everything would roll and shift in the cabinets.
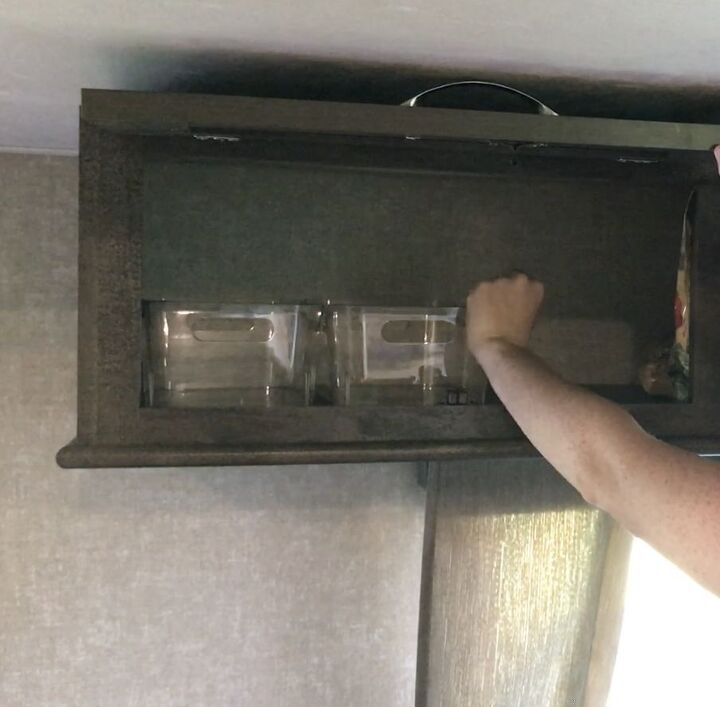
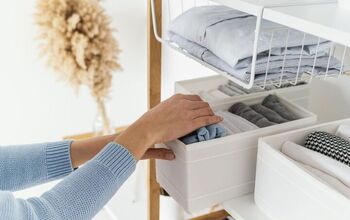
A simple solution for this issue was to place some small plastic bins inside the cabinets. Not only do the bins keep the food from sliding around, they also create an organized space. If you want to go one step further, you could add velcro to the bottom of the bins!
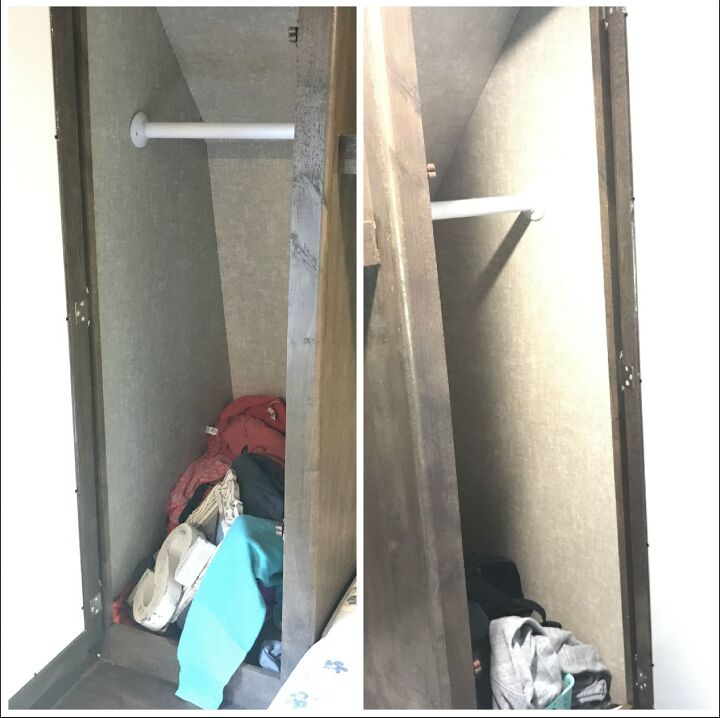
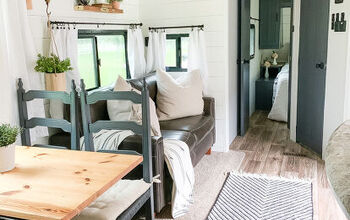
Hack 3: NO TOOLS-NEEDED CLOSET SHELVING
This hack was probably my favorite of all! Sheri really expressed the fact that she and her husband, Pat, needed closet shelving. Because the camper walls were so flimsy and unpredictable as far as nailing and screwing, she was afraid for me to add actual shelving.
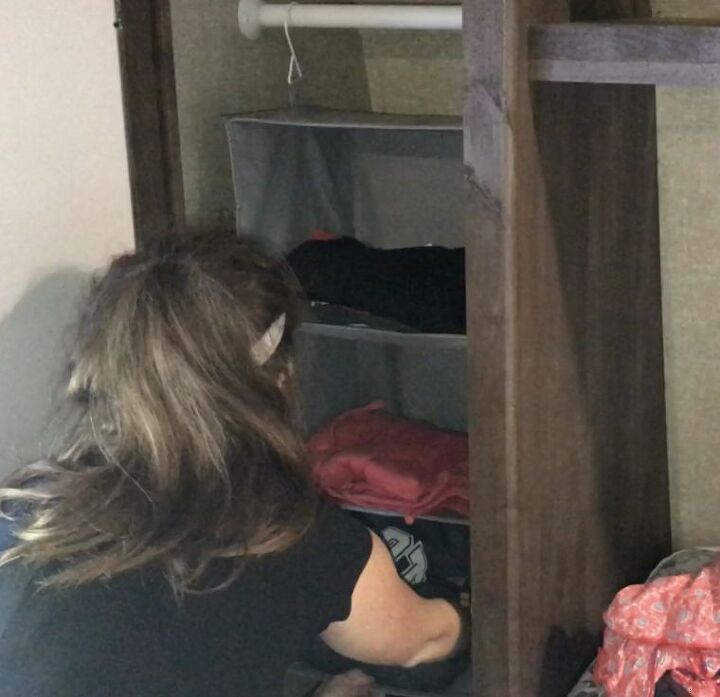
Solution: hanging shelves! I found these beauties online at Target and they were the perfect size for the closet areas in Sheri and Pat's room in their camper. Sheri originally had a little plastic bin in both her and Pat's closet cabinets so those fit perfectly under the hanging organizers. Be sure to watch the video to see how these hanging closet organizers turned out!
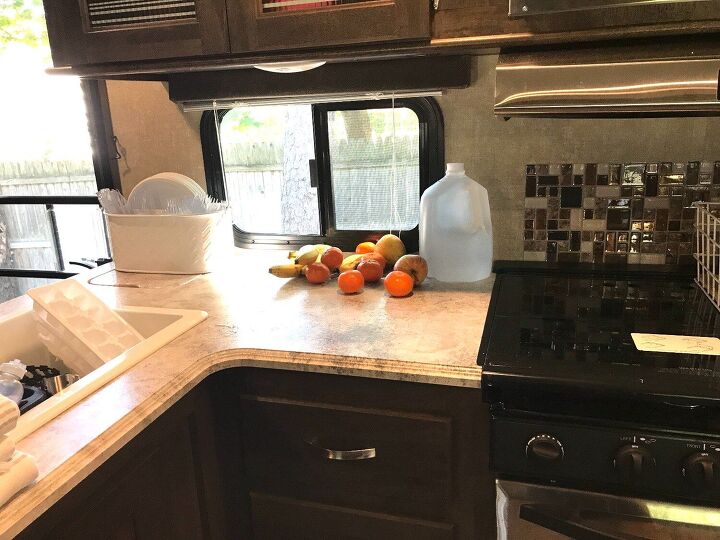
Hack 4: FRUIT/VEGGIE/MISC. STORAGE
Much like the bathroom towels, Sheri was having an issue with where to put her fruits and veggies without taking up counter space.
To fix this problem, I again used slate colored Command Hooks that hold three pounds each.
To fix this problem, I again used slate colored Command Hooks that hold three pounds each. I followed the instructions for removing the backing of the tape as per the packaging and I placed them on the end of the kitchen cabinets where Sheri preferred her fruits and veggies to go.
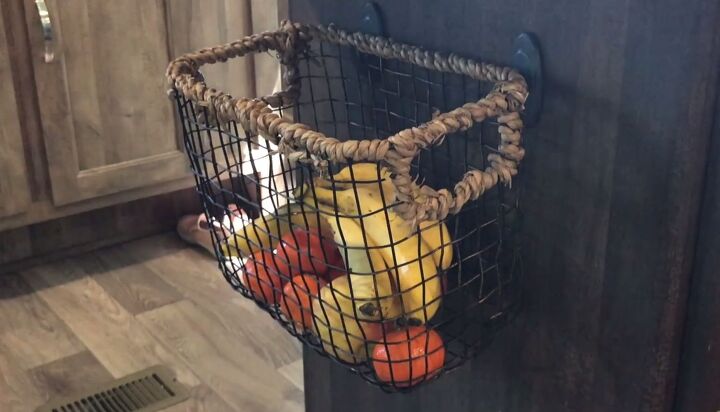
Easy and quick fix!
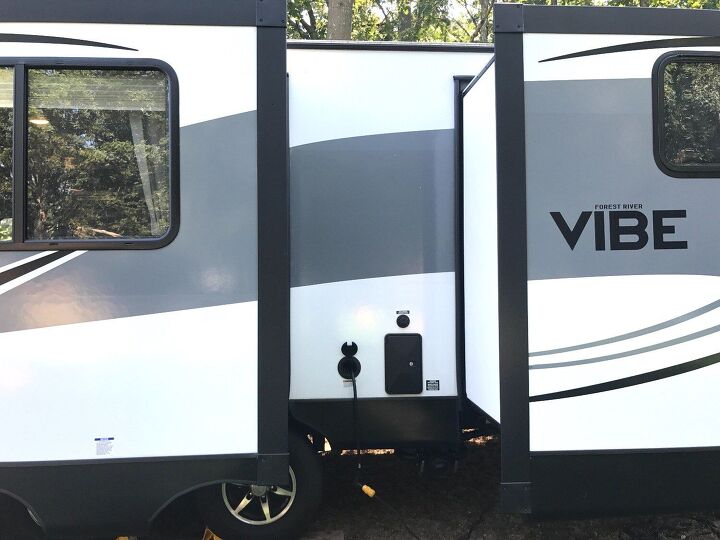
Hack 5: Outdoor shower privacy/bathing suit hangers
The final issue Sheri had was not having a place where she and her family could privately shower outdoors and hang their bathing suits when they came off of the beach. The outdoor shower setup was between two slide outs of the camper so Rob had the perfect idea...!
I had a shower curtain on hand that I wasn't using so I simply purchased some new slider rings for it...
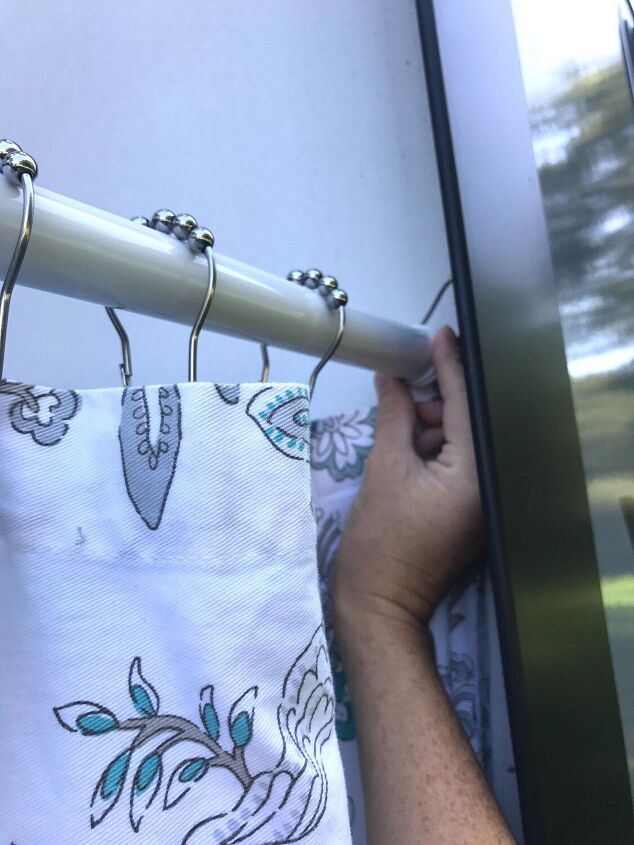
I had a shower curtain on hand that I wasn't using so I simply purchased some new slider rings for it as well as an extension shower rod from Marshall's and secured it between the two slide outs.
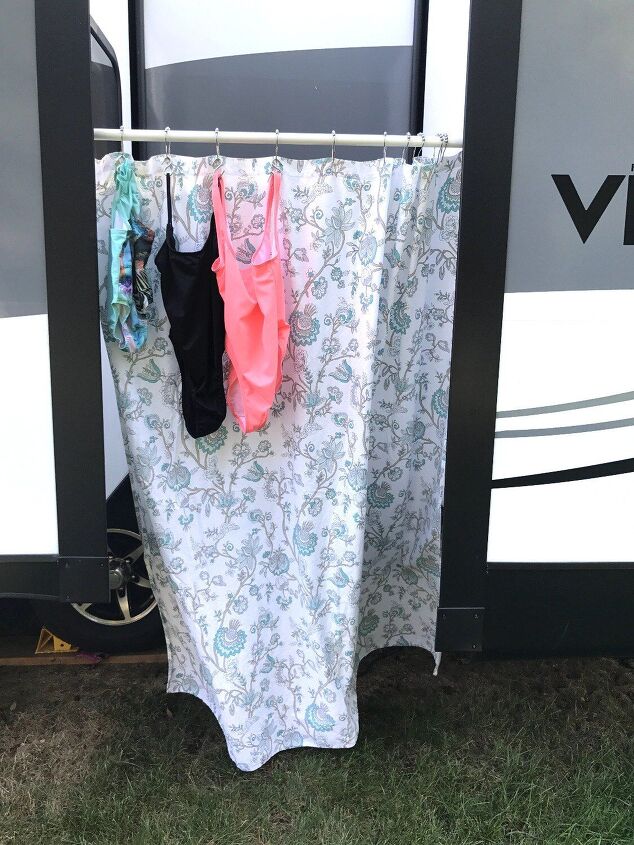
I really love how this came out and totally solved the hanging bathing suit situation.


Comments
Join the conversation
As a long time full timer I would like to add to your food storage idea. Plastic bins - couldn't get along without them, but don't forget slip-stop on all of your shelves - bathroom too. It's the rubbery, waffle weave stuff you get in the shelf liner section of Walmart. Line all of your shelves with it and whatever you put there will stay there. Also line your sink with it for all those wayward items you don't have room for in your cabinets when you're traveling. It acts as a buffer for all those sneaky potholes that attack your rig every chance they get. Happy trails.
Good Job! It was nice of you to do that for your cousin. It's interesting to me how some people just are not interested in figuring out how to organize things. Sheri is lucky she has you! Baskets, bins, command hooks, non-slip material and don't forget tension rods!, all key organizing items in a camper.
I have used command hooks all over our multiple campers for years now. Literally decades now. It says right on the back of the Command package not to attach to wallpaper, but, it's worth the risk to me. If you attach them to the wallpaper in a camper, eventually the hook adhesive degrades and loosens the wallpaper adhesive and it starts sagging. There will be an air bubble behind and all around the hook, under the wallpaper. I have fixed this issue dozens of times. You use an Exacto craft knife to cleanly cut the edge of the bubble about 3/4 of the way around, leaving a small connector piece at the bottom. Then use a very small amount of wood glue, or just regular Elmer's glue, to reattach the wallpaper, smoothing it and matching the edges back up. Put pressure on it, if you can, and let it dry thoroughly (like 48 hours!) before reattaching the command hook. I've never had one come back off after this fix.