Dreamy Ombré Wall Tutorial

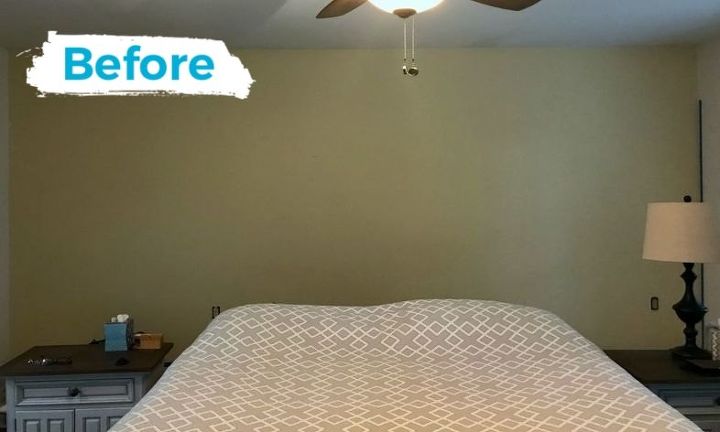
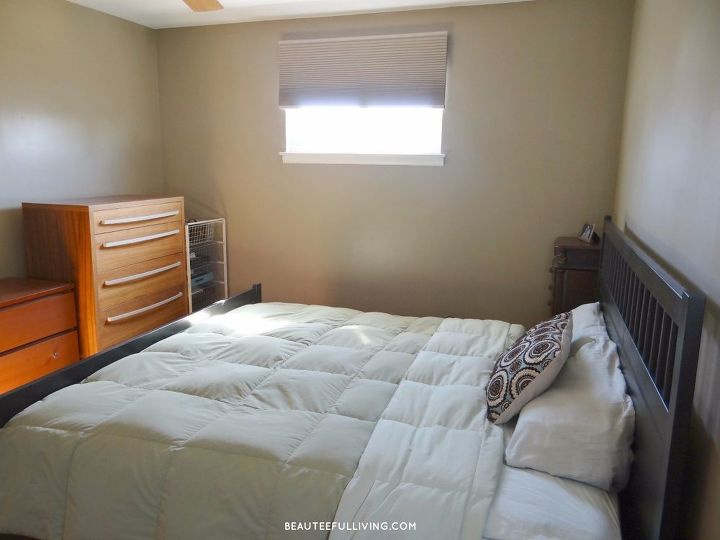
This is how my wall looked BEFORE
Boring, right? I decided to do an ombré wall using dark gray, navy blue and white. Get tutorial here
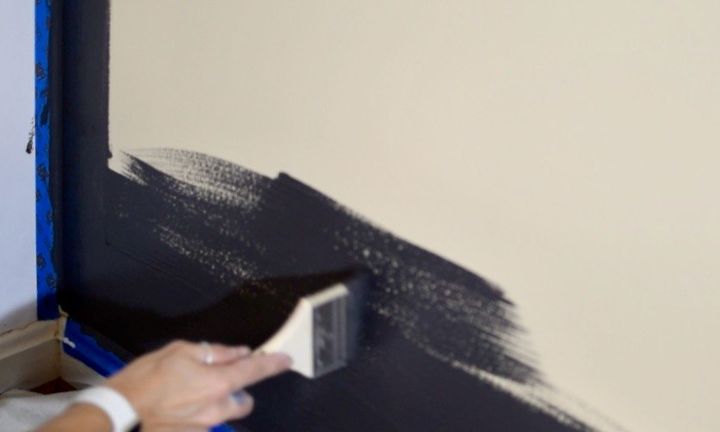
First the dark...
I painted a large stripe the darker color (gray) on the bottom. You can use a roller to save time at this point. Get tutorial here
...Then the light
I did the same thing on the top, with my lighter color (white). Get tutorial here

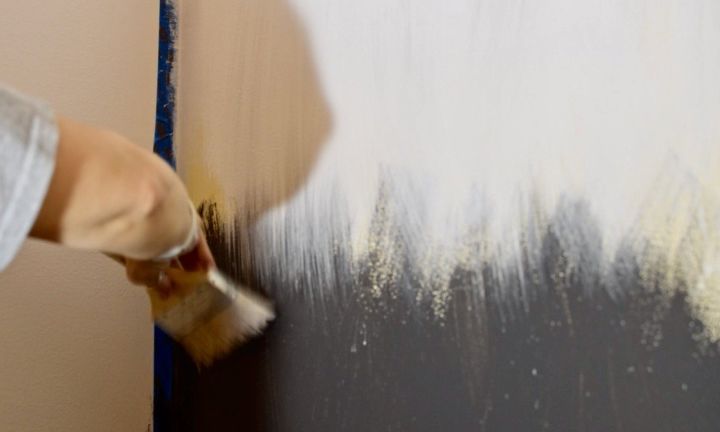
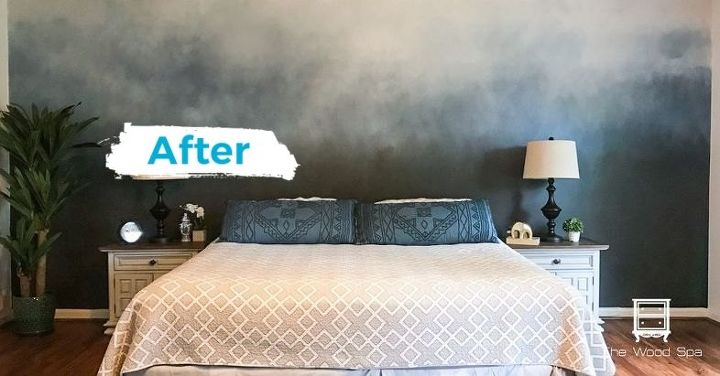
Then blend at the middle
I started adding water to my brush, and overlapping the colors on the wall, letting them blend softly. Get tutorial here
My technique:
I worked in a crisscross pattern, but that is optional, since the colors will blend and the pattern won't show. Get tutorial here
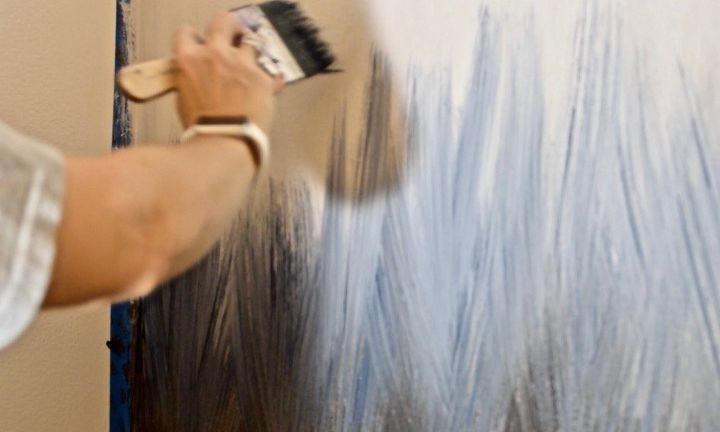
Blend, blend, blend
I worked all the way across my wall, always keeping my brush wet. Get tutorial here
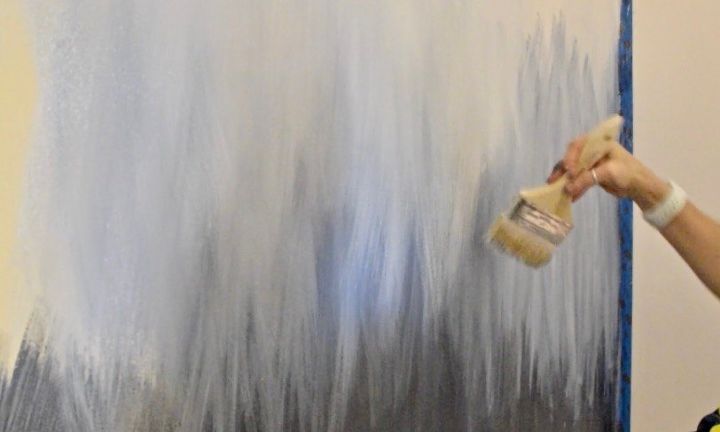
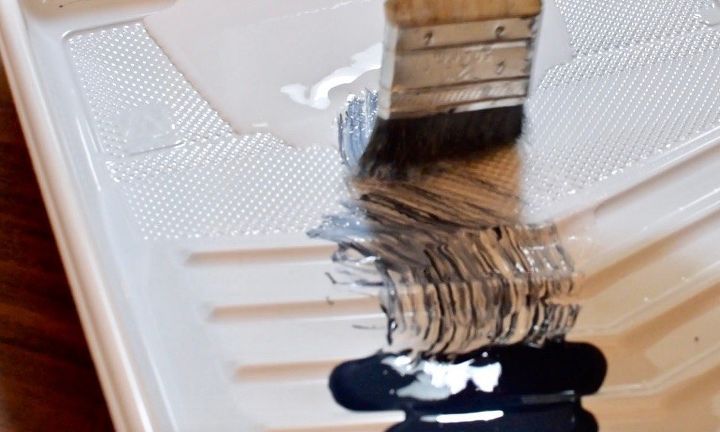
Next: touch up
The next day I made any adjustments I wanted using my tray to blend the colors. Get tutorial here
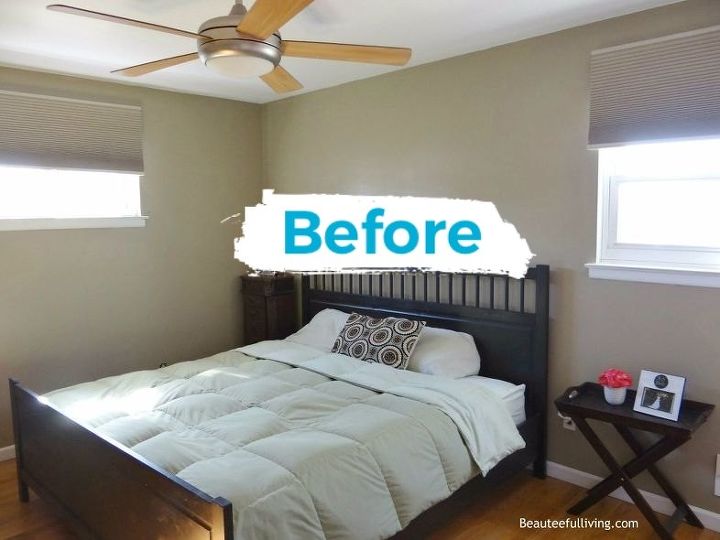
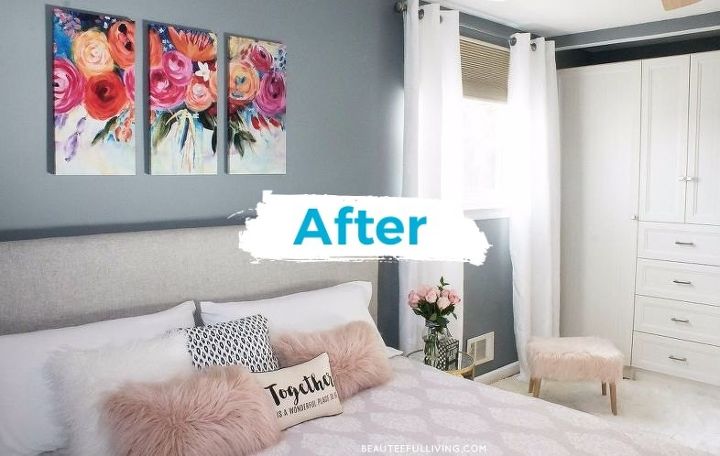
Plain Jane to Glam!
Although our bedroom before our recent overhaul wasn't terrible looking, it was definitely "Plain Jane." Get tutorial here
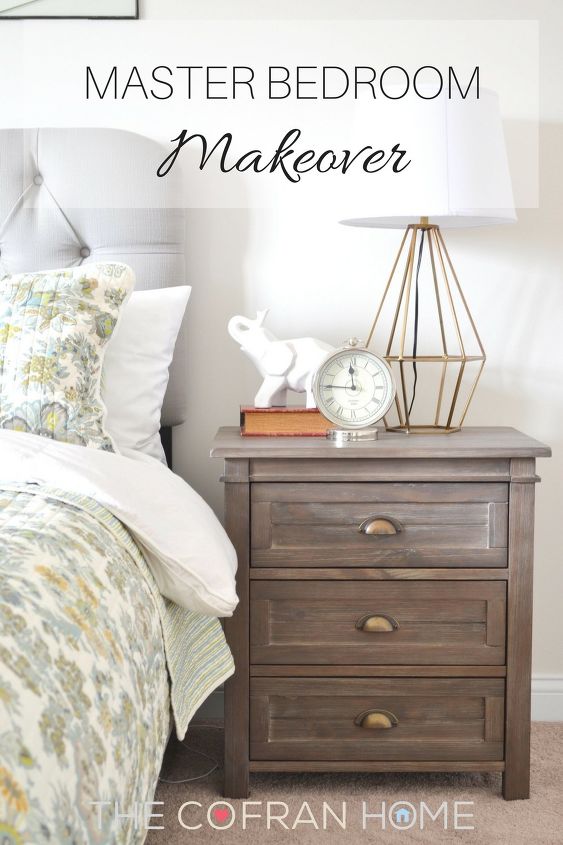
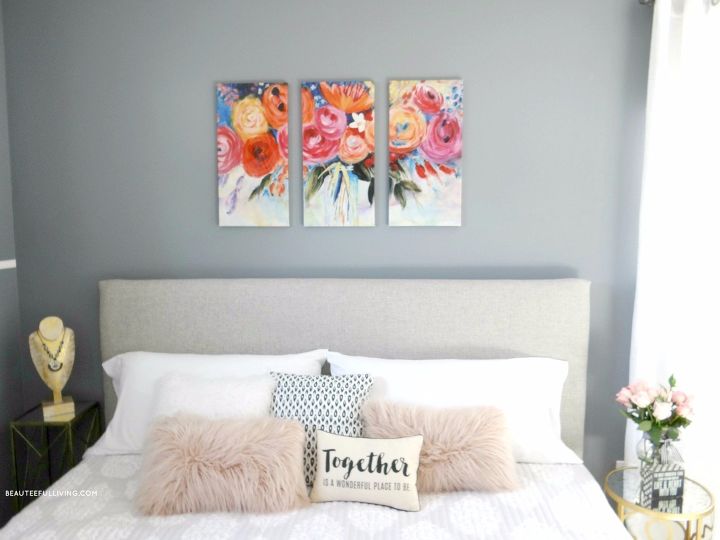
The bed
That's the same bed we had before but I upholstered the headboard! Get tutorial here
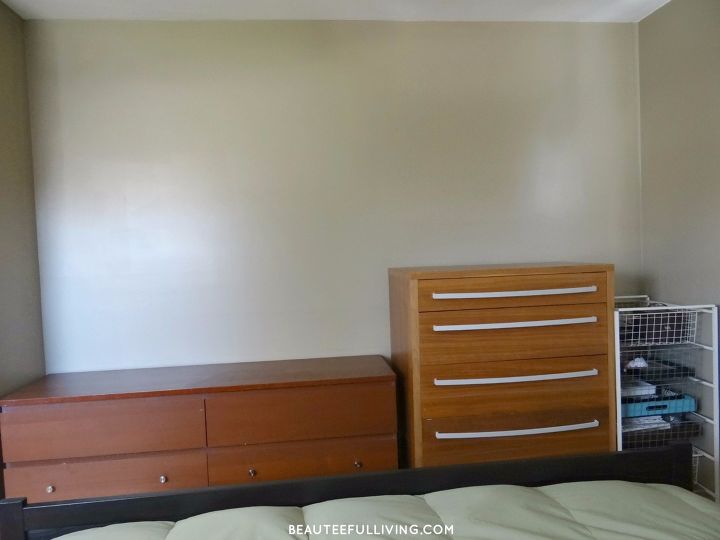
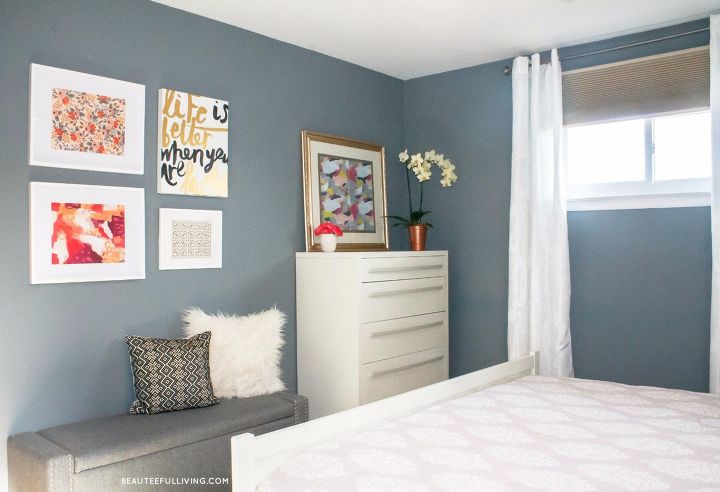
View from the bed
I repainted one of the dressers and removed the larger dresser out of room. Get tutorial here
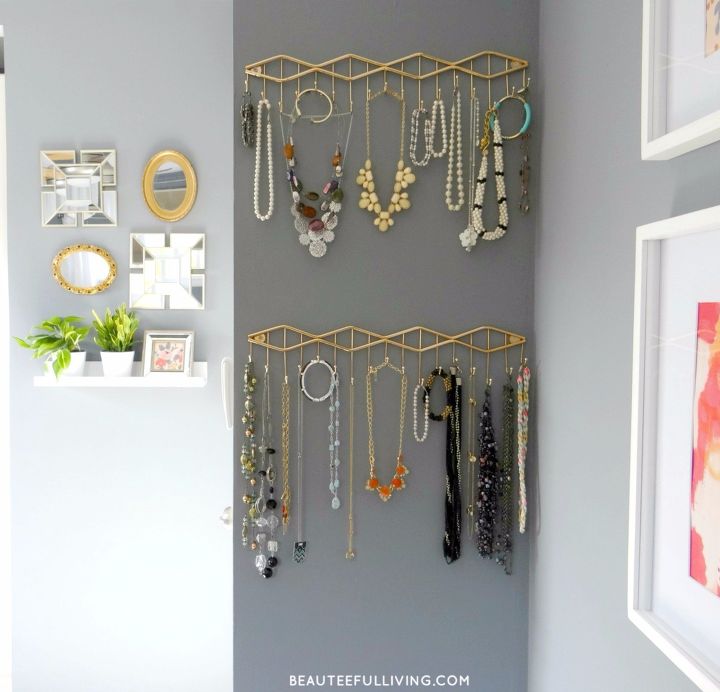
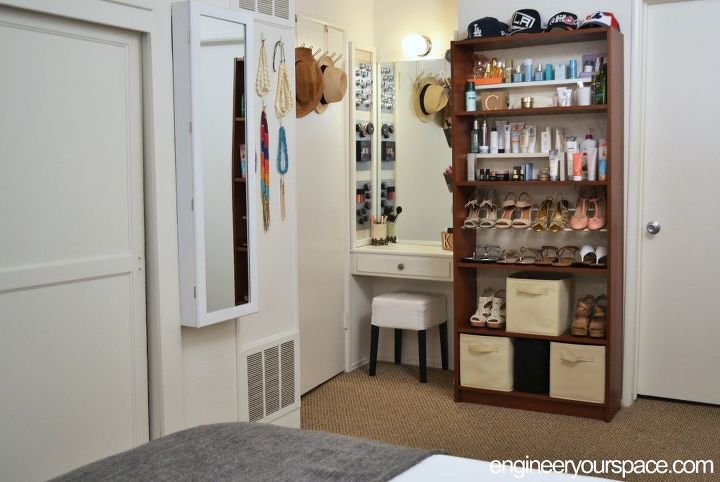
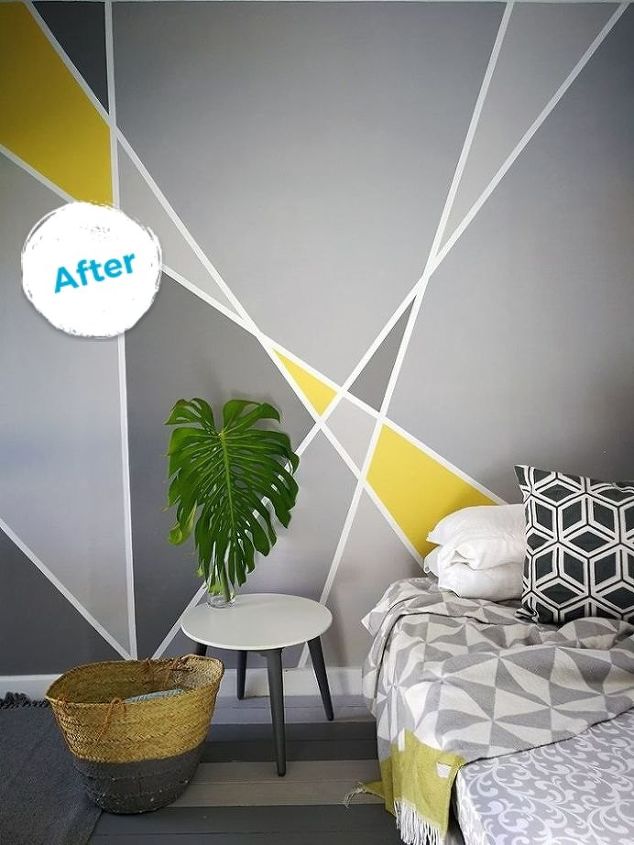
No more boring walls!
These jewelry hangers are both decorative and functional. Get tutorial here
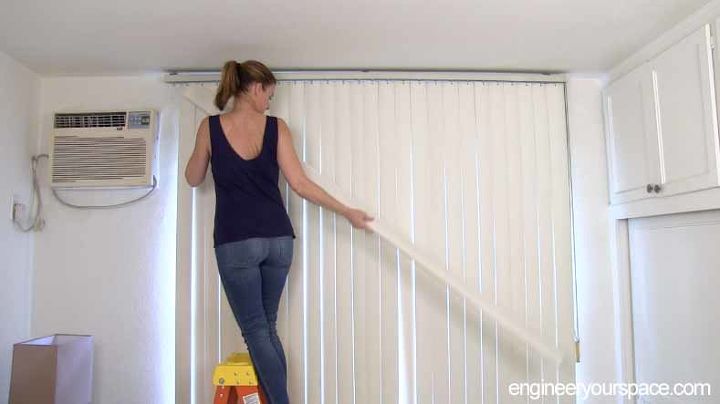
First: The windows
To bring in color and hide the vertical blinds and A/C unit, I took off the valance in front of the track. Get tutorial here
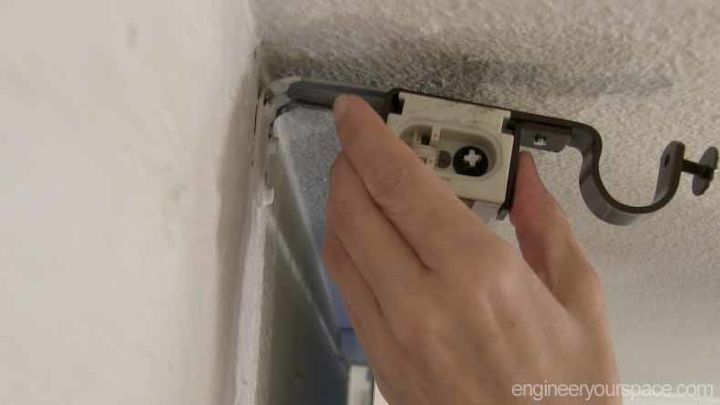
A renter-friendly hack
I used NoNo brackets that slide onto the existing vertical blind track- They're great when you don't want to make holes Get tutorial here
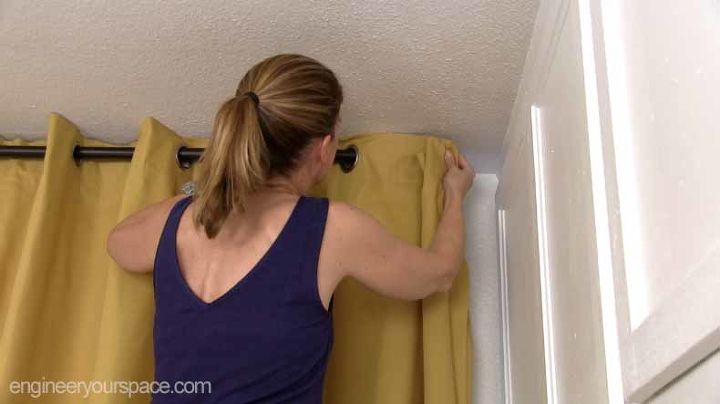
Colorful curtains
I pulled the curtains over the brackets on both ends so they could cover the entire wall, hiding the A/C unit. Get tutorial here
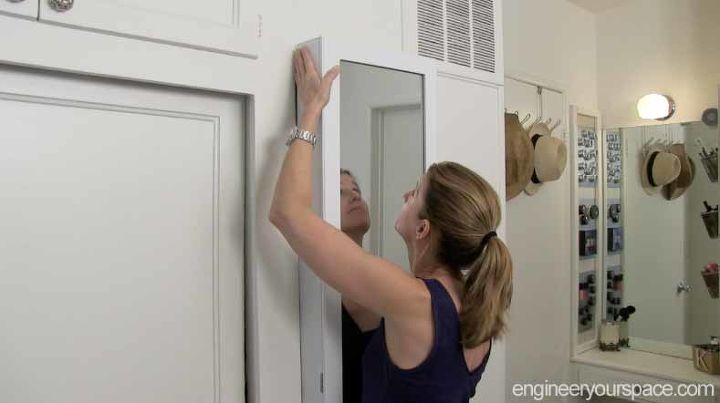
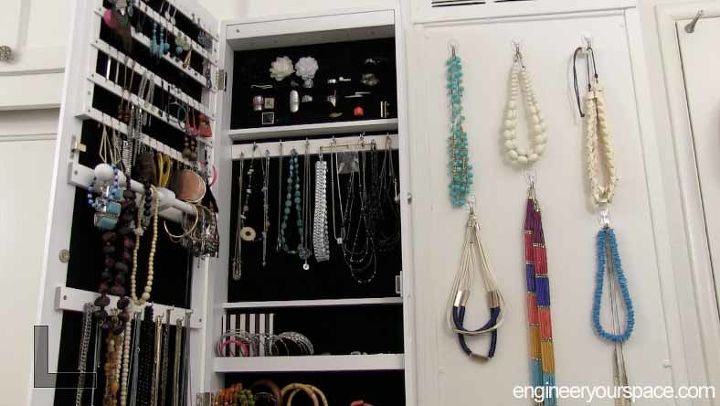
Then: Storage
I used a hanging jewelry box on the wall - it was the best solution to get the most storage without taking up any floor space. (Tikva Morrow) Get tutorial here
Place for jewlery
I used command hooks to hang more necklaces on the side of the jewelry box - they also serve as wall art which is nice. (Tikva Morrow) Get tutorial here
Place for shoes
I created shoe storage with tension rods and used cloth bins for clothes and other items. (Tikva Morrow) Get tutorial here
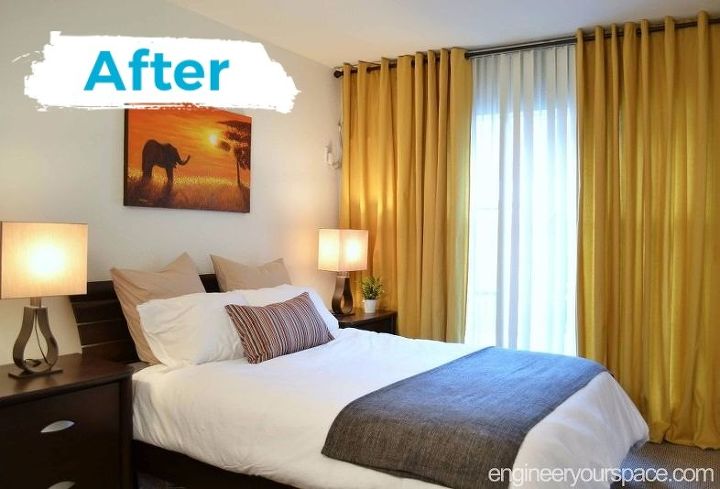
All done!
The entire makeover, including the jewelry box, curtains, and new bedding came in at only $266! Get tutorial here
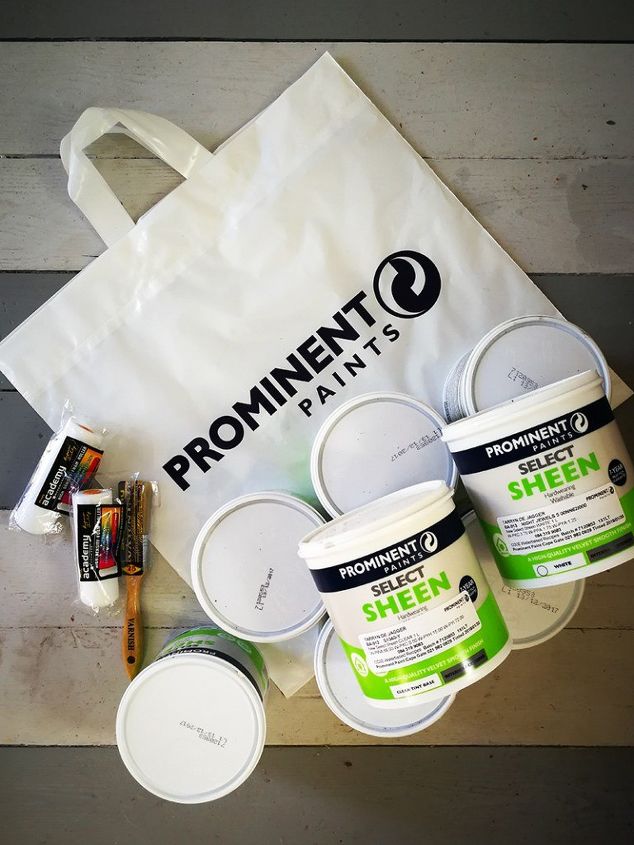
This is all you need:
A design, paint, masking tape, a foam roller, a small brush & a tray Get tutorial here
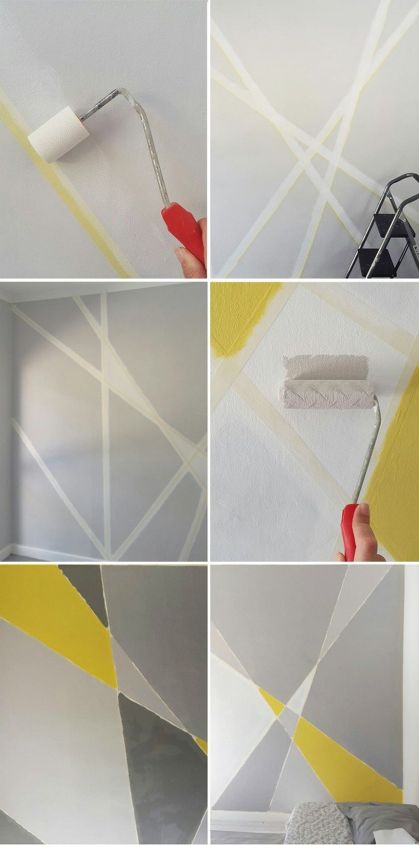
Create your design & Paint!
After you’ve taped, stand back and make sure everything is correct before you start painting. Get tutorial here
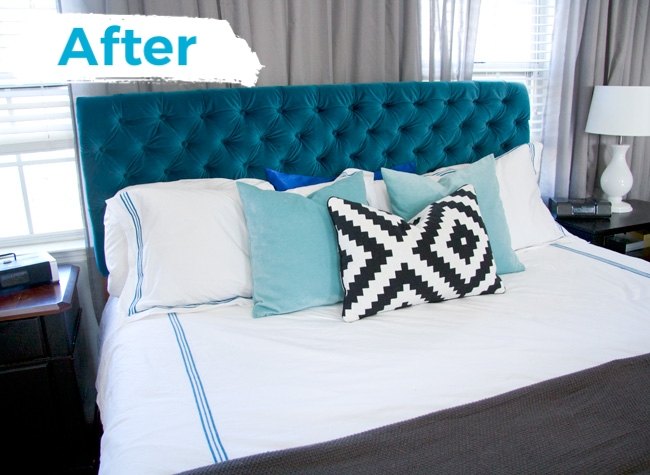
Velvet Diamond-Tufted Headboard
My husband and I decided to try making our own velvet headboard in the PERFECT shade of peacock. Get tutorial here


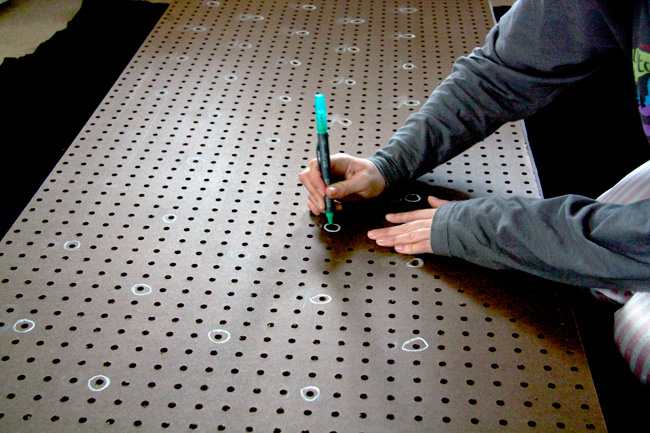
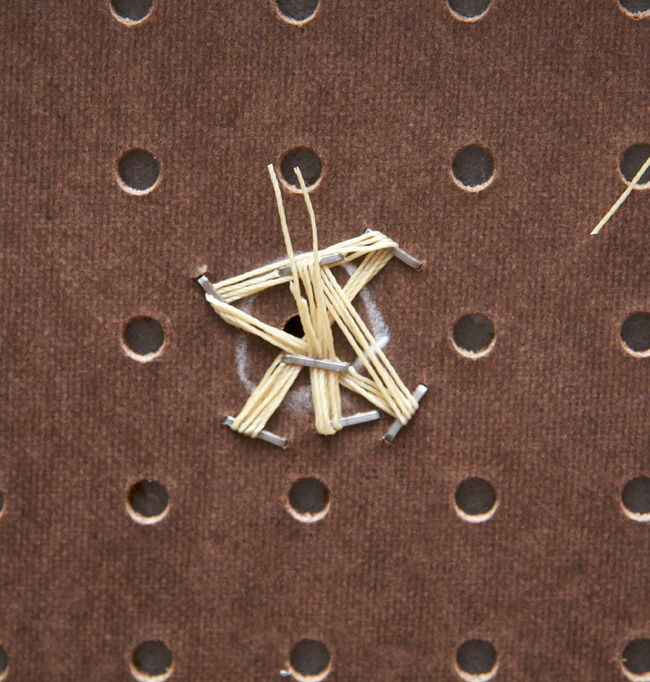
Step 2: Make a template
We cut a piece of pegboard to the desired size of our headboard and marked where each tuft would go. Get tutorial here
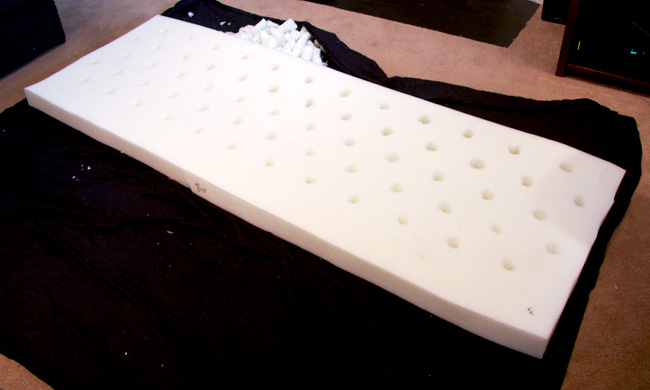
Step 3: Use the template to mark the foam
Once the foam was marked, I used a paring knife to cut a cylinder out in each tufting spot. Get tutorial here
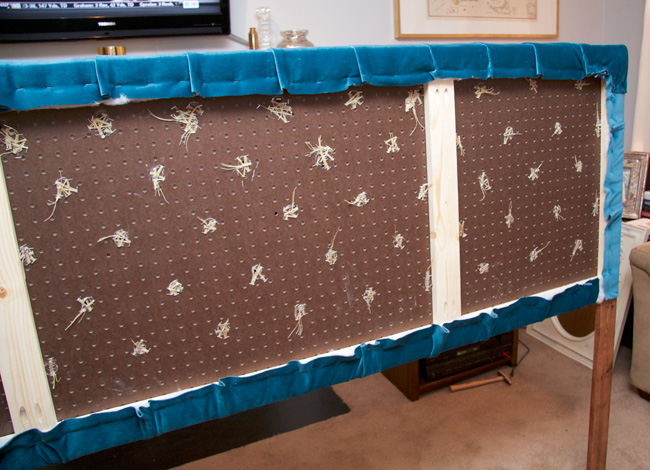
Step 4: Build the frame and legs
We stained the legs to match our bed, then screwed the pegboard to the front. Get tutorial here

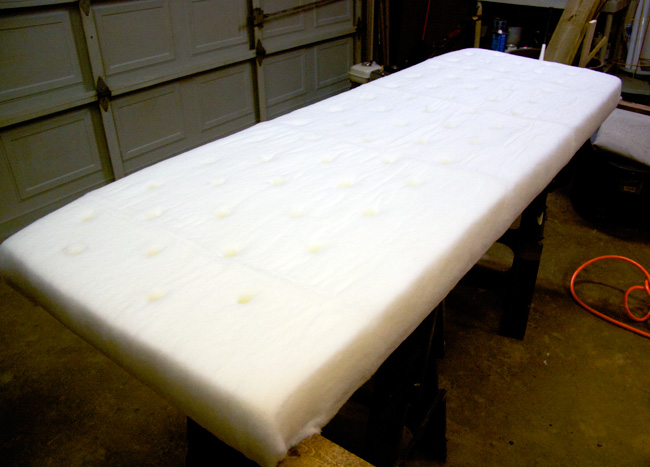
Step 5: Glue the foam onto the frame
After that, it was finally time to tuft! Get tutorial here
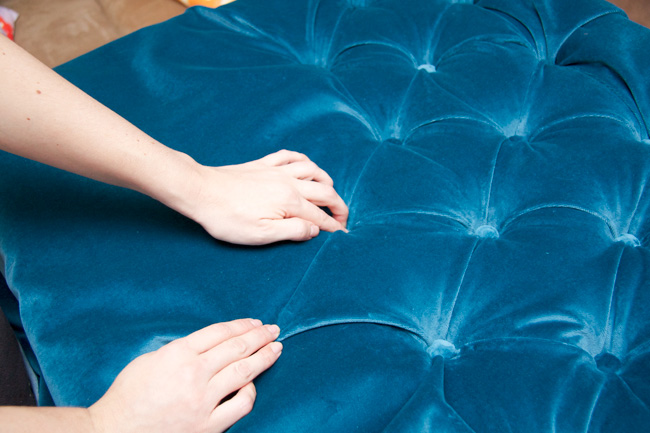
Here we go!
We used a 6-inch decorator needle with an arm-length of waxed button thread for each tuft Get tutorial here
When we were done, the front looked like this
Beautiful blue! Get tutorial here
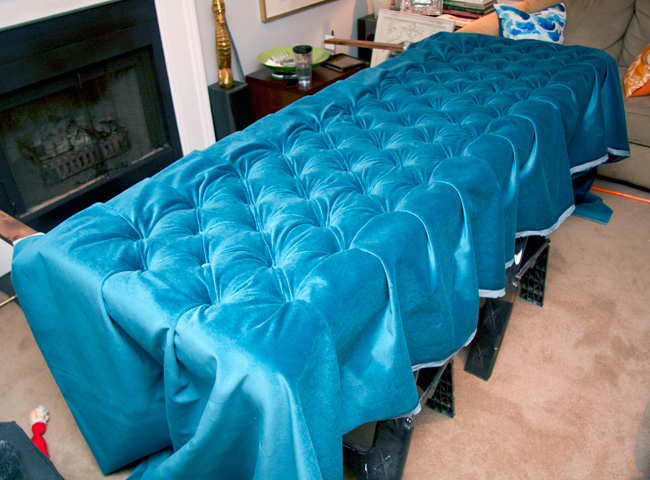
Finishing up...
When we finally finished all 62 tufts, we wrapped the fabric around the back and stapled it down. Get tutorial here
Here it is!
Our cat, Josie, is not all that impressed. She has terrible taste in furniture, though. Get tutorial here
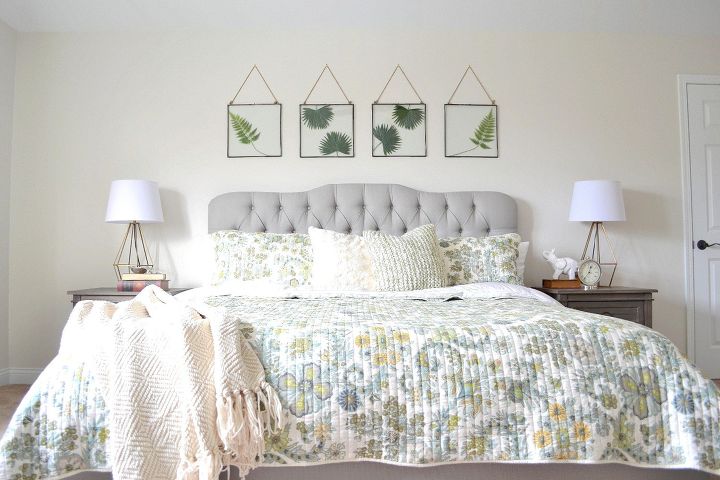
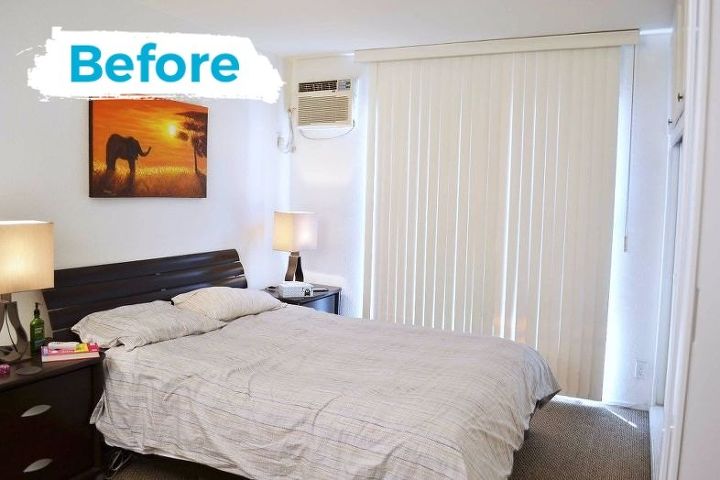
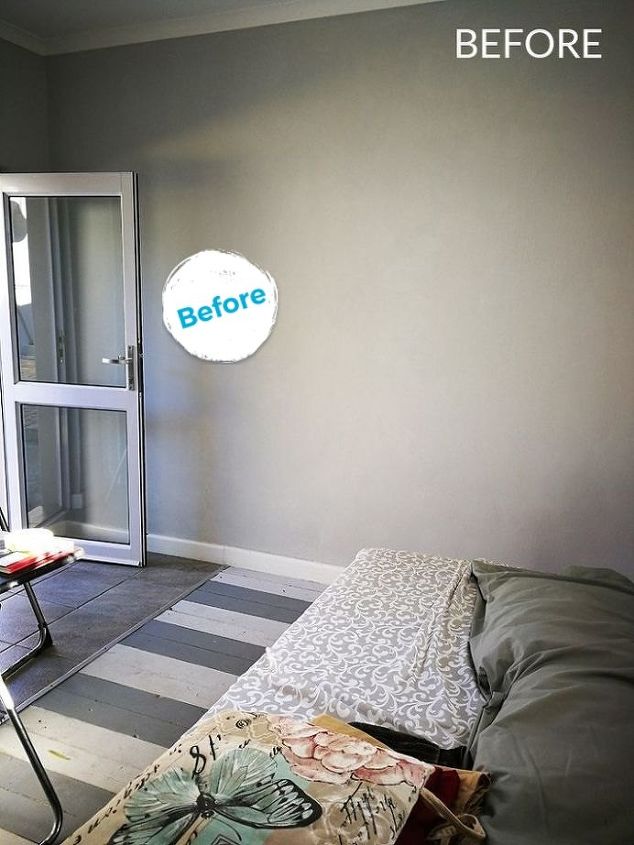
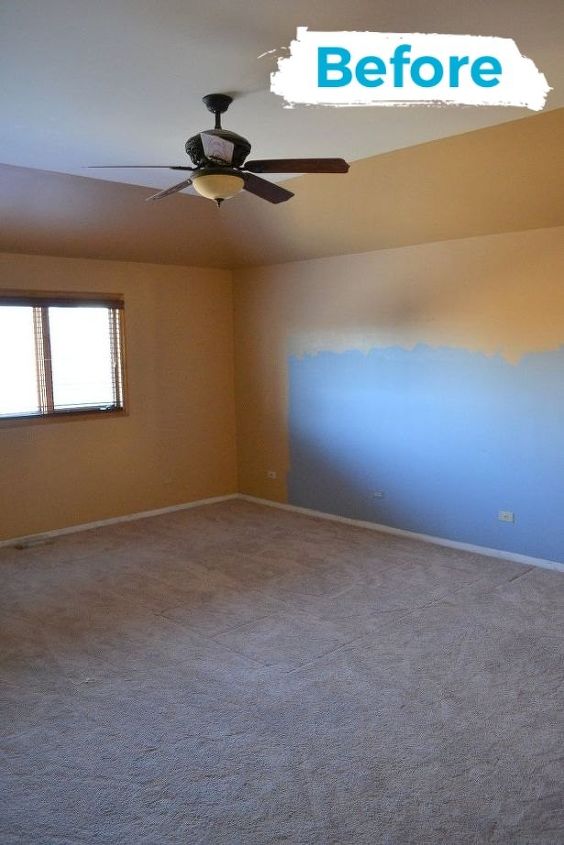
BEFORE
To me, a master bedroom should be a place where you can come at the end of a long day and unwind. Get tutorial here
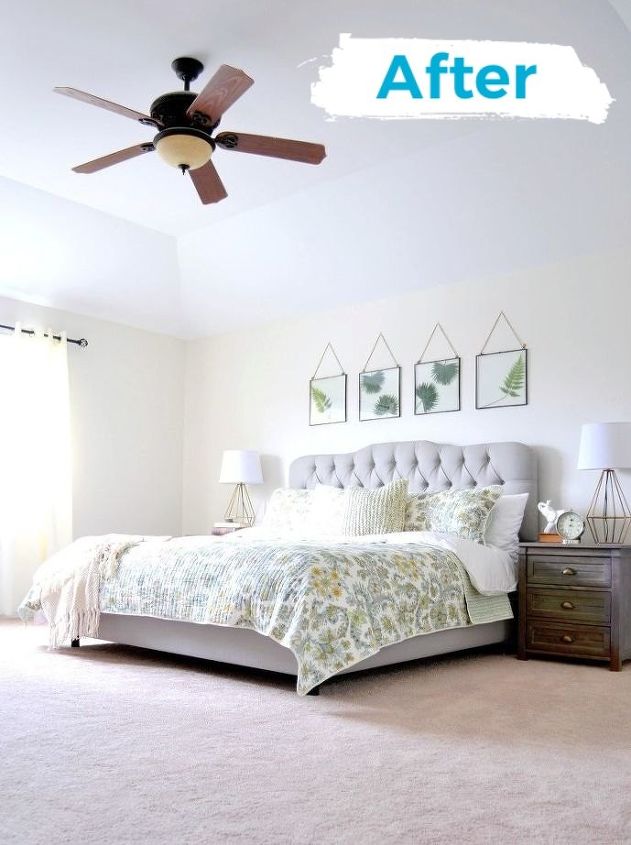
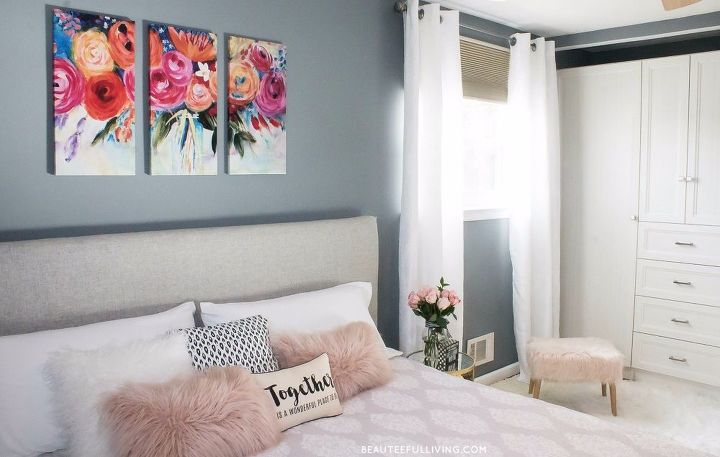
Serene, relaxing, and inviting.
I lightened up the space with some paint, DIYed some wall art, grabbed some budget friendly furniture and here it is now! Get tutorial here