21 DIY Headboard Ideas Designed to Spruce up Your Bedroom
Headboards can often make or break a bed. They can finish off the all-round look of your bedroom. A headboard doesn’t really have a practical use, other than to pinpoint where your bed is meant to be. This means you can be as creative as you want with your headboards. If you don’t currently have a headboard, why not consider these 21 DIY headboard ideas that can add a layer of style and luxury to any queen or king-size bed. Alternatively, if you already have a cheap and nasty headboard that you want to enhance, these DIY ideas will give you the inspiration to elevate bog-standard headboards into show-stopping bedroom centerpieces.
Refresh Your Master Bedroom With a DIY Headboard Out of Plywood
This Hometalker always decorates on a tight budget and used cheap plywood to jigsaw her brand-new headboard. An outline of a headboard shape that this Hometalker liked was found online and enlarged and printed to use as a template to trace onto the plywood. It was then cut out using a jigsaw and painted using two coats of gray paint, before going over it with white paint and another stenciled motif. Get tutorial here
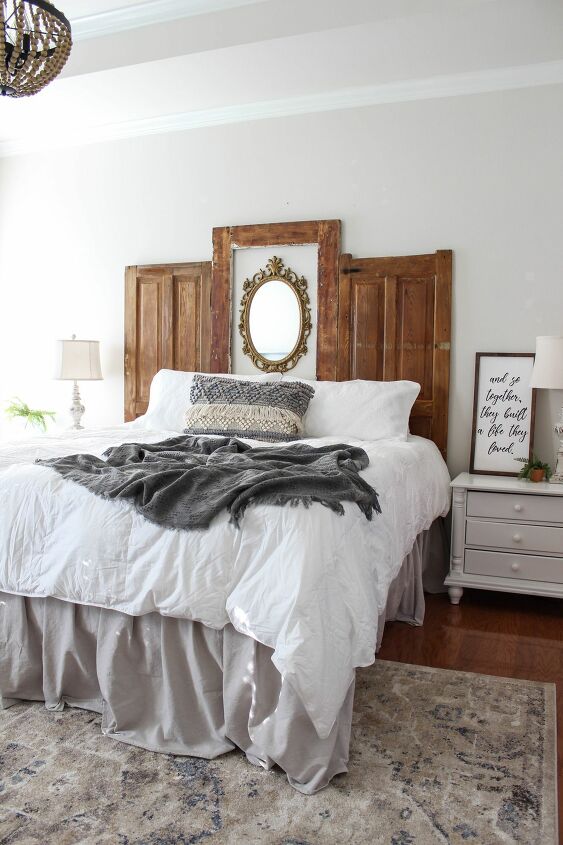
Learn How to Make a DIY Headboard and Bed Frame
This Hometalker was getting a new mattress and wanted to make her own bed frame and headboard to put it on. She pulled out the used doors that her family had in storage and cleaned them up using some bleach water, before letting them dry out. They were then treated with hemp oil to revive the wood and accentuate its natural color. The DIY bed frame was built to fit a king-size mattress. Get tutorial here
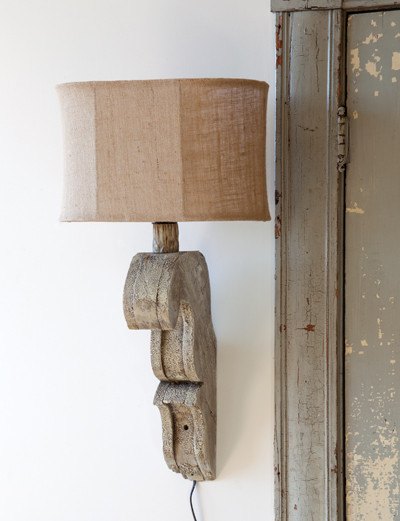
DIY Headboard Sconces for a Rustic, Farmhouse Vibe
Inspired by headboard sconces on Painted Fox, this Hometalker decided to make their own from scratch. They felt that their barn door headboard was crying out for some rustic sconces. Given the lack of floor space for bedside tables, sconces were ideal to negate the need for bedside lamps. A pair of lamps were acquired for just $10 and were stapled to the back of the existing headboard with electrical staples, leaving them in easy reach from the bed. Get tutorial here
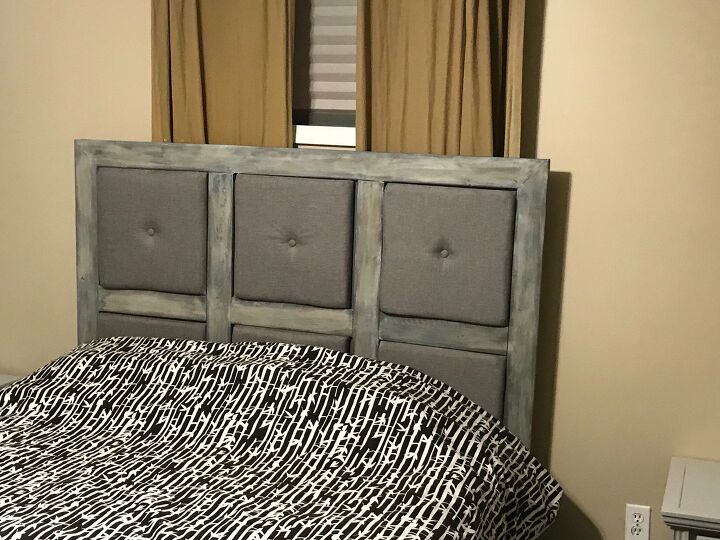
Cushion-Inspired DIY Queen Headboard
This Hometalker was inspired to create a DIY headboard after buying six headboard cushions at Aldi. They needed a new headboard for a queen-size bed. Having seen a string of staining and waxing techniques on Hometalk, they were keen to build and finish a handmade headboard. The six panels were cut to fit each cushion, before gluing and adding nails for additional support. After staining the frame an aged gray, it was the ideal contrast with the charcoal gray cushions. Get tutorial here
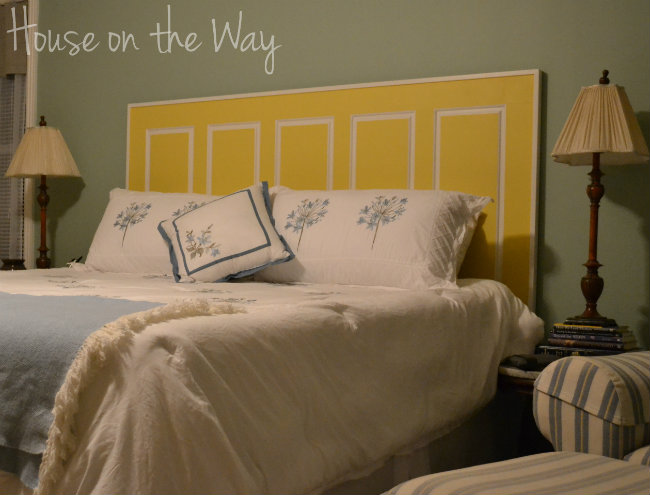
Transforming a New Door Into a Gorgeous Decorative DIY Headboard
This Hometalker bought a new door from a home improvement store, with one eye on using it for a DIY headboard. The door was hand-trimmed to fit and align itself with the rest of the bed and the king-size mattress before being painted. The warm yellow is bright and inviting, while the white decorative trim helps to accentuate the door’s design features. Get tutorial here
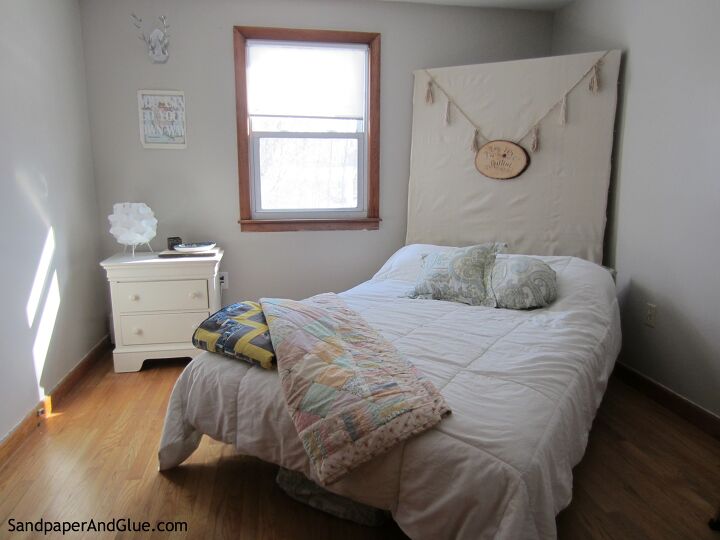
Rustic Headboard Necklace Ideas for Bland Existing Headboards
This Hometalker created a DIY headboard necklace to act as a rustic feature for her rather bland headboard. She used a plain painting drop cloth as the backdrop for a rather tall headboard to cover a gaping hole in her existing headboard. To detract from the cloth, she opted to design a “necklace” for her headboard using braided yarn and bakers’ twine. The printed message on the faux wood adds much-needed personality to this clean yet basic space. Get tutorial here
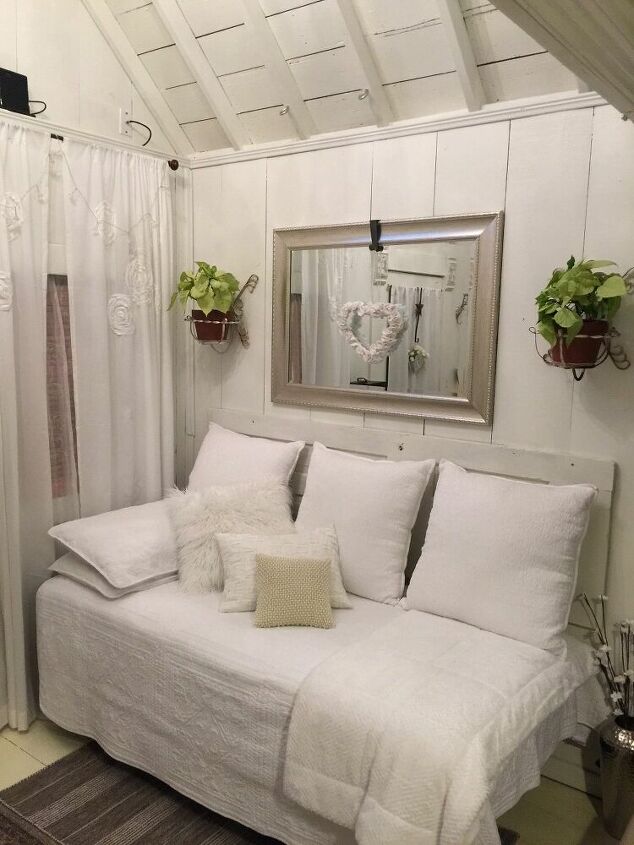
Cosy Cottage-Style Headboard Made From an Old Door
This cute cottage-style headboard has created an ideal frame for this Hometalker’s guest sofa bed. This DIY headboard is another made from an old door. The door appears to have been waxed and painted an off-white before being sanded to create that aged, distressed appearance. The off-white headboard also looks in keeping with the rest of the room, which also boasts soft white wooden cladding. Get tutorial here
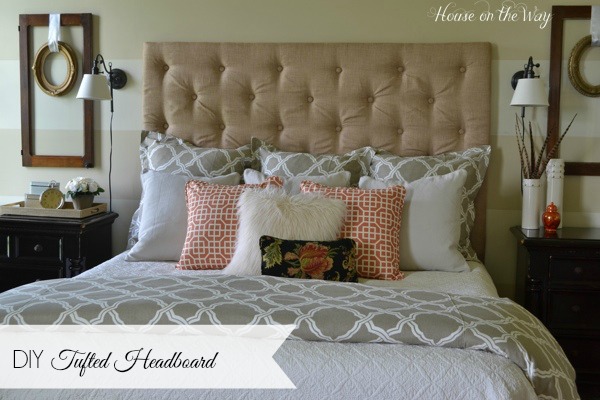
Discover How to Make a Tufted Headboard and Spend Less Than $150
This Hometalker learned how to make a tufted headboard for 20% of the price of a Pottery Barn headboard. She spotted a gorgeous tall tufted headboard at Pottery Barn but was unable to purchase it due to its $899 price tag. For less than $150, this Hometalker eventually created her own Pottery Barn knock-off. The fabric-covered buttons were particularly effective when creating the tufts before the fabric was pulled taut over the top of the plywood and stapled. Get tutorial here
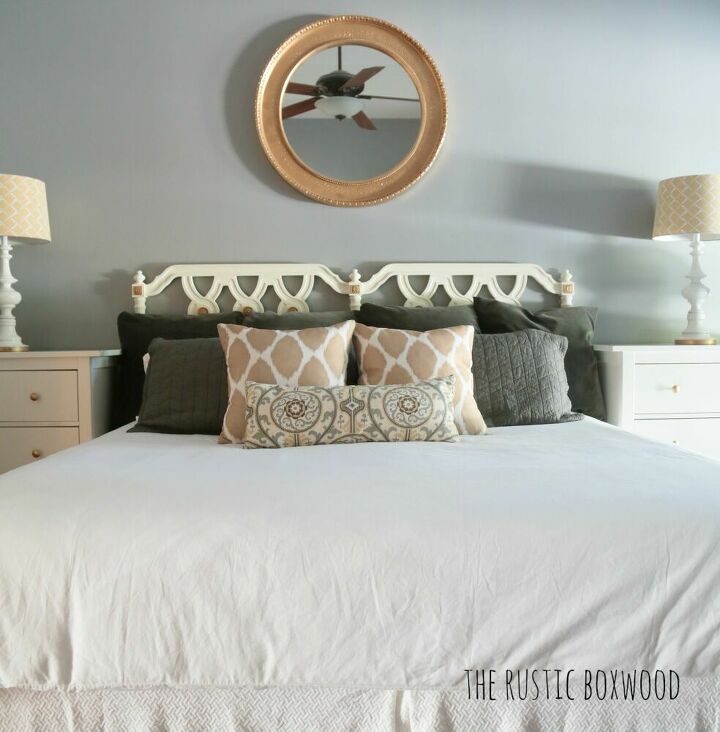
Turning a Dingy Antique Headboard Into a Beautiful King Headboard
This Hometalker was particularly proud of turning this $30 antique headboard into a contemporary statement. For just $30, this Hometalker bought an antique headboard that had tremendous potential. Using only chalk paint, she was able to bring this king headboard back to life, with no sanding, stripping or priming necessary. The gold rustic features have been buffed and accentuated by the fresh white chalk paint before a clear wax coat was applied to finish the job. Get tutorial here
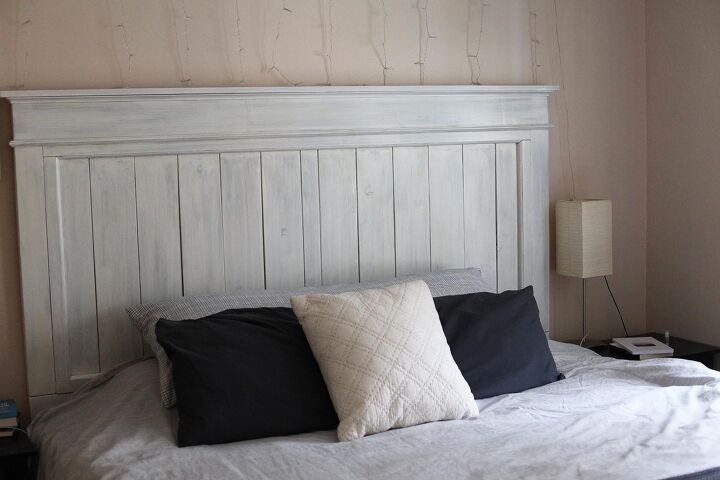
All You Need to Build a DIY Farmhouse Headboard
This bold, innovative Hometalker handmade a farmhouse-style headboard for his friends. This Hometalker talks you through all the materials you need to create your very own DIY headboard from scratch. Once cut to size, this Hometalker applied a Weathered Oak stain and let it dry before applying several coats of white stain on top. The wood was then given a coat of water-based polyurethane to give it that glossy, hard-wearing appearance. Get tutorial here
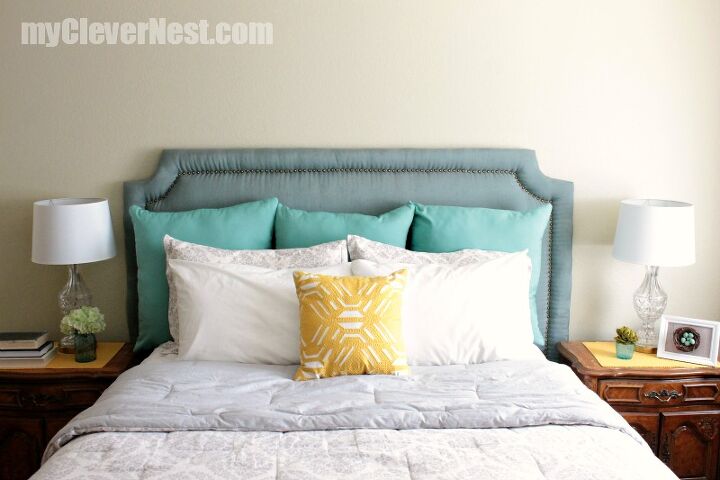
Traditional Nailhead Trim Looks Great on a DIY Headboard
This Hometalker spent just a single weekend prepping this new DIY headboard, complete with nailhead trim. The whole mini-project cost her and her husband less than $100 and the end result was a classic, calming duck egg blue king headboard that complements the traditional wooden features in the room. She admitted that working with nailheads proved problematic at first, but the end product is exceptionally stylish and accurate. Get tutorial here
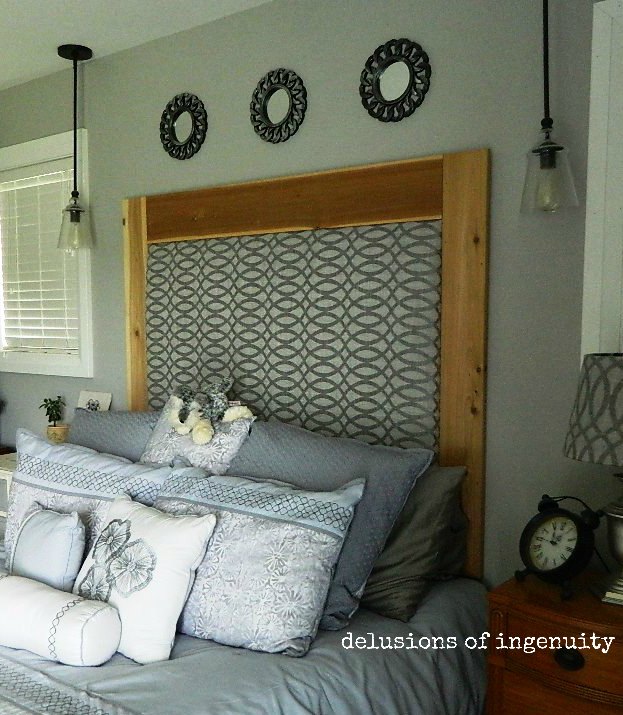
Upholstered Headboard Made From Curtain Panels
This Hometalker created a new stylish upholstered headboard using curtain panels bought from a local store. She purchased a large sheet of MDF and trimmed a value mattress pad to the back of it before wrapping the entire sheet of MDF and mattress pad in quilt batting. The curtain was then wrapped over the quilt before being stapled down to the MDF. The headboard frame was then engineered using rough-sawn cedar acquired from a neighbor. Get tutorial here
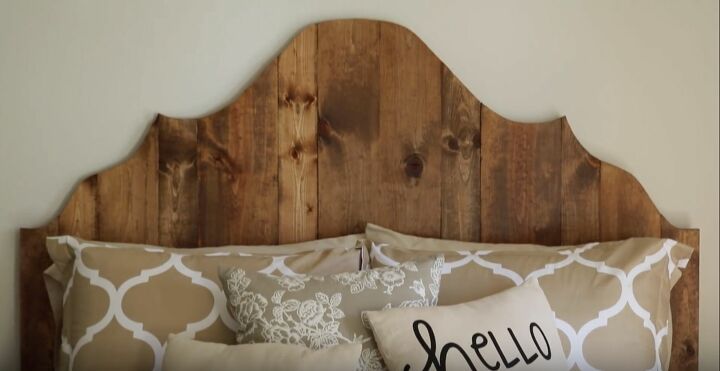
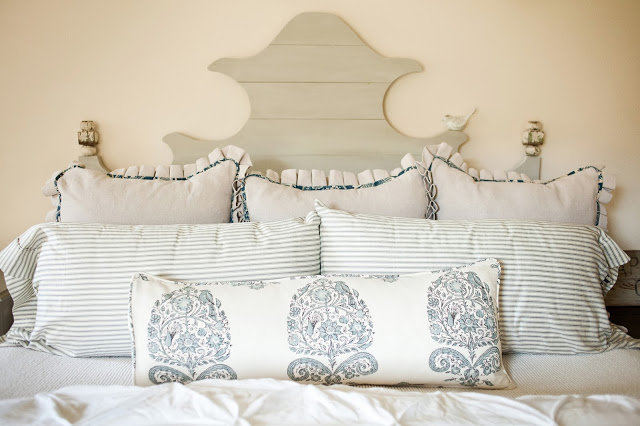
This Rustic Queen Headboard Was Designed Using a Stencil
This Hometalker wanted a wooden queen headboard and used a stencil and drop paper to get the perfect shape. She sketched out half of the shape she wanted and then folded the drop paper in half. She then cut out the shape and unfolded the paper to get a truly symmetrical stencil ready to use to cut out the wooden headboard. After attaching each piece together using self-tapping wood screws, she stained it the same color as her existing wooden bedroom furniture. Get tutorial here
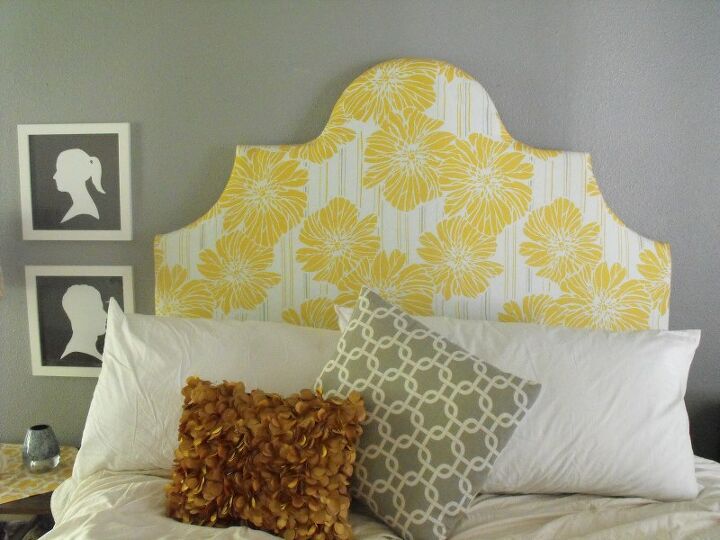
Create One-of-a-Kind Upholstered Headboard Shapes
After buying a giant 5x8 piece of MDF for just $5, this Hometalker than created a unique upholstered headboard. Once their unique headboard shape was cut, they traced out the upholstery foam using the same shape, before gluing it onto the MDF using spray adhesive. Rather than using traditional fabric, this Hometalker used a brand-new duvet cover to wrap the headboard before stapling it on top of the foam. Get tutorial here
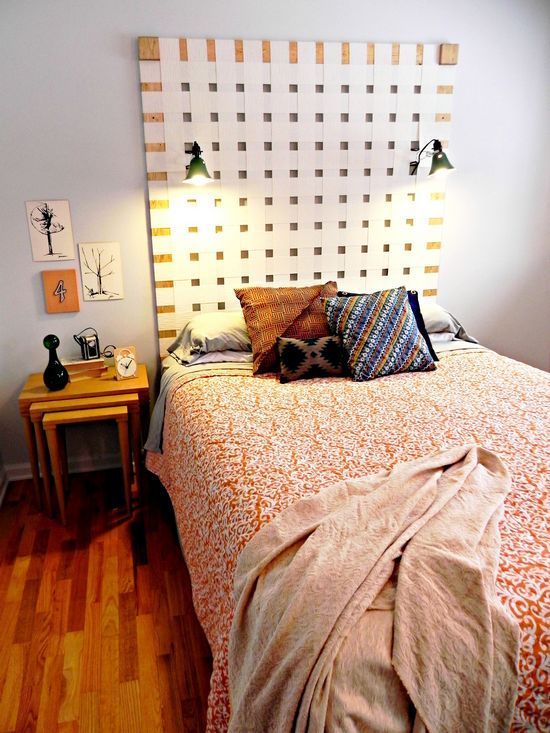
Turning Nasty Vertical Blinds into a DIY Woven Headboard
Instead of ditching unwanted vertical blinds, this Hometalker repurposed them to create a stylish oversized headboard. This giant woven headboard was made using vertical blinds that were once used to shield their bedroom from direct sunlight. The fresh white blind material offsets the natural look of the wooden headboard and helps to make the bedroom look more open and spacious. The reading lamps also bring a much-needed layer of practicality to the space. Get tutorial here
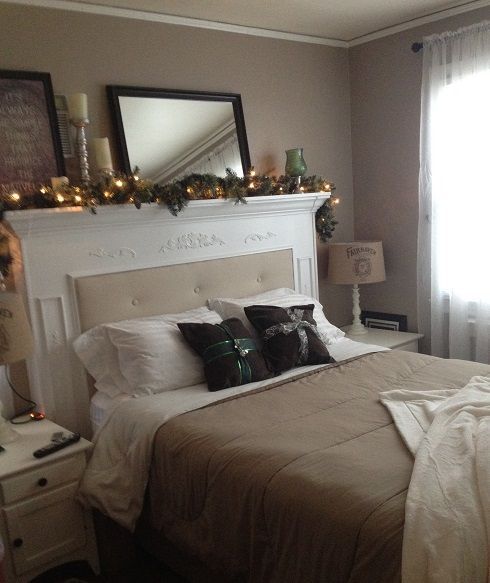
Faux Fireplace Mantel Headboard’s Add Genuine Bedroom Character
Inspired by a fireplace mantel she’d seen online, this Hometalker created her own fireplace mantel headboard. Scared off by the expense of buying a brand-new fireplace mantel outright, she opted to make her own. A U-shaped rectangle box was initially erected behind the bed, before adding crown molding and trim to create much-needed authenticity. The whole mantel was painted white and the end result is a beautiful, calming DIY headboard. Get tutorial here
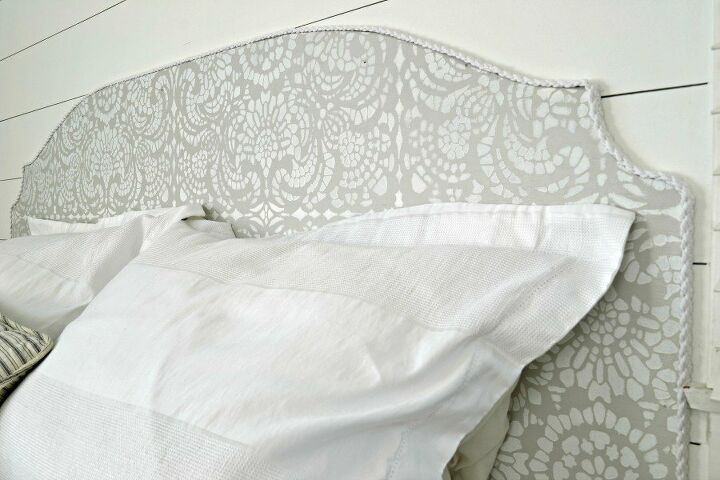
DIY Headboard Ideas Based on Expensive Ballard Designs Headboards
After being inspired by a headboard on Ballard Designs, this Hometalker created a replica for just $75. Using an old-school projector, she projected the image she wanted to trace onto the wood. It was then traced to the size they wanted before being cut out using a skill saw. Annie Sloan French Linen chalk paint added vintage charm and hooks were added to the back to make it easy to hang this DIY headboard to their bedroom wall. Get tutorial here
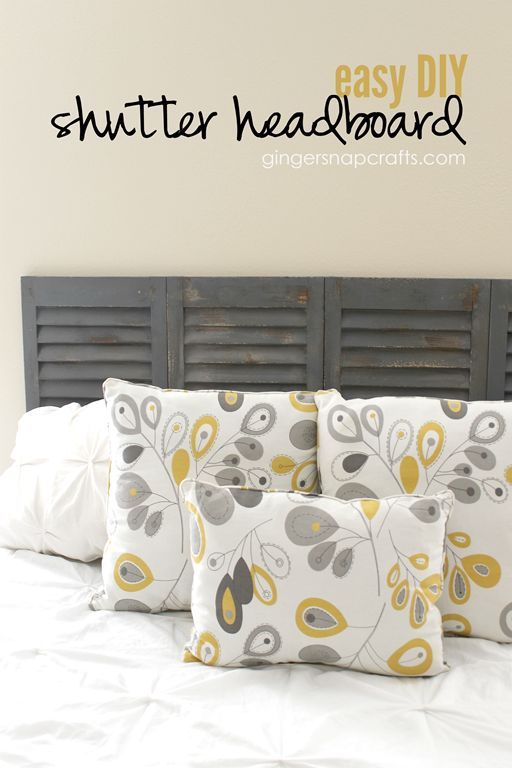
Window Shutter Headboard Ideas to Consider
These window shutters were fund online, with four making the perfect size for a queen headboard. After carefully removing the knobs and hangers from the back, the holes were filled with wood filler before being sanded and coated with matte gray spray paint. This Hometalker then distressed the look of the wood before hanging them using a nail gun. A stud finder proved useful to make it easy to fasten into the strongest areas of the bedroom wall. Get tutorial here
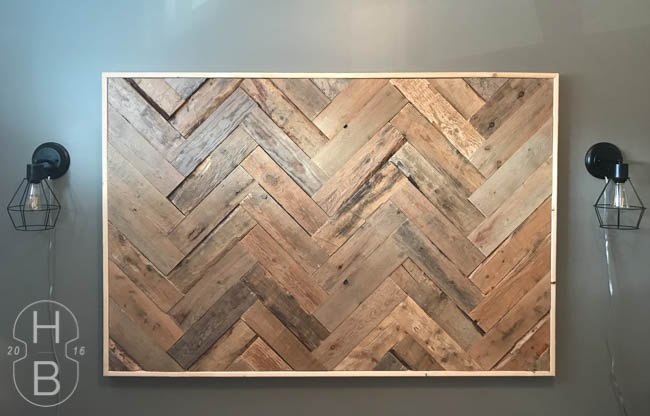
Using a Wooden Pallet to Create a Herringbone DIY Headboard
These free wooden pallets were used to create a stunning herringbone DIY headboard for a guest room. This Hometalker had two wooden pallets leftover in their garage after building their deck. She used a circular saw to cut the boards of the frame into small strips for the herringbone pattern. Once in the correct pattern, each pallet strip was attached to the plywood headboard. To prevent splinters and fabric snags, the headboard was sanded and covered in triple-thick polyurethane for a professional finish. Get tutorial here
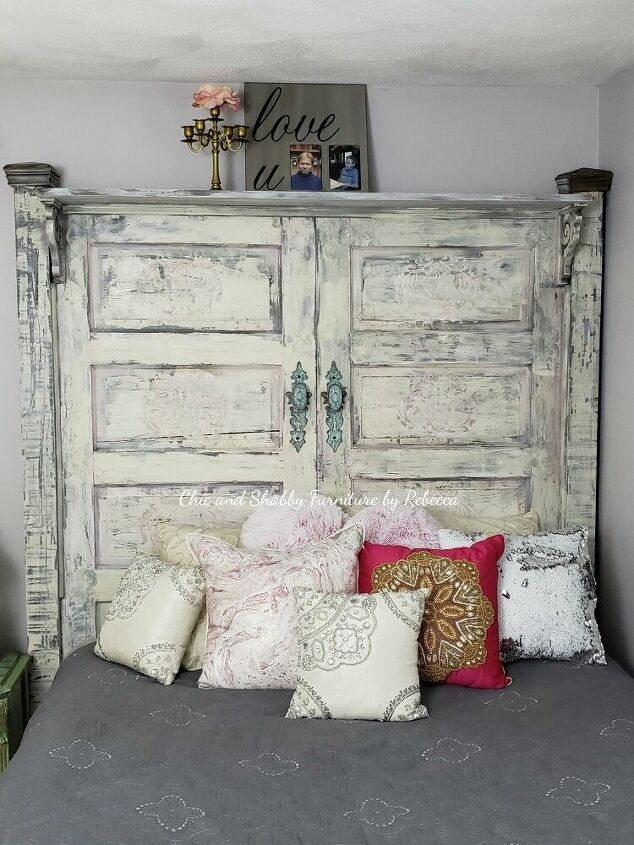
Repurposed Barn Door Headboard
With an obsession of stunning door frames, this Hometalker used two vintage doors to make a barn-style headboard. These two vintage doors were sanded, scrubbed and painted using weathered wood chalk paint, creating a chippy, authentic look. Raised stencils and décor stamps were used to imprint motifs on the woodwork, while the door knobs were kept as a design feature. Both doors were screwed together using 6” screws, creating a shabby chic farmhouse headboard. Get tutorial here
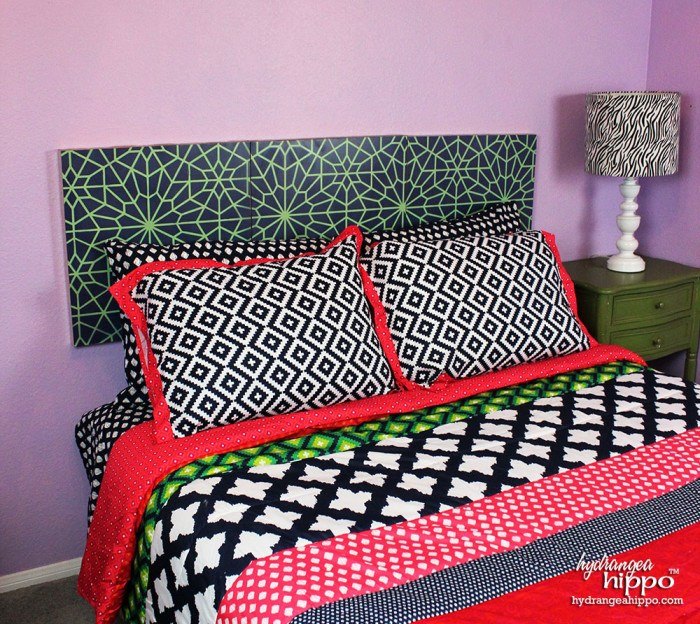
Stenciled Headboard Inspired by Royal Design Studio
This Hometalker saw the value in Royal Design Studio stencils to create a stunning guest room faux headboard. After being gifted a queen mattress set, the bedroom only had room for a basic bed frame, so they opted to create a stylish headboard to dress up the room. The Starry Moroccan Night Royal Design Studio stencil adds a dazzling, vibrant backdrop. The DIY headboard’s slim design takes up little space but the geometric style works brilliantly with the equally symmetrical bedding. Get tutorial here