


Cabinet Makeover

by
Christina
Our rental home kitchen needed an update before we could put it on the market so it had to be an inexpensive option. The original cabinets from 1915 were in good condition and a custom size that would be expensive to replace. The front of the cabinets were flat so I decided to add some framing to customize them a bit. This is how I did it!
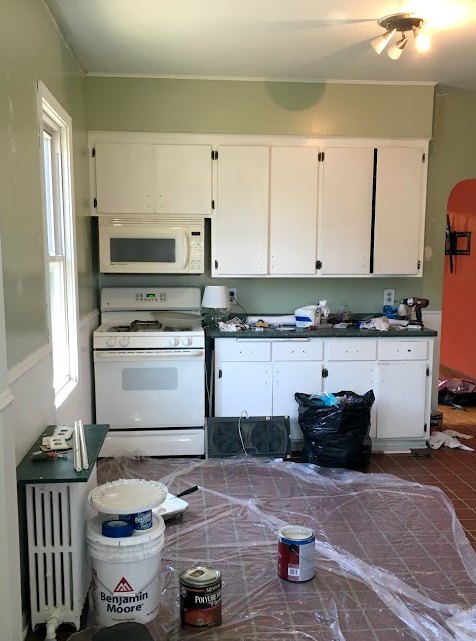
What a horrible before picture, right?! It had dreaded green countertops, plain cabinets, outdated appliances, and old hardware.
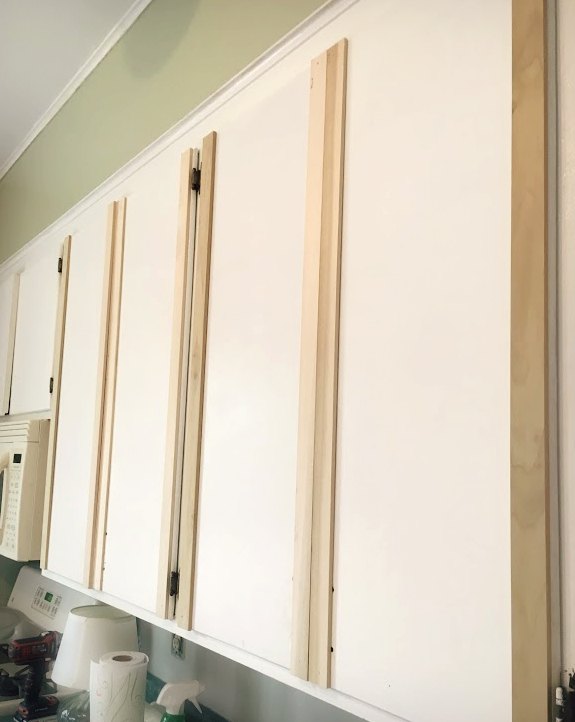
I started with poplar boards in size 1/4” x 2” x 3 feet (or you could use ¼” x 3 x 3 feet) and cut them to the size of the cupboard fronts to create a frame. Attach the boards with a nail gun and ½” nails.

Once the framing is up on each cupboard door, sand down the trim before painting. Use wood filler and silicone to fill any gaps between the boards. Now, paint the trim the same color as the cabinets so they look like they were made that way!
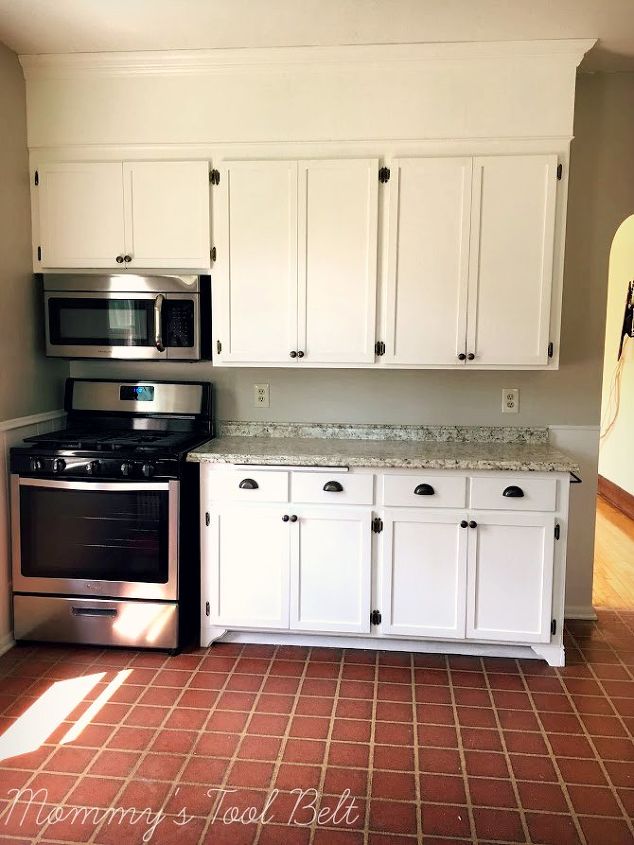
The cabinets look like new custom cabinets, but instead they just got a facelift! The hardware was changed and new countertops were put in along with stainless steel appliances. The soffit was painted the same color as the cabinets to make it look like a part of the cabinets. Add some ceiling moulding and that's it! See the full transformation at Mommy's Tool Belt.
Want more details about this and other DIY projects? Check out my blog post!
Comments
Join the conversation
2 comments
-
Wow this turned out beautiful, I love that you added black hardware and added pretty black appliances. Beautiful work on the cabinets and counter tops, it made a significant difference!
-
Turned out great! Great job!


Frequently asked questions
Have a question about this project?