


How to Stencil: Tribal Stenciled Wall Finish

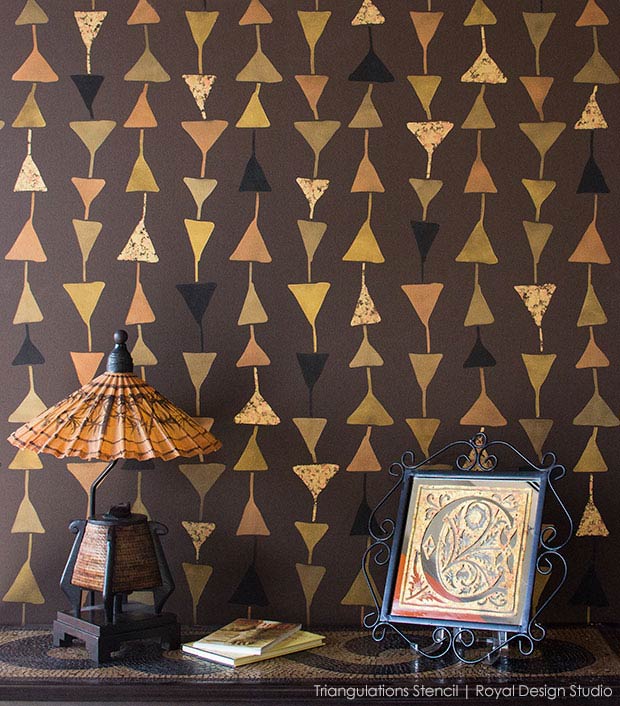
Looking for a custom, contemporary stencil finish that is hip, hot, and maybe even a little masculine? Here is an easy tribal stenciled wall treatment that combines warm metallic shades with an uber-cool tribal stencil pattern. We used the new Triangulations Wall Stencil from the Bonnie Christine Stencil Collection to create this fab feature wall look. This versatile design also comes in a smaller scale at the Triangulations Furniture Stencil, and I think this finish would look equally divine on a clean-lined furniture piece, don't you?
Specialty stencil products from Royal Design Studio "shine" in this stencil treatment-AND make it SO much easier than it looks. We alternated several different colors of our Metallic Royal Stencil Creme paints throughout the pattern. Royal Stencil Cremes glide on a cover like a dream, and provide a dramatic pop on a dark-colored background. We topped it off with some randomly place Tamise Flakes. Tamise Flakes are tiny broken bits of real Metal Leaf that are great for glittery accenting. Black Royal Stencil Size for gilding provides the perfect base for these, and is designed to apply cleanly through a stencil pattern-so you can do it right the FIRST time. Read on to see how this all comes together in the Golden Triangles Tribal Stenciled Wall Finish.
Specialty stencil products from Royal Design Studio "shine" in this stencil treatment-AND make it SO much easier than it looks. We alternated several different colors of our Metallic Royal Stencil Creme paints throughout the pattern. Royal Stencil Cremes glide on a cover like a dream, and provide a dramatic pop on a dark-colored background. We topped it off with some randomly place Tamise Flakes. Tamise Flakes are tiny broken bits of real Metal Leaf that are great for glittery accenting. Black Royal Stencil Size for gilding provides the perfect base for these, and is designed to apply cleanly through a stencil pattern-so you can do it right the FIRST time. Read on to see how this all comes together in the Golden Triangles Tribal Stenciled Wall Finish.
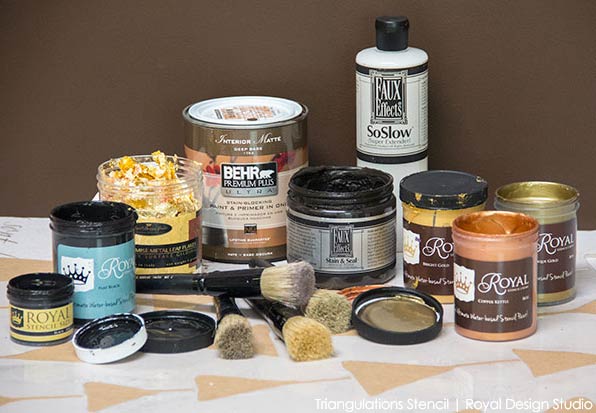
Stencil Supplies for this project:
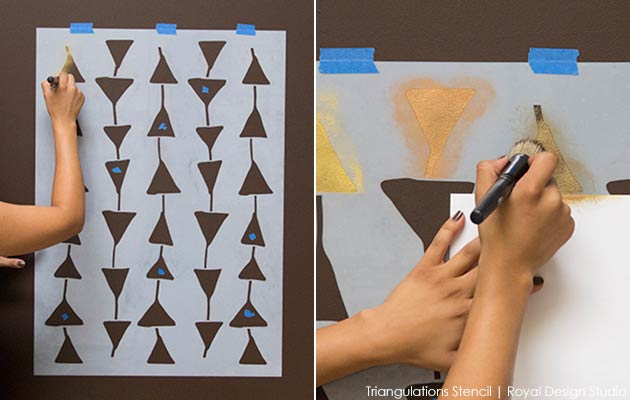
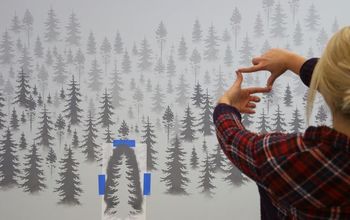
Begin with your stencil in the center of your feature wall. Before you start stenciling use Blue Painter's Tape to identify a few elements of the design that you will apply the Tamise Flakes to-approximately one per row.
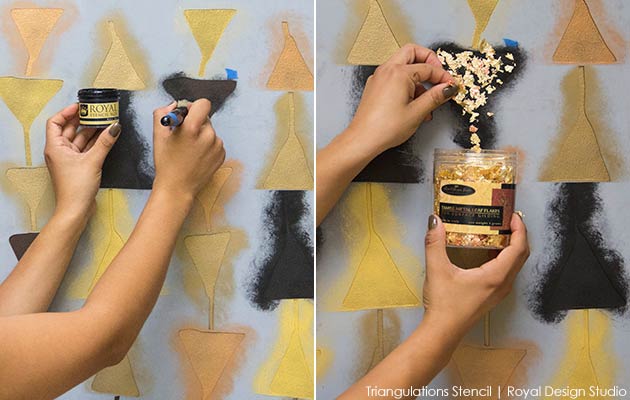
Remove the pieces of Painter's Tape and stencil 2 coats of Black Royal Stencil Size in those triangles.
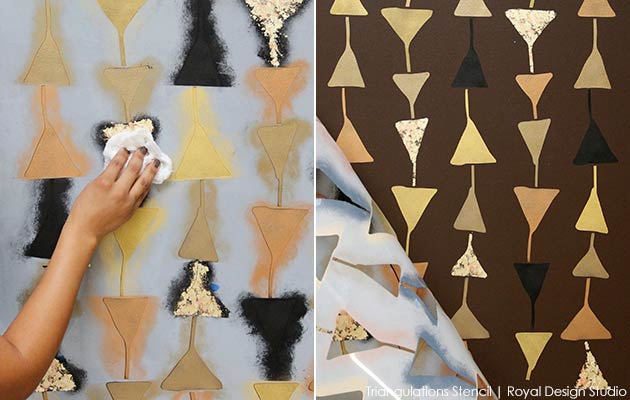
Once you have covered the triangles to the desired amount, use a piece of cheesecloth or soft rag to burnish the metal leaf into the size and remove any lo0se flakes. It is not necessary to clean you stencil after every repeat (clean maybe every 5th repeat) and having the colors now on the stencil will help you move faster as you continue the stenciled finis
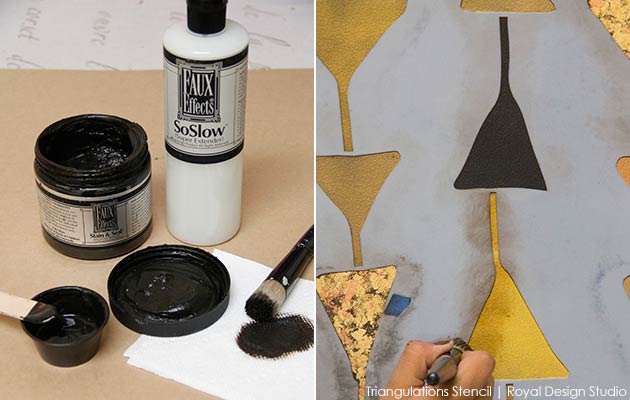
This next step is an optional "toning layer". I love to use toning (antiquing) layers, especially on metallic finishes, as this makes the overall look much richer and brings it more "together". Stain and Seal is a water-based gel stain that is designed for wood finishing, but it also makes a great glazing medium. In fact, it is important to always mix it with some So Slo Super Extender, as it will be too opaque and fast drying otherwise. For this treatment, mix 1 part American Walnut Stain and Seal with 1 part So Slo Super Extender. This will create a translucent, fluid toning medium. Stencil the stain mix over the pattern using a 1 1/2 " stencil brush. Use cheesecloth to soften and remove any excess glaze as you complete each triangle.
Comments
Join the conversation
2 comments
-
Very cool!
-
Thank you, @Hannah V :)


Frequently asked questions
Have a question about this project?