Patio Makeover Edition: My Bohemian Patio Makeover
My Bohemian Balcony Makeover
I wanted to give the family a hangout space, watch the sunset and give my husband a nice little nook to write. Get tutorial here

We turned the patio on the left to an oasis
I wanted to give my family a space to hang out, watch the sunset and give my husband a nice little nook to write. Get tutorial here

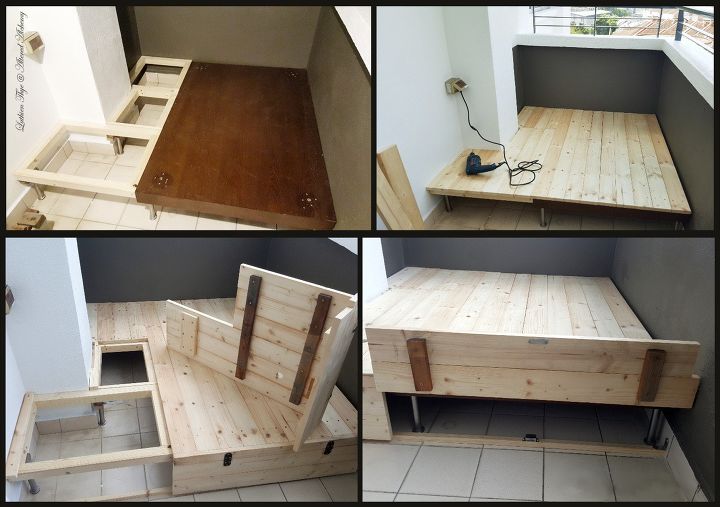
I began by building a mini deck
After framing up the extra area, I began to lay the 4x1 timber on top and secured them to the table/frames. Get tutorial here
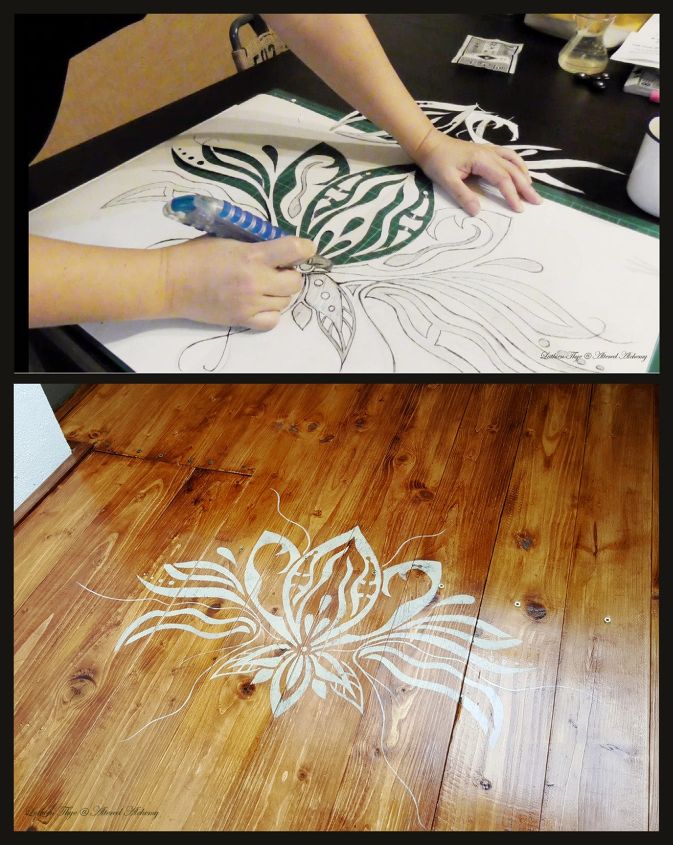
Stain and style
I used a mixture of 2 different stains. Then, I drew out a stencil of a stylized Lotus and simply stippled it on. Get tutorial here
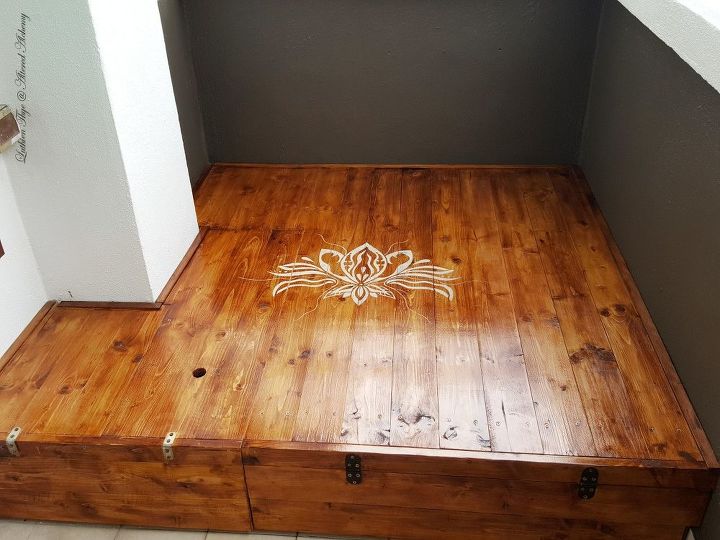
Here's the finished look
I coated the deck with 3 coats of polyurethane to make it sufficiently waterproof. Get tutorial here
Next: I made a fold-up table
I used left over block board and painted it turquoise. For the legs I used 2x1 timbers. Get tutorial here
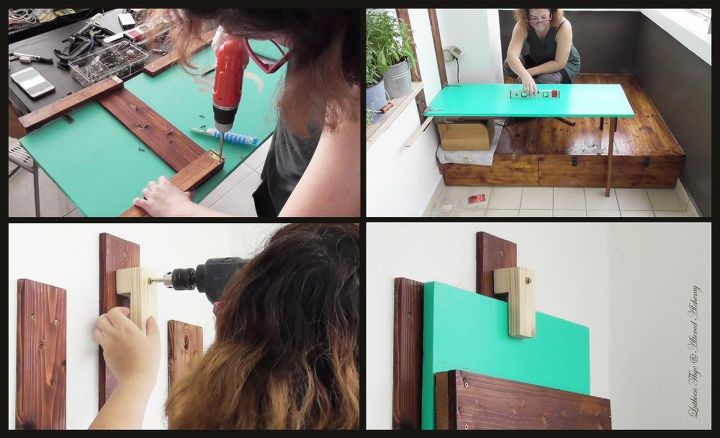
Function and art
I stenciled the Sanskrit symbol "AUM" within the frame and fashioned a 'stopper' to hold the table up when it's folded. Get tutorial here
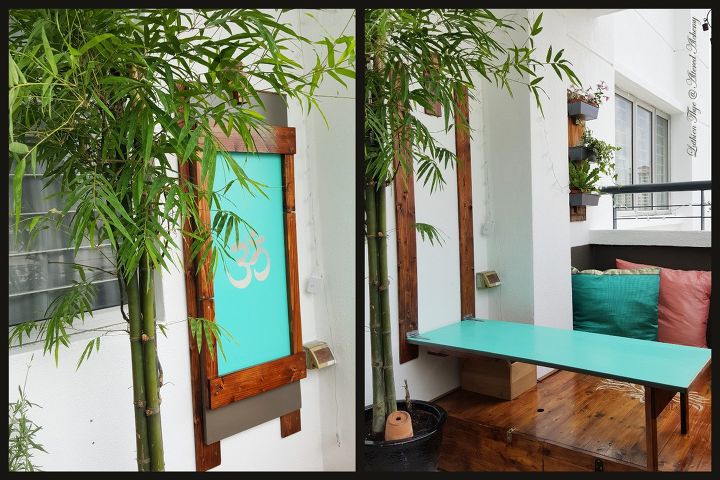
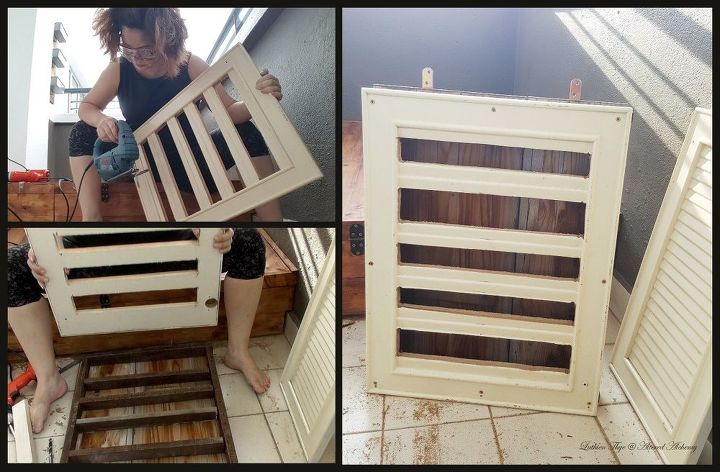
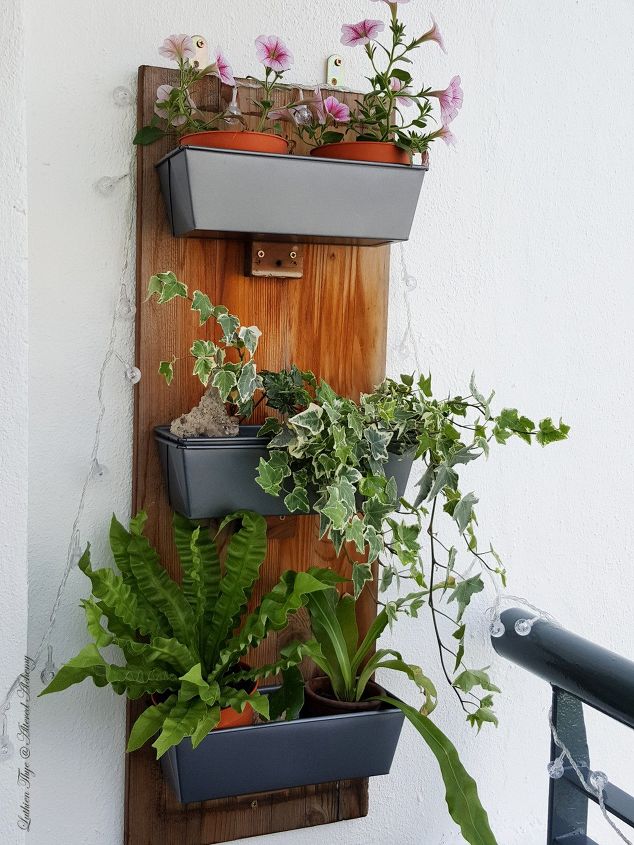
Time to beautify
I used cabinet doors left from a friends bathroom reno plus some recycled wood and voila... Get tutorial here
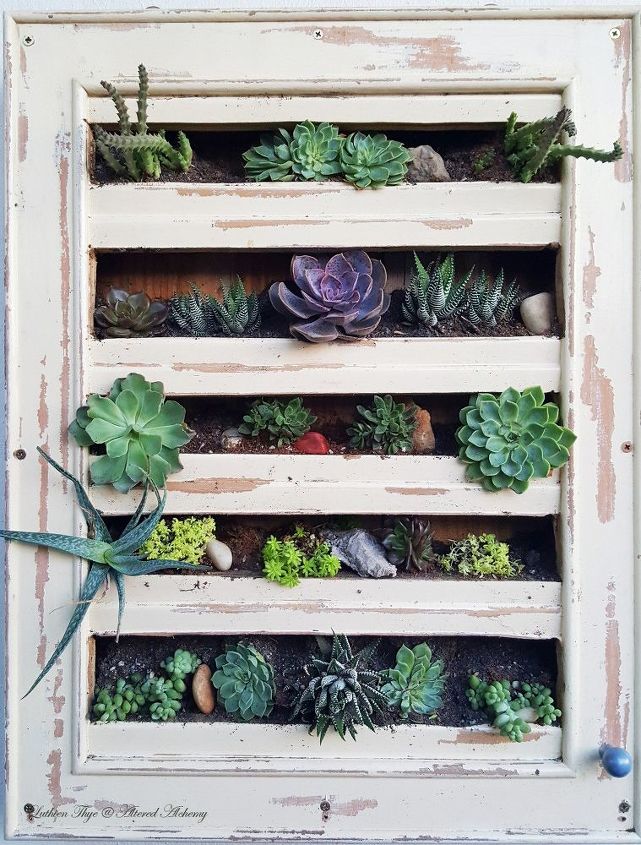
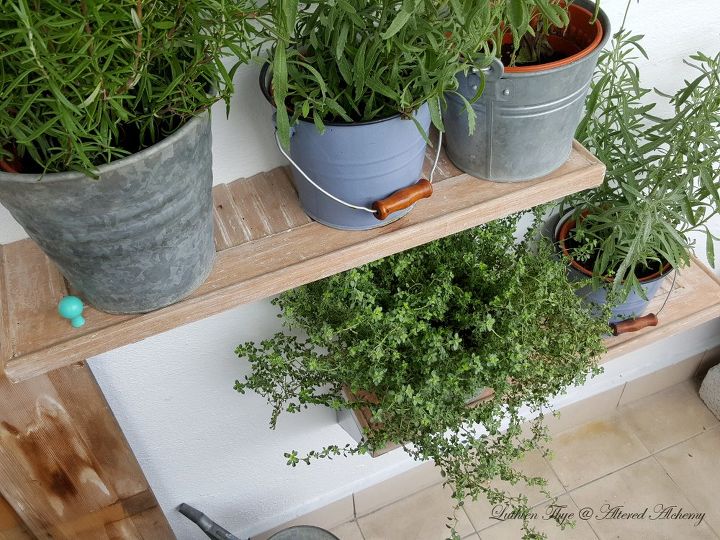
Then another one!
This planter was made out of recycled wood and cake tins I bought from Daiso (our 5 dollar shop). Get tutorial here
PATIO EDITION: THE PATIO MAKEOVER
4 years after moving into our home we finally did something with our covered patio. Get tutorial here
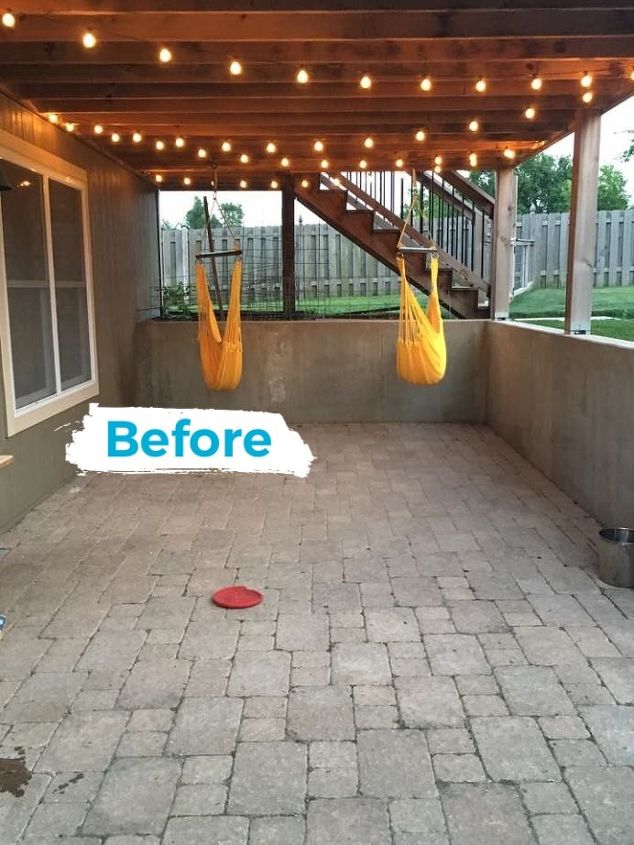
BEFORE
We cleaned everything out and hung up a couple of hammock chairs. Get tutorial here
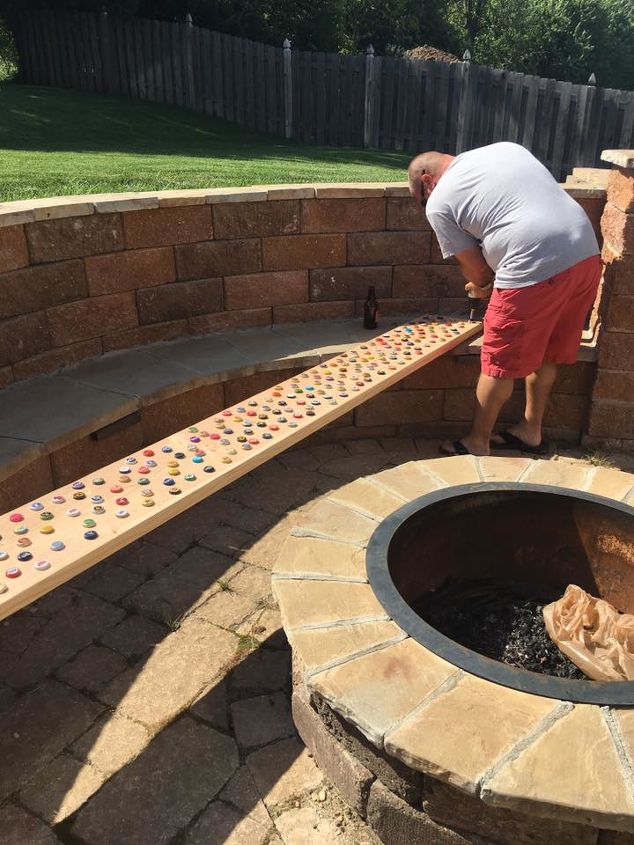
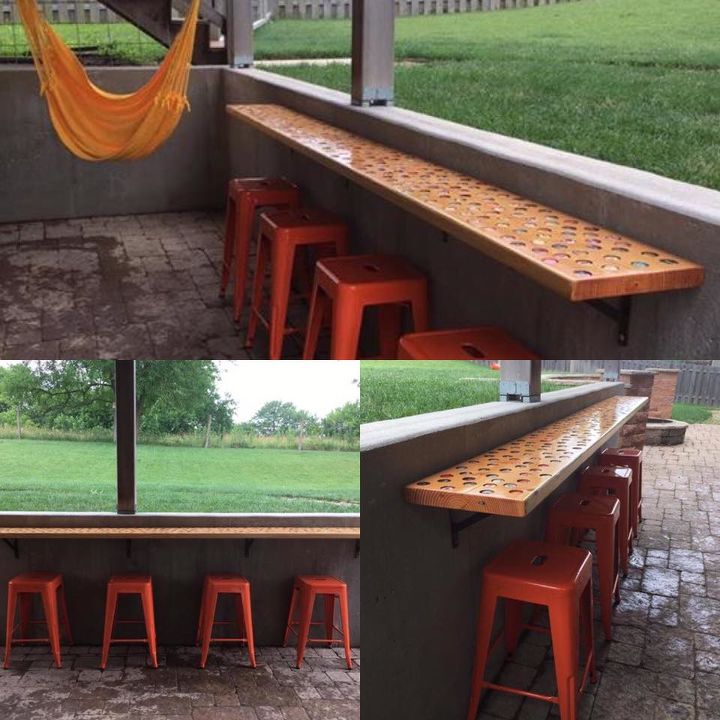
We dded a clever countertop
My hubby had the idea to make a bar counter with inset bottle caps. Get tutorial here
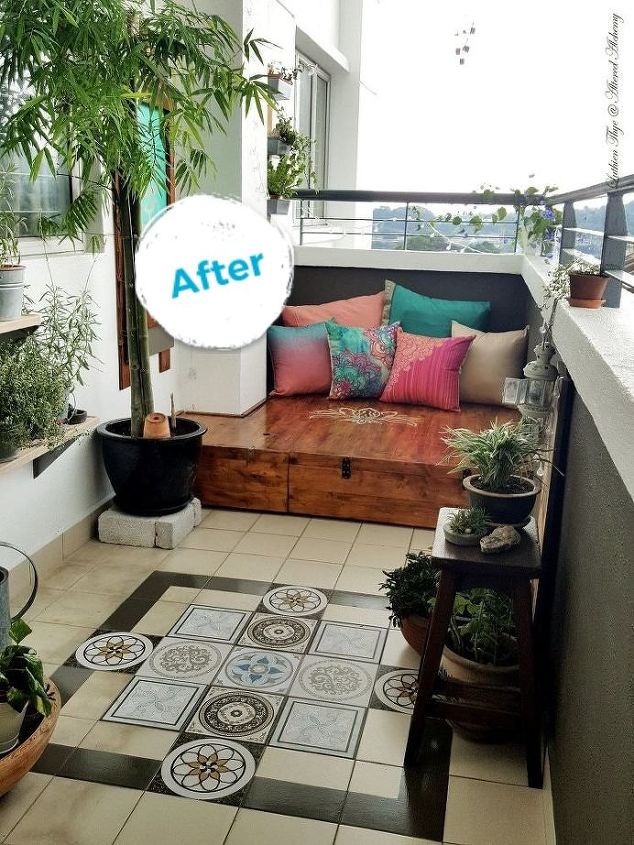
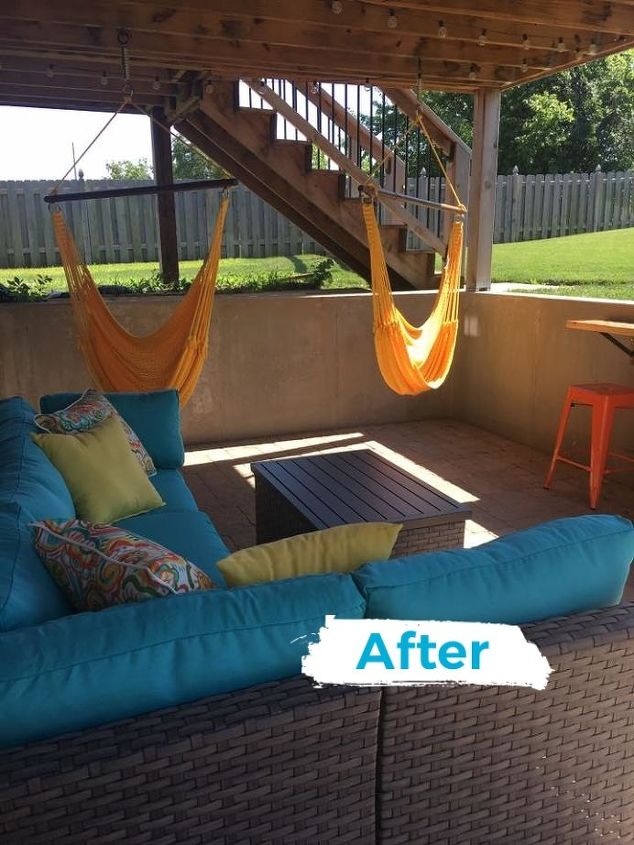
AFTER
Once the bright patio furniture arrived our colorful oasis was complete! Get tutorial here
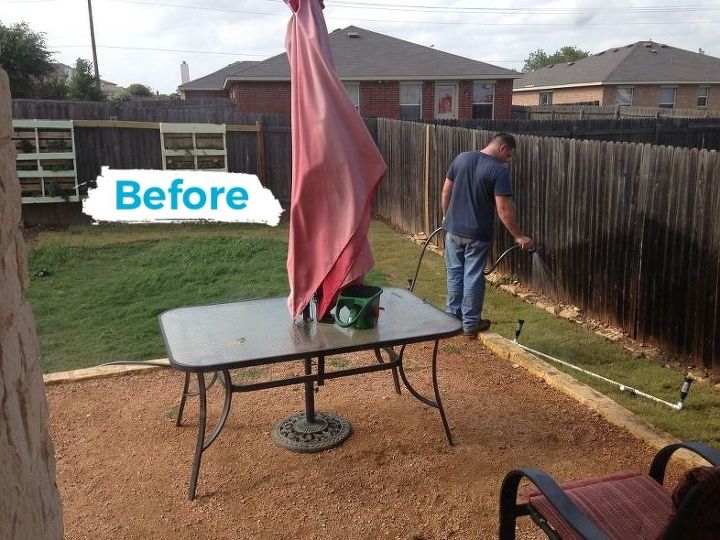
BEFORE
We moved into our house in March of 2015 and we could not WAIT to start this transformation! Get tutorial here
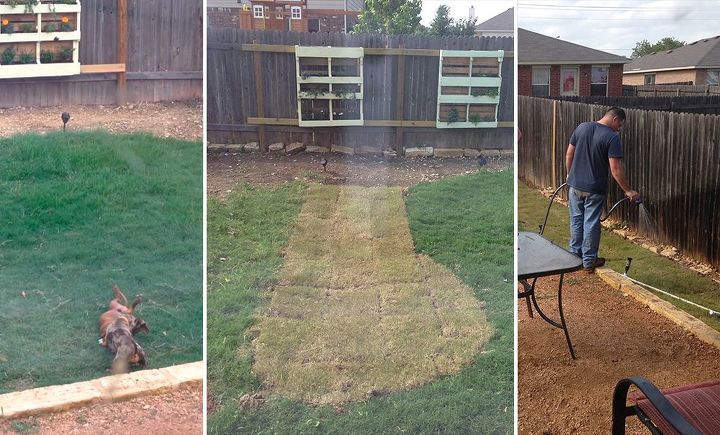
This is what we had to work with
There was a giant dog pen and a 3 foot river rock moat bordering the entire perimeter. Get tutorial here

All clear!
Once all the rock was gone, we saved up for a month or two and bought some sod to fill in the gaps. Get tutorial here
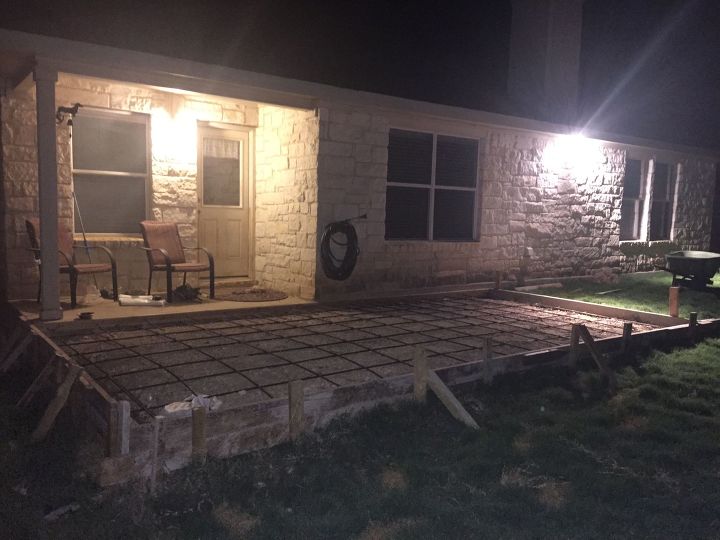
Then: The slab
We were able to have the slab constructed and poured by one of our neighbors! Turns out he's not too shabby! Get tutorial here
The rest is history!
I'm in awe. It's so hard to believe that this is OUR HOME! This little oasis takes my breath away. Get tutorial here

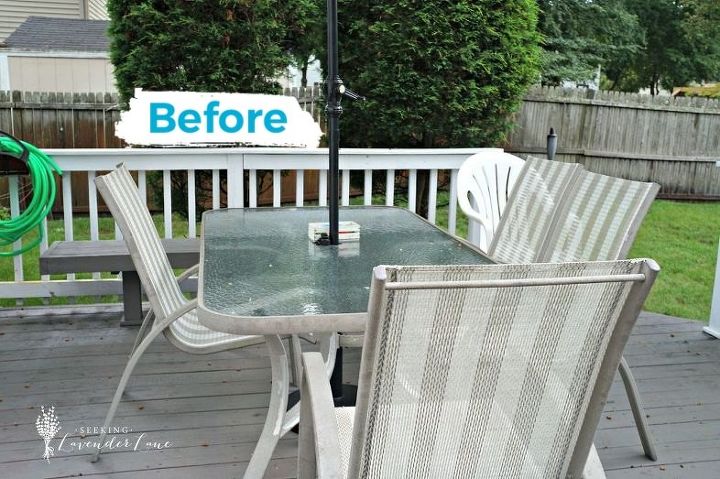
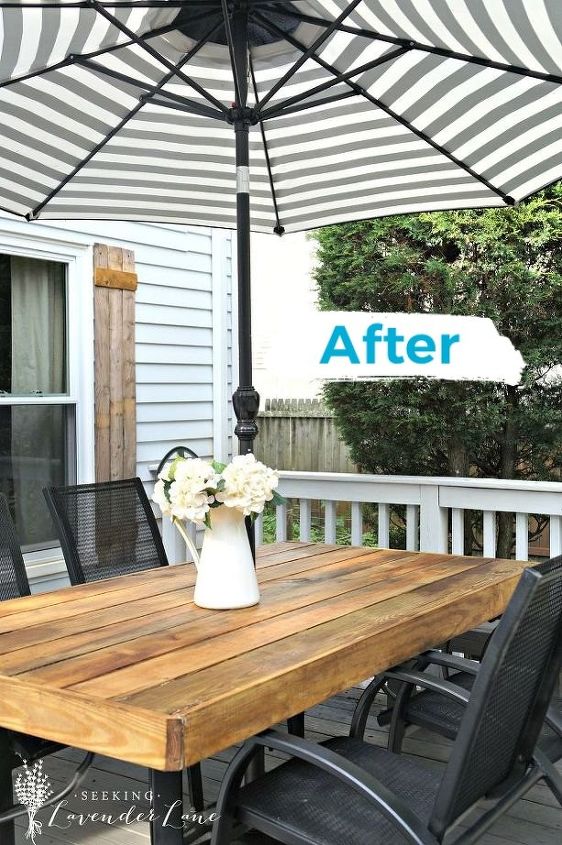
BEFORE
With a little imagination, I knew this table and chairs could work with just a little DIY help! Get tutorial here
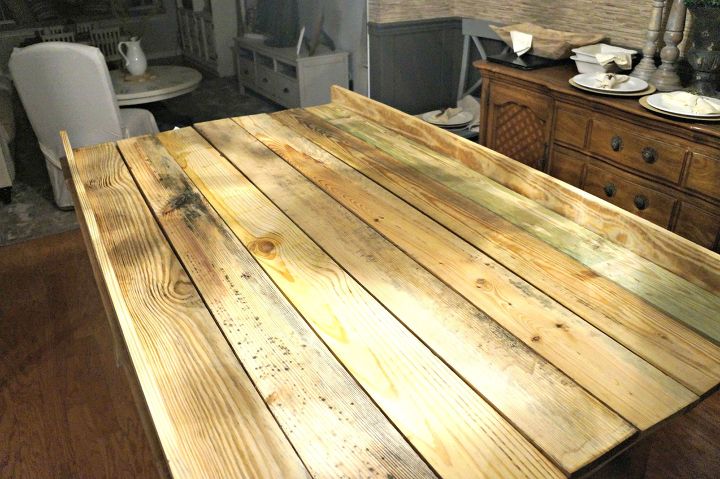
A new table top
We were sure to make the frame slightly larger than table to be able to slide table top right on. Get tutorial here
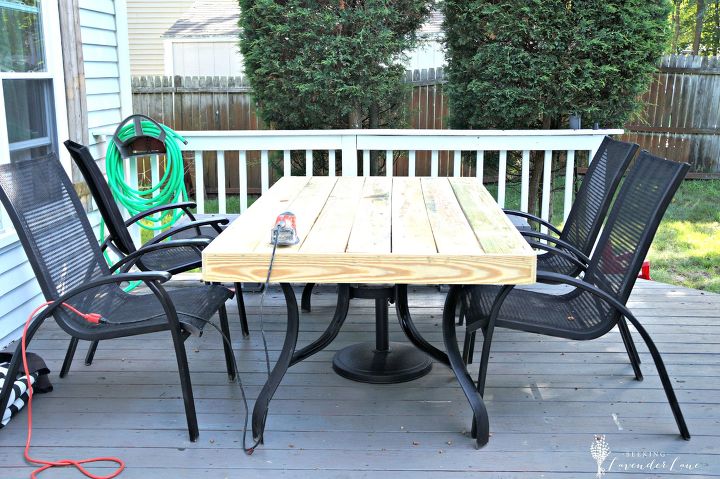
Sand, stain, seal
Once the table was complete, we used the hole saw to cut a hole in the center for an umbrella. Get tutorial here
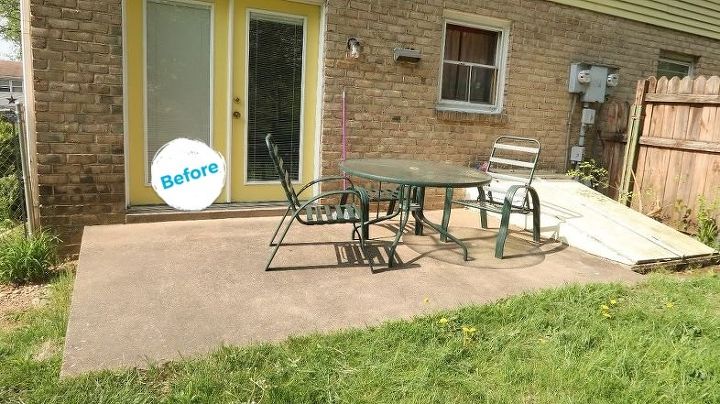
BEFORE
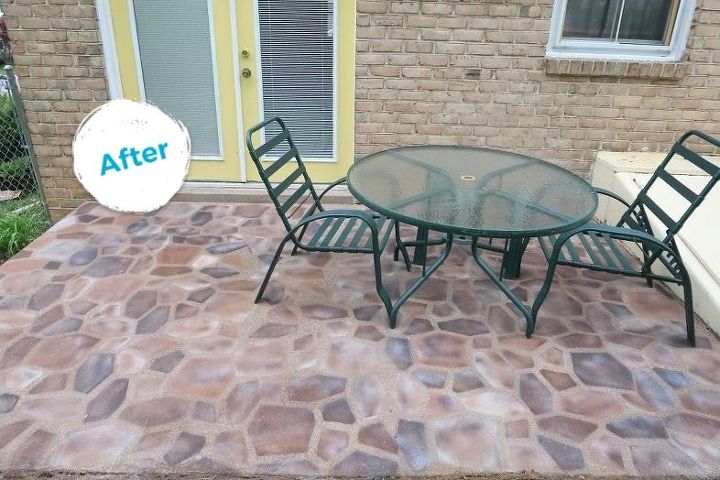
My sister loves flagstone but that wasn't in her budget so I gave her the next best thing - faux flagstone! Get tutorial here
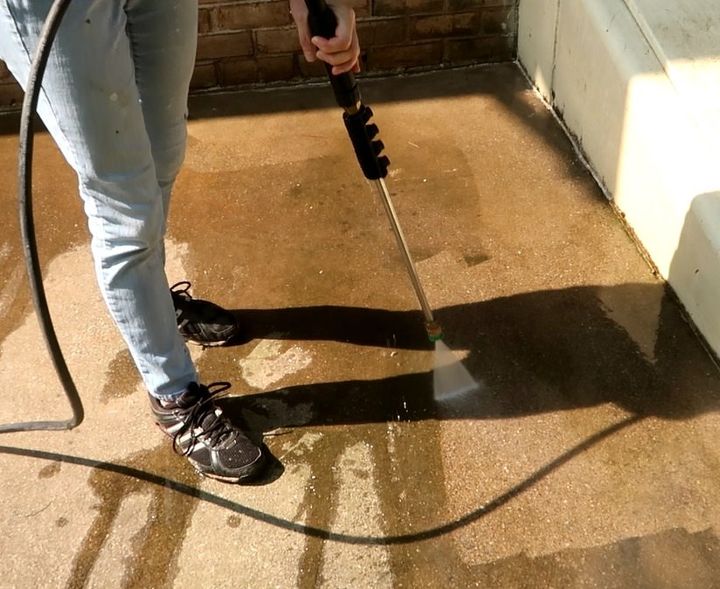
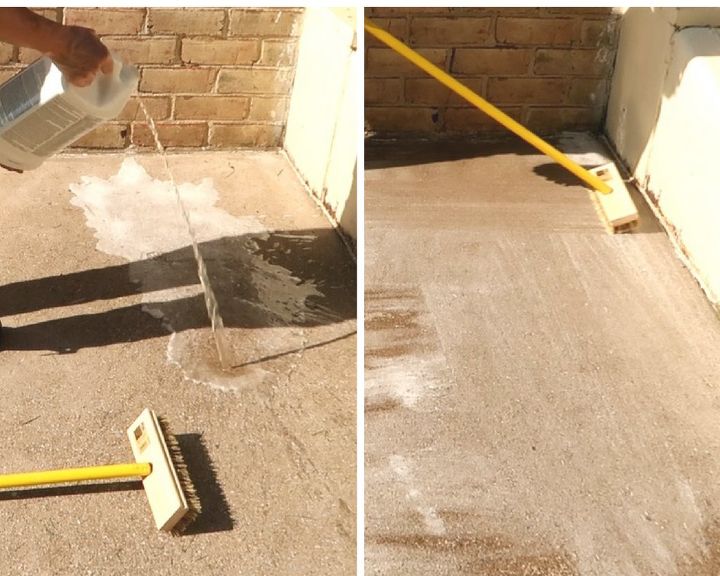
First: Power wash
You don't realize how dirty something is until you've power washed it. Get tutorial here
Then: Deep clean
After the patio dried, I used Fast Prep by Valspar to deep clean and etch the surface of the patio. Get tutorial here
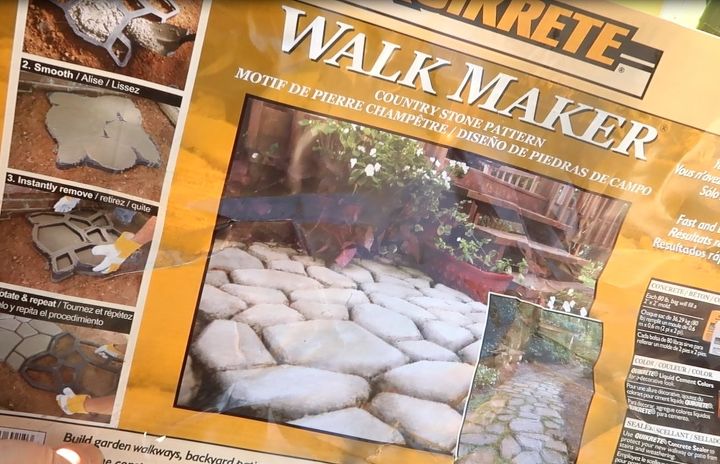
Time to make our faux flagstone
I used Concrete Walk Maker as my stencil. You can find this in the concrete aisle of Lowe's or Home Depot. Get tutorial here
Here goes!
I laid the Walk Maker flat onto the patio then began to paint inside each of the blocks using 5 different colors. Get tutorial here
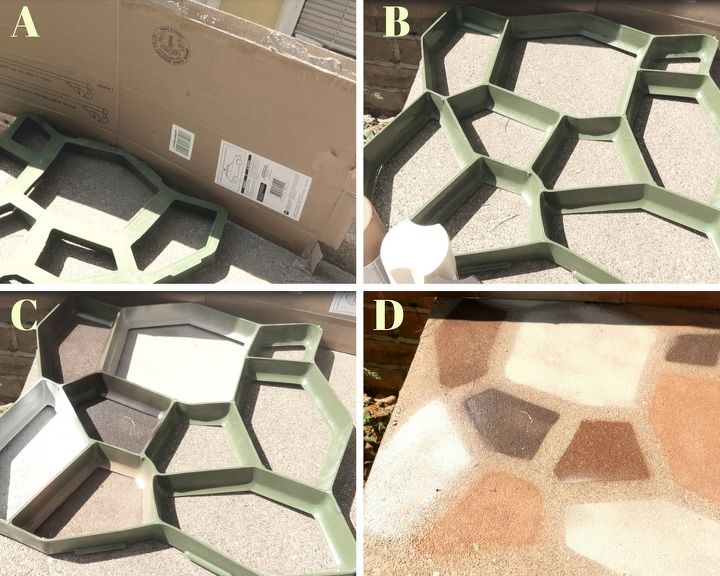
The process
The colors I used were: Coffee Bean, Pebble, Ivory, Brown Boots, and Leather Brown. Get tutorial here

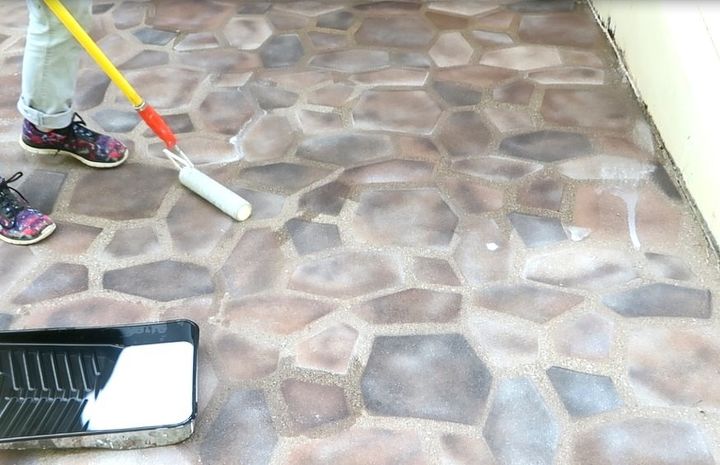
Then: Seal
Once all of the stenciling was complete, I sealed the concrete with Valspar Protective Sealer and let it dry for 12 hours. Get tutorial here
AFTER!
My sister loves her new patio and can't wait to spend her summer nights outside. Get tutorial here
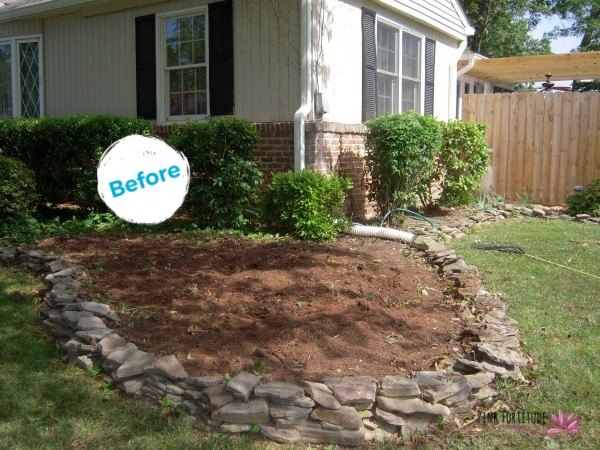
BEFORE
The space jetted out into the lawn, and was covered in weeds and ivy and had a small tree in the middle. Get tutorial here
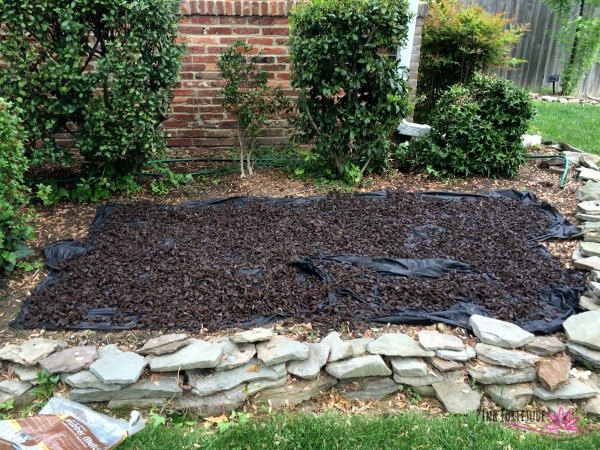
Just a few simple changes
We rounded out the space, laid down some weed cover, and recyclable mulch. Get tutorial here
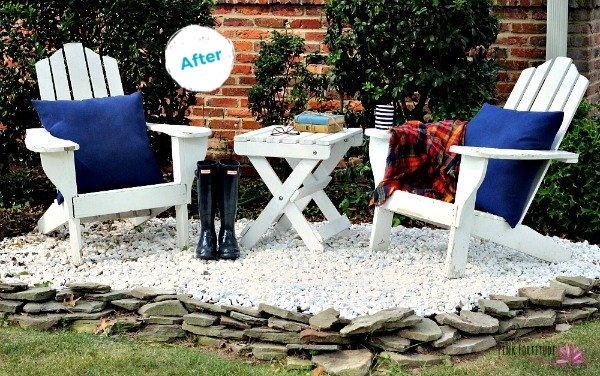
We added a layer of white stones, the DONE!
It didn't take much to create this beautiful conversation space! Get tutorial here