Can anyone recommend the best printer for printing on fabric?

+11
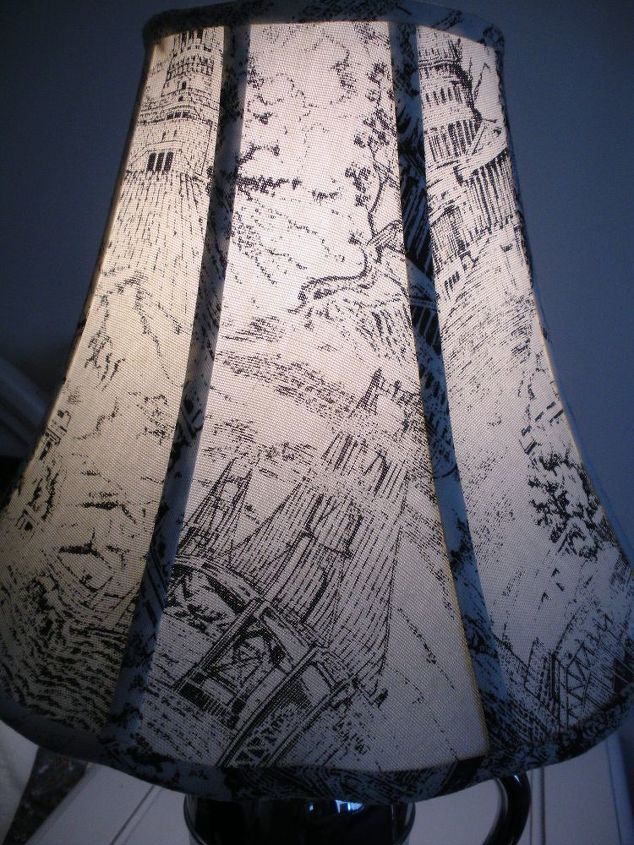
I plan on making lamp shades using old sheet music. Need to scan and print to cloth. Wondering if anyone can recommend a good printer for printing to cloth. Thanks
12 answers
-
I think most printers would jam up if you tried to print on cloth. If you put very thin material over a piece of cardstock, that might work. But I don't think it could be very thick.
 Elaine Simmons
on Jul 19, 2015
Elaine Simmons
on Jul 19, 2015
-
You can print on fabric by ironing to sheets of freezer paper (cut to size of letter paper) There are detailed instructions online. As for the ideal printer I have no idea. sorry.
 Mary Brien
on Jul 19, 2015
Mary Brien
on Jul 19, 2015
-
http://quilting.about.com/od/howtoprintonfabric/fl/How-to-Print-on-Fabric-with-Inkjet-and-Laser-Printers.htm?utm_term=printing%20fabric&utm_content=p1-main-1-title&utm_medium=sem&utm_source=msn&utm_campaign=adid-ac707d30-4be2-4dc5-a727-7a046a33cffb-0-ab_mse_ocode-22832&ad=semD&an=msn_s&am=exact&q=printing%20fabric&dqi=&o=22832&l=sem&qsrc=999&askid=ac707d30-4be2-4dc5-a727-7a046a33cffb-0-ab_mse
 Mary Take Massieon
on Jul 19, 2015
Mary Take Massieon
on Jul 19, 2015
-
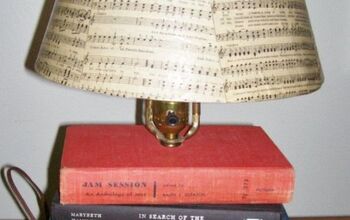
I would use ModPodge to put the sheet music directly onto the shade. You can cut it in pieces and overlap to suit yourself. If you want to keep the sheet music intact, scan it onto copy paper. I made a lamp using a stack of old books with music themes. The sheet music came from an old song book or patriotic and "old time" songs. Drilled the books and put in an electric lamp kit from a home improvement store.
 Audrey Trubshaw
on Jul 19, 2015
Audrey Trubshaw
on Jul 19, 2015
-
Mary Brien had the idea of freezer paper, plus you need to treat the material so it will absorb the ink. Nancy's notions and probably Joanne's, Micheal's have the solutions that you use.
 Marion
on Jul 19, 2015
Marion
on Jul 19, 2015
-
Back the sheet music w fuseable interfacing then cut to size, then glue sheets to shade frame.
 Theresa Last
on Jul 19, 2015
Theresa Last
on Jul 19, 2015
-
he wants to know what the best PRINTER to use for his new craft
 Peg
on Jul 19, 2015
Peg
on Jul 19, 2015
-
You can buy iron-on transfer ink jet paper and then use any printer.
 Mark Fitzgerald
on Jul 19, 2015
Mark Fitzgerald
on Jul 19, 2015
-
I use a HP bubble jet printer. I but the Precious moments paper backed fabric to print on. Just follow the directions. I have made many picture quilts this way and they wash up beautifully.
 Diane Cloward Smith
on Jul 21, 2015
Diane Cloward Smith
on Jul 21, 2015
-
I got a new Canon MX 922 for less than $99. The ink is low price on Ebay. I just picked up 2 packs for less that $10 & Free Shipping. I LOVE my printer, wouldn't use anything else. I can even print on DVD's
 Jmarie
on Jul 23, 2015
Jmarie
on Jul 23, 2015
- See 1 previous
-
Thanks Everyone. I think I am on the right path with all of your input... I love this site. If you need assistance in picking a printer for optimum permanency this is what I found. http://www.cjenkinscompany.com/Choosing_The_Right_Printer_s/21.htm
 Tim D. (The Retro Den)
on Jul 27, 2015
Tim D. (The Retro Den)
on Jul 27, 2015
-
Tim this helped me on info for your project: HOPE THIS HELPS.. Printing your own fabric is not as difficult as it sounds, and you don’t need any special equipment to get started. The only secret to a successful print is to make sure that you have the right type of ink. Cheap printer cartridges and refills often use a dye-based ink that colors unpredictably on fabric, and may even wash out completely in water.More expensive printer cartridges use pigment ink. Pigment ink is colorfast on many different surfaces, and is much more useful for printing on fabric.Unfortunately, finding out if you have pigment ink or dye is not always straightforward. Your printer manual is a good place to start, and a physical examination of the ink should settle the matter beyond doubt. When the printer cartridges need changing, remove the yellow ink and place some on a piece of glass. Yellow pigment ink will be vibrant but opaque, while yellow dye will be transparent and almost brown in color. Not all printers can print on fabric, and putting fabric through your printer could damage it permanently. This is an experimental technique, and you should only try it if you understand that it involves an element of risk. You will need: Epson R1800 Printer ( the best ) Light-colored fabric Printer that uses pigment inks Scissors Card Sticky tape * Step 1: Choose a light-colored, flat fabric, and cut it to the maximum width that your printer can handle. A Epson R1800, so it can take just over A3+ width of fabric. If your printer supports printing from a roll, then you can make the fabric as long as you like. Otherwise you will need to cut the fabric into sheets. Step 2: Take a piece of card the same width as the fabric and fix the end of fabric to the card using sticky tape. The card works like a leader, giving the printer something to hold onto when you first start printing. I use a piece of card about 10″ long, and tape the fabric about 2″ in from the end. Once the card is through the printer, the weight will help keep the fabric running smoothly. Step 3: Feed the card into the printer. On the Epson R1800, use the roll feed to accept the paper, because the paper enters the printer at a more shallow angle and also because I can print unlimited lengths using the banner mode of the printer. Step 4: Create your design on the computer, and then print it out. Keep a constant eye on the printer while it is running, and watch that the fabric doesn’t get creased or jam up the head. If you do have a problem, turn the printer off at the wall and clear the fabric manually before restoring power. Do not pull or move the fabric while it is still being printed. Slight changes in fabric tension can make your design distort, and increase the chance of creases forming. Step 5: You will need to fiddle around with the brightness / color settings on your printer to get the design looking right. Each fabric is slightly different, and experimentation is absolutely necessary if you want to get good results.Step 6: When the printing is finished, you should leave your new custom fabric to dry for about an hour. You might find that some of the ink comes off on your hands when you first handle the fabric. This is normal, and is nothing to worry about. Simply rinse the fabric in warm water to remove any excess pigment, and then hang it out to dry. Step 7: When the fabric is dry, iron the reverse side at low temperature. From this point onwards, the fabric can be treated just like shop-bought fabric. I recommend using a cool wash and ironing on the reverse side where possible to help preserve the colors.
Jmarie
on Jul 28, 2015
Sign Up to Answer