PERSONALIZE YOUR SPACE WITH A WALL MURAL

Personalizing your camper is a hot topic in the camper living forums. There’s two camps of people… The one’s who are ready to change it all, and the ones who think it’s de-valuing your RV.
Bet you can’t guess which one I’m in.
Just kidding. You’re here, so you already know.
PERSONALIZE. IT. ALL.
One of the quickest and easiest ways to give your camper a facelift is wallpaper.
I have peel and stick wallpaper in almost every room in our camper, and I will probably continue that trend whenever we buy a house too.
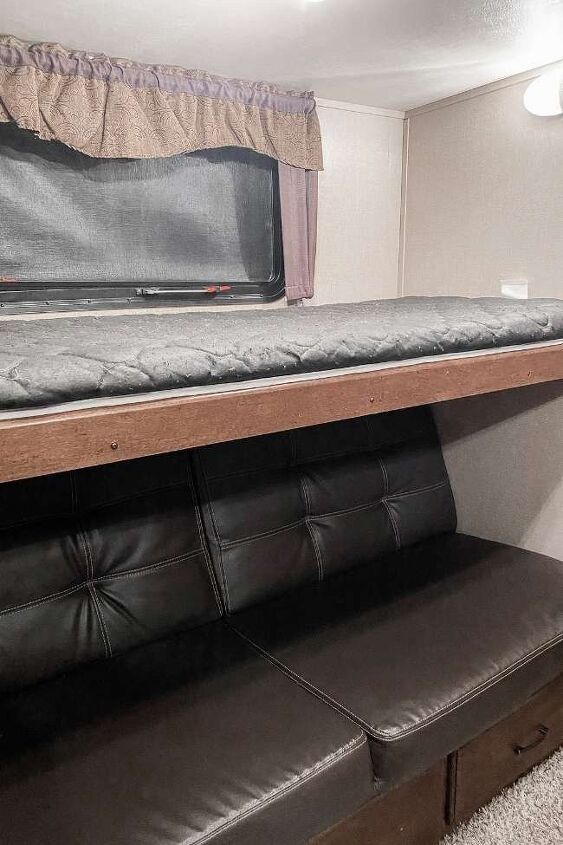
This bunkhouse started out with a flip down bunk in this slide and a jackknife sofa with drawers below. NONE of this made it to the current state.
I started off by removing basically everything. I did have a mattress on the jackknife platform for awhile, but eventually opted to remove that as well. Losing the drawers was definitely a bummer, but we’re pretty minimalist, and gaining the open floor space was definitely worth it.
READ ALL MY BEST DOWNSIZING TIPS HERE
Normally, I’m obsessed with what a little paint can do. Though the white walls were an improvement from all the beige. Don’t the walls just feel a little… boring?
Yeah, I think so too. Let’s fix that!
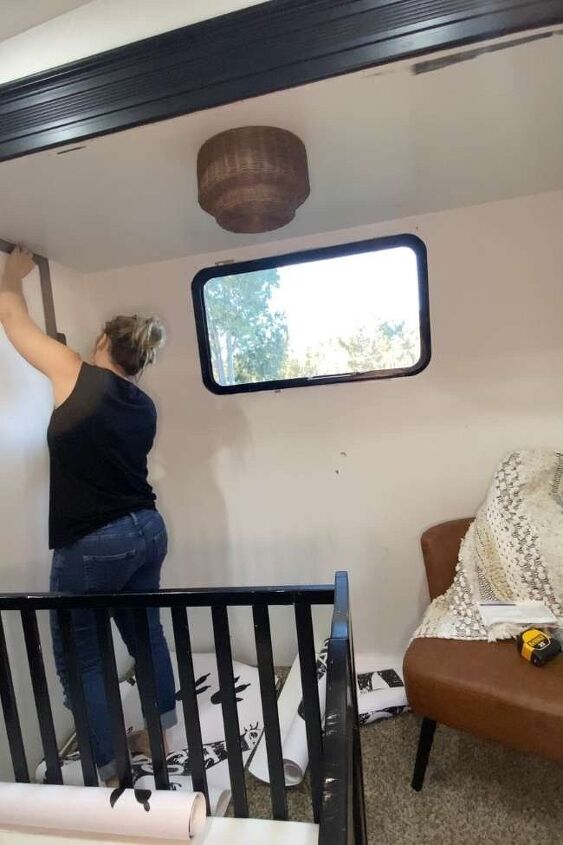
I start every wallpaper project by creating a vertical line with a level and a straight edge where the edge of my first panel will line up.
This framing square is my favorite thing to use for a straight edge. It’s a running joke that it’s a ridiculous thing to keep in such a small space, but it’s honestly one of my most used tools.
When you’re starting in a corner, do not trust that your corner is perfectly straight. Draw the line, thank me later.
If you start your first panel out perfectly straight, the others should go up relatively easy. Though, nothing is even remotely straight in a camper. The walls are crooked, the ceiling is crooked, the floors are crooked… You get the point.
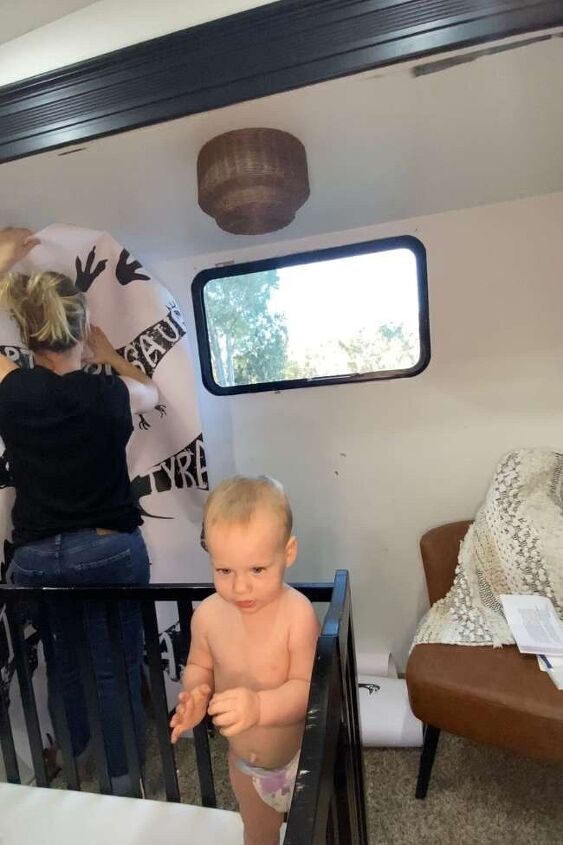
Your first panel will line up to the vertical line you created in the last step. Each panel after that will line up to the one before it. Work your way down the wall until you’ve covered the entire space.
It helps if you have a tiny unhelpful baby to keep you company while you complete this step.
I prefer not to hang the top of my panel exactly at the ceiling, rather I leave a little extra at the top and trim it down later. Then, if anything ends up a little crooked, you don’t have a huge gap on one side.
Once all the panels are hung, use your straight edge and razor knife to trim off the excess parts around the ceiling, floors, and/or corners.
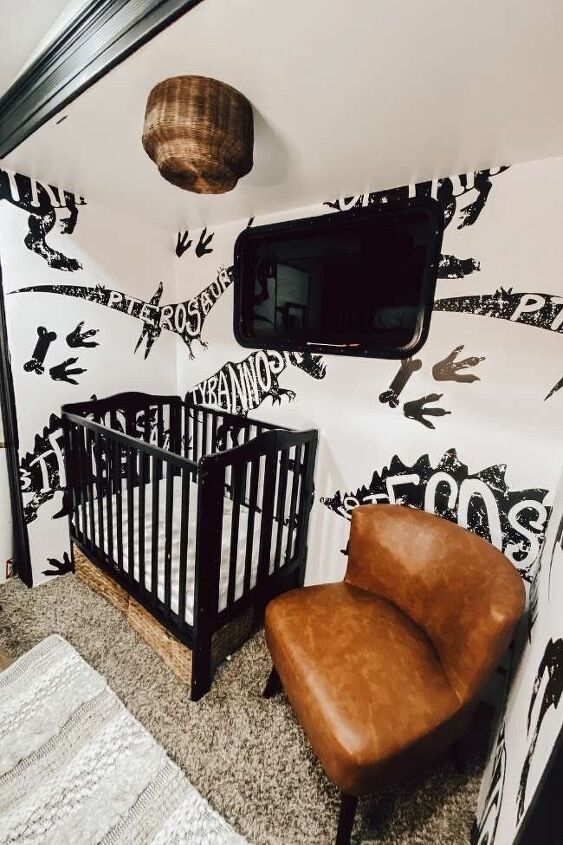
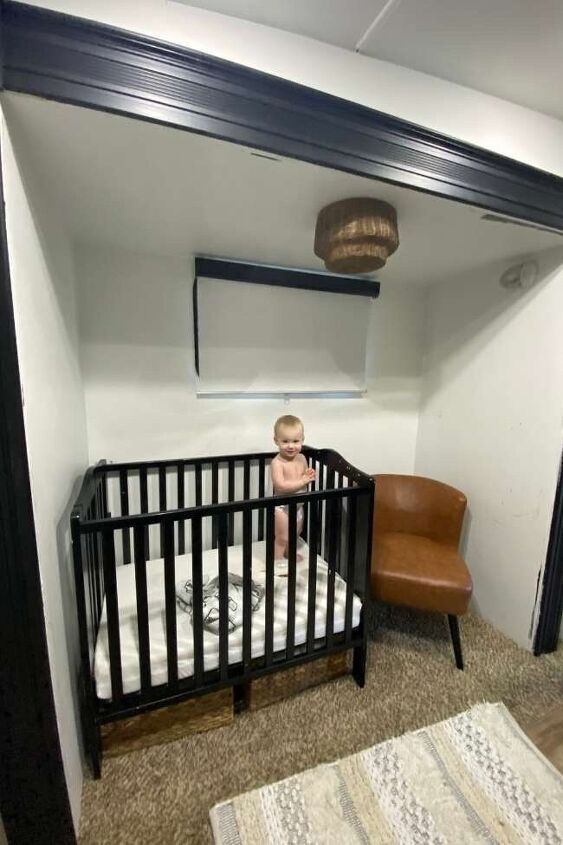
THE RESULTS:
Are you ready to give a wall mural a shot?
SEE MY OTHER PROJECTS AND FOLLOW ALONG ON OUR RV JOURNEY
♥
Sydney


Comments
Join the conversation
Very nice. Great accent wall. Bold pattern but not overpowering. Looks good.
you did a beautiful job, but not for a young baby. Just my opinion. I would have gone with a baby print. Babies love colors, and colors help with the growth of the baby. Then change it when the baby is older.