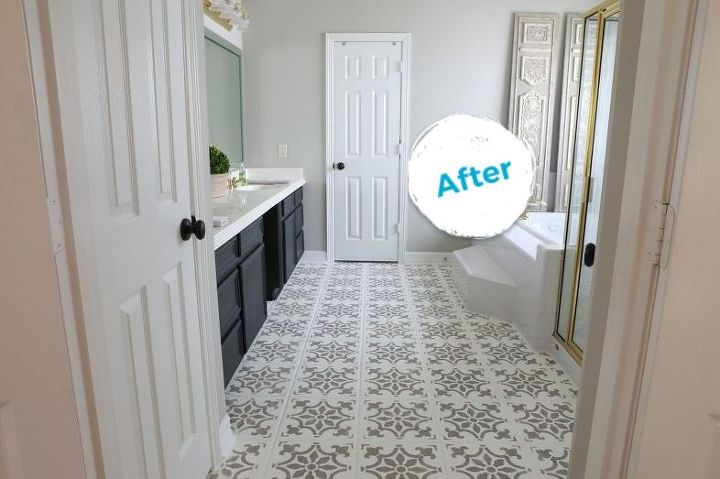
How to Paint a Faux Tile Floor
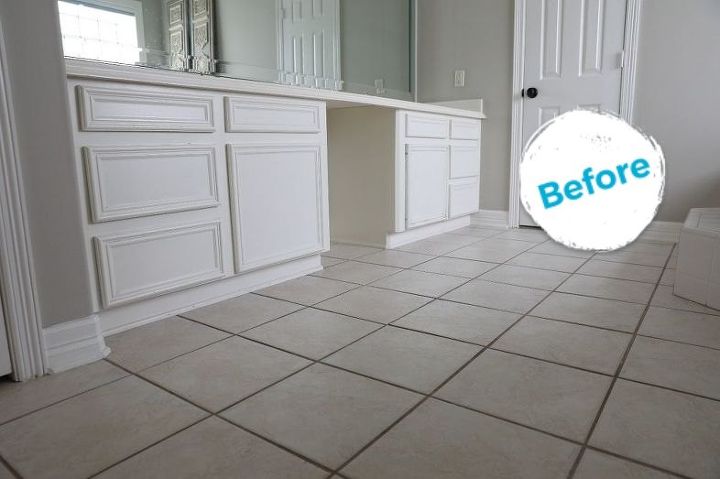
BEFORE the transformation
This boring bathroom floor is about to get an elegant upgrade. Get tutorial here
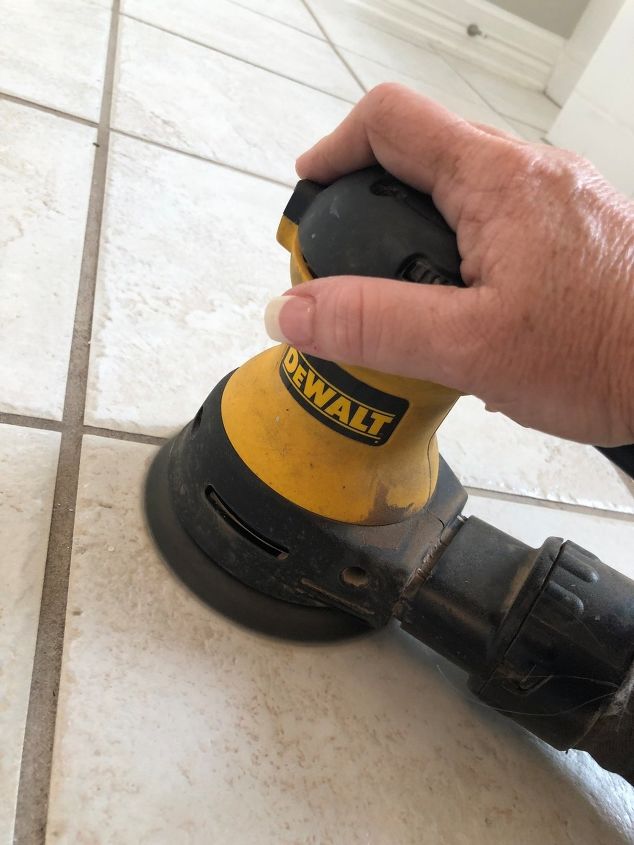
Step 1: Clean and sand
After cleaning, lightly sand your tile to rough up the surface. Vacuum up any debris when you're done. Get tutorial here
Step 2: Clean with a degreaser
Rinse the entire flooring surface with a clear water rinse to be sure to remove any residue left behind by sanding or cleaning. Get tutorial here

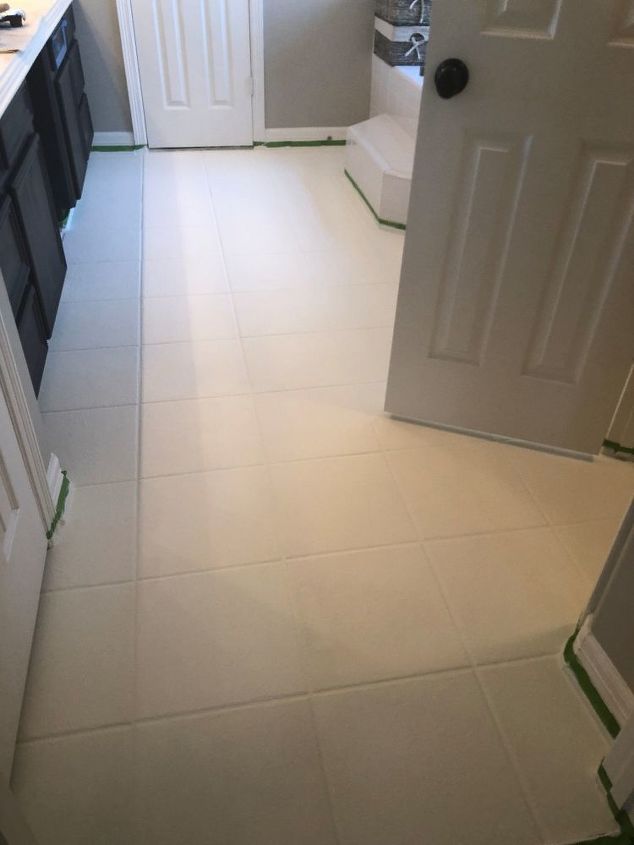
Step 3: Tape and prime
Tape off the walls and apply the first coat of primer starting at the furthest corner from the exit. Get tutorial here
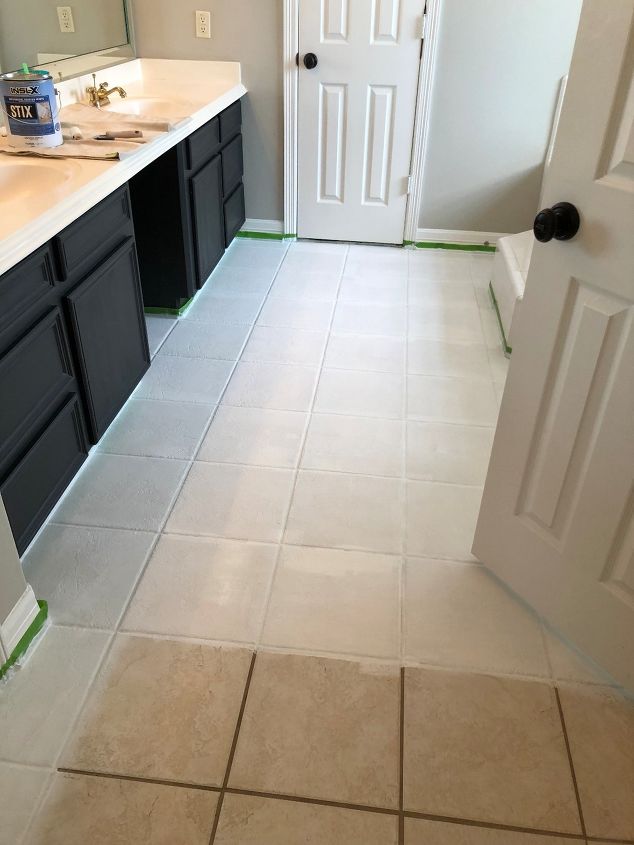
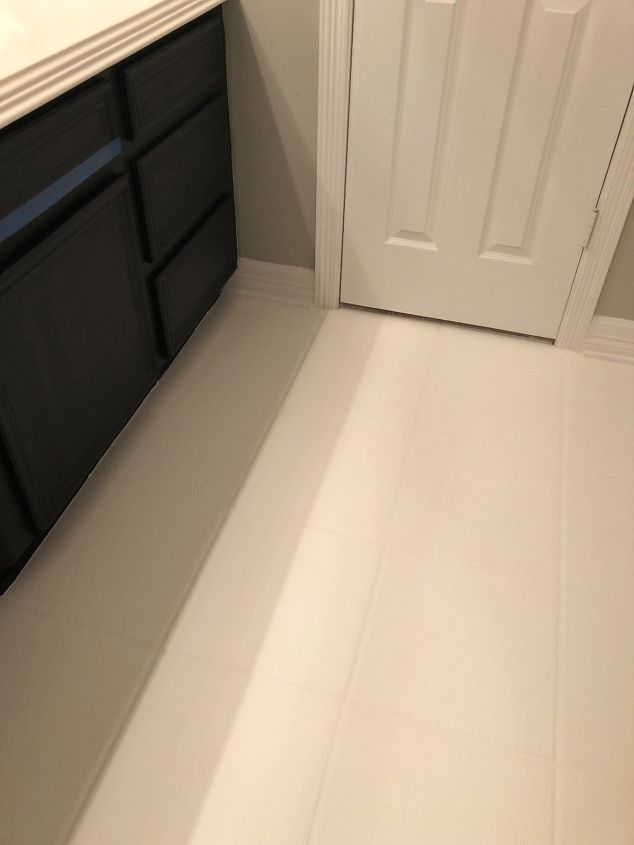
Step 4: Add a second coat of primer
Wait 2-4 hours before applying a second coat. Apply the primer to the entire surface and allow 4 hours of drying time. Get tutorial here
Step 5: Paint
Allow the first coat to dry for two hours and then apply as second coat. Get tutorial here
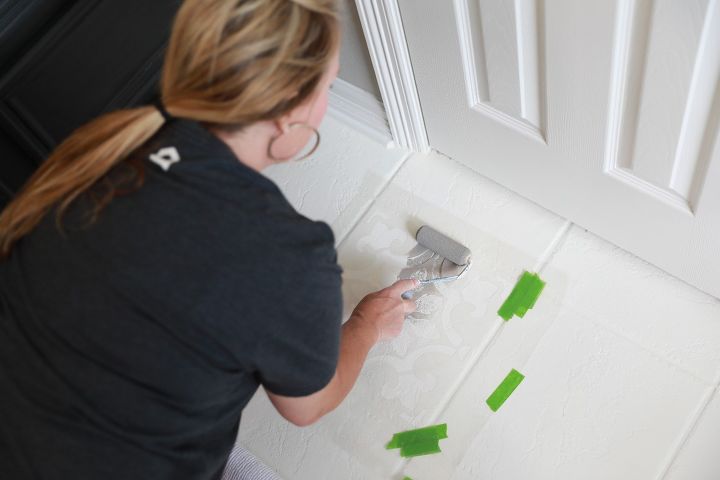
Step 6: Stencil
After the second coat dries, use painters tape to hold your stencil in place. Once your stencil is positioned apply your paint! Get tutorial here
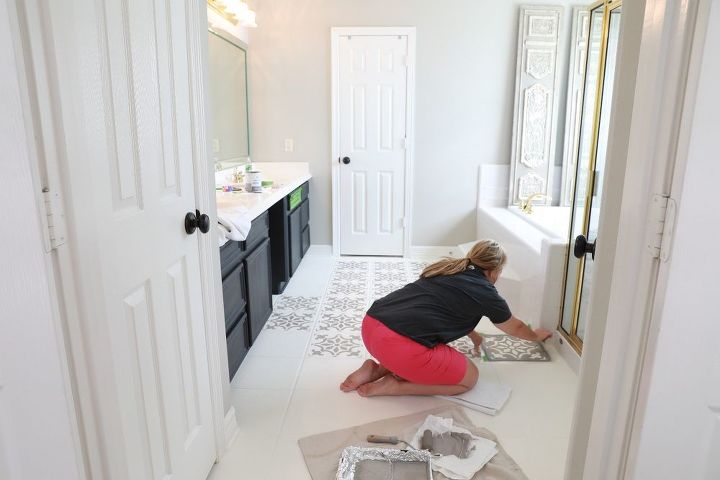
Step 6: Continue stenciling each tile
Continue pulling up your stencil and going to the next tile, etc until your floor is covered. Allow your paint to dry thoroughly. Get tutorial here
Step 7: Seal and done!
Apply 2-4 coats of sealer. When it's dry, pull off the tape, sit back and enjoy your fabulous NEW floor done exclusively by YOU! Get tutorial here

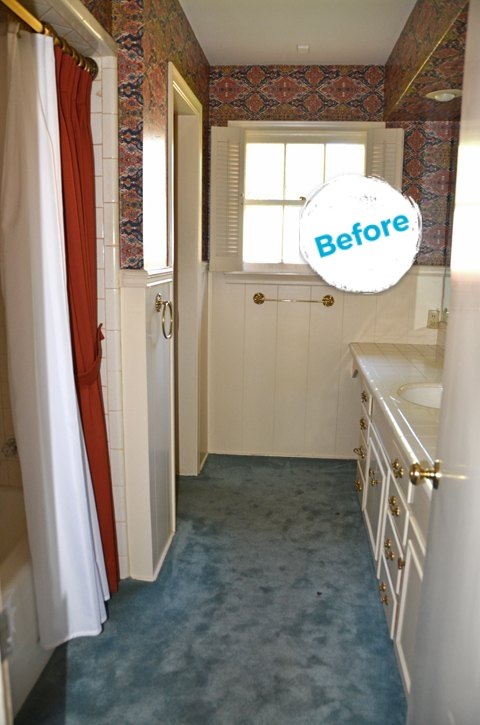
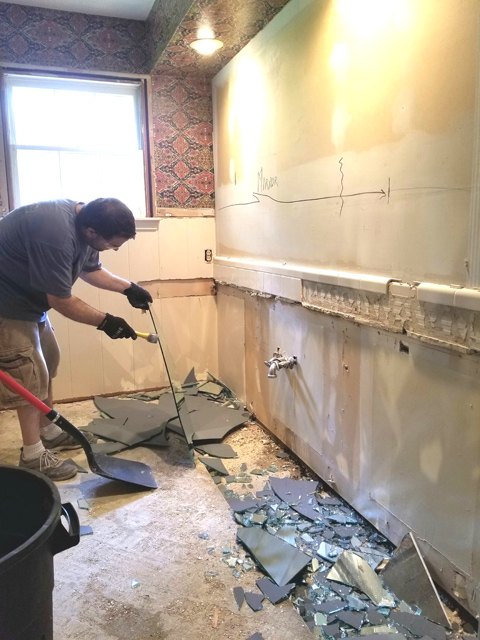
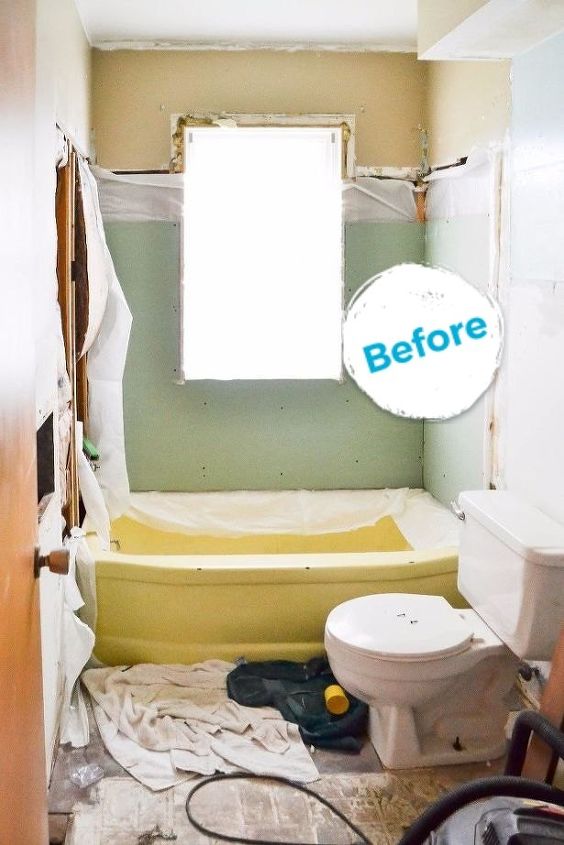
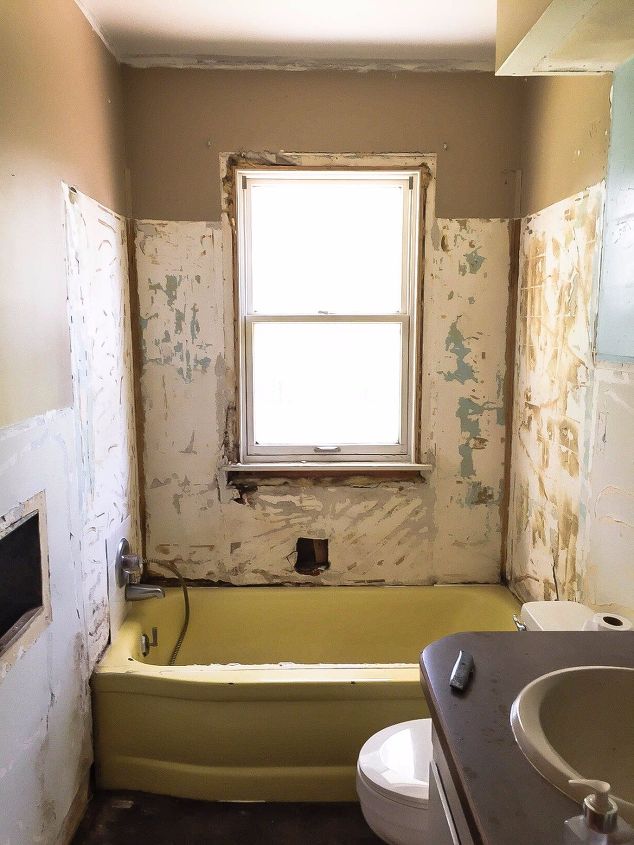
Everything had to go...
The only thing we wanted to save in this room was the tub. Get tutorial here
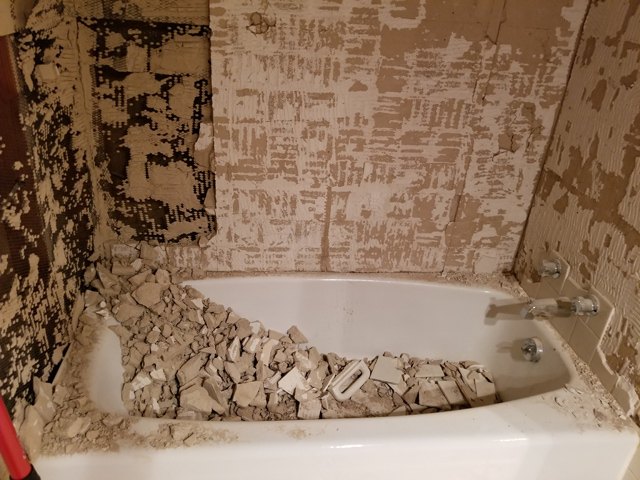
Serious demo
We hired our neighbor’s son next door to help my hubs rip out all the tile. Get tutorial here
This is how NOT to remove a wall mirror! Haha
My husband stood in the hallway and threw a hammer at it. Get tutorial here
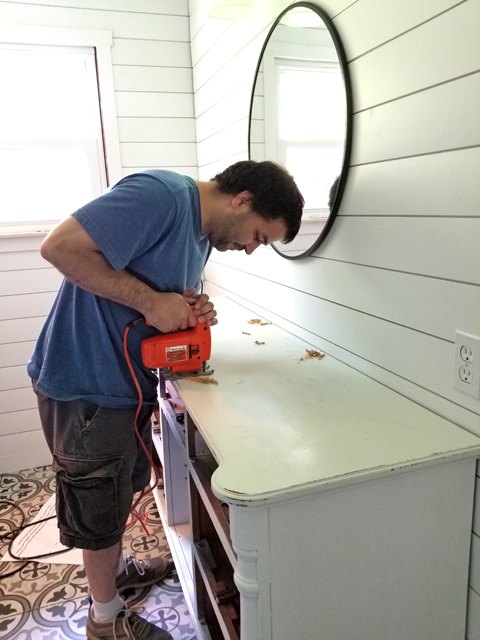
A vintage find
Found this dresser at a vintage market, cut a hole in it and tuned it into a vanity! Get tutorial here
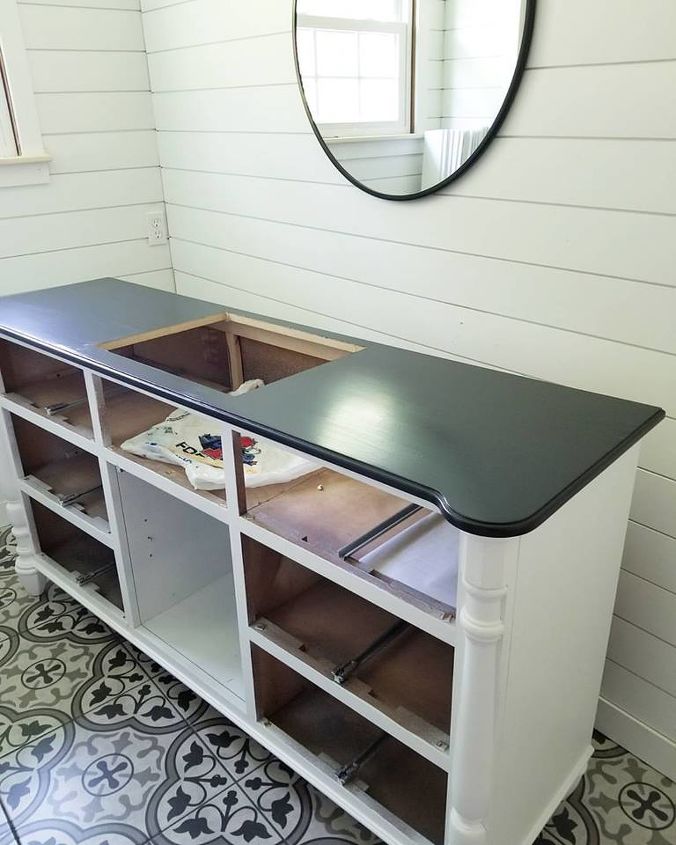
Looks like new!
I repainted it white and the top black. I then put several coats of poly on the top. Get tutorial here
In goes the sink
The sink was purchased at Lowes. It’s called Anna White Farmhouse Sink. Get tutorial here
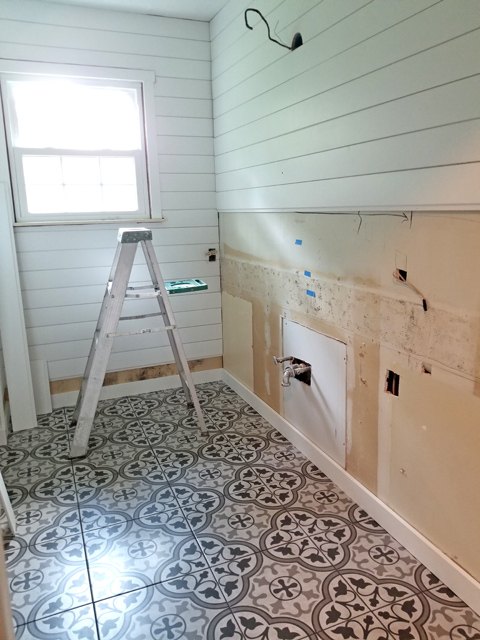
AFTER
This space has gone from nasty to demolished, to beautiful! Get tutorial here


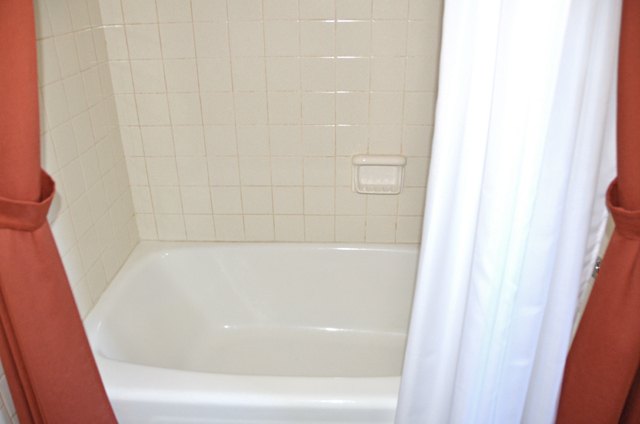
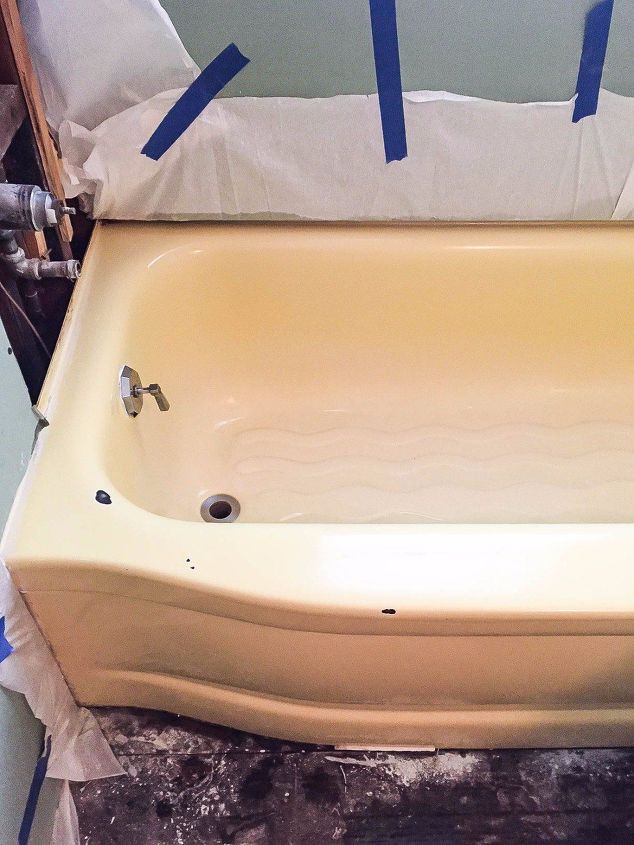
BEFORE
We started demoing the bathroom and decided to paint the bathtub. Yes! Paint it! We had nothing to lose. Get tutorial here
Getting started
We bought the Rustoleum Tub & Tile Refinishing Kit. We read the instructions a few times and went to work. Get tutorial here
Clean and sand
We cleaned the bathtub like a boss with the products suggested on the back of the box. Then, we sanded the tub. Get tutorial here
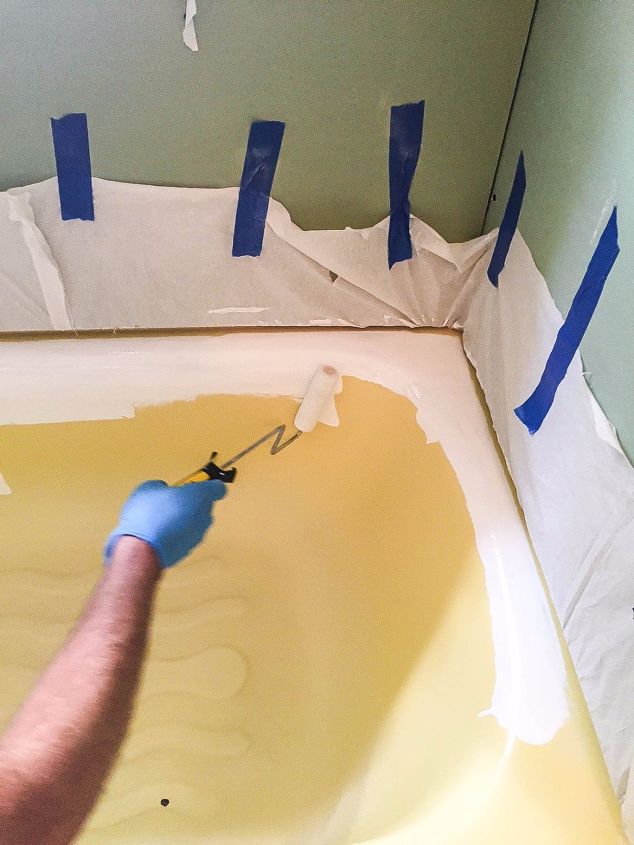
Time to paint!
We used a roller in the beginning, but the paint brush was easier to control. Get tutorial here
Next: Apply a second coat
After the first coat dried, it was time to put on the second coat. Get tutorial here
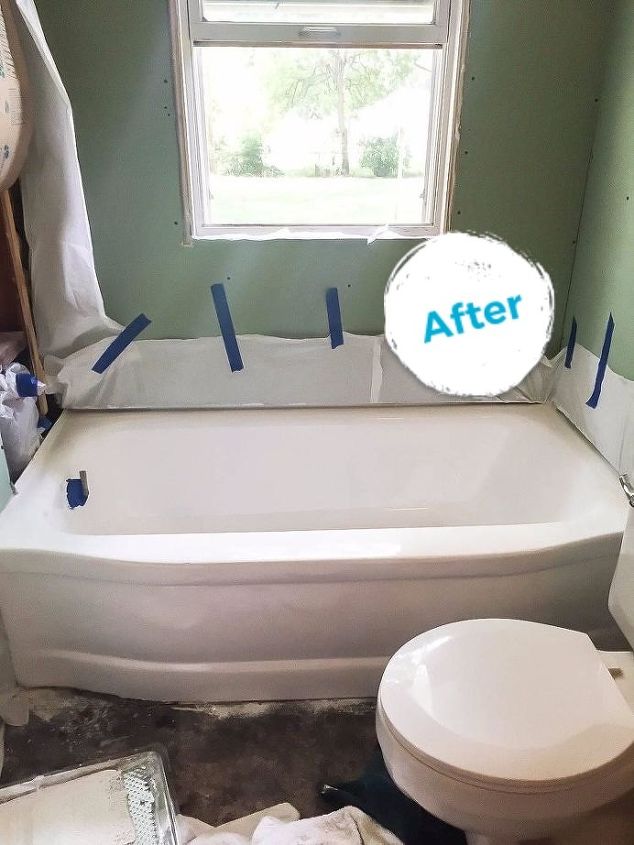
Look at the yellow tub now!
I am so glad we decided to paint it. It saved us to much time, money and work and it looks brand new. Get tutorial here
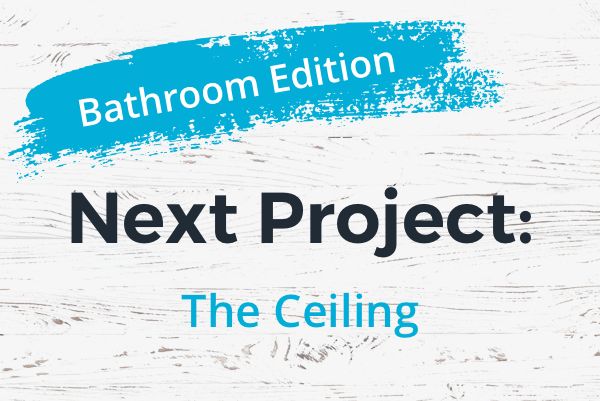
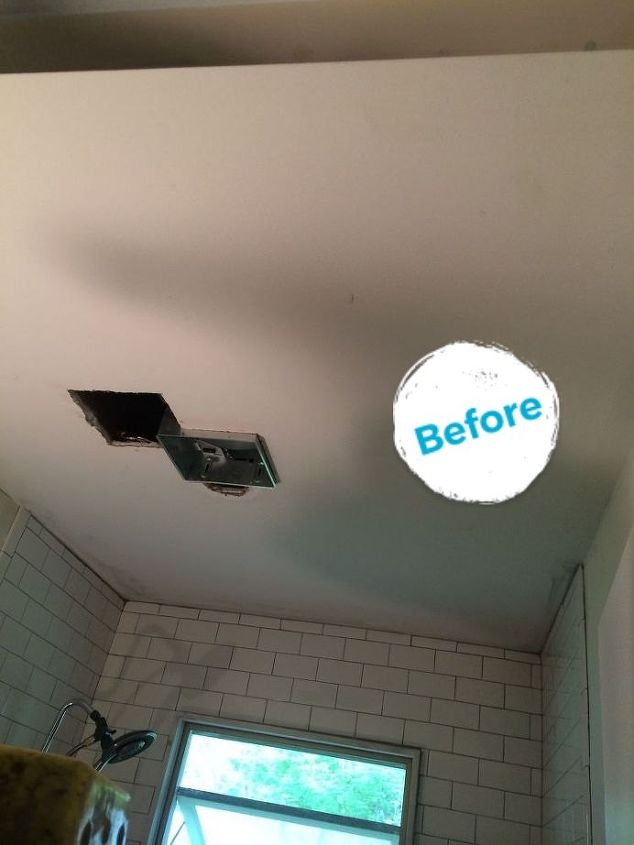
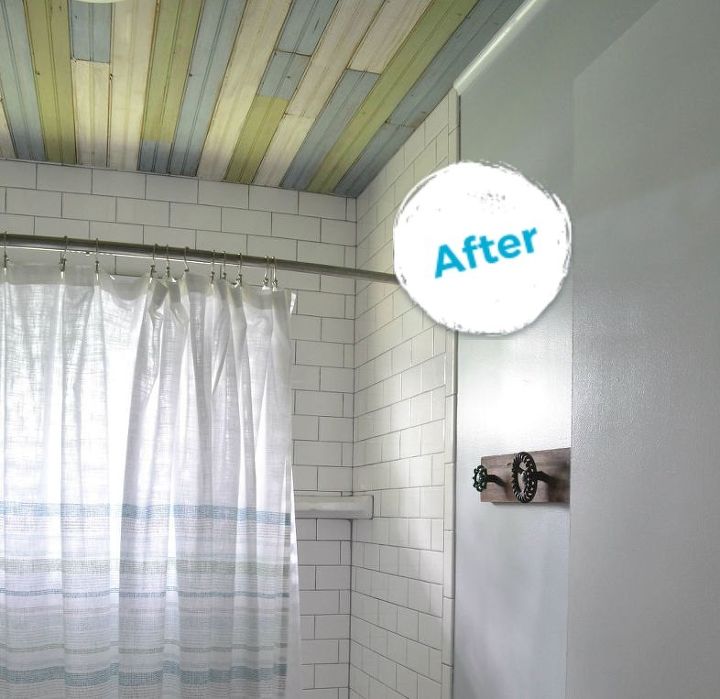
BEFORE
I want to show you how we created the focal point in the small space - the ceiling. Get tutorial here
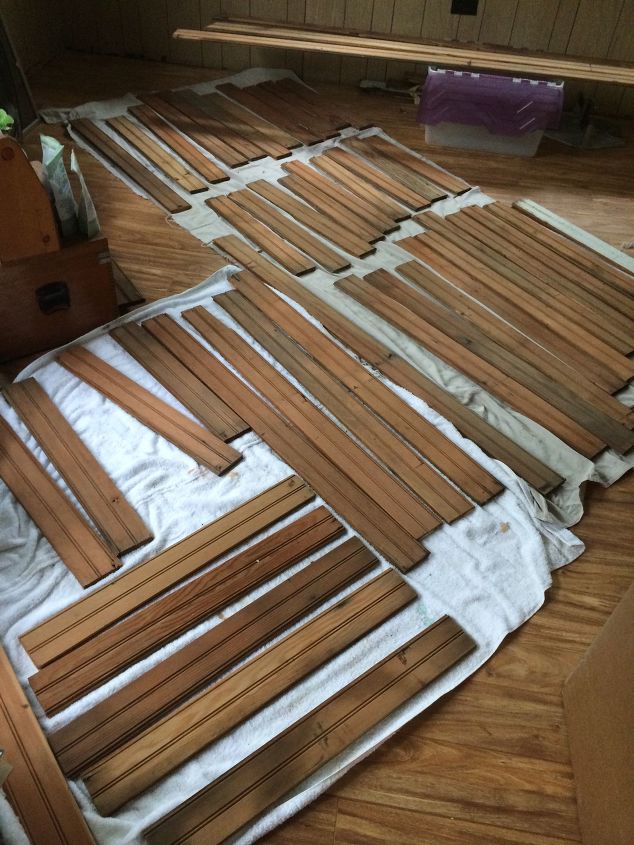
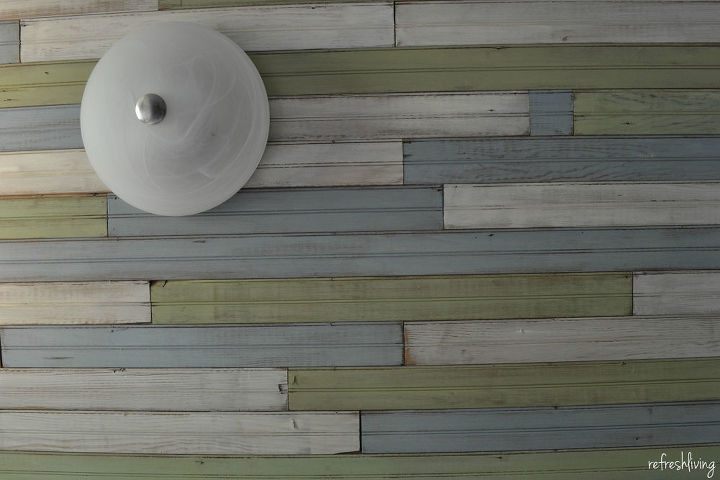
The materials:
This beadboard came from an old milk barn in Wisconsin and was already in various lengths. Get tutorial here
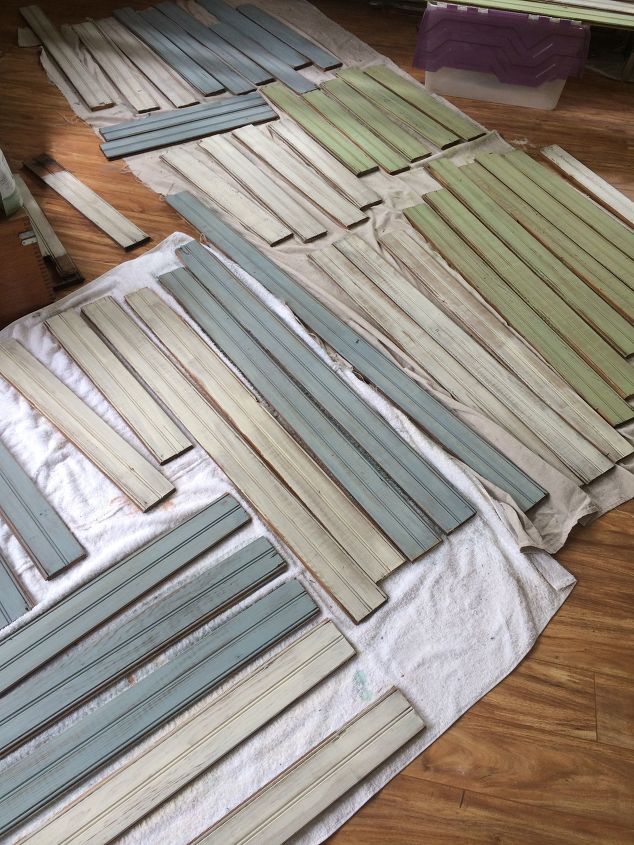
Clean and paint
I cleaned up the pieces, and painted them with milk paint. Get tutorial here
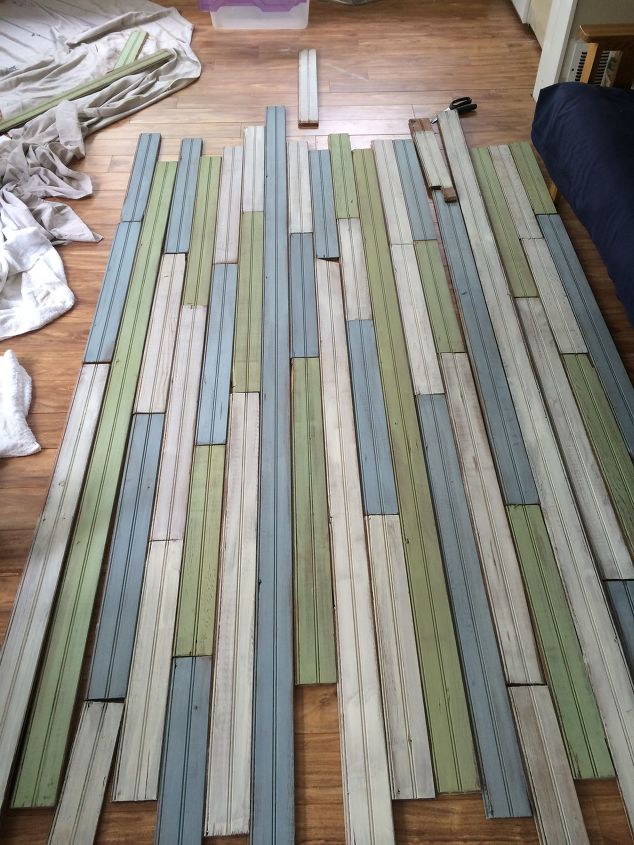
Next: Arrange your boards
I measured the ceiling and then taped off the same size rectangle on the floor, giving me a template to work with. Get tutorial here
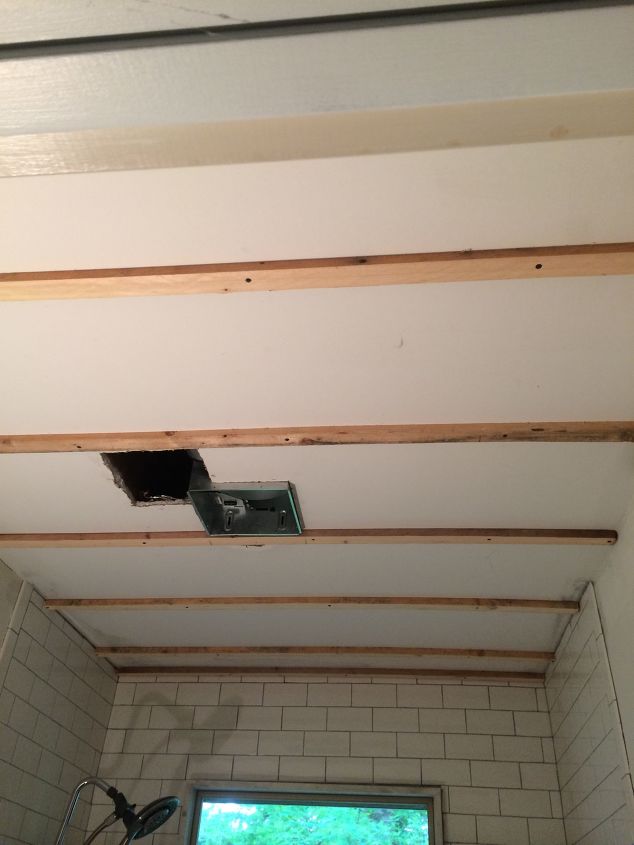
Prepare the ceiling
I used furring strips (1" x 2") and just screwed them into the joists. Get tutorial here
Up go the boards
We air-nailed the boards right into the furring strips. We had the whole thing installed in 30 minutes! Get tutorial here
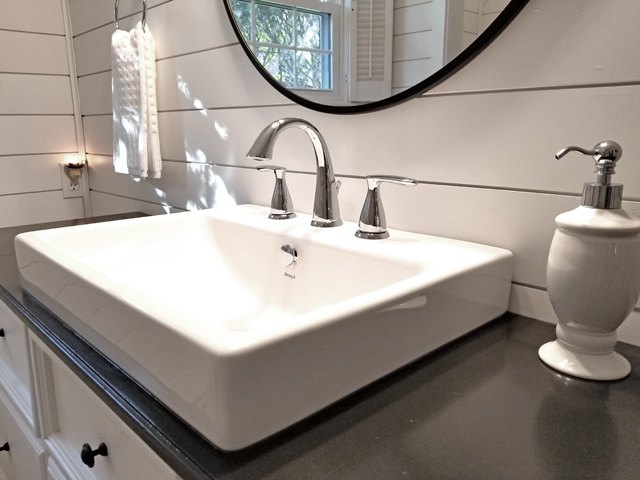
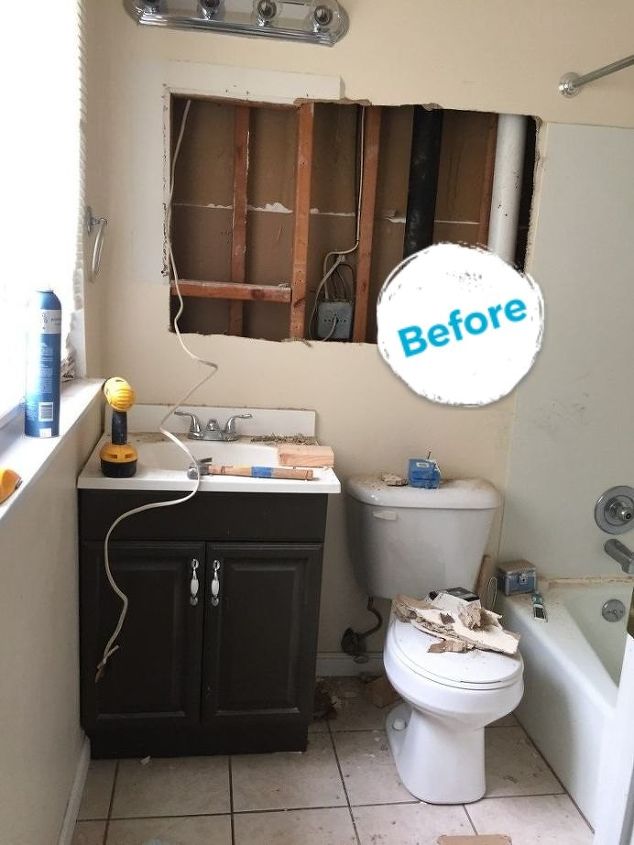
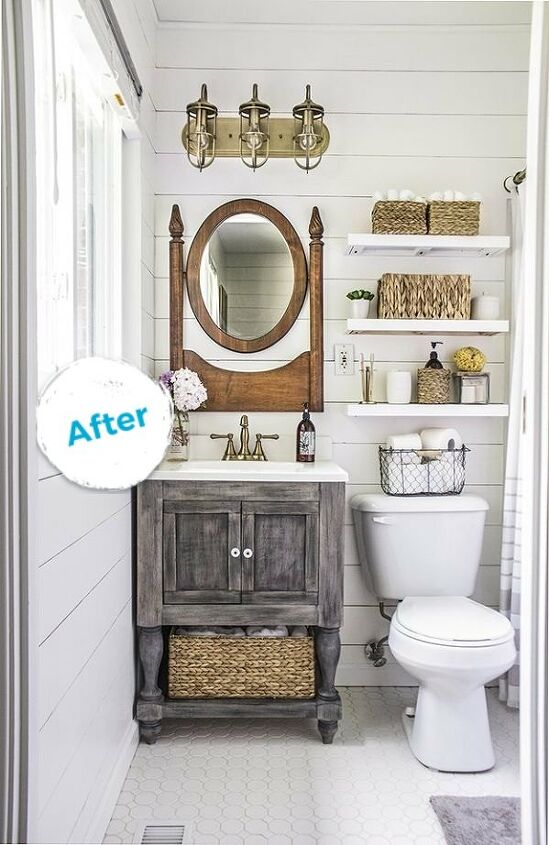
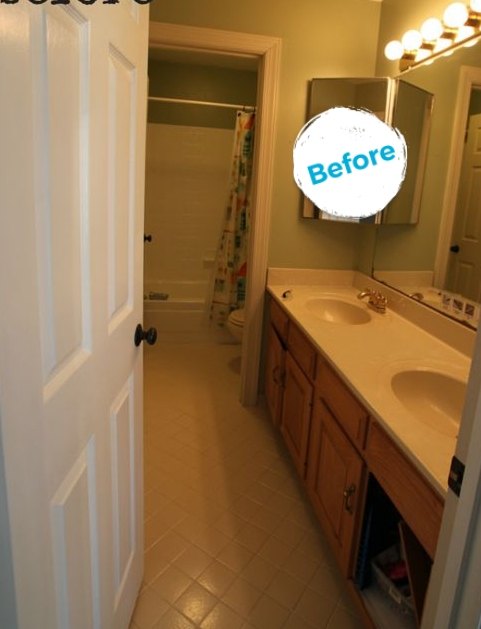
BEFORE
We were able to completely transform this space with lots of built-in character! Get tutorial here
First: The walls
I added faux shiplap by using 1/4" plywood and attaching it to the wall with a nail gun, liquid nails, and spaced with coins. Get tutorial here

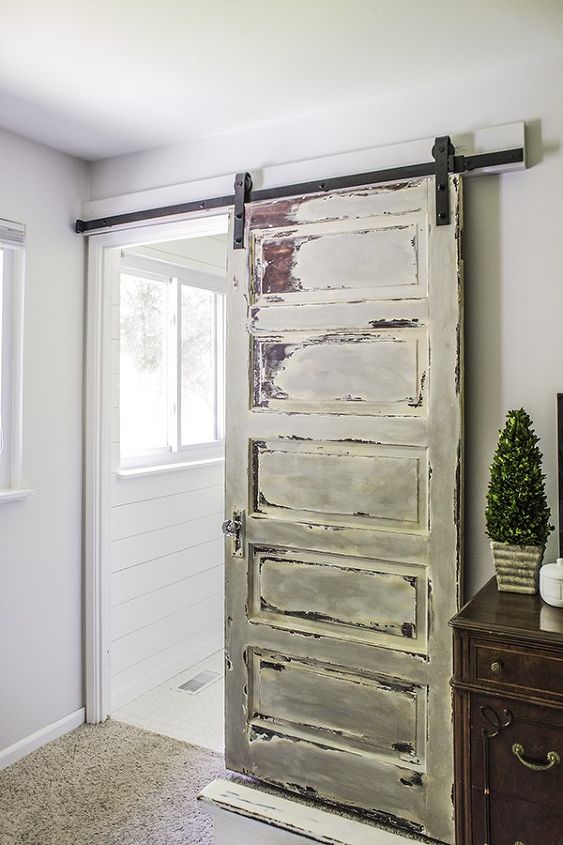
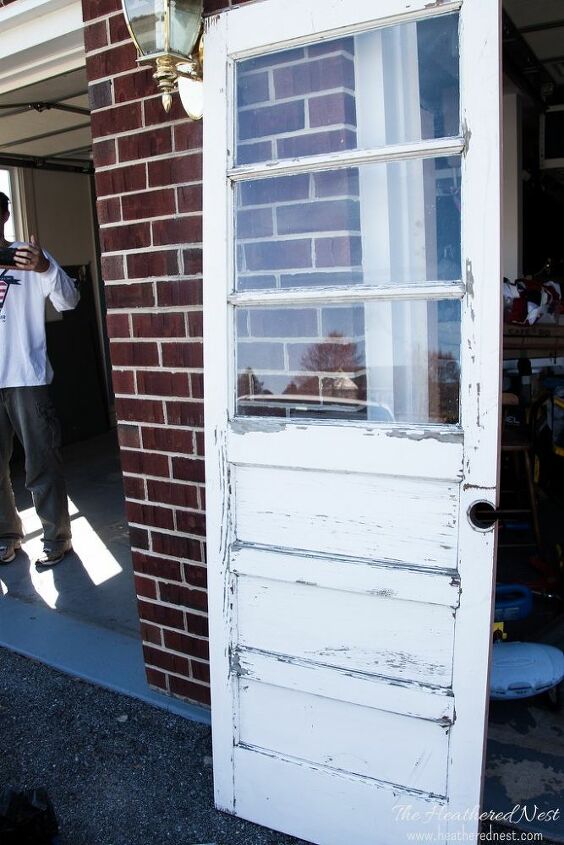
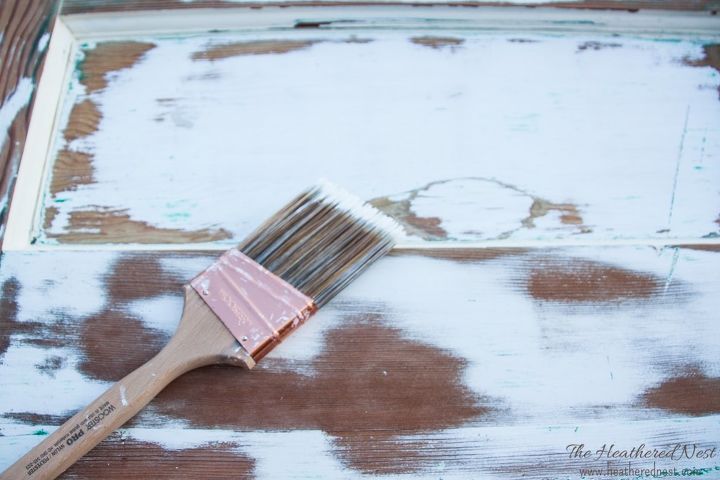
Next: The Door
The door was painted with several layers of paint, but I scraped some off to give it a layered look, adding some visual interest. Get tutorial here
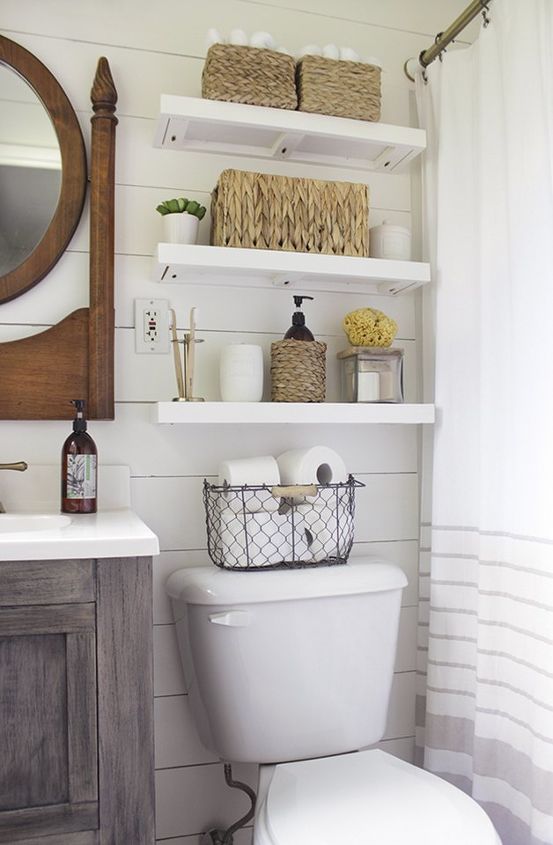
After that: Add storage
The baskets and jars hide all our toiletries and keeps things from piling up on the limited counter-space. Get tutorial here
DONE!
The finished bathroom is something I am very happy with. Total cost for bathroom makeover: $1250 Get tutorial here
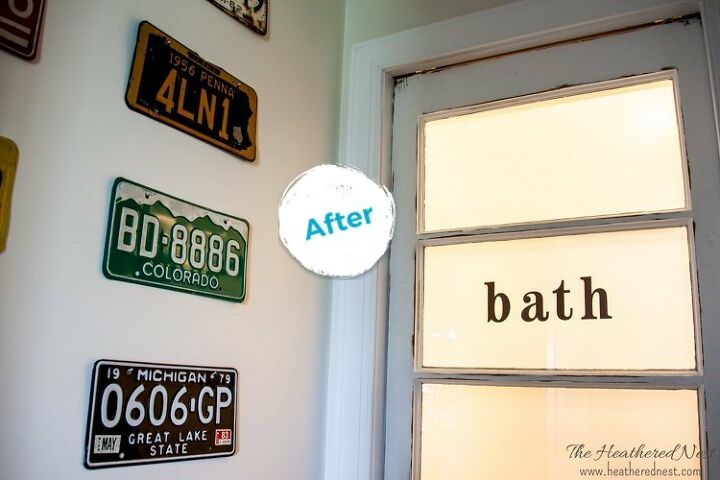
This was the space BEFORE
The thing about this bathroom space is that there is absolutely no natural light. Get tutorial here
Solution: A door with windows!
Found it on a Facebook yard sale site! This beauty was to be our new (ok, old) pocket door. Get tutorial here
First: Sand and paint
After sanding, I painted it with Behr's Ultra Pure White Semi-Gloss paint. Get tutorial here
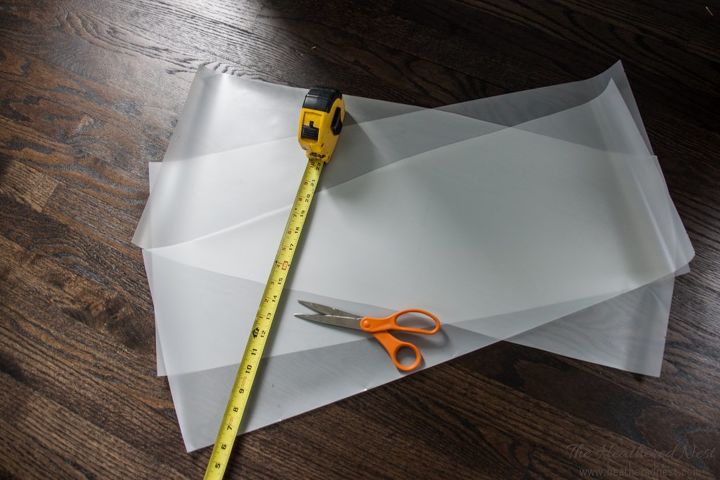
Then: Add Privacy
Privacy film is inexpensive, and it's something that anyone could DIY. Get tutorial here
AFTER
We were able to maximize the little light we had, while keeping things in the privy private. Win, win I think! Get tutorial here