10 Budget Room Makeovers That Only LOOK High-end!
Welcome to the world of affordable elegance! In this post, we showcase 10 remarkable room makeovers that prove you don't need a hefty budget to achieve a high-end look.
From clever design tricks to strategic DIY projects, these transformations will inspire you to create stunning spaces without breaking the bank.
Get ready to uncover the secrets behind these budget-friendly makeovers that exude sophistication and style.
Exploring cost-effective ways to renovate your home?
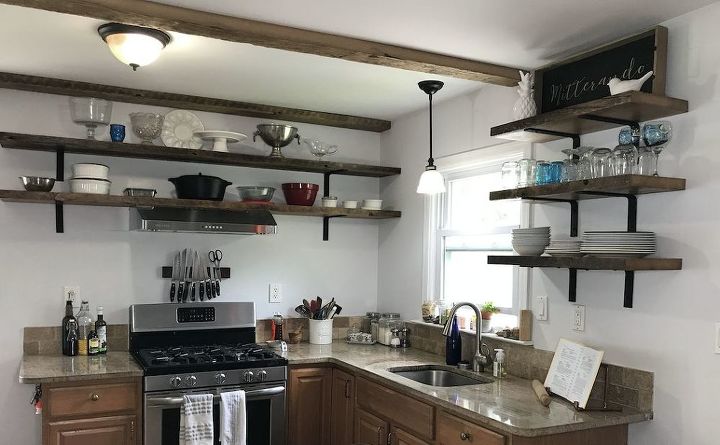
1. Add Space to Your Kitchen
Discover the latest kitchen craze: open shelving! Join Rob & Courtney M as they share their journey to create a bigger and more inviting kitchen with a limited budget.
Learn how they tackled this two-fold project, including repurposing cabinets for basement storage. Follow their step-by-step guide on installing brackets, attaching shelves, and adding a touch of personalization.
Get ready to embrace open shelving and create a cleaner, more open look for your kitchen. Get tutorial here
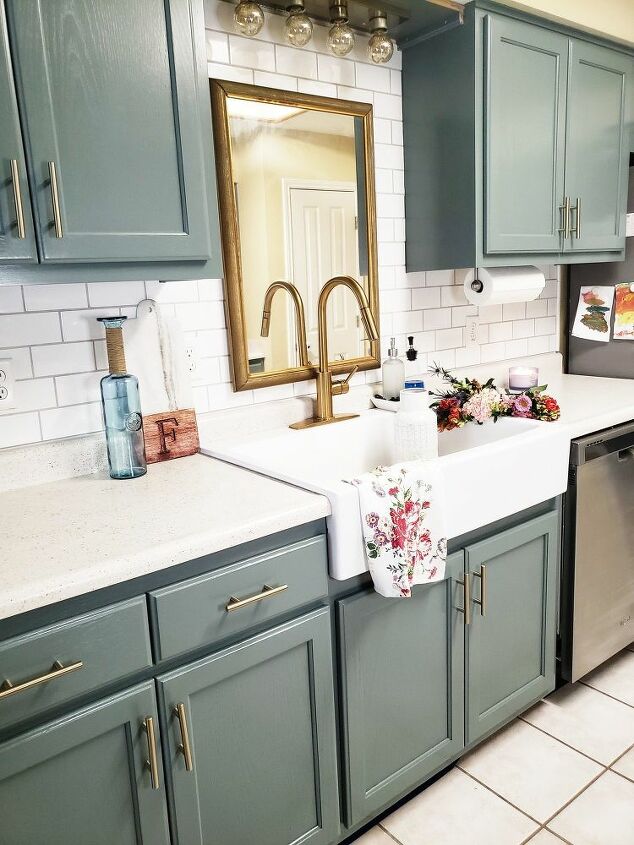
2. Create Stylish Kitchen Counters
Join Michelle from Breaking Down the Box as she takes on her kitchen transformation, one project at a time. Follow along as she tackles her outdated countertops with an affordable solution.
Discover how she partnered with Daich Coatings to refinish her counters using their Mineral Spreadstone kit in Natural White. With a budget-friendly price of $125, Michelle shares her step-by-step process, from prepping the counters to applying the clear coat.
Embrace this beginner-friendly option to give your kitchen a bright new look. Get inspired and explore cost-effective ways to update your kitchen! Get tutorial here
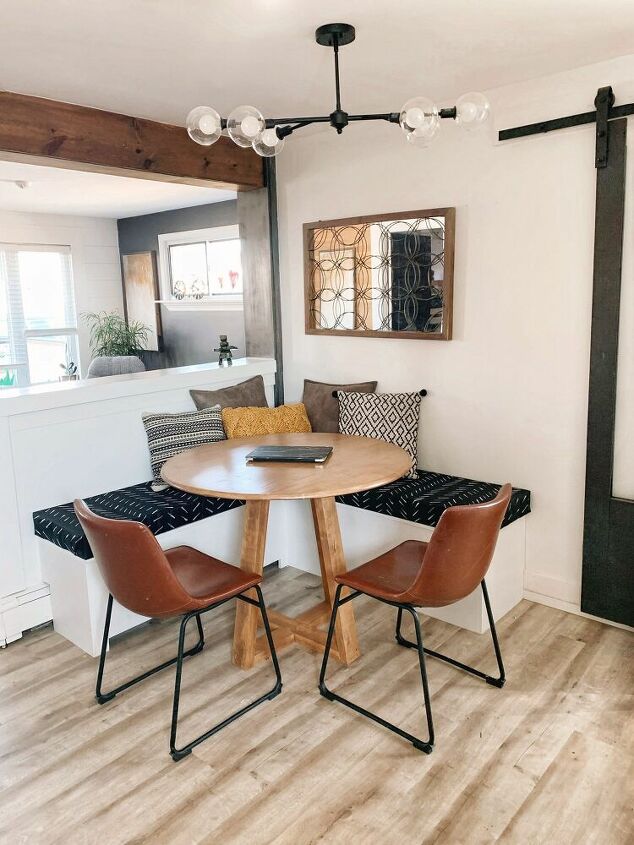
3. Build a Charming Kitchen Nook
Join Denika Coakley as she guides you through the process of building a kitchen nook that saves both space and money. Discover her tips and tricks to optimize materials, allowing you to achieve the same stunning results with only half the material cost.
Don't be intimidated by the size of the project; Denika assures you that it's straightforward, with simple cuts and building techniques. Follow her step-by-step instructions, from planning your space with tape to attaching a cleat and constructing the sides. Finish it off with a prime and paint.
It's time to transform your kitchen with this fun and budget-friendly project! Get tutorial here
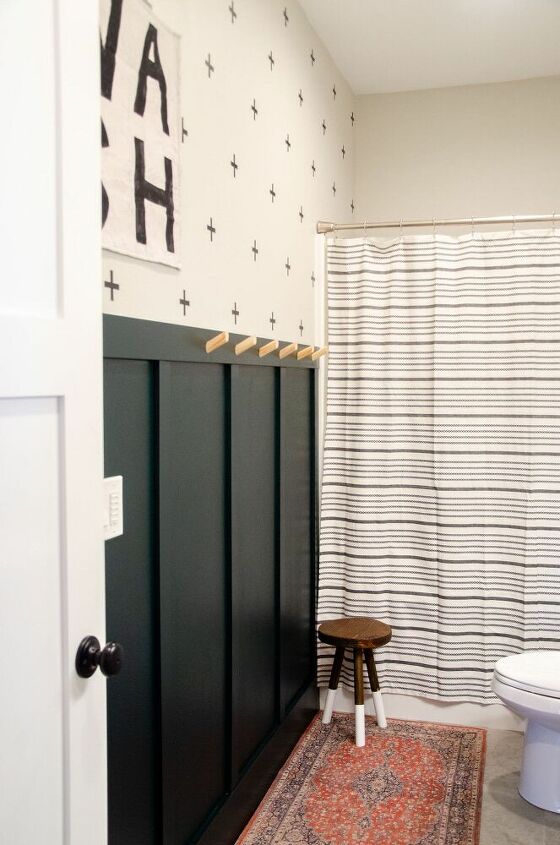
4. Unveil Your Bathrooms Hidden Potential
Stephanie shares her journey of transforming a plain and boring kid's bathroom into a vibrant and lively space. With a desire to add some color, she chose Benjamin Moore Salamander, a dark green hue that brought a refreshing change to the gray-dominated room.
Keeping her budget in mind, Stephanie utilized leftover materials for a cost-effective board and batten wall treatment and created DIY cross decals using black tape. She added wooden dowel towel holders for a charming touch and framed the mirror with a 1x2 board. With spray-painted lighting fixtures and homemade decor, Stephanie completed the look.
Follow her fun and wallet-friendly approach to create a stunning bathroom update for around $70! Get tutorial here
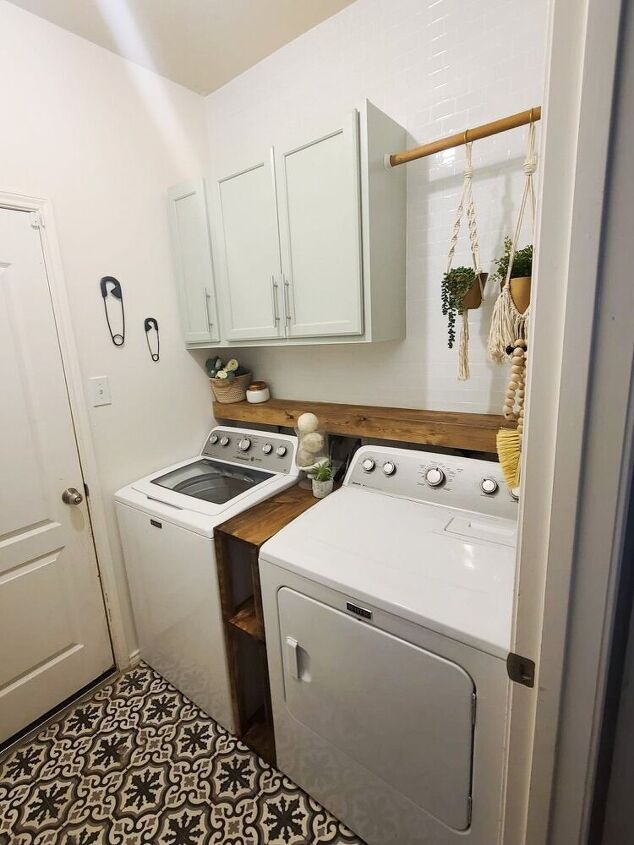
5. Give Your Laundry Room an Gorgeous Makeover
Join Kelsey from A Dabbled Dwelling as she embarks on a budget-friendly laundry room makeover to enhance storage and functionality.
With a creative vision in mind, she starts by demolishing the existing built-ins to make way for cabinetry. Kelsey shares her step-by-step process, from repairing the walls and giving the room a fresh coat of white paint to installing affordable unfinished cabinets from Lowe's. She provides handy tips like using a 2x4 as a ledge for easy installation and caulking for a professional finish. Kelsey adds a stylish touch with peel and stick subway tiles for an affordable accent wall and creates shelves to hide utility outlets and maximize space.
Discover how she transforms her laundry room into a functional and beautiful space without breaking the bank. Get tutorial here
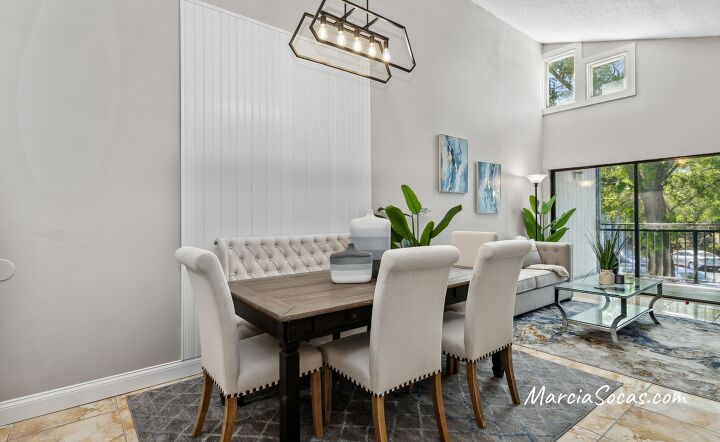
6. Create a "Separate" Dining Area
Join Marcia Socas as she transforms a condo's dining and living area with a creative twist using a beadboard accent wall.
In this sponsored project by, Marcia showcases the versatility of PVC trim and mouldings. With the reversible 6" beadboard panels, she effortlessly creates a visual separation while drawing attention to the height of the ceilings. Follow her step-by-step guide, from measuring and nailing the panels to finishing with quarter-round and a wainscotting cap.
The result is a stunning DIY beadboard accent wall that adds distinction and charm to the space. Get tutorial here
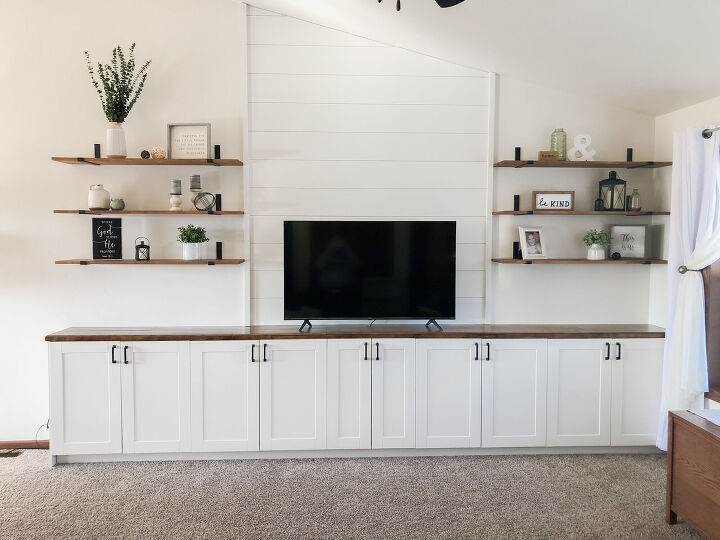
7. Add Charming Living Room Built Ins
Join Fiercely Blessed in their journey to convert a plain vaulted ceiling into a functional and inviting wall full of storage. This DIY project incorporates wall cabinets, faux shiplap, and pine boards to achieve a complete look. The best part? It's incredibly affordable compared to custom cabinetry, making it accessible for anyone to tackle.
With two kids and a desire to declutter and define their living room, the couple ventured to Menards for quality stock cabinets from Klearvue. They customized the cabinets by using wall cabinets with added legs, providing durability and flexibility for future flooring changes. The countertop was crafted from plywood and pine boards, stained and sealed for a beautiful finish.
Floating shelves and shiplap were added to enhance the design. Despite not being cabinet installation professionals, FiercelyBlessed achieved a level and secure result. The project not only solved their storage needs but also created a cozy atmosphere and visually separated their living and dining areas.
With a touch of creativity and a willingness to take on a DIY adventure, this living room transformation proves that affordable built-ins are within reach. Get tutorial here
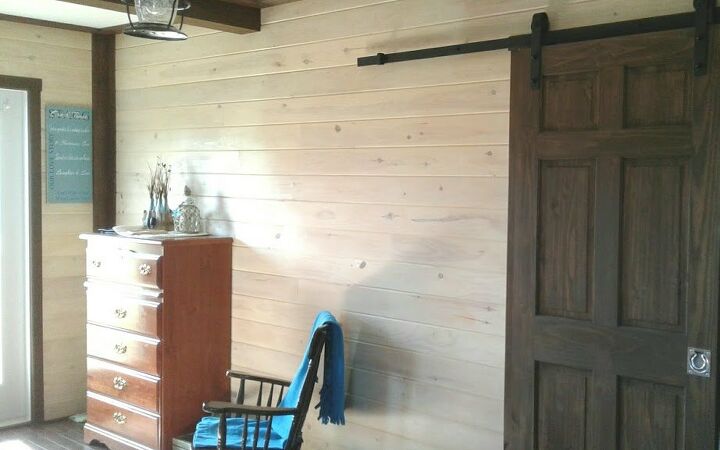
8. Merge Two Bedrooms into One
Join Skilled Thrifty Creatives in their journey to transform two small bedrooms into a larger, more inviting guest room. With their kids having moved out, they saw an opportunity to create a spacious retreat.
The project began by removing the dividing wall between the rooms and repurposing the electrical wiring for improved lighting. With their experience in construction, they tackled the demolition and insulation themselves, prioritizing heat conservation for their cold Northern climate.
Custom-created pine tongue and groove boards were installed on the walls, providing a cozy and customizable look. After staining the boards with a water-based wood conditioner and a shade called Honeydew, the transformation was taking shape. They chose a walnut-colored laminate floating floor and added a cream, tan, and brown wavy-patterned rug for a stylish touch.
The room's aesthetics were completed with coffee-stained custom corners, a melon-colored accent wall, and a matching brown door on barn-style tracks. The result is a bright, airy, and spacious guest room perfect for relaxation, TV viewing, and reading in the sunshine.
This project demonstrates how a creative mindset, some construction knowledge, and a willingness to DIY can turn two small rooms into a maintenance-free haven without breaking the bank. Get tutorial here
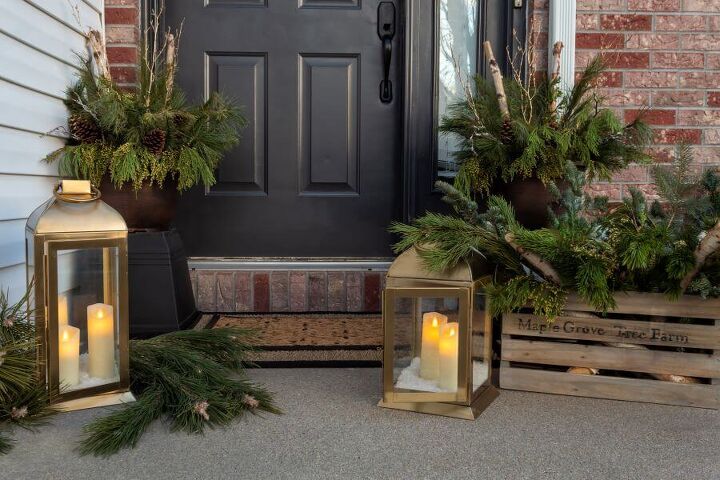
9. Refresh Your Porch for Winter
Join Jen Svendsen from Midwest Life and Style as she gives her front porch a delightful winter refresh for the new year, with a little help from The Home Depot.
Despite the unpredictable Midwest weather, Jen was determined to tackle this ambitious project and create a whole new porch experience. Her to-do list included priming and painting the front door, refreshing the window sidelight and trim, creating a winter wreath, adding new rugs and a doormat, making DIY winter porch pots, and incorporating decorative touches like a rustic crate and gold lanterns.
Jen's attention to detail and love for layering rugs and greenery transformed her porch into a cozy and inviting space. With the power of paint, she revived her front door with a stunning dark gray shade, while the DIY porch pots brought the fresh scent of pine and a touch of elegance. The finishing touches, including a DIY winter wreath and a rustic wood crate, added the perfect charm to complete the winter porch refresh.
Thanks to The Home Depot, Jen was able to find beautiful and affordable decor items that made a big impact without breaking the bank. This simple yet stylish winter porch refresh is a wonderful way to start the new year and bring joy to your home. Get tutorial here
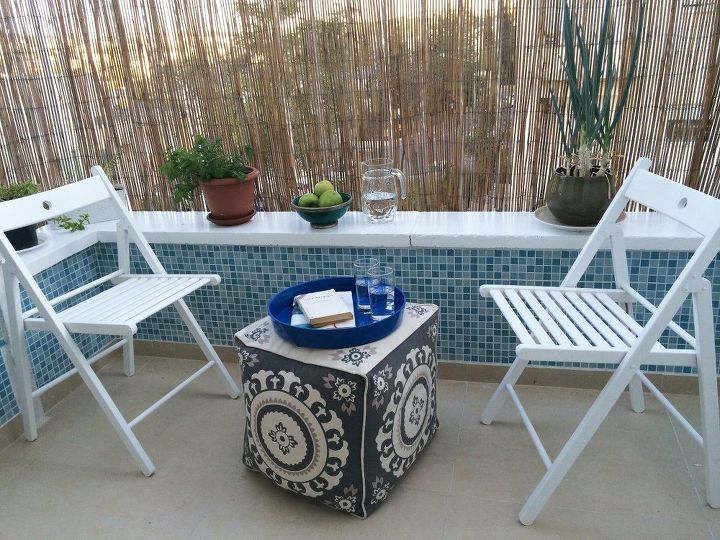
10. Make the Most of Your Teeny Tiny Balcony
Join Tova Pearl as she takes on the challenge of transforming her small and worn-out balcony into a cozy and inviting space on a budget.
With water damage on the walls and a desire for a refreshing blue theme reminiscent of Mediterranean tiles, Tova embarked on a tiling project that brought charm to her balcony. In a short video documenting the process, she shares her journey of scraping off paint, preparing the surface, applying mortar, and carefully laying down the blue mosaic tiles.
Tova's attention to detail ensured that each tile was firmly in place, giving her balcony a touch of Mediterranean flair. The grouting process was the fun part, as she mixed and applied the grout to achieve a clean and polished finish.
Along with the tiling, Tova painted the stone ledge with a fresh coat of white paint and added a DIY bookshelf made from shoe racks. Completing the transformation with affordable Ikea chairs and a pouf, Tova created a lovely space for relaxation and enjoyment.
Her resourcefulness, limited time, and low-budget approach resulted in a beautiful balcony where she looks forward to sitting, sipping a glass of wine, and escaping into a good book. Get tutorial here