


A Simple Winter Front Porch Refresh For The New Year
A new porch for the new year! See how I gave our front porch a simple winter refresh with some help from my friends at The Home Depot.

*This post is generously sponsored by The Home Depot. All opinions shared here are 100% my own. This post also contains affiliate links for your convenience. To learn more, you may read my Disclosure Policy. Thank you for supporting my blog and the brands I truly love!
A Simple Winter Front Porch Refresh For The New Year
Next to the dining room, our front porch is one of my favorite spaces to decorate each season. It may be tiny, but that doesn’t discourage me from finding creative and unique ways to spruce it up and add some curb appeal to our home.
Last year’s winter porch was neutral with minimal decor. It was just a bit of greenery, some layered rugs, and a simple wreath. That was it. No muss, no fuss.
Looking back to last year, I think I was struggling with a big-time case of burnout from the holidays. It’s such a busy season! I’m pretty sure it was all my poor brain could handle at the time.
Decorating our home is one of the things that brings me joy. So when it’s more stressful than fun, I know it’s time to reevaluate. This time around, to bypass the holiday burnout, I planned ahead to create a simple winter front porch refresh for the new year with some help from my friends at The Home Depot.
A New Porch For The New Year
Our weather can be a bit unpredictable this time of the year. So much so that we have a saying here in the Midwest. If you don’t like the weather, just wait a bit, and it will change. And it’s true! One minute we can be in the middle of a blizzard, and the next, it can be 50 degrees.
With the constant changes, I knew that this refresh was an ambitious project to tackle in the month of December. But I was determined to finish in time to have a new porch for the new year.
To-Do List
- Prime and paint the front door
- Paint the window sidelight and surrounding trim
- Create a winter wreath
- Add a new rug and doormat
- Make DIY winter porch pots
- Add decorative touches, like a rustic crate and gold lanterns
Preparing The Door And Trim For New Paint
Before I could paint the door and the surrounding trim, I had some prep work to do. The paint was chipped in several spots and needed to be fixed. It’s been an eyesore for several months now, so I was more than ready to roll up my sleeves and get to work.

Since this was my first time painting our wood trim, I referenced The Home Depot’s online how-to guide for help. There are several ways you can remove old paint from wood. You can use a heat gun, some paint stripper, or you can use some sandpaper. Since I only had a small area to repair and did not need to remove all of the old paint, I opted to go the sandpaper route.
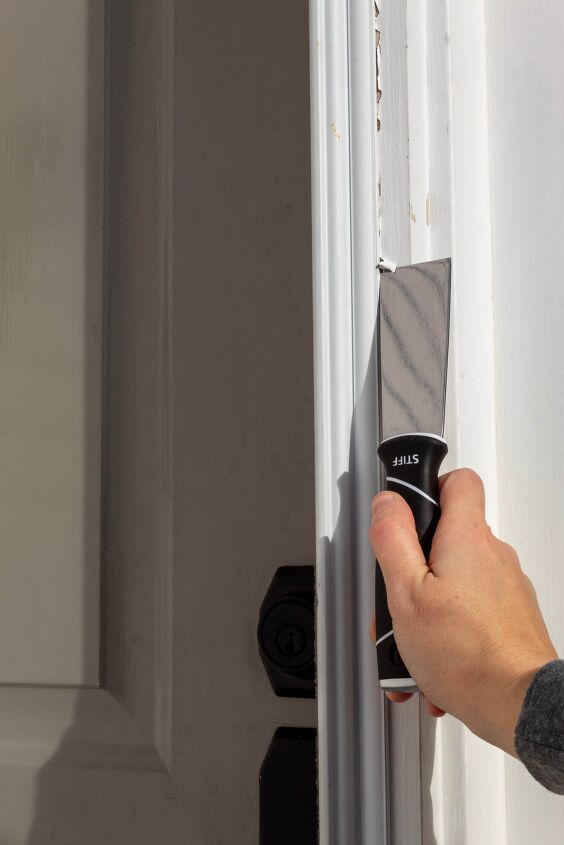
First, I used a paint scraper to loosen the peeling paint. Then I used some medium-grit sandpaper to sand the surface smooth.

Next, I used filler to patch the trim and level out the paint. Once the filler was dry, I used light-grit sandpaper to sand everything smooth and then wiped off any remaining dust with a damp cloth.
How To Paint A Door Frame
With the prep work done, it was time to paint. Before I started, I read The Home Depot’s resource guide for how to paint a door frame. I was able to pick up some helpful pointers about the do’s and dont’s of how to paint a door and create a list of the supplies I would need for the project.
After I created a list of the tools I needed, I went to The Home Depot to get some brushes, a tarp, and paint. At first, I had a hard time picking out a paint color for the door. I must have looked at at least 30 different sample cards. I went back and forth between a few different shades before I decided on Shadow Mountain from Behr.

The last time I painted our door, I used oil-based paint, so before I could apply the new color, I primed our door with a special primer. One coat was all I needed. Then I used an angled brush to paint the edges and a high-quality roller to paint the door and the surrounding trim.

I’m always amazed at the power of paint. It’s such an easy way to make a big transformation without spending a ton of money. Now our door looks brand new! I’m in love with the dramatic dark gray color and the way it complements the brick exterior of our home.
How To Make Winter Porch Pots
The smell of pine clippings is one of my favorite scents, so I always try to include some fresh greenery in my winter decor. DIY porch pots are an easy and budget-friendly way to do it.
I found everything I needed to make my winter planters at my local Home Depot. From fresh greenery to pinecones and some new planters. The Home Depot is my favorite one-stop shop for all of our home improvement projects.

Speaking of planters. I fell in love with the color of these copper ones. Aren’t they gorgeous? They have a classic feel about them and help add a touch of elegance to the overall look of the porch.

To make the winter porch pots, I filled the copper planters with some potting soil. Then I added sprigs of greenery and mixed in pinecones, a few small birch logs, and some gold curly willow branches.

What I love about these planters is how easy they are to make. They’re a simple way to add a pop of color and a subtle touch of winter to our porch. For relatively little money, they make a big impact. And who doesn’t love a low-cost DIY?
Simple Decorative Touches
No one knows home improvement better than The Home Depot, and that includes their selection of beautiful and affordable decor. To finish our simple winter front porch refresh, I added a few decorative touches.

I shopped online and found a pair of new rugs, and picked out the supplies I needed to make a DIY winter wreath and a rustic wood crate. To save time, I used The Home Depot’s convenient delivery options to have everything shipped right to my door.
When you look at our porch throughout the seasons, you’ll probably notice a common theme. I love to layer rugs. Not only do they add a bit of visual interest, but they also help to cover up all of the less than attractive cement.
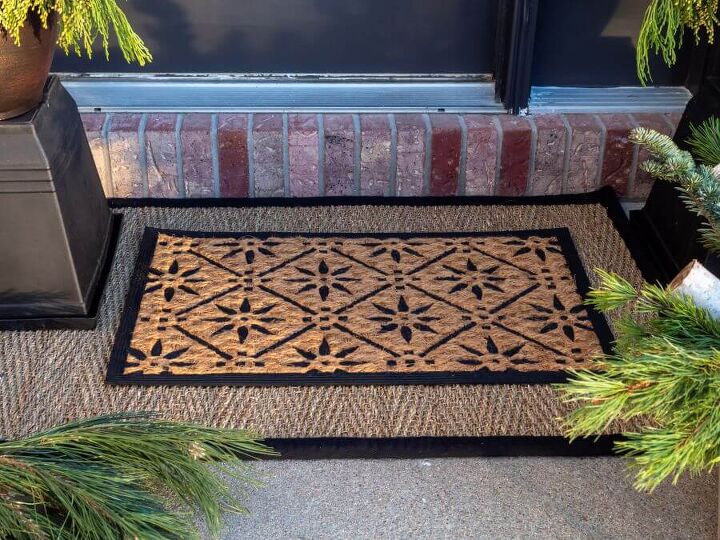
To create the first layer, I used a seagrass herringbone area rug. The rug is great for either indoors or outdoors and comes in several sizes.

Then I placed a small starlight doormat on top. The stars remind me of snowflakes, so, of course, it was the perfect choice for my winter porch.
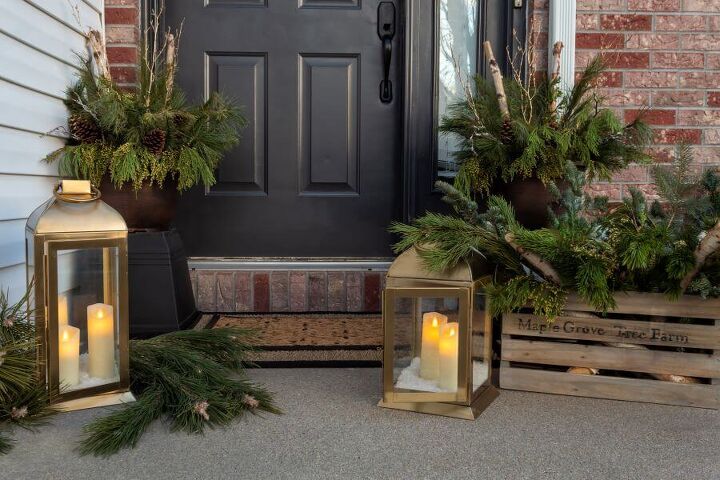
For a bit of elegance, I added a pair of gold lanterns.

These lanterns are a favorite of mine and have made the rounds in our home.

You might recognize them from my holiday brunch tablescape or my recent holiday home tour.

The candles add a bit of extra ambiance and make the porch feel cozy and inviting.
More Winter Porch Decor Ideas

To dress up our front door, I created a DIY winter wreath. I used an old wreath that I had on hand and wrapped it with some fairy string lights.

Then, to give it a bit of New Year’s flair, I added a gold bow and used some garden twist ties to attach a few silver and gold party horns.

When it comes to winter planters, I like to keep things simple, and I try to mix and match traditional decor with more rustic pieces whenever I can. I love the look of old wood crates, so I decided to make my own.

I found a plain wood crate and used two different colors of stain to give it a weathered look. Then I used a black paint pen to stencil on some letters and sanded them a bit to make them seem worn and aged.
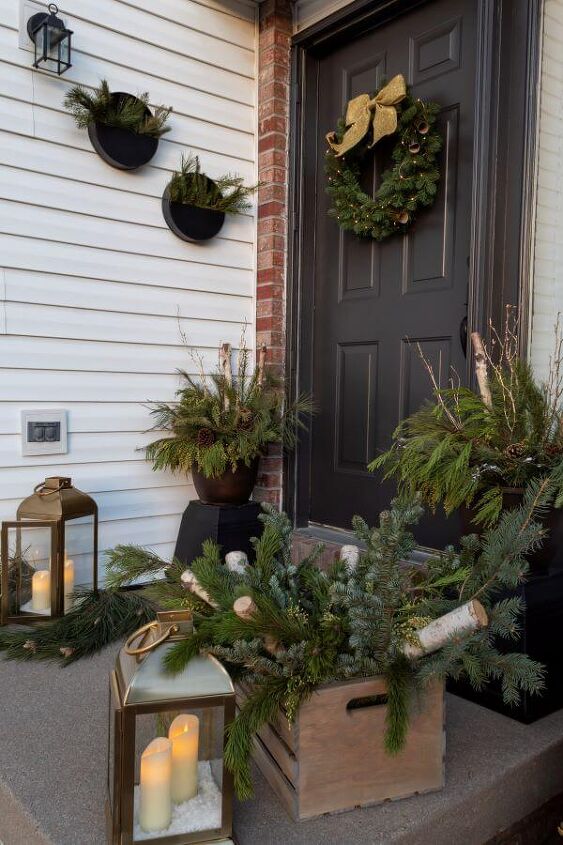
To finish the crate, I added some more fresh pine clippings and a few birch logs. I love the rustic look of the crate mixed with the traditional copper planters.

It’s the perfect way to tie all of the elements of my winter porch refresh together.

Seagrass Herringbone Area Rug / Starlight Door Mat / New Year’s Party Horns / Indoor & Outdoor Fairy String Lights / Wood Crate / Black Craft Paint Pen / Copper Plastic Planter / Metallic Gold Natural Dried Pinecones / Gold Lantern Set / Battery Operated Candles /
A Simple Winter Front Porch Refresh For The New Year
That’s it! I hope you enjoyed these winter styling ideas and how I transformed our front porch with a simple refresh for the new year. I plan to leave my decor up through the winter…or as long as my greenery lasts! Fingers crossed it will get me through until the spring.
Xo,

Did you enjoy this post? PIN it for later!

You may also like: Decorating With Neutrals - Our Winter PorchStyling Our Porch For Christmas
More Wallet-Friendly Room Makeovers

Comments
Join the conversation
-
love it. how did you place the greenery in the crates. are they stuck in styrofoam. you can't use potting soil as the crate is open. also, for the planters you said you used potting soil. does this greenery have to be watered throughout the winder (i live in new jersey so the winters are cold.
-
Looks inviting but crowded. If you rarely use nice but if you use front door I’d spread out elements or remove some


Frequently asked questions
Have a question about this project?
Did the lanterns come from Home Depot, too?
This is winter refresh? I would call this Christmas!!