


How to Create a Separate Dining Area With a Beadboard Accent Wall

This project is sponsored by Westlake Royal Building Products™.
You usually see beadboard projects as beautiful half-walls, but I wanted to use it a bit differently in this condo I was renovating.
This was part of a condo flip that involved many cost-saving DIY projects. You can view them all at marciasocas.com. The beadboard accent wall project and the associated post were sponsored by Westlake Royal Building Products. The opinions expressed are completely my own and are based on the results I achieved with the products used.
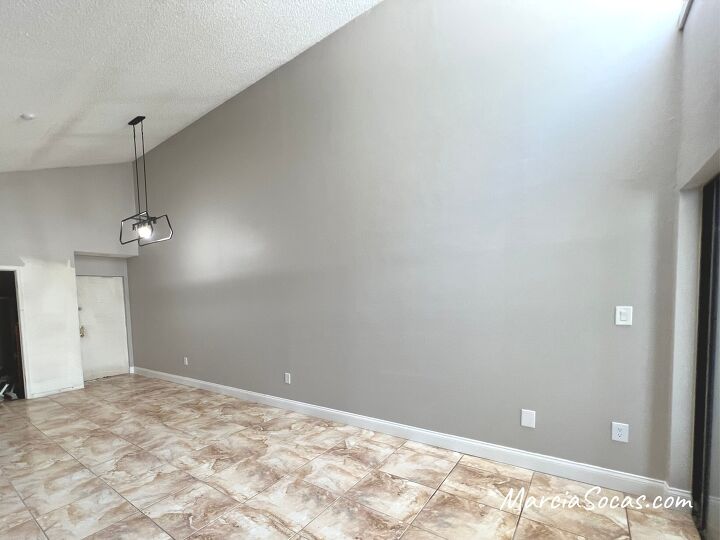
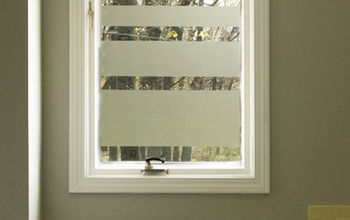
Before the project
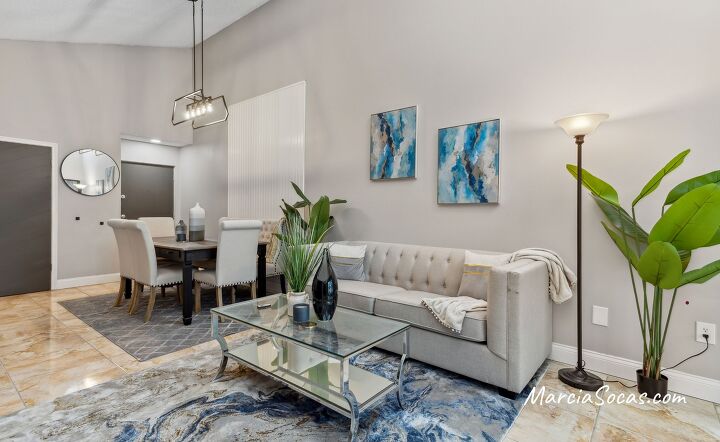
I was having a hard time creating a visual separation between the dining and living area in this condo. I didn’t want to create a dividing wall, but I wanted to make sure there were distinct living and dining areas. I also wanted to draw attention to the height of the ceilings.
Plus, I needed a project that I could complete by myself within a few hours.
You can see the ceilings are high, but there’s no real distinction between the dining area and the living area. Adding some kind of physical divider wouldn’t make sense, and it would take away from the open space. So, my best bet was to add a room divider visually through the use of an accent wall.
Products used
I worked with Westlake Royal Building Products and used their products for this project. I love the ease that the PVC trim and mouldings provide.
I was really excited when Westlake Royal Building Products sent the materials and I loved the feel of the products, they’re sturdy and I was looking forward to using them.
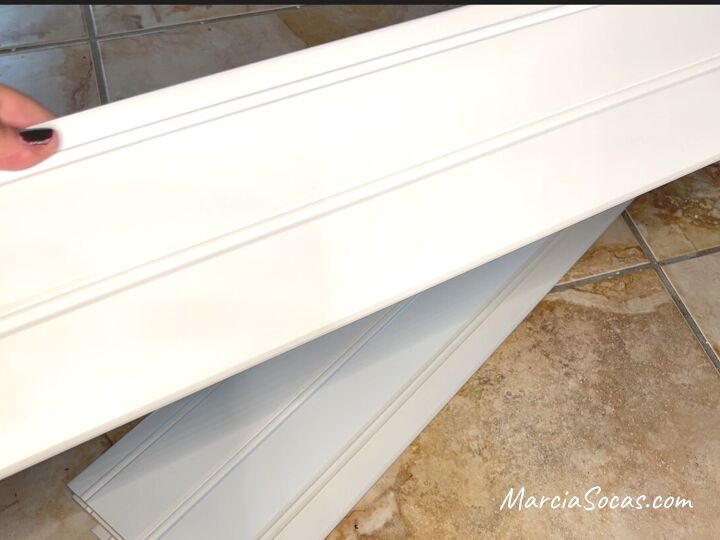
The product I used for the main part of my wall was Product Model 9734, a 6" reversible beadboard (½" x 5¾"). I used the 9ft length so that I could really showcase the height of my condo wall and ceiling.
Since the product I used was reversible, here's a look at the back. It's smooth and I'd love to use this side for future projects.
1. Measure the wall
First, I measured my wall to see exactly how much product I needed. I calculated that I needed 14 panels for my project.
2. Cut the pieces (optional)
Cut your pieces to the proper height (if necessary). I didn’t need to cut my beadboard at all, I wanted the 9-foot height as part of my design, so I was able to use the pieces exactly as they were.
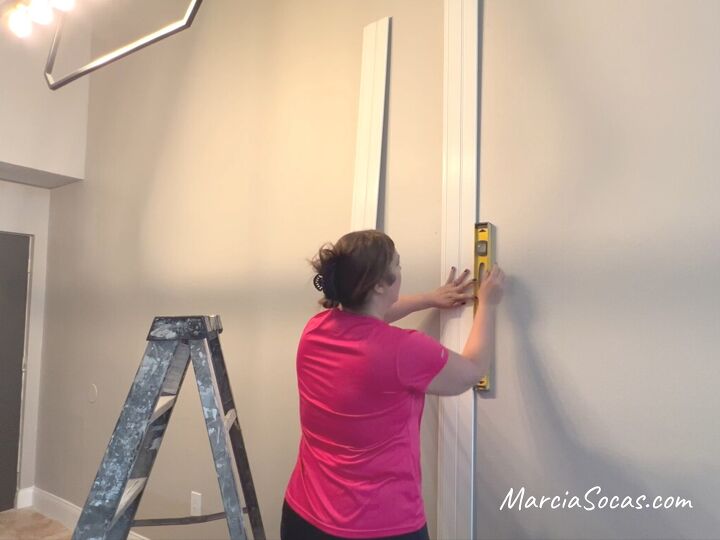
3. Mark the start
I marked my starting position and then made sure the first piece was plumb using a level.
Note: I was working from right to left, so I made sure that the "tongue" side of the panel was to my left. You'll see why this is so helpful in the next steps.
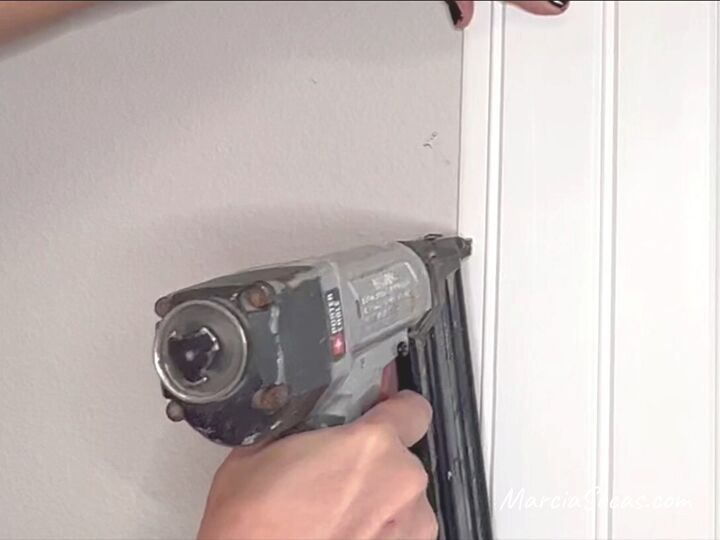
4. Nail the panels to the wall
Using a nail gun and 18-gauge nails, I secured the panel to the wall.
See how the tongue part is on the left? That's where I'm securing it with the nails. This will be covered by the next panel, which goes right over it.
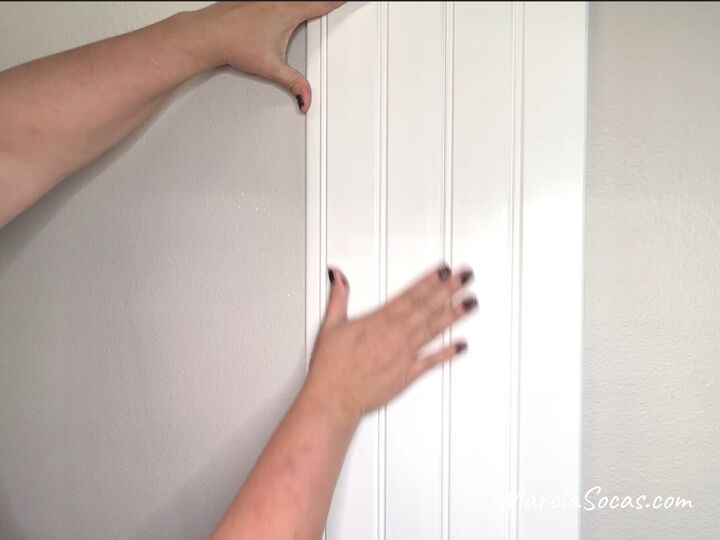
Here's a picture of the second piece in place. See how it covers up the tongue of the first piece and the nails disappear?
It just fits right over and the seams come together perfectly.
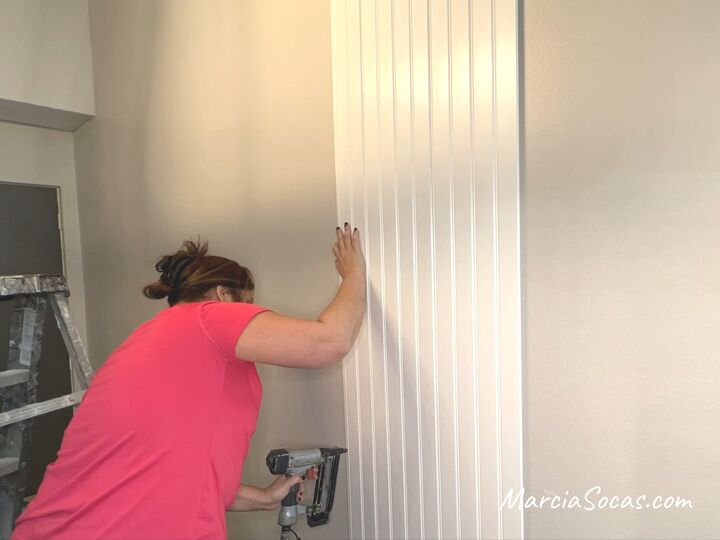
It was easy for me to continue adding panels, and the project went by super quickly.
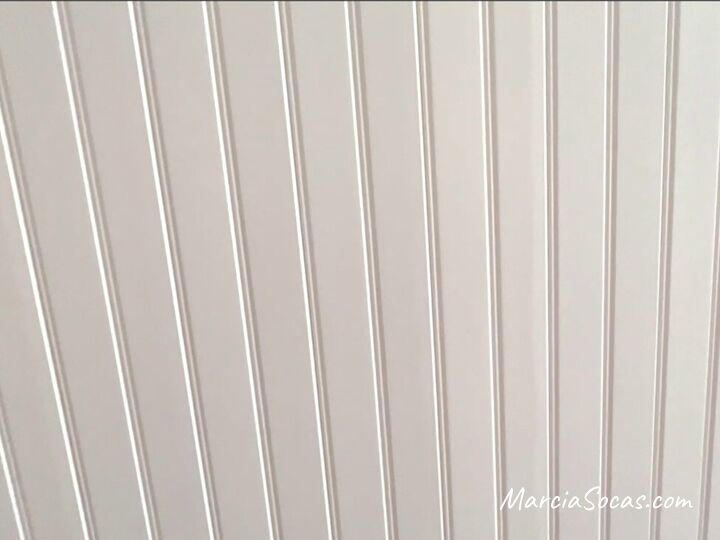
This is kind of an extreme close up but I wanted to show how nicely the panels fit together without any gaps or seams.
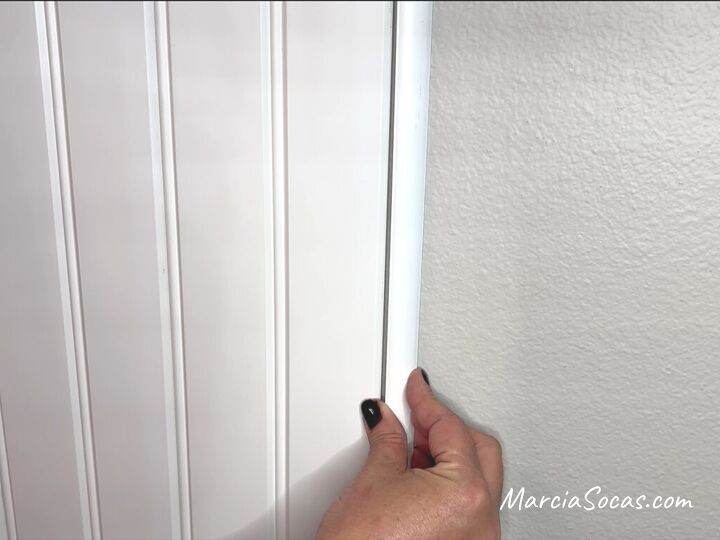
5. Use a quarter-round to finish
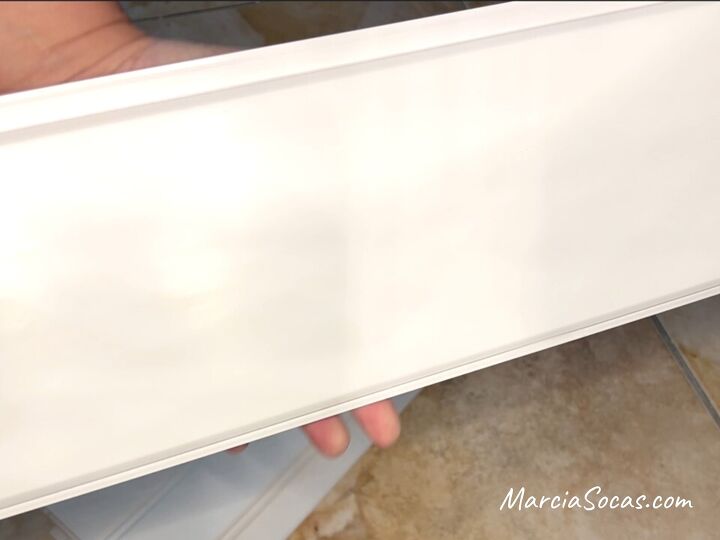
To finish off my edge here, I used quarter-round. It fits absolutely seamlessly with the beadboard. It was exactly the same depth and so it looked like a perfectly finished custom piece. Specifically, I used Product model number 2024, which is also ½” in depth.
The other great thing is that the length of the quarter round already came in the exact same length as the beadboard, so it literally could not have been easier! I attached the quarter-round finishing edge with my nail gun, but you could also use construction adhesive if you prefer.
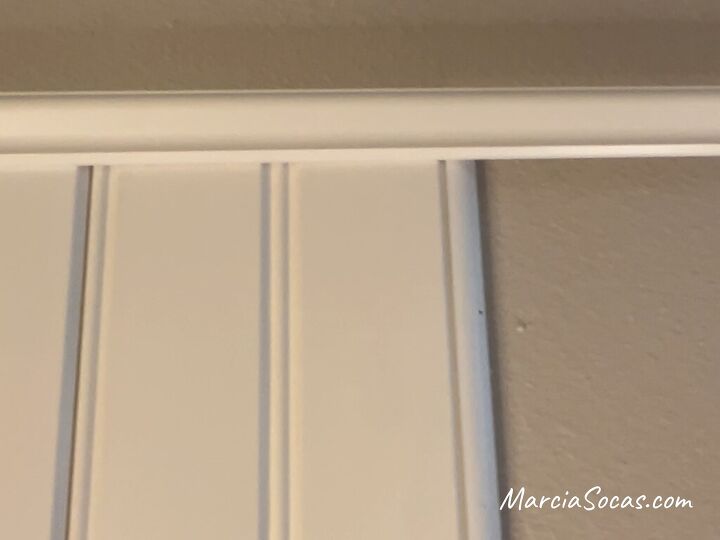
6. Top with a wainscotting cap
For the top piece, I used a wainscotting cap, product number 9995.
The reason I used this here was that it fit right over the beadboard and gave a wonderful finish along the top.
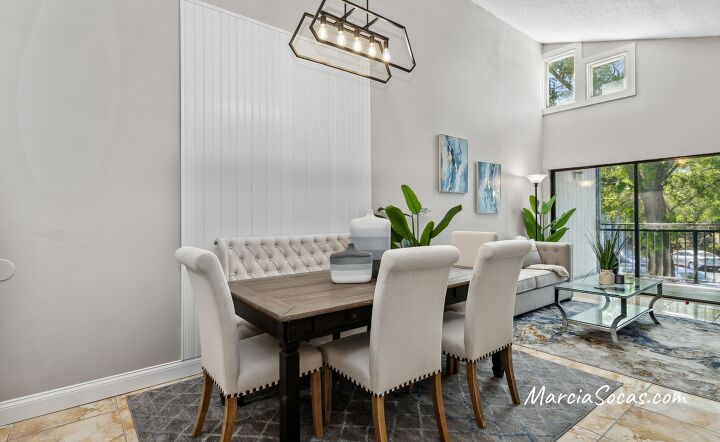
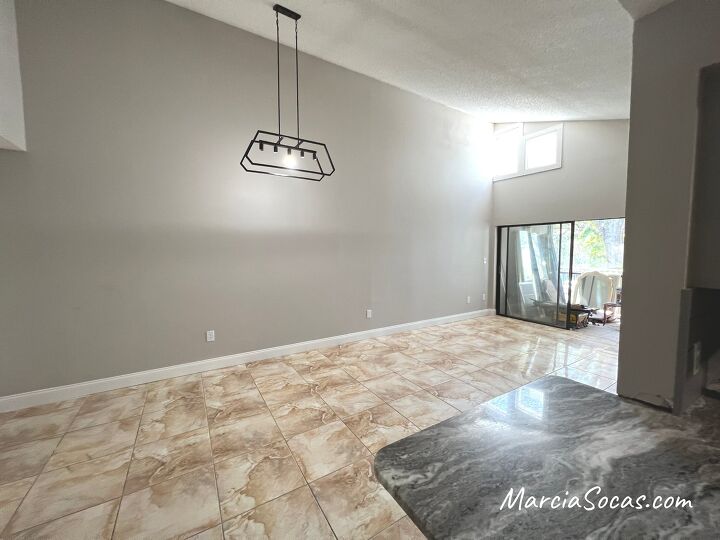
DIY beadboard accent wall
In a matter of just a few hours, I was able to create this beautiful DIY beadboard accent wall. Now you can clearly get a feel for the distinctive space between the dining and living areas.
I hope you love this project as much as I did and encourage you to try it yourself!
Using the beadboard this way really allowed me to express my own style, and bring attention to the height of this wall. I love the fact that it’s made of PVC, so it’s extremely durable. There’s no denting or scratching, and it is extremely easy to clean, which works well in a busy area like this one.
Let me know what you think of the results in the comments below.
Westlake Royal Building Products provided the materials for my project. I loved the opportunity to work with these products and was thrilled to receive such beautiful results in this quick and easy project.
More Wallet-Friendly Room Makeovers
Comments
Join the conversation
-
Looks great!!!
-
Nice🙂


Frequently asked questions
Have a question about this project?