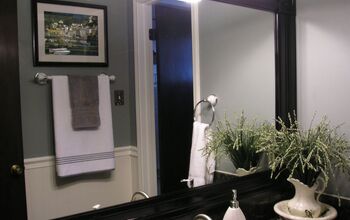
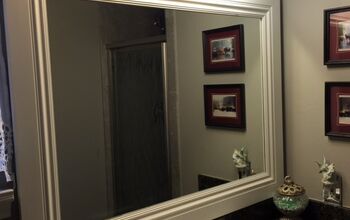
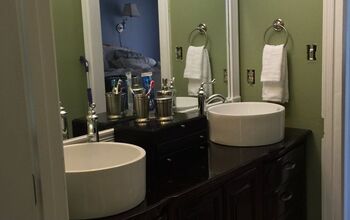
I need instructions on how to frame a bathroom mirror with molding
by
Janis
+15
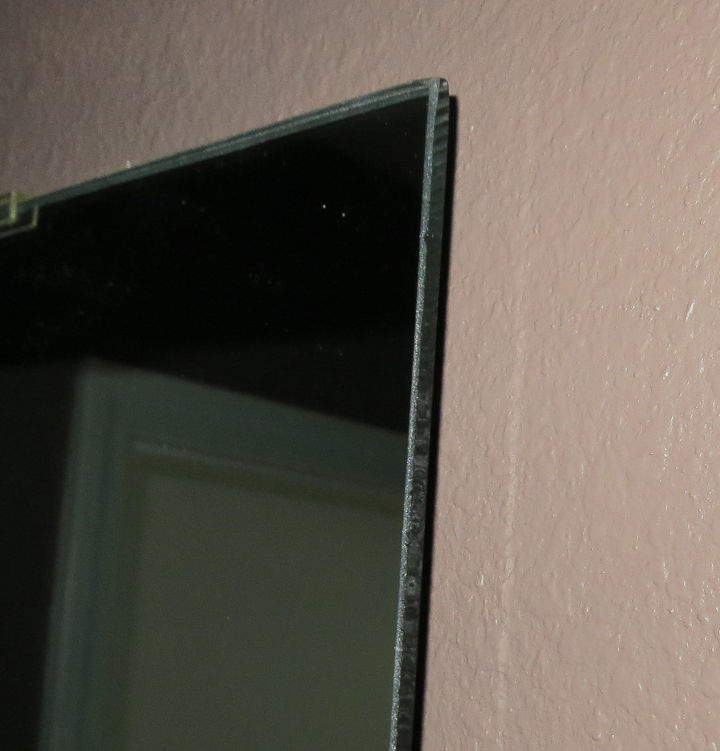
What do I do about the clips that hold the mirror in place?
11 answers
-
easy peasy. Get corner block from HD and molding that you like. I prefer the thicker kind. You do not have to miter can cut straight pieces with corner blocks or miter and attach to mirror with construction glue. When you paint molding make sure back is painted half way because it reflects in mirror.
 Dee
on Feb 19, 2016
Dee
on Feb 19, 2016
- See 2 previous
-
Looking to do the same in our bathrooms. So, I'm gonna lurk around on here! Shhhh.
 Pam Lewandowski
on Feb 19, 2016
Pam Lewandowski
on Feb 19, 2016
-
There are kits available online but they are expensive. There are lots of tutorial online for making them. Just do a google search...
 MN Mom
on Feb 19, 2016
MN Mom
on Feb 19, 2016
-
i am doing the same in my bathroom and was wondering the same thing, so I checked my mirrors and fond they were glued so I am able to take the clips off and once the molding is up this will replace the clips and support the mirror.
 Amarpale
on Feb 19, 2016
Amarpale
on Feb 19, 2016
-
Dee has it down pat!! My only tip is to use Heavy Duty Liquid Nails and tape your pieces in place while it dries. We did the one in our bathroom and it wasnt glued. The mirror was 4 by 6...it was a pain in the bum. Anyway, because it was so long, the boards wanted to slide or bend. It took 3 days, to be safe, and a lot of books to keep it flat. Just be VERY careful if you take it down.
 Becky
on Feb 19, 2016
Becky
on Feb 19, 2016
-
Dee, what about the clips?
 Linda
on Feb 20, 2016
Linda
on Feb 20, 2016
-
I framed the mirror in my house. First I used glass/mirror adhesive that comes in a caulking tube. It's what contractors use to affix those big mirrors to the wall. When I got to the edges with the clips I measured my piece and cut it then held it in place and marked where the clips would be once installed. I then used either my table saw with the blade set at the correct height so as not to cut the mounding in half, but to cut a notch out for the clip or used my chisel to form the notch since I used two types of mounding and they hit the clips at different places.
 Mandy Brown
on Feb 20, 2016
Mandy Brown
on Feb 20, 2016
- See 2 previous
-
I did similar to Mandy. I used the molding that is made out of a polystyrene because it is lightweight and easier for the construction adhesive to hold, but also I was able to cut a notch in the back with my very sharp utility knife. The notch went over the clip.
 Jhmarie
on Feb 20, 2016
Jhmarie
on Feb 20, 2016
-
Try securing the mirror to the wall with mirror glue (Home Depot). That was you can safely do the molding that you like. Be sure your mirror is level before you glue it and that you have support under the mirror (books, etc.) and tape it to the walls with blue painters tape to hold it until the glue dries. Another nice way to accentuate the mirror is with the small tiles they sell at Home Depot. They also sell the stuff that you can cut and glen right to the wall, place your tile and then grout the same day!
 Elaine
on Feb 20, 2016
Elaine
on Feb 20, 2016
-
Thanks everyone for your help. I hope to get started on this project soon.
 Janis
on Feb 20, 2016
Janis
on Feb 20, 2016
-
Many times the mirror is glued to the wall. The rosettes are only there to secure the mirror until the glue sets. It you actually need the rosettes to secure the mirror to the wall then substitute washers for the rosettes. That way there is no 'bump'.
 Anna
on Feb 21, 2016
Anna
on Feb 21, 2016
Sign Up to Answer
Related Discussions
Suggested Project Book
