Asked on Mar 01, 2015

What the photo transfer tutorial didn't tell me.... :(

Angela A
by Angela A
I saw a video tutorial on FB recently of transfering your pictures to a piece of wood. I thought, "WOW! That looks SOOO cool! I have to try that!" Let me just say.....total BUST! And I don't really know why....The tutorial wasn't overly informative, however, it gave the steps you are supposed to use....see below...I followed them PRECISELY...even though it about KILLED me to wait during the drying time! I was reallllly looking forward to this working.
Has anyone done this type of photo transfer before and can tell me what I may have done wrong?
Steps taken:
1) Spread Gel Medium on wood, place black/white photo face side down on piece of wood. Smooth out all wrinkles. Let dry overnight.
2) Wet paper with sponge or rag and gently rub off. Make sure to clean off all paper residue.
3) Cover with mod Podge. Let dry.
Seems simple enough right??? EPIC FAIL! Where did I go wrong??
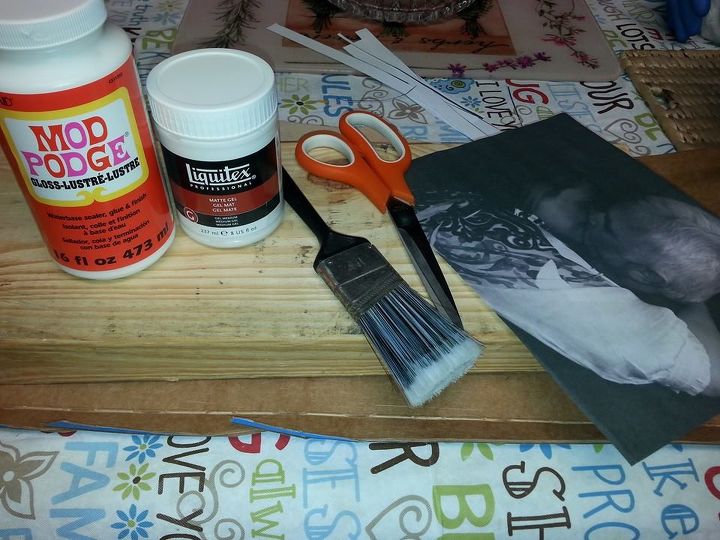
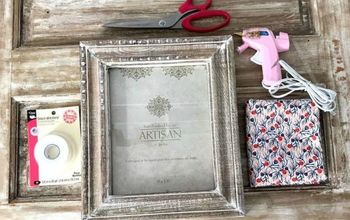
Supplies used in this project.
covered board with gel medium as in step 1
placed picture face side down.
two pics on one board.
removing the paper the next day.
FAIL!!!! what went wrong???
  49 answers
  • Shelly Shelly on Mar 01, 2015
    honestly my understanding with decopoge or modpodge glue. is you put the picture face side up? I do not know about this gel.. so this is more my? but I have just always seen pics done face side up.
  • Christinewilliams905 Christinewilliams905 on Mar 01, 2015
    maybe you put a coat of decoupage on the back of the picture before drying?! Glad you spoke out on this tutorial - I've got it on the back burner to try. I'm always interested in transferring images to different mediums.
  • Elaine Simmons Elaine Simmons on Mar 01, 2015
    Shelley, this is different than decoupage. Christine, I have not used a photo but I have tried to use a print from The Graphic Fairy and had the kind of luck you had. But people do it and I don't know where I went wrong either. It could be that I rubbed too hard on it but I had the ink smear.
    • Marsha Marsha on Jun 10, 2018

      i have the same problem....I have used chalk paint and poly crylic water base..... leaves edge of cut out and cannot rib all paper off without taking off the image

  • Angela A Angela A on Mar 01, 2015
    I did notice on the left picture that the harder I rubbed the more ink came off with the paper. (It was already a bust on that side for sure at this point so I experimented). But the thing was, I really couldn't get all the paper off without rubbing....so on the right side, I used a bit more water, but I still had ink lifting off the wood. On the right side, you can see that pic better, but neither one turned out the way hers did in the tutorial.... :-\
  • Gloria Gloria on Mar 01, 2015
    I was going to do this craft with my teenage cousins, We like to do projects when they come to spend the night. I guess we wont try this one until I can get more information either. The supplies are not cheap enough to mess up 3 pics at once. Thank you for letting me know ahead of time.
  • Gloria Gloria on Mar 01, 2015
    I did notice u are using a paint brush and the lady in the video was using a sponge brush . I don't know if that would have something to do with it or not.
    • Angela A Angela A on Mar 01, 2015
      @Gloria I didn't even pay attention to the type of brush she used lol. I guess maybe it could be, but I dont know. I feel like I got the gel medium on the board really well....BUT, maybe that was my problem....
  • ...I have found that sometimes - NOT ALL the time, mind you- that some of these tutorials seem to ' skip something', ..even if its not intentional. I looked at that video and was still trying to figure it out, so its not just you ! And I have done a lot of crafts !
  • Betty Ann Kinney Betty Ann Kinney on Mar 01, 2015
    I tried it too and mine came out even worse. The paper didn't totally come off and as I rubbed harder I found I was rubbing the ink off as well. TOTAL FAIL! I tried something else I saw on line and I think with more trial and error it could work. Try printing on the shiny side of the backing of label paper like Avery shipping labels. The ink smudges easy so be careful,l but I think if the right base coat is on (possibly even the gel medium) it will work better. The black and white photos below are the same application you tried but the light house pic was just printed on the shiny paper then simply rubbed onto raw wood.
    • Angela A Angela A on Mar 01, 2015
      @Betty Ann Kinney very interesting, thanks for sharing! I will have to try that...thanks!
  • MamawEydie MamawEydie on Mar 01, 2015
    I'm getting ready to try this, but the directions I have say to put the gel medium on both the board AND the face of the photo and then put the photo face down and let it dry completely. After it dries (approx. 24 hours) use a very wet sponge or soft cloth to gently wipe off the photo paper. I have not, however seen this used with color photographs so I don't know if that causes a problem or not. Hope this helps.
    • Angela A Angela A on Mar 01, 2015
      @MamawEydie mine was a black/white photo, however, my instructions didn't mention putting the gel medium on the photo as well. let us know how yours turns out?
  • Chey1130 Chey1130 on Mar 01, 2015
    I tried this and have already taught a class with senior citizen ladies. My husband cut my pine 1x4x6" boards and sanded them so that there was no residue and the grain was smooth. I photocopied the picture on standard copy machine paper. I cut the paper larger than the wood to make it easier to peel off. I used Liquitex String Gel Medium and applied it evenly and generously with a sponge brush (I make mine with cheap sponge cut into 1" piece and clipped it to a clothespin). I placed the picture face down on the wood and used an old credit card to gently smooth the paper and work out any bubbles. I actually completed my project in under two hours! I used a hair dryer to dry it completely. Next, I used either a folded wet paper towel or a wet sponge to again wet the paper on the wood. Once it is wet, grasp a corner and peel the paper off, moistening the paper as needed. Carefully rub any paper off, but rubbing can remove the ink from the wood. You should be able to see the grain of the wood through the picture. Once again, dry the project before adding at least one coat of Mod Podge, also applied with clean sponge brush. Again dry it.
  • Chey1130 Chey1130 on Mar 01, 2015
    By the way, sanding the wood allows the wood to be able to absorb the ink much better.
    • See 1 previous
    • Chey1130 Chey1130 on Mar 06, 2015
      The string gel medium has a really different consistency, it has a gel appearance instead of a paste.
  • Kathy Munson Kathy Munson on Mar 01, 2015
    I would pay attention to the way the picture was printed as well. The one that had the success said she photocopied the picture. Perhaps the type of ink or paper makes the difference?
  • Liz Liz on Mar 01, 2015
    I have been told that all pictures should be photo copied using colored ink even if the print or picture is black and white. Something to do with the ink transferring from the paper. Hope this helps
  • Pat B Pat B on Mar 02, 2015
    Read one instruction recently that said to copy photo using lasier printer not ink jet printer for it to work.
  • Donna Donna on Mar 02, 2015
    Have not done this myself, but all the instructions I have seen say to use a Laser printer and print the photo onto plain copy paper. Perhaps that will help.
    • See 1 previous
    • Kelly Stump Kelly Stump on Dec 20, 2017

      This is super old, but In case any body reada this : you MUST use laser copies. Inkjet xopies will not work. You will have some photo transfer, but no a clear pic. I tmtrued both and the difference is huge!❤️

  • Donna Donna on Mar 02, 2015
    I think you are also supposed to print in mirror image so the photo will be facing correctly when printed?
  • Elaine Simmons Elaine Simmons on Mar 02, 2015
    Go to "Paint" on your computer. There it will allow you to do the reverse image.
  • Susan Hughes Susan Hughes on Mar 02, 2015
    you have to use print paper a copy of picture other wise normal photo will smudge and peel if used
  • April Groten April Groten on Mar 02, 2015
    Hi...I used my laser printer to print off the picture that I wanted and it worked with just mod podge,...waited over night and it worked.....my surface was smooth, I used lots of water to rub off the paper as well..I also found the longer I let it dry the better....hope this helps and good luck to you....this can be a frustrating project....I do have some pictures where the picture has rubbed off on the edges...which makes it look aged so its o.k. again good luck...
  • Patty Patty on Mar 02, 2015
    Go to Pinterest .....lots of info on this....I have done quite a few of these. You do not have to put mod podge on the copy....
  • Bonnie Renner Bonnie Renner on Mar 02, 2015
    I have had trouble with this as well. I end up rubbing off the design. Are you supposed to leave a thin layer of paper still on?
  • Connie Connie on Mar 02, 2015
    You HAVE to use a laser printer (not inkjet) and all will be fine...
  • Kris Harley-Jesson Kris Harley-Jesson on Mar 02, 2015
    Laser printer on regular paper gives the best results. This way you are transferring toner onto the wood, not ink (which has been absorbed into the paper). Inkjet on photo paper is NOT recommended either. Sorry this didn't work for you, but I hope you'll try again!
  • Marinet van Wanrooy Marinet van Wanrooy on Mar 02, 2015
    Hello, i read also that it should be normal paper. Not photo-paper.i'm about to try this also. :-)
  • Rotha Marsh Rotha Marsh on Mar 02, 2015
    did you use a laser copy? not from a ink jet or photo paper just 20lb copy paper
    • Angela A Angela A on Mar 02, 2015
      @Rotha Marsh I used regular copy paper, and I think they are saying use regular paper as well, just to make sure you print with a laser printer...I believe that is where I messed up. I printed from an ink jet, (my home printer).
  • Rotha Marsh Rotha Marsh on Mar 02, 2015
    yep inkjet ink bleeds!
  • Cathy Ward Zorilo Cathy Ward Zorilo on Mar 02, 2015
    Don't give up! You can do it!
  • Kathy Munson Kathy Munson on Mar 02, 2015
    @Angela A sounds like how it was printed was the answer you were looking for. Hope it works for you now...glad I got the question out there. I wondered myself why it would matter...guess the answer is in the toner not the ink...
  • Beth Wilkerson Beth Wilkerson on Mar 05, 2015
    I have also found that using recycled content paper makes it easier to remove the paper and leave the image behind. I have my laser copies done at Office Depot and I request the less expensive recycled content paper.
  • Chey1130 Chey1130 on Mar 06, 2015
    I just used our regular printer at home for mine, and it worked fine.
    • See 1 previous
    • Brenda Temple Brenda Temple on Aug 12, 2016
      @Chey1130 what kind of printer do you have at home? I have also tried this project and it didn't come out the way I had hoped...the instructions I had didn't mention any gel..
  • Chey1130 Chey1130 on Mar 06, 2015
    Thanks Nancy Spencer Carlson...
  • Cathy H Cathy H on Mar 14, 2015
    You can use injet as long as it it an pigment based ink, not a dye based ink. The way to tell is drop some water on it and if it pulls the ink out at all don't use it. I also would put a coat on the paper and let it dry and then do it as per instructions. It gives it a bit more medium to "hold' the image. And make sure all the paper is off or it get a smudged look. I didn't read all the comments so you may have done this, but i thought i would throw my 2 cents in:)
  • PainterNoni PainterNoni on Jul 20, 2015
    I wouldn't call this a total fail, even if it didn't turn out the way you wished. It has a very romantic arty feel to it.
  • Jacks Beta Jacks Beta on Apr 13, 2016
    I did the same for an Easter gift to my sister. The tutorial I used said the picture had to be printed on a laser printer, NOT INKJET. I also applied the Modge Podge photo transfer medium to the photo, not the wood. I used the Liquitex brand once and it came out bad. That may be where you went wrong. Use the Modge Podge Photo transfer medium for best results.
  • Jobou19 Jobou19 on Apr 13, 2016
    Maybe your picture was too dark??
  • Tracey Chavez Tracey Chavez on Dec 22, 2017

    I was looking for something cause mine maybe got fail. I realized I used a different mod podge than all the Pinterest posts use. I used The same one pictured on here that she used. I’m worried mine will fail. Waiting for it to dry.

  • Diane Kirsch Diane Kirsch on Dec 23, 2017

    do you think the wood may be to blame? maybe a better choice would have been to use a 'cleaner' sheet of pine?

  • Debra Joann Topolski Debra Joann Topolski on Jan 16, 2018

    This is my first try I used regular copy paper laser jet ink and gel medium to transfer pic to wood. It did leave a light paper residue but I put a couple coats of modge podge super gloss finish and you can't see the paper residue anymore!!!

  • Jessica Cash Jessica Cash on Mar 06, 2018

    I like a sponge brush to apply but it doesn't matter as long as it's as thick as you want it. You put the mod podge on the picture it self then place it face down on the wood. Smooth out air bubbles or extra glue as much as you can. Let it dry completely. Then use a cloth dipped in water to take of the paper: I run the wood under water so all the paper get a wet then gently rub it off with my fingers.

  • Rachel Randall Judson Rachel Randall Judson on May 02, 2018

    You need to have the picture printed out onto THIN computer paper & try putting a little extra gel medium on the wood before placing the picture face down(make sure if there's any words you do a "mirror image" & after you place the picture on the wood use a card to smooth everything out so you don't have bubbles & after you do all that let it sit a full 24hrs then take a soaking wet wash cloth & gently rub the paper off. Hope this helped.

  • Jennifer Carter Jennifer Carter on Dec 08, 2018

    I got to the step of getting the back of the photo wet and the paper wouldn't soak up the water or start to come off. Am I using the wrong kind of paper? It's photo paper from Target


  • Christy Christy on Feb 15, 2019

    Use the *thinnest* plain white paper that you can print on with a laser printer only. Inkjet printers will not work. Image must be placed face down in the transfer medium. Let it dry for a few days.. I know, it's very hard to wait.. I struggle with this one & will sometimes use the hair dryer trick to speed things up. Be prepared to have several sessions of trying to gently remove all of the paper. I take the first layer off, let it dry to see where the next batch of white will be.. then do it again, super gentle.. I keep doing this until there's no more bits of white paper overy my image.

  • Iyaremis Velazquez Iyaremis Velazquez on May 30, 2019

    I've read once that it was with toner ink... It might help you. I have been searching around and I would like to know from somebody that have done it successfully and willing to share all the steps... Good luck!

  • Rose Hathaway Rose Hathaway on Dec 14, 2021

    I know this is an old thread, but I found a super simple way to do photo transfers. If any of you're interested, I can make a how to video.

  • JennaKravitz JennaKravitz on Dec 16, 2021

    When I bought my new computer, it was a Dell. I heard that there are good and highly functional monitors in this industry that will last for many years. I decided to believe the reviews and bought one. Along with the computer I received several installed applications. From this list, I only used a few of them: Adobe, Paint, softorbits, Excel, Word. There were also some ad blockers and antiviruses but I did not see any useful features for my computer.

  • Jen Jen on Jul 29, 2022

    I don't use a printer. I draw mine out on tracing paper put some mod poge on the wood, put my drawing ink side down, more mod poge, work out any bubbles or wrinkles and let it dry for 24 hrs. I'll look for the picture of the one I did for my husband and take one of the one I'm working on now

  • MeM70310342 MeM70310342 on Nov 09, 2023

    I've always seen them put the Mod Podge on the printed side of the picture. Then place that of course facedown on the wood and they say let it dry for at least 24 hours, that would be the hardest part for me the waiting. Then take a damp cloth or sponge and wet the backing on the photo and gently rub the paper off if not careful the picture comes off completely if you rub to much. It's normal for some to come off or rather lighten or so they say. Then after that you put a layer of Mod Podge over it to seal it. I am going to try to do my step son and his wife's wooden cake stand with their photo like this fingers crossed I hope it works.

  • Deb K Deb K on Nov 10, 2023
    • Hi Angela, thank you for the information! Paint an even layer of Mod Podge across the entire wood surface. Place the printed photo face down onto the wood. Smooth it out using a credit card or brayer and wipe off any excess mod podge that squeeze out the edges. Allow wood piece to dry for 72 hours. Spray the back of the photo with water or dampen it with a sponge.
    • Spray the back of the photo with water or dampen it with a sponge.
    • Gently start rubbing the wet paper. Paper fibers will rub off under your finger. Continue rubbing gently. When the paper dries, get it wet again and keep rubbing.
    • Gently start rubbing the wet paper. Paper fibers will rub off under your finger. Continue rubbing gently. When the paper dries, get it wet again and keep rubbing.
    • You will begin to see the photo showing through. As it dries, it will get cloudy again. You will have to repeat the process, wetting and rubbing across the entire surface of the photo, 3-4 times
    • Wait a few minutes to see if any cloudy spots appear. If they do, get them wet and gently rub away the rest of the paper. Once the photo is clear, paint a thin layer of mod podge over the entire surface to seal it.