11 Fantastic Fire Pit Ideas to Heat Up Your Yard
Want to add a hot new look to your yard? With a few sparks of inspiration from our community of DIY enthusiasts, you’ll be able to create the perfect fire pit. Using a variety of materials, from metal to stone, you can achieve a fabulous new look with the minimum amount of effort. To see what we mean, take a look at the hottest Hometalk fire pit projects.
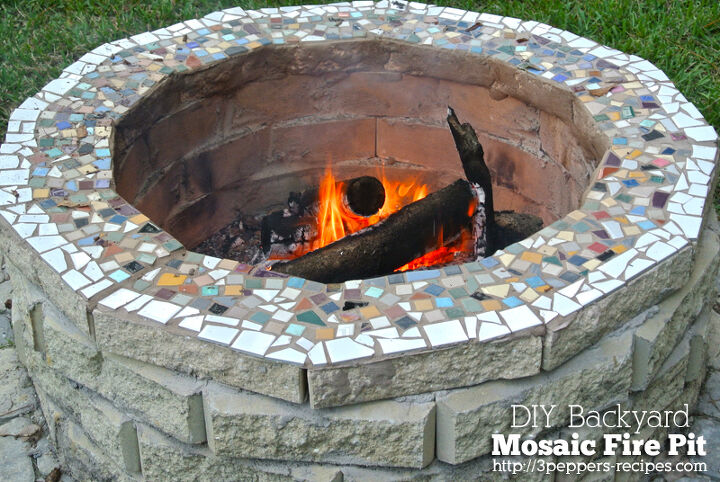
Delightful DIY Fire Pit
DIY designs can look just as good, if not better, than a professional product, as you can see here. After digging out a base and setting in concrete pavers, Kirsty arranged four layers of retention blocks and set them in place using outdoor grout. Once dry, she used broken tile pieces from an old sample book. Placing them on the top layer of blocks using adhesive tile paper, she then grouted them in place to achieve this impressive mosaic finish. Get tutorial here
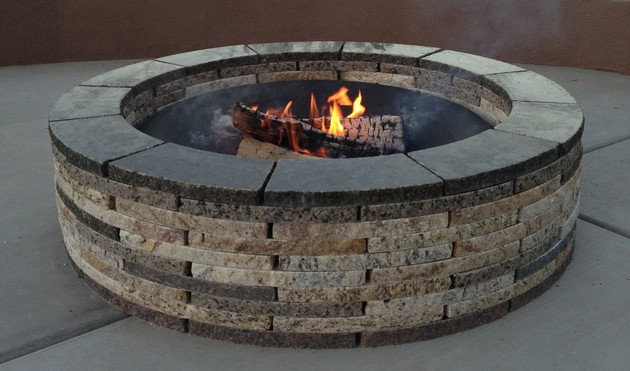
Ostentatious Outdoor Fire Pit
Granite is great in your kitchen but it also makes an ideal material for a luxurious looking fire pit. Although you’ll need access to recycled granite blocks, recreating the fire pit above doesn’t take a ton of skill. By sourcing blocks made from old granite kitchen countertop scraps, Greenstone layered them in circles and added quick dry concrete in between each layer. As well as options for propane units, a steel base and natural logs can be used to finish this opulent fire pit. Get tutorial here
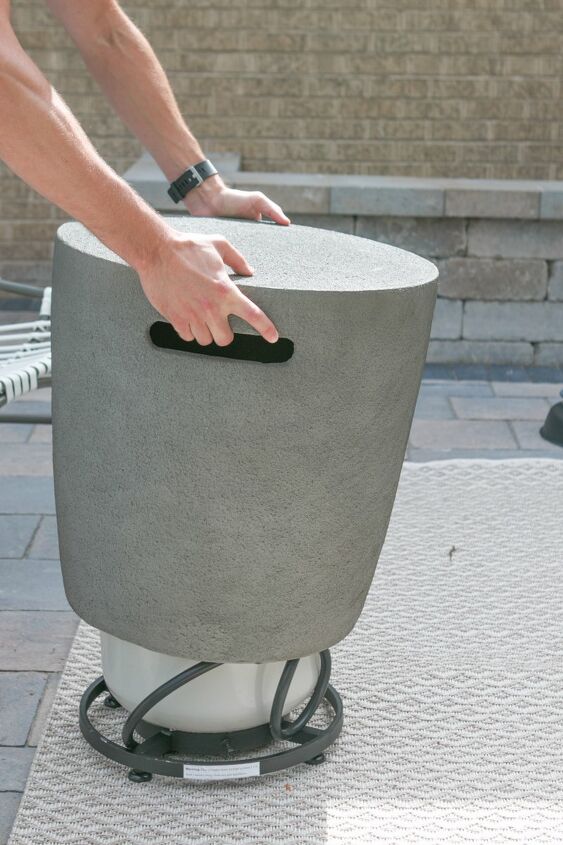
The Perfect Propane Fire Pit
A propane fire pit is one of the easiest ways to bring some warmth to your garden. Not wanting his propane tank to detract from the slick looking fire pit she’d installed, The DIY Playbook found a neat cover. Designed to look like a side table, the sheath was inserted over the tank and moved into place. To complete the concealed look, she cut a hole in her outdoor rug and threaded the gas cable underneath. Get tutorial here
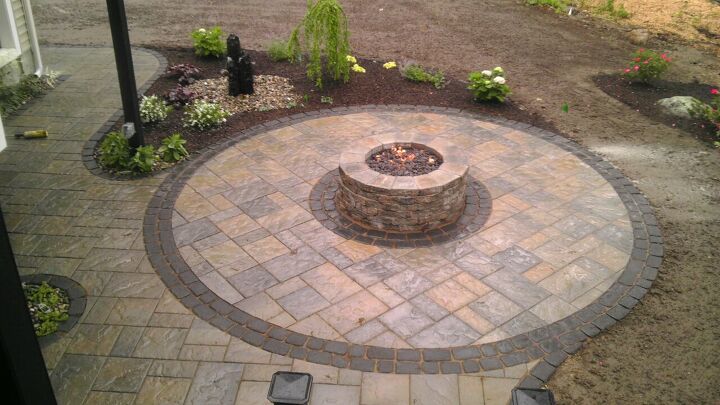
A Great Gas Fire Pit
Sometimes it’s not what you do with your fire pit but what you do around it that makes it pop. Taking a gas burner and combining it with a Techno-bloc fire pit kit, Forever Green Lands formed the centerpiece for his new patio. Opting for the circular look, this Hometalker continued the theme by offsetting the pit with a ring of Villagio onyx black pavers. Finally, Blu 60 slabs filled the center to give this gas fire pit a stunning new look. Get tutorial here
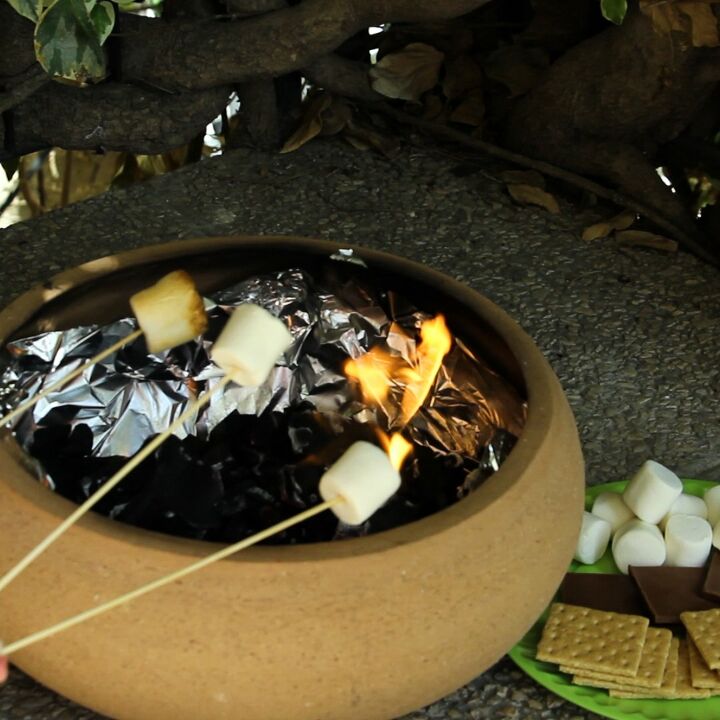
Smoking Hot Portable Fire Pit
A portable fire pit can be just as eye-catching as one that dominates your outdoor living space. Using nothing more than a terracotta pot, aluminum foil and BBQ coals, Shawna Bailey made her own mini fire pit in just five minutes. Although this project is simplicity personified, we still love the earthy look her terracotta pot provides. To make your own, line the pot with foil, add the coals and fill with dry sticks and grass. Light and enjoy. Get tutorial here
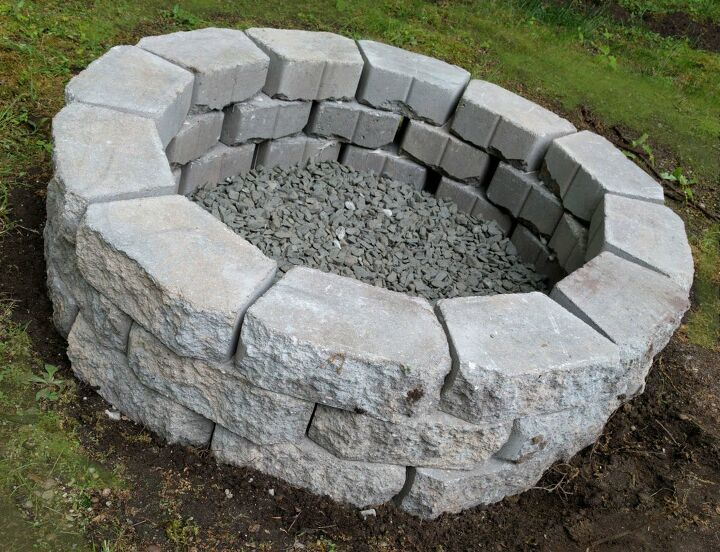
A Budget Fire Pit that Doesn’t Burn Your Bankroll
With offcuts of retaining wall blocks and granite rocks, you can make your own budget fire pit like Taryn G. Digging down a few inches and levelling the base, Taryn set the first layer of blocks. Using a rubber mallet to bed them in, she chipped away the lips from the remaining blocks and applied landscape adhesive to the bottom layer. Repeating the process, she eventually created a secure well into which she poured two bags of granite rock. Simple! Get tutorial here
The Coolest Fire Pit Cover
When the flames subside, what better way to make use of the space than with this quirky cover? After removing the center of an old table, Lori sourced weather-hardy wood (cypress or marine plywood). She then cut six lengths 1 1/2” longer than the pit. To ensure the cover stayed in place, she also cut shorter lengths than would fit snug in the center of the table. Using mending plates and screws, the batons were fixed together and painted. Get tutorial here
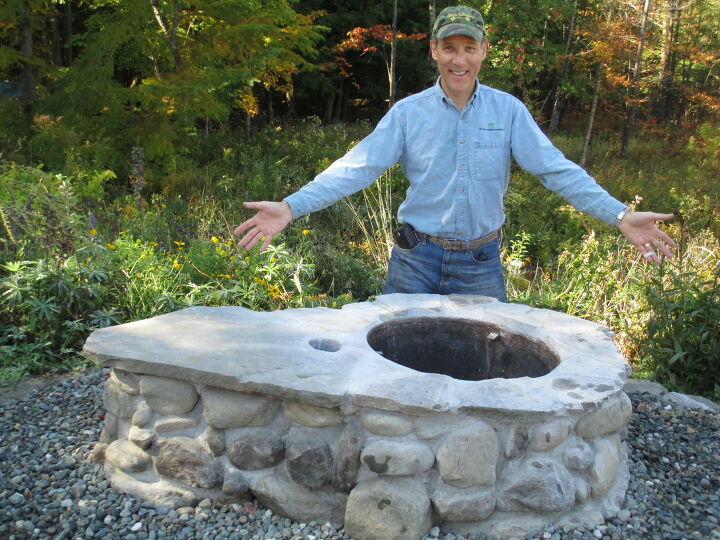
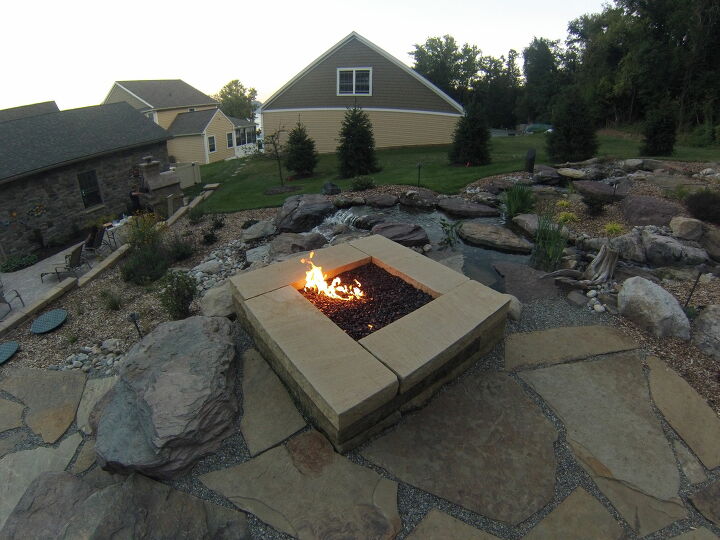
Naughty Natural Fire Pit
For a seamless look, we love this natural stone fire pit from Cepontzsons. Starting with a stepped flagstone patio, this Hometalker purchased sandstone barn steps measuring 5” wide and 18” deep. Arranged into a square, the weight of the blocks negates the need for any cement. Finally, a propane fire was recessed 6” below the surface to create this all-natural look. Get tutorial here
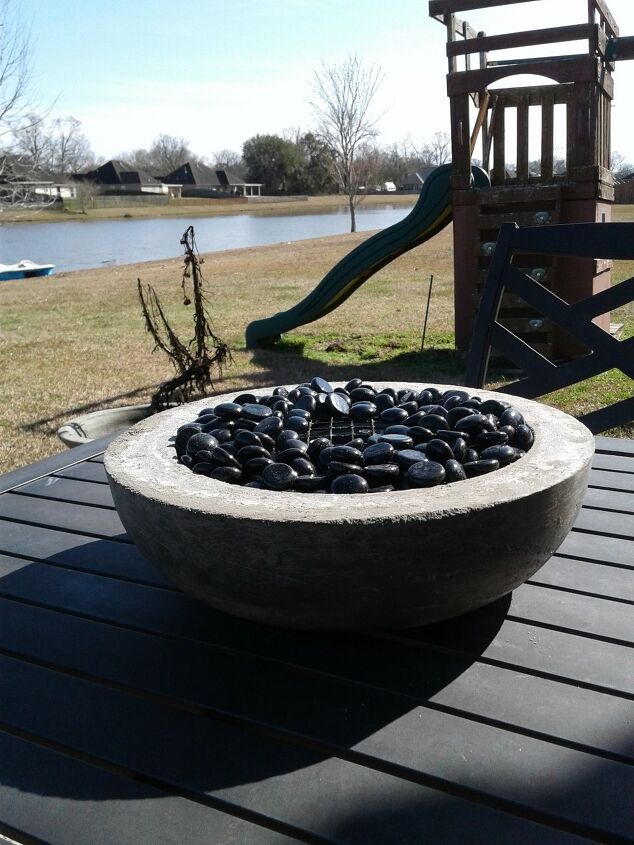
A Crafty Concrete Fire Pit
We love DIY projects that turn nothing into something. Wanting a portable pit, C.D. Scallan took two cheap bowls (one large, one small). Coating them with petroleum jelly, she poured in a concrete mix (5:1 mix to water ratio). The small bowl was placed inside the larger with a paint can used as a weight. Once dry, the bowls were peeled away, a wire top added and the fire pit was complete. Her top tip is to tap out any air bubbles to avoid cracking the bowl. Get tutorial here
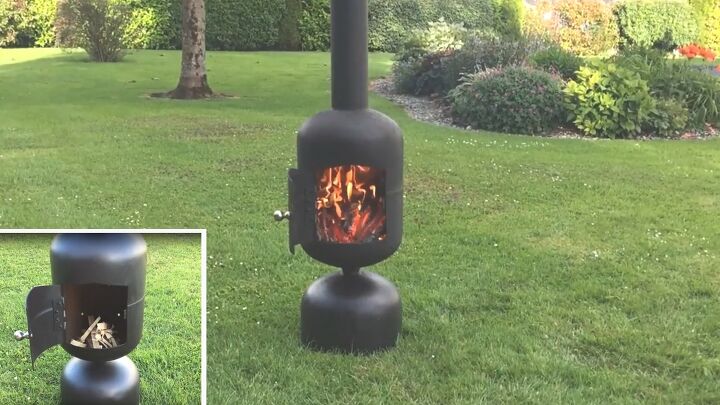
The Patio Heater Fire Pit
A fire pit doesn’t always have to be recessed…Going for the industrial look, Eamon Walsh came up with this clever design. After purchasing two used gas cylinders, Eamon removed the valves with an angle grinder, washed them and allowed them to air. From there, he welded the tanks on top of each other, cut a door and screwed on a hinge. After adding a handle and funnel, it was painted black to produce the perfect patio heater. Get tutorial here
A Fire Pit Fit for a Feast
Where there’s fire, there can be food if you take inspiration from this project by Andrew Kazakoff. Starting with a 50-gallon drum, three Weber grill racks were welded to the sides. The lowest rack was approximately 2 feet deep, with the highest being around a ½ foot from the surface. Once welded, Andrew dug down 22” and back-filled the hole to secure the drum. Finally, field stones were piled up and held in place with quick dry concrete to get this perfect outdoor cooking pit. Get tutorial here