


How to Make Plastic Look Fantastic- Clear Tower Storage

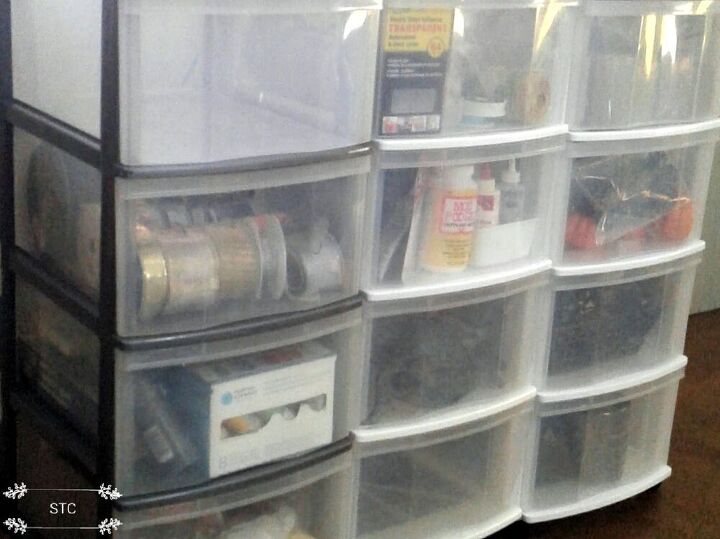
As a crafter I use a wide variety of supplies and tools and because I seldom throw anything out I require lots of storage options. For this project I'll be sharing an updated solution to my original problem that I experienced using those wheeled, plastic, drawer units.
Best removable wallpaper!
I don't think I even have to disclose what the issue with them is! I know, I know you can all see my mod podge and ribbons and so on...it's storage but not hidden storage!
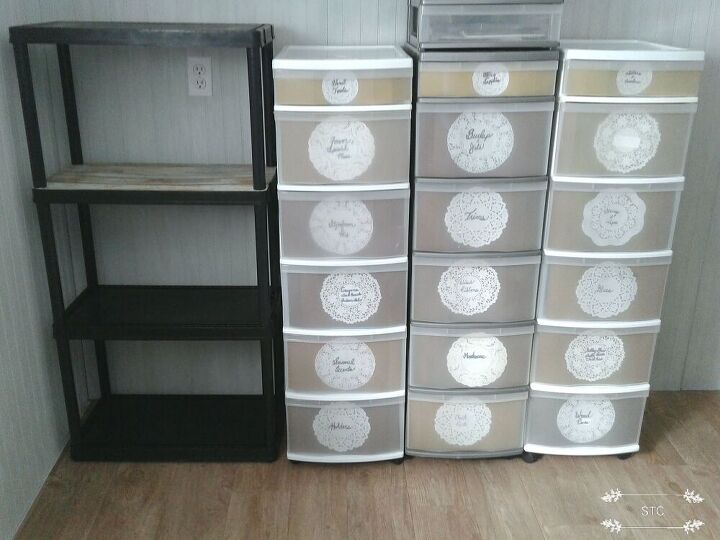
This was an earlier I post I shared here on Hometalk, back then I used construction paper and paper doilies as the labels. It was cute at the time and it served me well over the years as did the trolleys, but an update was needed to go with the craft room reno.
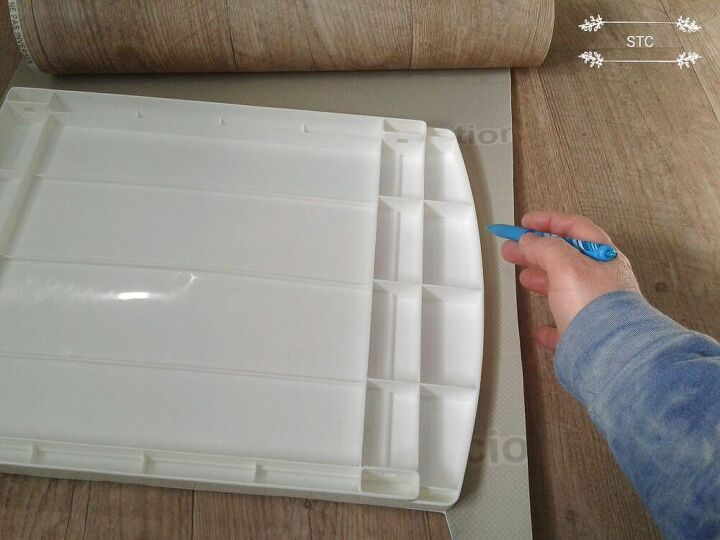
I popped off the top tray and traced the shape onto the back of vinyl flooring remnants, new flooring laid in my room gave me leftovers to put to great use!
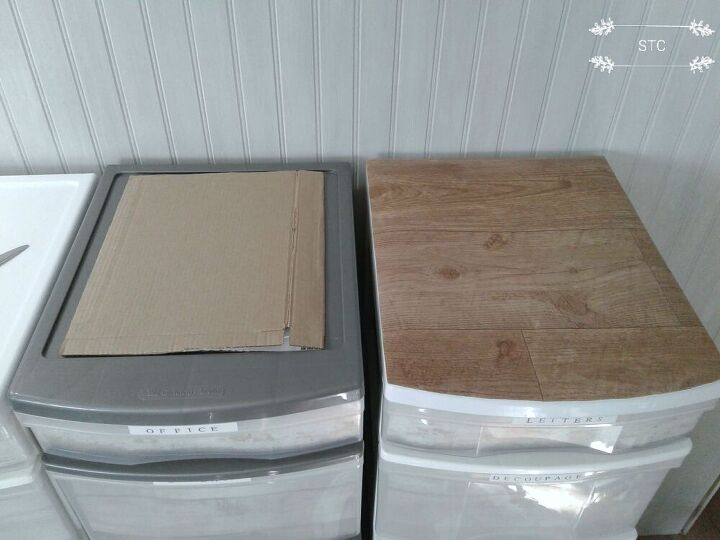
Since there's an indent in the tray, the vinyl would sink into that cavity so I raised it with just some scrap cardboard. That way the vinyl rested flat over the entire top and nobody would ever see the cardboard, that is except all of you Hometalkers but I know my secret is safe with you!

To keep any edges from shifting or rising up I used a few snips of double sided tape, it worked perfectly!
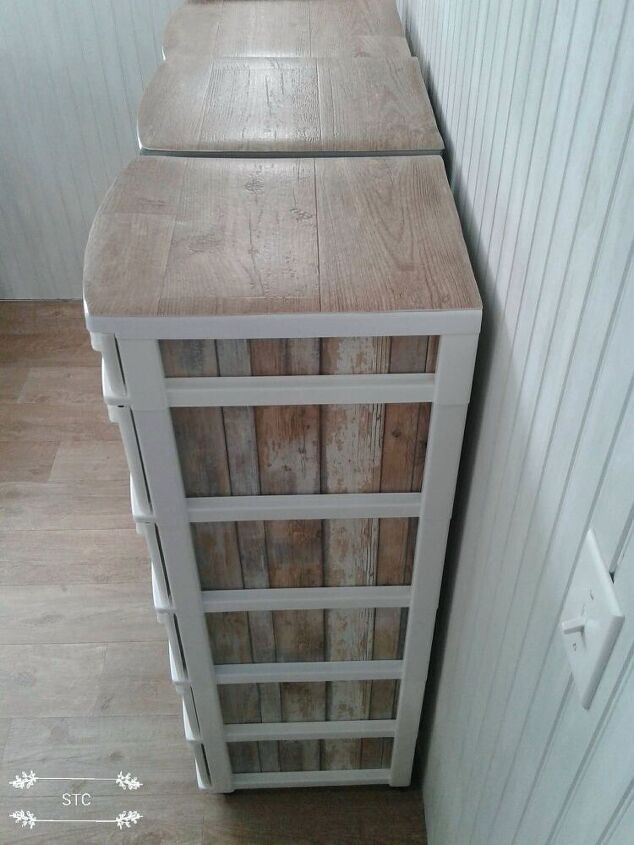
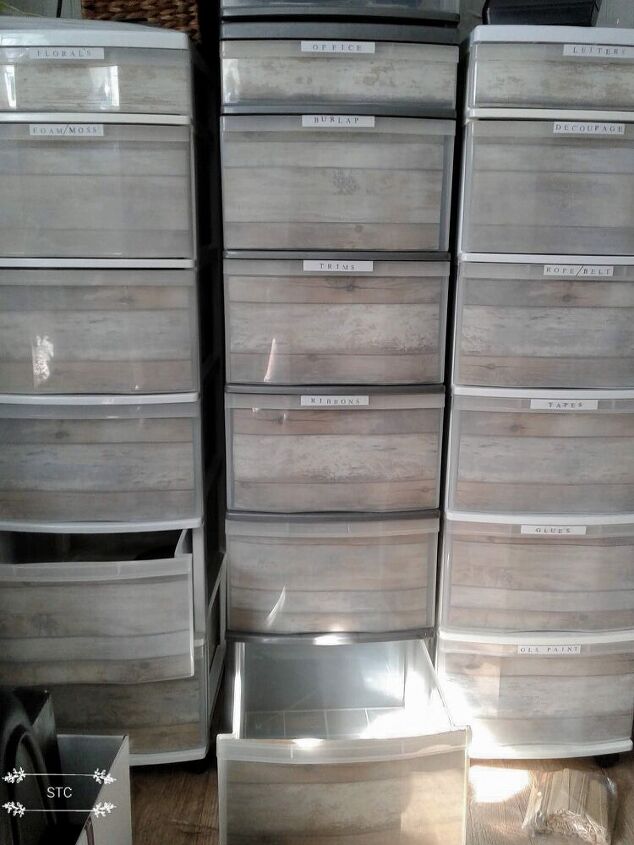
Since anyone who enters my room would see the full side profile of the drawers I chose to cover each drawer side panel with removable wallpaper. It's very easy to use as its repositionable and you can trim after each piece is applied because the edges aren't visible when the drawers are put back in the unit.
The drawer fronts I simply went the easy route and recovered the construction paper that was already there, my husband always says, "work smarter, not harder." Since the panels were already custom cut and fitted I used those as my template to adhere the wallpaper onto.
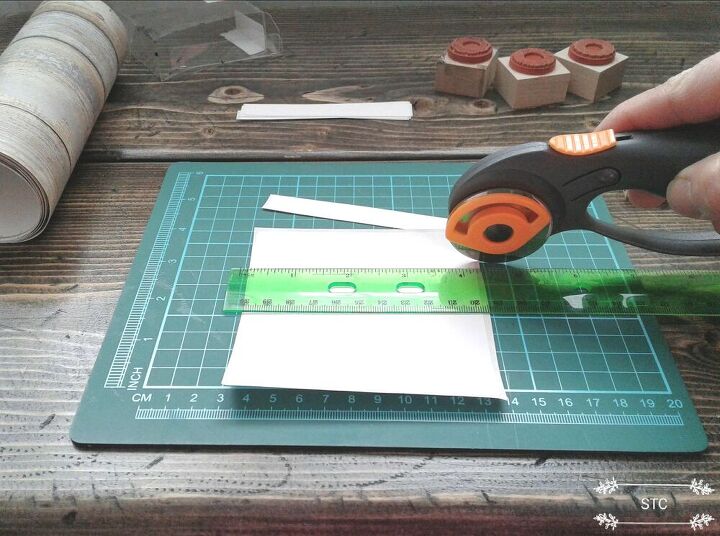
I now had all of my goodies hidden but how would I easily find them all when I needed them? Labels! I cut larger address labels into narrow strips so they would be able to go on the narrow pull part of the drawer and although visible they wouldn't be distracting.
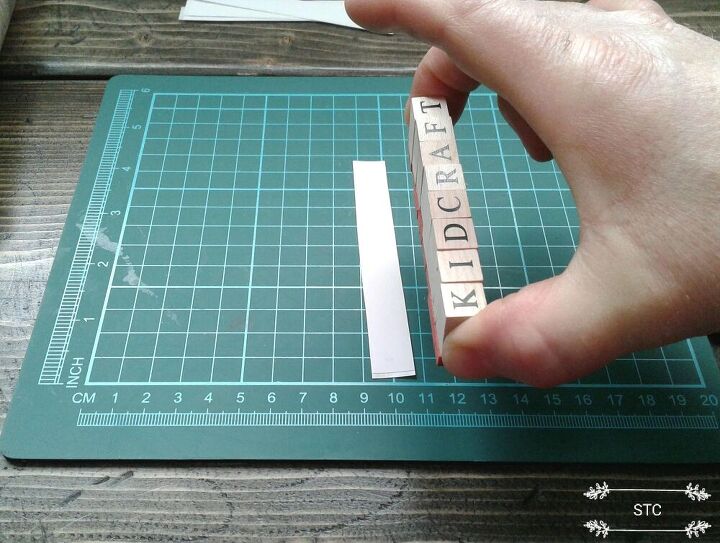
Using my rubber stamp set I'd spell out the word first on the cutting pad and decide on centering the placement before I inked and stamped.
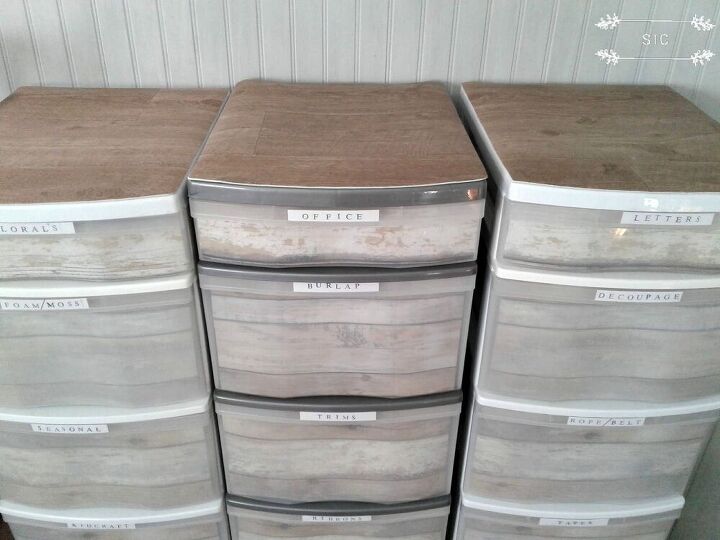
So here you'll see where I affixed the labels, they are clear to read and easy to swap out if the contents inside ever change.
One by one I removed the contents and the front panel to complete the update and as I refilled the drawers I purged and tidied the stashes.
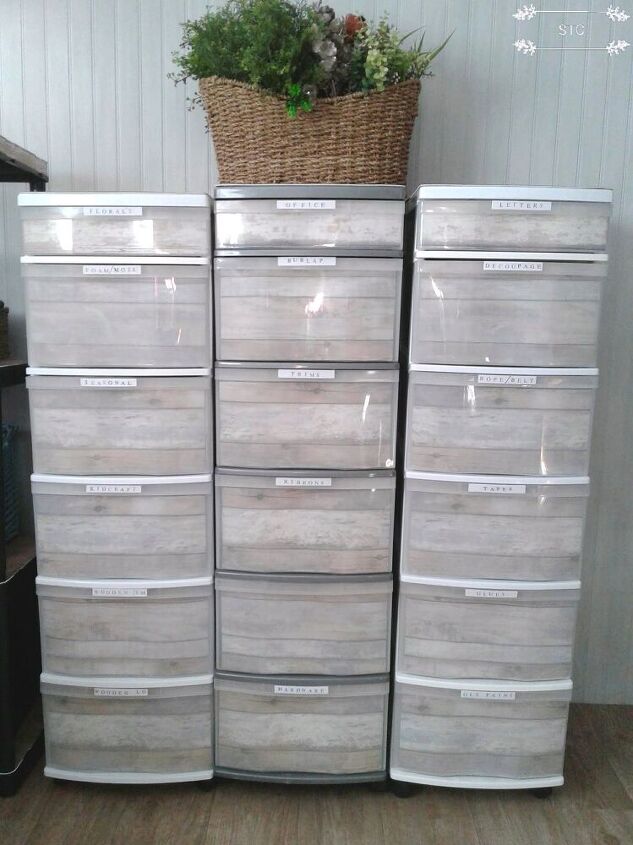
They are once more concealing the contents and are easy on the eyes, oh yeah and easy on the budget! I think you are all going to look at your drawer storage a little differently from now on after seeing the potential that plastic has to become fantastic! Another project addressing plastic storage solutions is shared in the link below if you are looking to upgrade what you may already have.
*Cost doesn't reflect storage drawers because I already owned them.
Resources for this project:
See all materials


Comments
Join the conversation
-
Beautiful solution and thanks for all of the detail!!!!
-
Very nice! I have several of these. I don't have the patience for this..like the reviewer before..I'd rather concentrate on my crocheting or my latch hook projects. Nice job, though


Frequently asked questions
Have a question about this project?
Wonderful job! You had the storage you needed and gave it a makeover with what you had on hand to get the look you wanted AND the makeover can be removed and replaced if or when you choose! Very creative!
I have never known what to do about that recessed top and you found a terrific solution for that as well! Is that roll vinyl flooring you used?
Brilliant idea! Thank you for sharing!❤
Is there a reason you didn't cover the outside instead of the inside? I like the look you have but some don't want to see the plastic.