Ugly Metal Vintage Desk Makeover

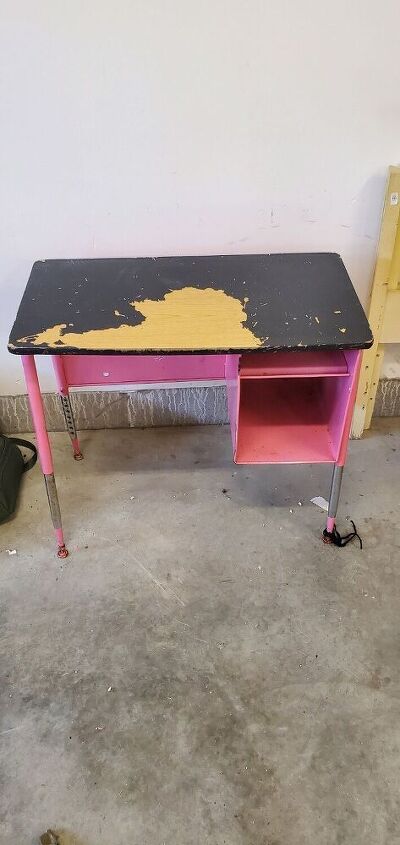
I found this sad, ugly vintage metal desk for $5. It was covered in pink spray paint; but I saw its potential! I'm going to show you how I brought this old desk back to life with some chalk paint and stain.
This poor desk had been sprayed with pink spray paint and painted in chalkboard paint. It had good bones; so I knew I could bring this piece back to life in just a few simple steps.
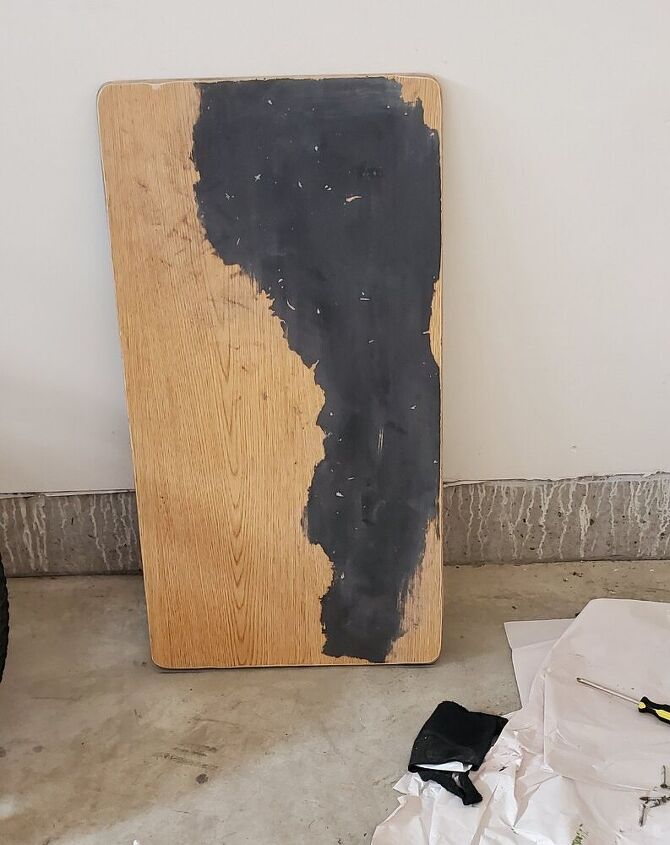
The top of the desk was held on with screws, making it easy to remove. Since I didn't want to paint the top, I found it easier to remove before painting.
Whenever removing pieces held with screws, remember to place the screws in a safe place. I find it easier to use the original screws (if in good condition,) as I know they will fit perfectly.
the top of the desk was covered in, what looked like, black chalkboard paint. It was chipped up, which made it a bit easier to remove.
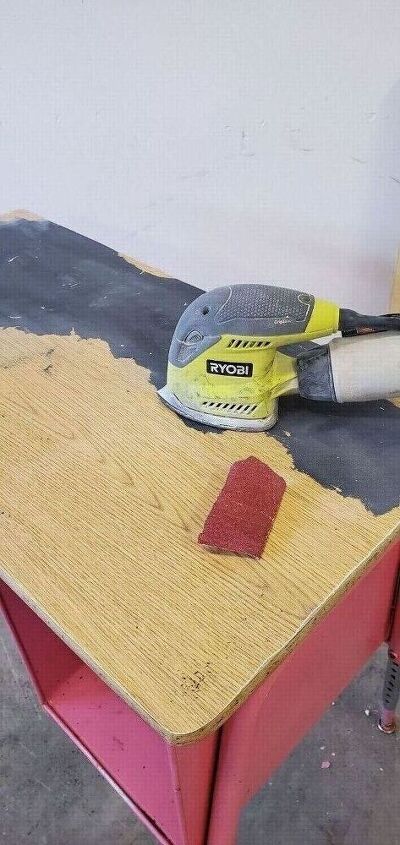
I used my Ryobi hand sander, with a 120 grit, to remove the paint. It took some time; but did come off without ruining the top.
For this project, I wasn't looking for a dark rich stain; rather slightly darker than the original color. This was very easy to achieve, due to the fact that the stain did not absorb well into the type of coated wood the top consisted of.
I applied about 3 coats Miniwax stain, in Dark Walnut, allowing each coat to dry between applications and wiping away excess stain. The stain was just the right amount to create that color I was looking for.
I used polycrylic, in a matte finish, to seal the stain.
before applying paint, it's best to always wipe down your piece. I removed the dirty and dust using a vinegar and water mix.
I absolutely love chalk paint! I love the finish and the little work required to apply it. I used House&Canvas chalk paint, in Evergreen.
I love earthy greens, and this was the perfect color! I have used various brands of chalk paint; and this one is definitely my favorite. It is not super thick like lots of chalk paints, allowing for a smooth, easy finish.
Find out more about the products I used on the blog:
https://www.houseandcanvas.com/diy/2020/05/ugly-metal-vintage-desk-makeover.html
I love chalk paint because it requires little prep work. In this case, I did have to sand some areas of the desk, where the spray paint was chipping. Besides that, I just started painting away!
I like to apply chalk paint with a round bristled brush, made specifically for chalk paint.
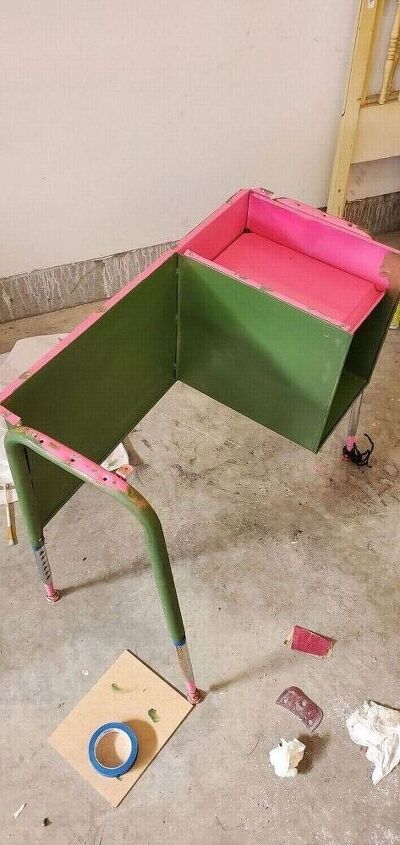
I applied the paint over all the pink spray paint (minus the pink on the legs.) I worked in sections, starting with the back of the piece, and moving inward (the cubby section.) The removal of the top was such a help in applying the paint. It allowed me to easily access the areas needing paint.
I applied two coats of paint, allowing each coat to dry between applications.
in order to keep the paint off the metal legs, I used painters tape. I just taped around the top, close to the body of the desk.
i did not want to paint the metal legs; so I needed to remove the pink spray paint. I found hand sanding was the easiest way to do this. I used an 80 grit, because this is what I had on hand. I made sure not to apply much pressure, to avoid scratching the metal as little as possible.
I also used the sand paper to get some of the rust spots off the metal.
While sanding the pink paint off the legs, I found it difficult to remove the paint in the grooves of the feet. I decided to see what I had lying around, and found this grey colored acrylic paint. I knew I didn't need much, so wasn't concerned it wasn't metallic.
I used a small paint brush and applied a very little amount of paint on the brush. I then applied a very light amount of grey paint over the pink paint. I was able to easily blend the paint and cover the pink.
after removing the pink spray paint, and applying the grey paint to the feet, I was pretty happy with the results. There are still some light scratch marks; but I wanted a worn look, so it's perfect.
I decided to seal my piece with furniture wax, as it won't get a lot of use. Wax is actually recommended for chalk paint; but depending on what the piece will be used for, I sometimes go with a poly top coat.
I used the House&Canvas furniture wax, in walnut. It adds just the right amount of tint to give it that "aged" look.
A good brush is so important when applying the wax. You really need to get a good coverage to protect your paint. I like using a brush specifically made for waxing. You can find these on most sites who sell chalk paint and wax. I used the House&Canvas waxing brush.
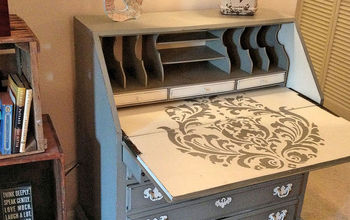
How absolutely beautiful did she turn out?! I wouldn't even know it was the same desk!
Enjoyed the project?
Suggested materials:
- Sand paper (Lowes)
- Chalk paint (https://www.amazon.com/gp/product/B084H24FQR)
- Hand sander (lowes)
- Grey acrylic paint (Michael's craft store)
- Painter's tape (lowes)
- Paint brush (Lowes)
- Furniture wax (https://www.amazon.com/House-Canvas-Furniture-Wax-Protection/dp/B0856Z)
- Polycrylic (Lowes)
Comments
Join the conversation
-
 DN
on May 11, 2021
It looks fabulous! I love the shade of green which goes well with the wood top. Really nice. ❤️
-
-
 Creative Moments
on May 12, 2021
great save!!
-
 Georgia N @myvintage_obsession
on May 13, 2021
Thank you!
-
-













Frequently asked questions
Have a question about this project?