Asked on Mar 27, 2015
"Is your vent hood levitating?"

by
Erin
+20
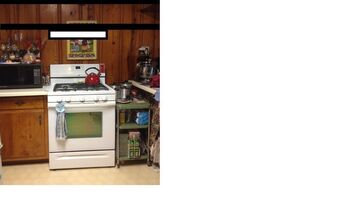
I live in a small house, with no stove vent hood. we are looking at options to install a RECIRCULATING one (which is not ideal, but because of other factors, we can't vent through the roof OR under the house.).
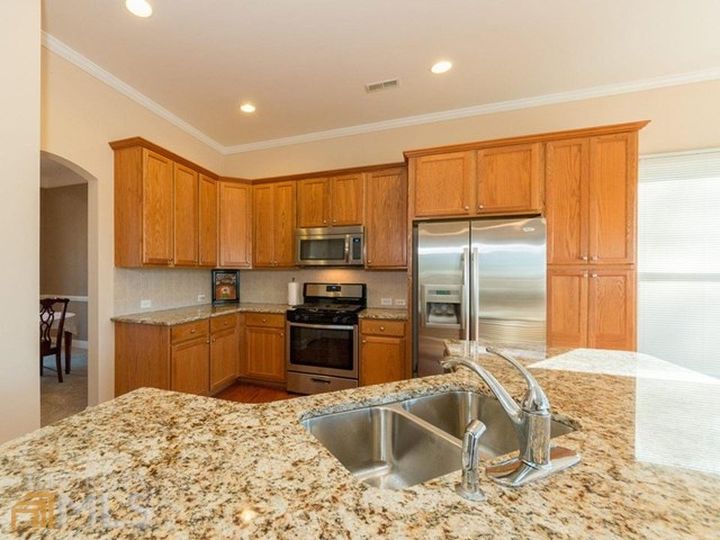
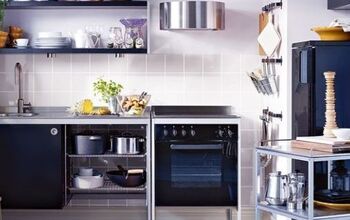
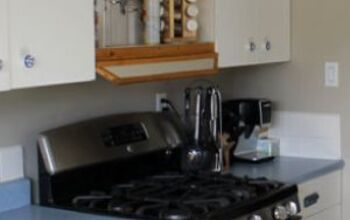
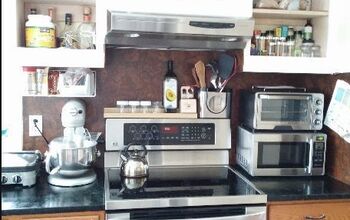
My concern is that the vent hood not look like it is "floating". We are NOT PLANNING on installing cabinets above or to the sides of the stove, as you can see in the picture, there is a cabinet where the microwave is. It is coming out and a tall free standing "cabinet" is going to be installed in it's place. To the right in the picture, you can see the "floating" shelf we have over the kitchen bar, we are thinking about linking the tall freestanding cabinet with another one (or possibly two, possibly boxed in between to create cubes) shelves on the wall, and having the vent hood attached to the bottom of one of those. I've googled lots of images of vent hoods, but haven't found much to allay my fear of the hood looking strange.
The shelves would be the same color as the walls, since the floating shelf is already that color. The vent hood would be matched to the stove color as they usually are. The type of vent we are looking at has the controls on the outside of it, so covering it up by boxing it in is not an option. (unless someone knows of a vent with interior controls that is affordable. if so, please share a link.)
Anyone have any insights? If you have pictures, that would be fantastic.
20 answers
-
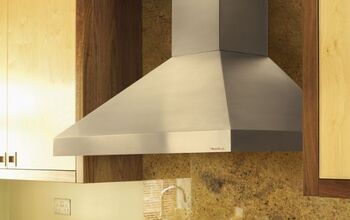
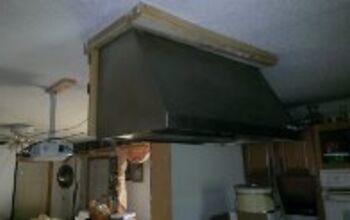
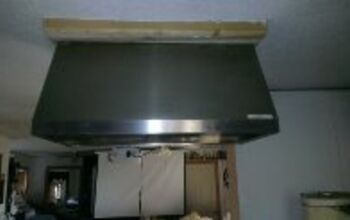
I love trying to find stuff on-line. Here are my ideas. I think the best idea is floating shelves over the stove itself and the hood attached to that.
 Alice Shockley
on Mar 27, 2015
Alice Shockley
on Mar 27, 2015
-
Here's another idea.
Alice Shockley
on Mar 27, 2015
-
The open shelves are similar to our idea... Except ours would be long and rectangular. All the pictures I've seen have SOMETHING end capping the vent, whether it's cabinets, windows or the like. I have thought about boxing it in, but it's a totally different kind of hood for that. (The controls are on the inside, not the outside.) as you can see, I'm still pondering! ;)
 Erin
on Mar 27, 2015
Erin
on Mar 27, 2015
-
So you are looking at just shelves, with the hood hanging down below, with nothing on the left and right sides? I actually think it would look okay. Depends on how far down the hood hangs, but if it's kind of short and sleek...I'd think it's okay. I don't have photoshop or anything, but I drew this on paintbrush...just to see the hang-down look. What do you think?
Alice Shockley
on Mar 27, 2015
-
Yeah, a lot is going to hinge on the hood itself.
Erin
on Mar 27, 2015
-
And that's not half bad for just using paintbrush! Lol.
Erin
on Mar 27, 2015
-
Thanks, lol. I actually think that if your hood was the same color as the shelves it would barely show at all...but then, unless you go with white shelves, it won't match the stove. Anyway, I'm out of ideas. :) Good luck!
Alice Shockley
on Mar 27, 2015
-
I totally agree with Alice on this one! Also can frame it out similar to the stainless one in the first post.
 Hope Williams
on Mar 28, 2015
Hope Williams
on Mar 28, 2015
-
Do check out the hood when planning concerning how high above the stove to mount it. If you mount it too high, it won't vent properly--which defeats your plan for function. Also, you might try some mock-ups of your plans by using cardboard boxes which you could place where you think you want cabinets. Fabricate a range hood out of cardboard to go with the boxes and you can dink around with different solutions.
 Grouchy
on Mar 28, 2015
Grouchy
on Mar 28, 2015
-
I am building a small house and my cook top is in an island and zi installed a vent over it. look good.
 Ray Phillips
on Mar 28, 2015
Ray Phillips
on Mar 28, 2015
-
If you plan on buying a new stove, get a JenAir that vents downward through the floor or straight out the wall.
 Josh Bullington
on Mar 28, 2015
Josh Bullington
on Mar 28, 2015
-
I love the first picture idea that Alice posted although it does look expensive. Maybe building something like it using a bathroom fan/light combo with a charcoal filter in/on it.
 Carol
on Mar 28, 2015
Carol
on Mar 28, 2015
-
Part of the reason why I have concerns is almost every picture you see has SOMETHING on either side of the stove. Windows, cabinets, something that comes down and visually 'boxes' in the hood.
Erin
on Mar 28, 2015
- See 1 previous
-
I hope these help.
Hope Williams
on Mar 29, 2015
-
This is pretty much how most hoods are mounted. You could attach a shelf and mount your vent to the shelf. If at all possible, get one that you can vent outside and doesn't recirculate back into the kitchen. When we put our roof on, we had them cut a hold and put a bafel type exhaust on the roof. Would have preferred using the exterior wall but it was too far. The exhaust tubing can only go so far and that can be found in the owners manual. I do recommend that you stay away from the microwave/vent combo. They do not work nearly as well as a standard vent hood. Learned the hard way on that one!
Hope Williams
on Mar 29, 2015
-
Hope, we cannot vent through the ceiling. I referenced that in the original post. We will have to install a recirculating vent. Because of this, we wil lack cabinets both above and to the sides of the vent, which is how they are usually installed. I also referenced attaching the vent to a shelf, not just the wall. My concern is that it look balanced and well done. Thanks! (i also dislike those recirculating microwave hoods. they're expensive, to boot! ;) )
Erin
on Mar 29, 2015
-
Found this answer on: http://www.frentzandsons.com/content/howto/needavent.htm In this customer’s particular case, venting the stove up through the roof is not an option. Her stove is on an interior wall that backs up to the living room. So, what’s the solution? If you can’t go up, just look down, Mike says. “You can easily run the venting pipes down through the kitchen floor into the basement, then across the basement ceiling to an exterior wall where you can install a vent,” he says. Let’s get started First, here’s list of what you’ll need:An duct elbow joint Round duct piping that is 5” in diameter (that tends to be the standard) and long enough to reach from the oven, through the floor to the basement; A length of 5”-diameter flexible aluminum duct piping that is long enough to reach across the basement ceiling from the exterior wall to the area below your stove; Two metal adjustable hose clamps for clamping the adjustable piping to the vent and other duct work. You’ll also want to have a keyhole saw on hand because you’ll be cutting circular holes in the kitchen floor and the exterior wall of your house. An exterior vent that you’ll mount on the outside of your house and connect the flexible piping. There are three basic types shown here in Figures 1, 2 and 3. Mike’s vent of choice is the one pictured in Figure 1. “These are easy to install, will keep the critters outdoors and they are easy to paint to match the exterior of your house,” he says. Figure 1 Figure 2 Figure 3 From the outside in It might seem natural to get the saw out and start cutting a hole in the floor, but Mike says, “Whoa! Let’s start from the other end.” He recommends figuring out where you want to put the vent on the exterior wall in your basement and then cut a 5-inch hole in the wall. “You want to try and make the hole fit the vent as tightly as possible so that any exhaust doesn’t escape back into the house he says.” Once you’ve cut the hole in the wall, firmly affix the vent to the outside of the house using screws that will hold through wood and/or aluminum siding. Then go down to your basement and fit the flexible piping to the vent using one of the adjustable rings. Now it’s time to start cutting the hole in the kitchen floor. Before you cut, it’s really important to make sure the spot you’ve chosen to run the piping lays in between the floor joists. The last thing you want to be doing is cutting through one of those your you’ll jeopardize the stability and support of your flooring in the kitchen. To help guide you, put one end of the straight duct piping up to the ceiling and trace a circle around it. When you go to cut a hole in the floor to accommodate the pipe, you want to make the hole about 7-8” in diameter. This provides the piping some room to give in case you need to move the stove a little bit here or there. Mike recommends using the straight aluminum duct piping here because the flexible type is easily perforated and you could end up with an air leak. Once your hole is cut, attach the straight duct piping to the stove and feed the piping through the hole in the floor. Now head back to the basement and attach the elbow joint to the duct piping coming through the floor. Lastly, use the other hose clamp to fit the flexible piping to the elbow joint. That’s it – you’re cooking now
 Gale O'Neal
on Mar 29, 2015
Gale O'Neal
on Mar 29, 2015
-
I don't have a basement. We are installing a recirculating vent. My question is about design and asthetics... Thanks.
Erin
on Mar 29, 2015
-
http://www.amazon.com/AKDY-Convertible-Stainless-Ductless-AZ-B02-75N/dp/B00AEZIVWA/ref=cm_sw_em_r_awdtod_qAqgvb0TN1EE0_tt
Hope Williams
on Mar 30, 2015
-
I googled wall mount, ventless range hood. As far as aare tics go, it's personal taste that fits you best.
Hope Williams
on Mar 30, 2015
Sign Up to Answer