A Guide to Painting Wood – Tips and Tricks to Get the Perfect Finish
Painting wood can be a pain if you don’t use the right techniques and materials. Fortunately, it’s not as tough as you think once you learn the basics. In this piece, we’ve picked out some fantastic projects that not only show what’s possible with wood paint, but also demonstrate how to achieve the best results. What’s more, we’ll settle the age-old debate about whether you should paint wood or not!
1. What’s the Best Wood Paint?
According to Natalie, the best wood paint is chalk paint. Alternatively, a clay-based paint will also do the job, as both types provide a flat finish and, importantly, don’t require any sanding or primer. As long as you apply two coats and finish with polyurethane, you’ll get smooth results as you can see in the image above. Get tutorial here
2. How to Paint Wood Furniture
Painting wood is a science. As At Home with the Ellingtons have shown us, prep is crucial. When painting their kitchen, they worked in sections, labeling each part as they removed it. After degreasing the wood and sanding, they vacuumed. This was important as it removed dust and allowed the smooth, long-lasting finish you see above. Get tutorial here

3. Painting Wood – Three Unique Looks
In this project from Val Frania, you can see how different shades can create a unique look. After sanding and repairing her antique dresser, Old Fashioned Milk Paint gave it a new lease of life. The key to this look is mixing powder paints. This allows you to create a darker shade at the bottom that gradually melts into lighter tones at the top. Get tutorial here
4. Get Creative When Painting Over Stained Wood
Turning 80s stained wood into a modern marvel requires paint, wax, and creativity. For this project, BJ Massa sketched flowers on the tabletop and filled in with Espresso and White Ning stains. For the base, layered greens covered the old stain for a regal feel. A final coat of hand-rubbed wax sealed the surface of this fresh-looking 80s revival. Get tutorial here
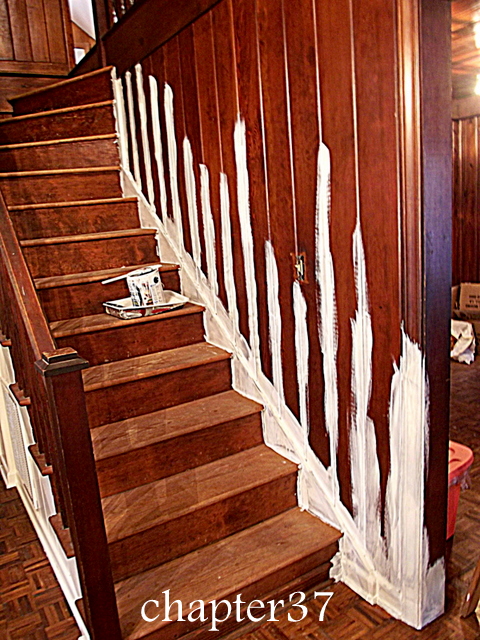
5. Painting Wood Paneling Takes Time
Painting wood paneling isn’t the same as giving drywall a new look. According to Abby, the key to success is in prep using TSP and in cutting in. Take your time cutting in between each board and do it freehand instead of relying on painter’s tape. Once you’re done, a thick first coat followed by a thick second will have each panel looking like new, as you can see. Get tutorial here
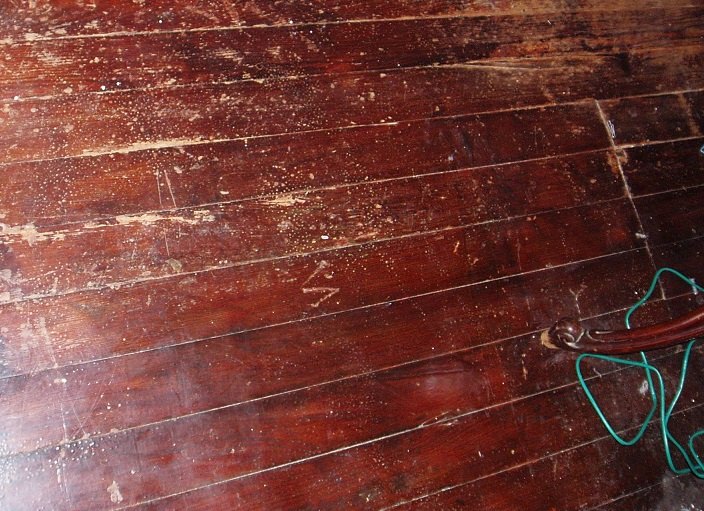
6. Wood Floor Paint Wonders
Painting wood floors doesn’t require endless hours of sanding. According to Hometalker Janet, a high bonding thick primer is ideal for covering up imperfections. For this project, Janet applied a few coats of grey paint once the primer was dry. From there, she added stencils for decoration. Finally, a coat of clear poly gave her floor a neat shine. Get tutorial here
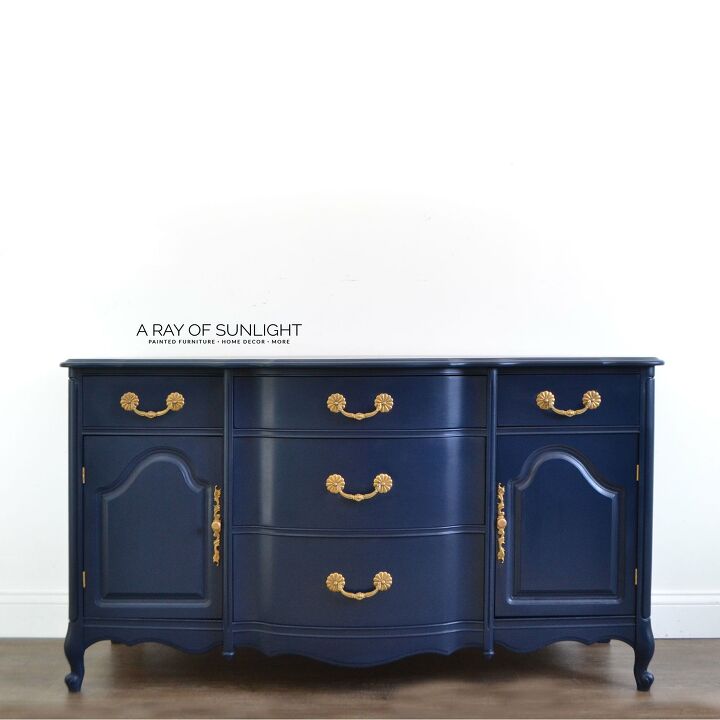
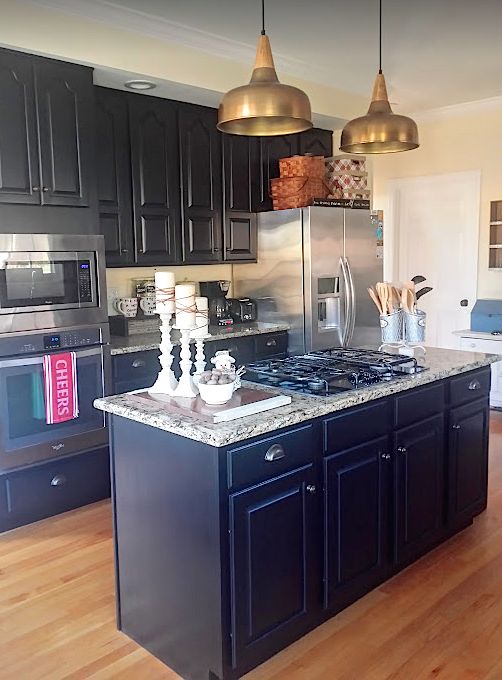
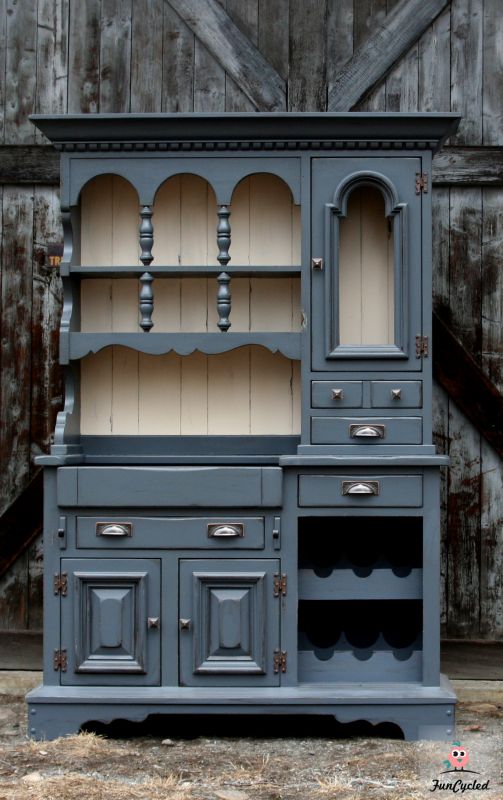
7. Be Bold When You Paint Wood Cabinets
Wooden cabinets need to be bold. Whether they’re standalone or part of your kitchen, they should be a focal point like this project from At Home with the Ellingtons. To quickly transform their stained wooden cabinets, they used General Finishes Lamp Black Milk Paint. As well as preventing any bleed through, the color provided a contrast to the lighter worktop. Get tutorial here
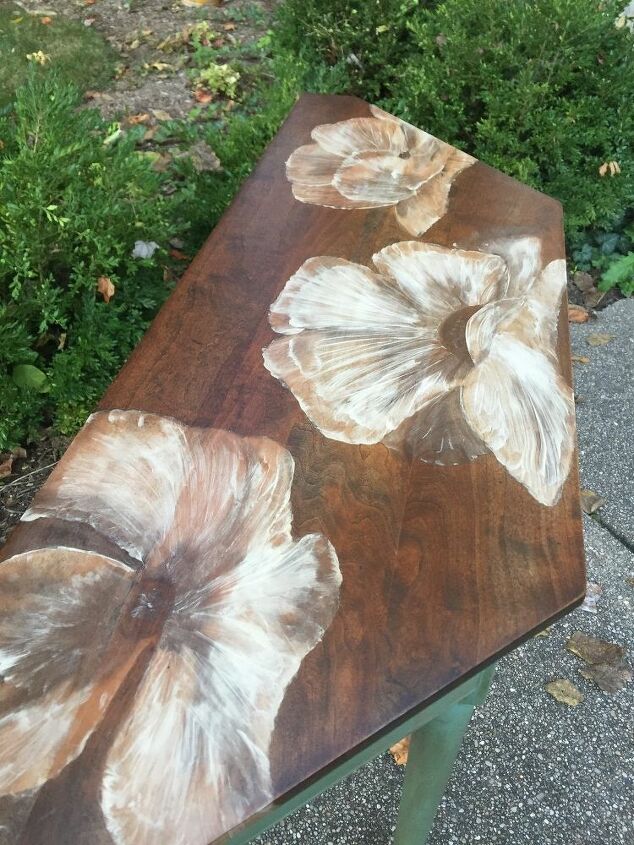
8. Paint Wood, Don't Hide Wood
The grandeur of walnut isn’t something you want to hide. As you can see, Megan chose to enhance her table’s innate qualities rather than cover them up. The basic elements here were a primer, stain, and a glaze. For the walnut top, two coats of Minwax's Dark Walnut brought out the natural grain. For the base, Rust-Oleum's Decorative Glaze in Java Brown provided a distressed look without any sanding. Get tutorial here

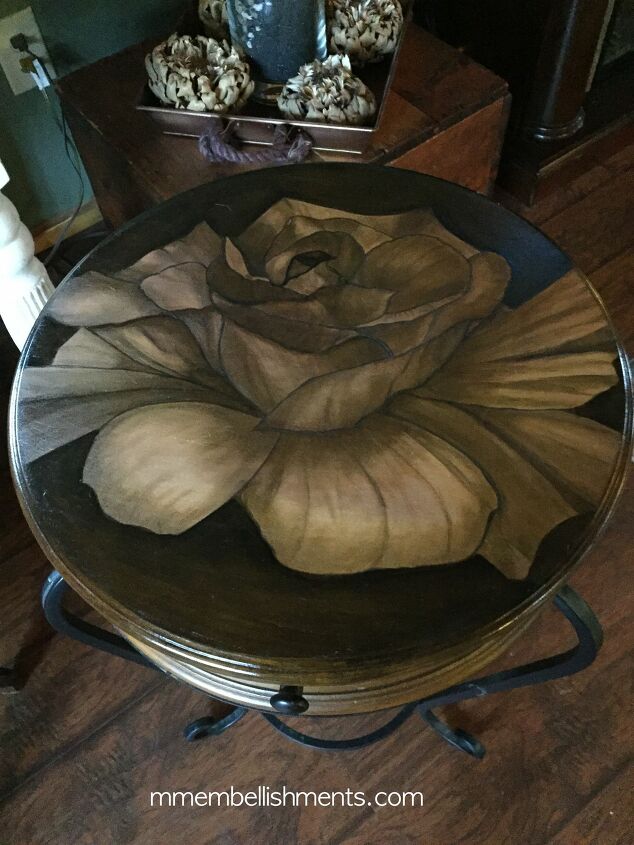
9. Stencil Success – Painting Over Stained Wood
Instead of painting over stained wood, why not work with it. In this project, M&M Embellishments used a maple stained table as the base for a rose design. After drawing each petal (you can use a stencil), she applied light and dark stains to bring the rose to life. A top tip is to place an object on the table to ascertain where the shadows fall. Get tutorial here
10. What to Do When Wood Paint Gets Wet
When you’ve just painted a wooden surface, there’s nothing worse than a watermark. Well, according to Debbie, all you need is Zinsser Bulls Eye Spray Shellac to solve the problem. One spray of this seals the stain and prevents any bleed through. Once sealed, a quick touch up with the original wood paint and the stain is gone! Get tutorial here
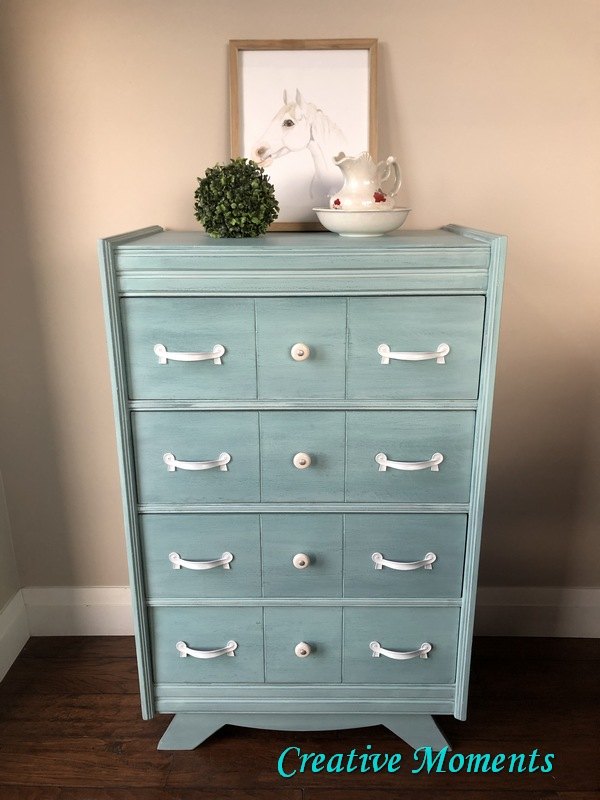
11. Watery Wood Painting Technique
Ever seen furniture that flows like water? For this dresser, Creative Moments used milk paint to achieve a unique finish. Firstly, she layered Miss Mustard Seed milk paint with a short cling brush. Once dry, she applied Fusion Mineral Paint's beeswax and MMSMP paint in Eulalie's Sky. Finally, she sanded to blend the colors. Get tutorial here
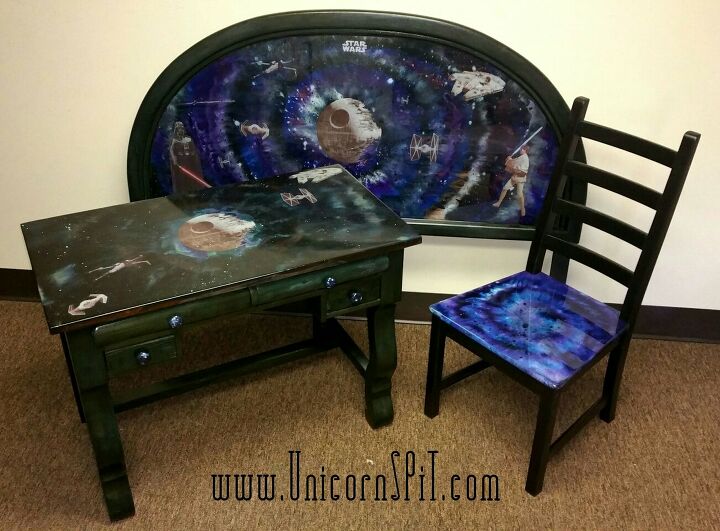
12. A Star is Born - Intergalactic Wood Paint
Wood paint doesn’t have to be boring. For her son’s space-themed room, Michelle made a spiral pattern on the surface of the wood. After misting with water, she put a plastic drop cloth on top. Misting again, she slid her hands across the plastic to swirl the paint. Finally, she removed the cloth, flicked in some black paint, and primed it. Amazing! Get tutorial here
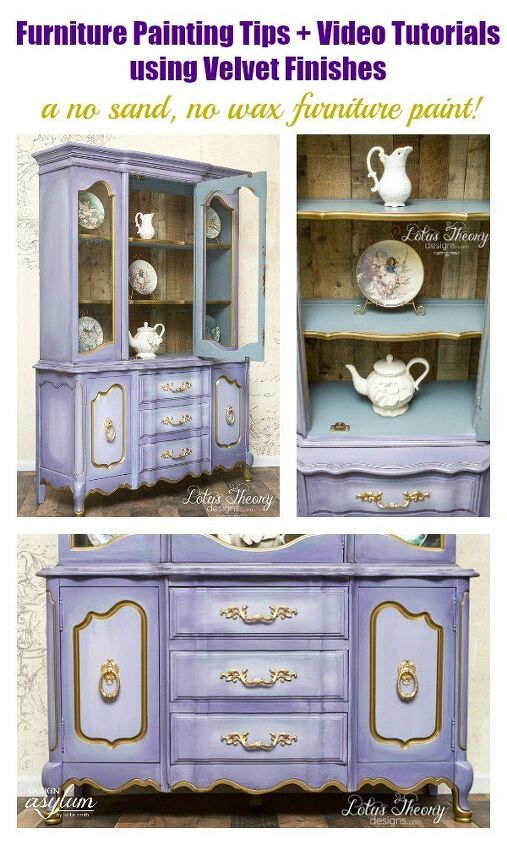
13. Wood Paint as Smooth as Velvet
For a velvety smooth finish like this one from Lotus Theory Designs, try blending and sanding. Using three velvet paints, this Hometalker sprayed on a basecoat before smoothing with fine-grit sandpaper. Finally, she painted sections in different colors and sprayed with water. With the paint moist, she used a dry brush to blend the colors. Get tutorial here
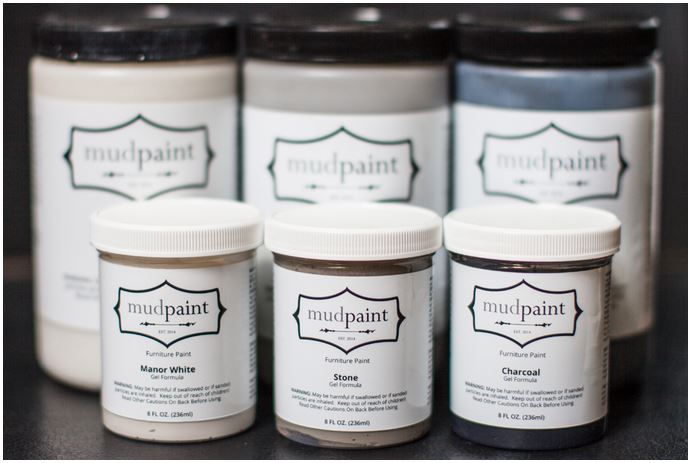
14. The Best Paint for Vintage Furniture
When you’re painting wood, materials matter. With that in mind, what’s the best paint for vintage pieces? According to Genevre, it’s Mudpaint, which she has used for several projects. As well as being able to apply this onto almost all wood surfaces without any primer, Mudpaint can be used to paint, distress, and “antique” furniture, as you can see in the image above. Get tutorial here
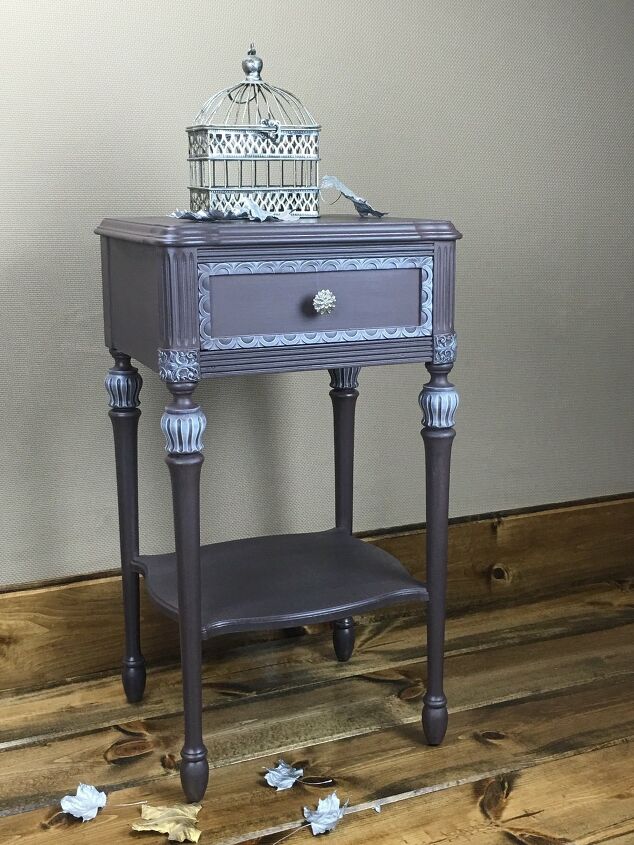
15. Soft Wood Finishes Need Hardware
One of the most overlooked aspects of painting wood is the hardware around it. In this project, Sarah Top found that grey and cream was the right combination to create a bold look. After painting the dresser, she found copper knobs at a local hardware store. The matt finish allows the sheen of the copper to take center stage and create a rustic yet modern look. Get tutorial here
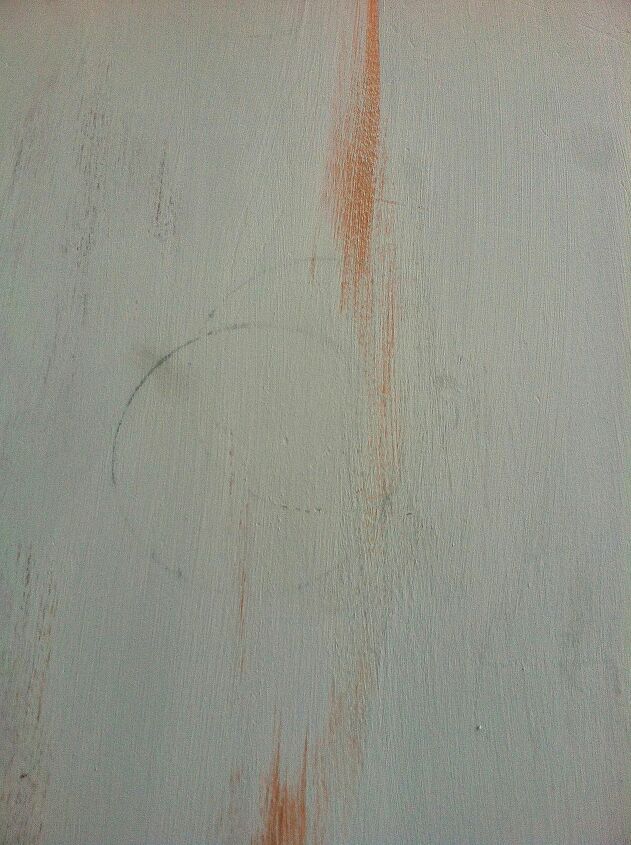
16. How to Paint Wood Without Being Perfect
Not all wood painting projects need to be perfect. For this console table, Jenni wanted a distressed look. That meant leaving its imperfections in place. Still, she wanted to add extra distress. She went over the surface in 120 grit and then 220 grit sandpaper. From there, she gave this piece a fun, rustic look with three coats of Persimmon Milk Paint with Antique White. Get tutorial here
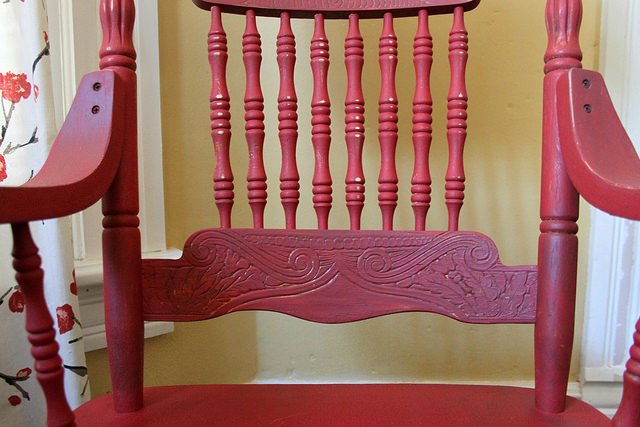
17. A Little Wood Paint Goes a Long Way
It took just five paints and an hour of work to transform this dining room set. Dixie Belle Paint Company used different colors and the paint stretched a lot further than expected. For the chairs, they needed just two coats of Dixie Belle Chalk Mineral Paint. Once dry, they distressed the surfaces with a sanding sponge before adding Grunge Glaze for a shiny finish. Get tutorial here