I thought of adding shelving to be able to go up the entire system and then I will paint the shutter in a great color with mandala stencil to give it some bling. I then think I will put one on each side of my front windows which I think would hide them but I will still have access to all my supplies. Anyone have any better, prettier or more economical ways of storing tons of crafts supplies? Thanks for reading and giving me any input. God Bless :)
Asked on Jan 06, 2018
I am a craft supply hoarder

by
Sam Bo
+6
I have most labeled in plastic shoe boxes and I am not allowed to put screws or permanent holes for shelving. I do have double full length louver doors and plan on converting these into shelving units to hold the shoe boxes but if you have ideas that do not cost a lot but will stand the test of time and look great I do not mind putting some money into it. I am overwhelmed

Hi Sam, Here's a link with lots of idea:
https://www.pinterest.com.au/pin/767582330210103104/?lp=true
Good luck!
Wardrobes are a great way to store crafts and keep them organized. They range in price from $60.00 and up.
https://www.target.com/p/clothing-armoire-black-prepac/-/A-538180?ref=tgt_adv_XS000000&AFID=google_pla_df&CPNG=PLA_Furniture+Shopping&adgroup=SC_Furniture_Top%20Performers&LID=700000001170770pgs&network=g&device=t&location=9027437&gclid=CjwKCAiAhMLSBRBJEiwAlFrsTqf0C_JNcET38qJSJSCW0DOhEcri0bQCWs3445sU_6if1Ihl-WNeDBoCCWsQAvD_BwE&gclsrc=aw.ds
If you don't mind splitting the shutters, you could do what my mom did when she needed a book shelf in her family room in the basement. She had a whole bunch of reused brick left over from building their house, the outside and a good sized wall in the main floor family room and the basement family room had fireplaces and built ins with the bricks. She took redwood shelving and the reused bricks and made a DIY bookshelf that was three shelves high and about six feet across. You could do something like that using bricks or even concrete blocks. The only thing you have to do is make sure that it is solid on the floor and stable with the weight that you put on it. The placement of the bricks or blocks depends on the length of the shelves and the height of the shelves. I now have that book case and it is working well for me with all the books I can put on it, it helps, as every bookshelf is crammed two deep with books. It takes no time at all to put together once you know how you want to set it up. Good luck on your project!
two old step laddders could hold the doors to make a shelf. Also a couple of 2 door filing cabinets, spaced a doors length apart could hold a door. Stack boxes on the floor under it, then on top. With 2 more file cabinets you could go up another another level and place another door on Top. Fill the cabinets with what ever fits inside them. Milk crates could be used to build the shelves too. There’s also plastic shelving.
Hi Sam Bo,
What is your budget? Do you live in an apartment so you can’t attach shelves to your walls or is it a husband thing like not being allowed to paint wood? I would give my eyeteeth to paint my dark, dreary, kitchen cabinets, but you would think it is an unpardonable sin to touch wood with paint. Men sometimes. Sorry guys.
I really like the shutters just as they are, maybe painted in a color to match the room. I would use them for doors. You can even use hooks to hang things on the louvers inside or cute little pots of flowers on the outside to add color and cheerfulness to your work area.
Can you buy or build some free standing bookshelves? If you build your own, I would get some 6-8 foot x 1-2 foot pieces of wood for sides and put adjustable metal shelf strips on them. Or if they are not in your budget, drill holes at multiple heights in the side pieces and use those little plug shelf holder things. Sorry, I know they have a correct name, but it escapes me right now. Think the metal strips would be just as cost effective though. You will need two strips per side.
Then buy a couple pieces of pegboard and some hooks to put on the back between the two side pieces. There are all kinds of hooks for holding various items from curved to straight to small for one item or long ones for multiple items. Of course, you will have to add wood strips to the top, middle and bottom running between the end pieces to hold it all together and screw the pegboard into. This way you can adjust the shelves to many heights to fit whatever you want to store on them and have the pegboard to hold scissors, tape, ribbon, glue gun and all items you want handy to grab quickly without opening the shoe box.
I love pegboard for my craft room. I even picked up some plastic baskets with holes on all sides at the dollar store for my ribbon. The dollar store is a great place for dirt cheap craft storage and organizing items. I ran dowel rods through the rolls of ribbon and hung them in the baskets with the tails of the ribbon going out the holes for easy unwinding, cutting and preventing tangles. Depending on the size of the rolls, I was able to get 2-3 levels of ribbons with 4-6 rolls per level in each basket. I hooked the ends of the dowel rods, that extended beyond the baskets, on hooks on the pegboard. Neat with easy access and visibility.
Attach the shutters to the front of the units with hinges to be your doors. Put some pretty door handles or pulls on them. If you have a unit on either side of the window, you can have one with doors and one without if you prefer.
If you need a work area, stack some bricks or cinder blocks and lay a piece of wood between them or look for a clearance piece of countertop for a desk/work area. Paint the wood or cover it with cute contact paper as a smooth, splinter free accent. Even two, two drawer filing cabinets under the board/countertop would give you extra storage. I would run it under the window with the cabinets on both sides so you have a place to sit and work with a nice view and light when crafting. You can also hang often used materials on the outside of the cabinets next to your work area for easy access. Or hang a pretty pictures to enjoy while working.
A lot of time Habitat for Humanity has great pieces at great prices. Or check garage sales, Goodwill or thrift shops for items you can paint or fix up to fit. Probably find some inexpensive shelving units at one of them and then all you need is some pegboard for the back. I would remove the back of the cabinets and replace them with the pegboard. If the backs are thick enough, cut them down to make extra shelves.
I hope this makes some semblance of sense. Not sure I explained it well enough for you to build sturdy cabinets. I sweet talk my wonderful husband into doing the engineering of my numerous ideas. :-> Do you have someone with building talents you can recruit to lend a hand with the construction? Frankly, I would hit the thrift shops to keep hammer, sawing and nailing to a minimum. Painting is cheap and easy if you find the basic pieces. :->
Wishing you much success and enjoyment on your finished storage design. I hope you will post pictures of it along with your crafting creativity!
Hi Sam Bo
i too am a craft hoarder. When my kids left home i used one of the bedrooms as my craft room. Now i have a grown daughter and two grandchildren living here so had to give up my craft. I do have a large dining/living room combo that i am using as dining/craft room. I will show you picks of things i have done.
i bought an armoire from a thrift store
i bought two matching cube shelf units
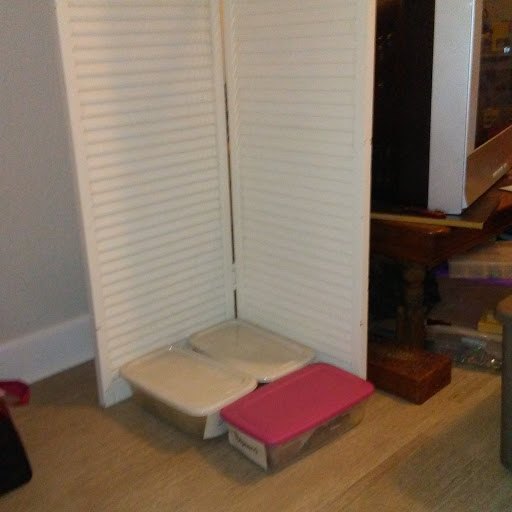
i made a folding screen out of window screens we didn’t use to hide stuff behind
Maybe these ideas will help you!
I would stretch the shutter doors across crates to make a table. Then I would skirt your new table and store the shoe boxes underneath. https://www.exquisitelyunremarkable.com/2014/11/ring-clip-skirted-table-easy-diy.html