


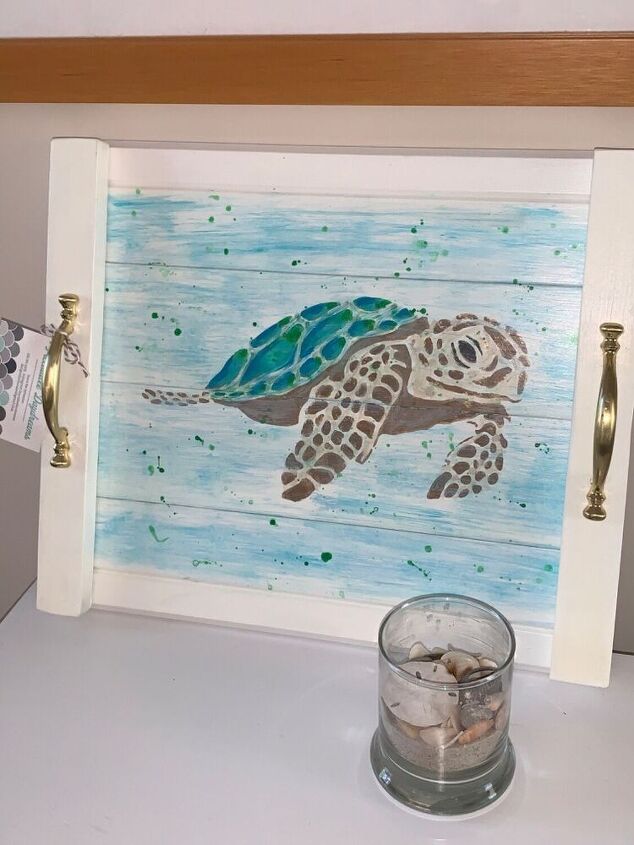
Sea Turtle Serving Tray

I live on the North Carolina coast and belong to a sea turtle patrol group. We love our sea turtles. Doesn’t everyone! Here is an idea that looks great and is functional in so many ways. Lots of pictures with easy instructions. You just might realize that you can paint a sea turtle too!
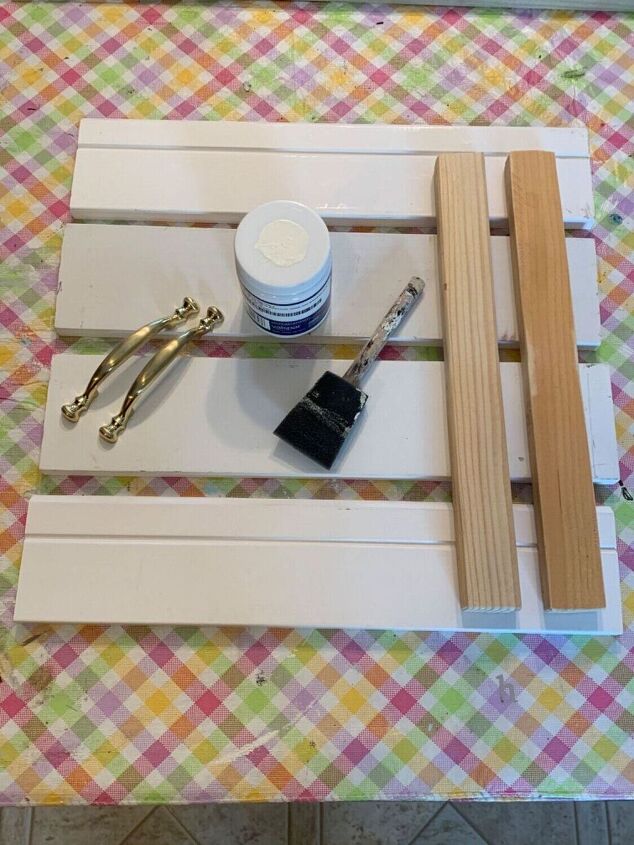
The white wood is from my son-in-law who does trim work on new homes. So I’m lucky enough to get his scraps. Two smaller pieces of wood are used to hold everything together and makes mounting the handles easier. The size of wood depends on how large a tray you want. The smaller pieces of wood need to be as long as the width of your tray. This tray ended up measuring about 18” x 14”. This whole project cost less than $10 because I really only needed to buy the handles. I had everything else in my stash.
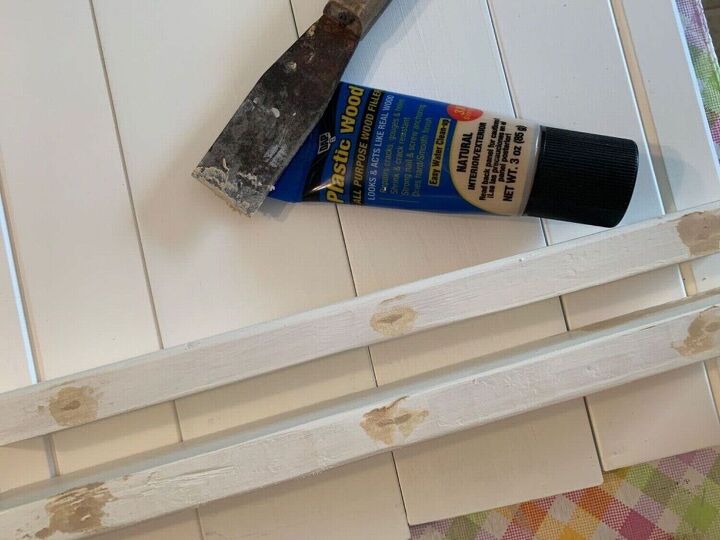
The smaller wood was leftover from a project and had a few nail holes. Wood putty to the rescue.
I then gave all the wood a quick coat of white paint so everything looked fresh. Don’t forget to paint the edges!
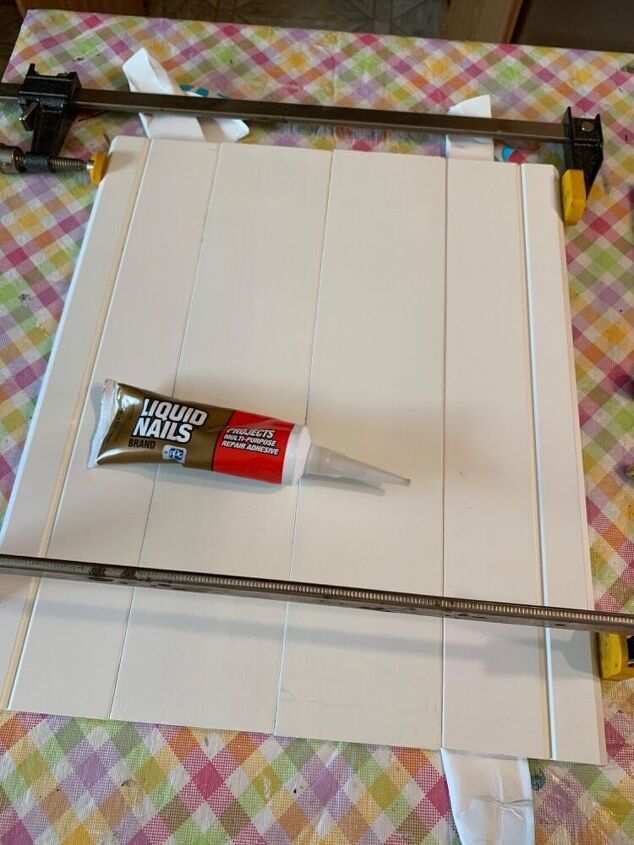
There is an easy way to connect the four pieces of wood. I used liquid nails and then held everything together with large clamps. Let this sit for a few hours until the liquid glue is good and dry.
If you don’t have clamps place something large and heavy on both sides. There’s always a Plan B!
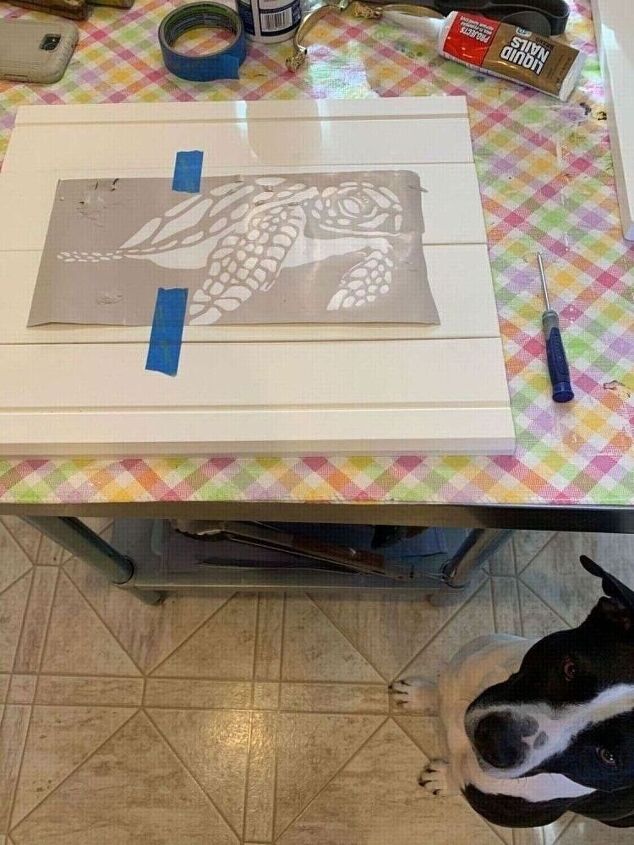
I make my own stencils with my silhouette cameo cutting machine. I use inexpensive shelf liner for my stencil material. Wait until you see how easy it was to paint a very colorful sea turtle on this tray.
Miss Abby always seems to get into the picture.
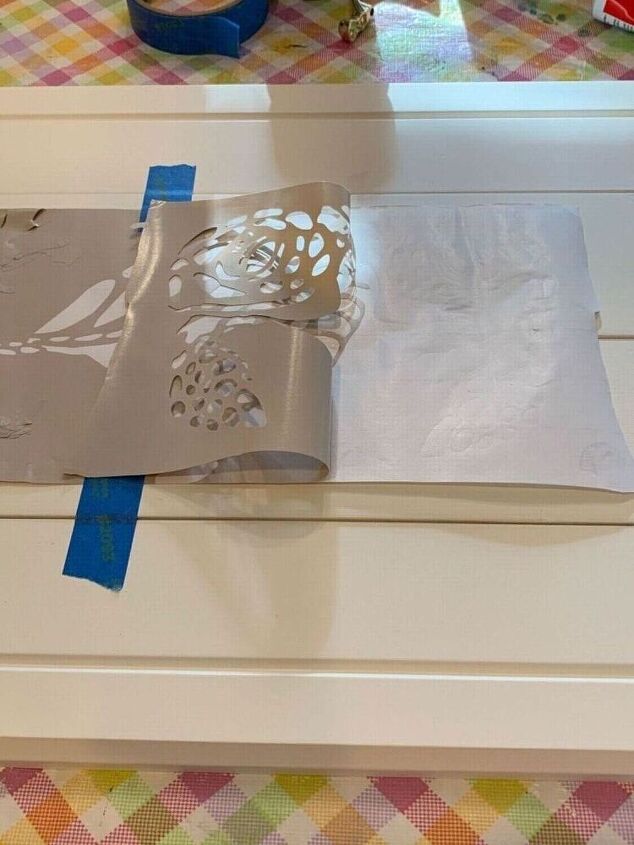
The stencil material has backing. A good tip is to not pull off all the backing at once. First I use painters tape to secure it in place. Then I peel off maybe 1/3 of the backing at a time. So easy.
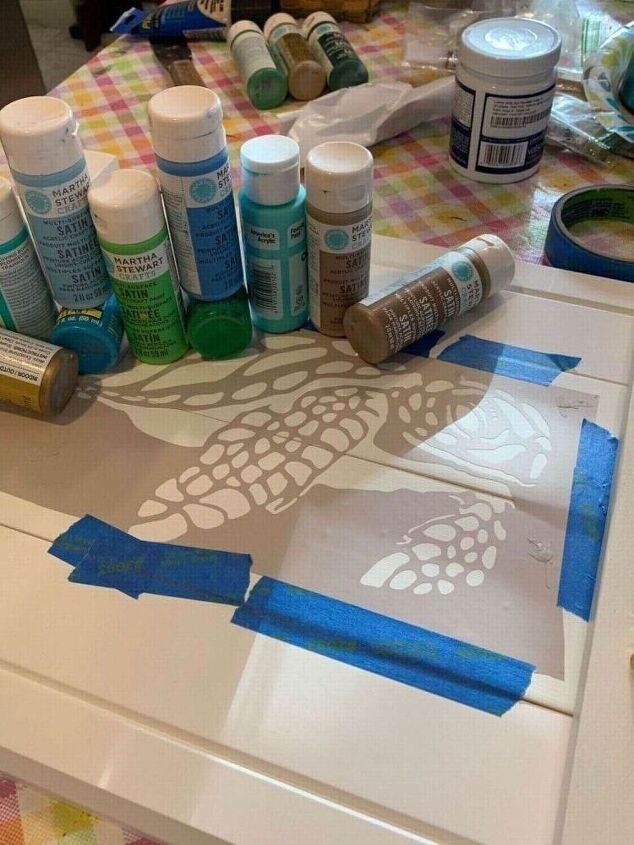
Gather a combination of blues and greens. I even added gold paint to the mix. I placed painters tape around the edges so I don’t accidentally get paint where I don’t want it.
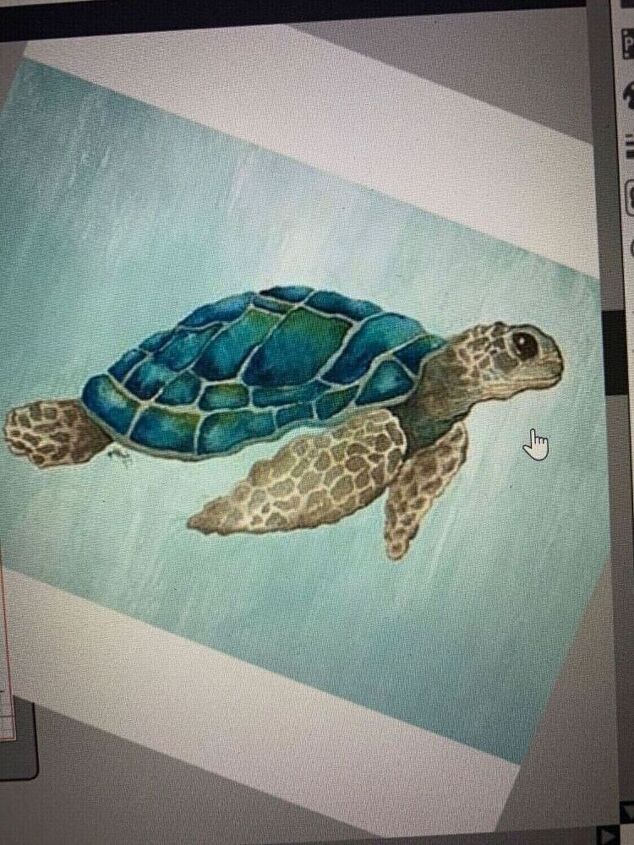
Find a picture to use as a guide. This style of painting and stenciling doesn’t require perfection. And that makes this project so easy!
Add dollops of all the different color paints to a paper plate. After placing the paint onto the brush be sure to dab it on a paper towel. This will keep it on the dry side on your brush. Too much paint can leak under the stencil.

Don’t be afraid to add more than one color in each area. Perfection not needed! After I pulled off the stencil I used a tiny brush to add the in between colors.
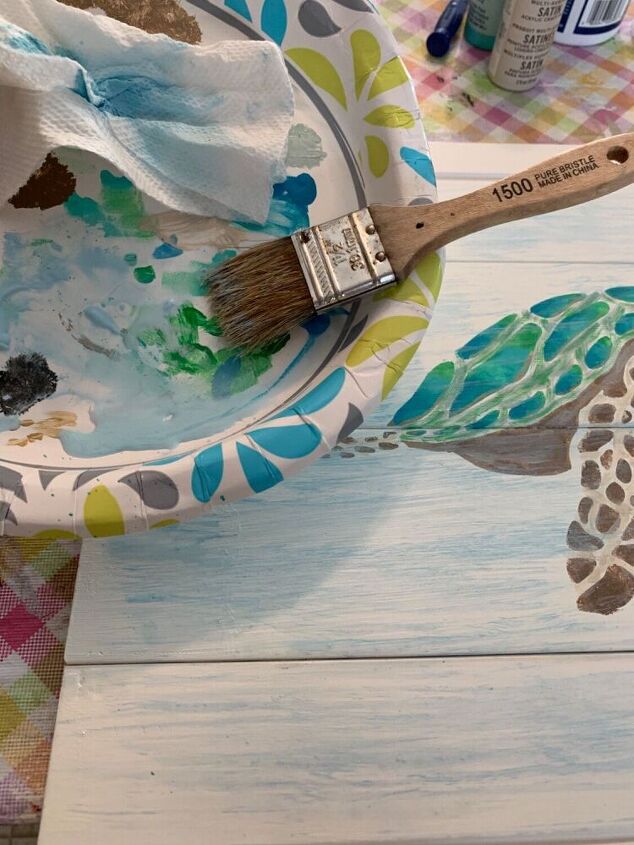
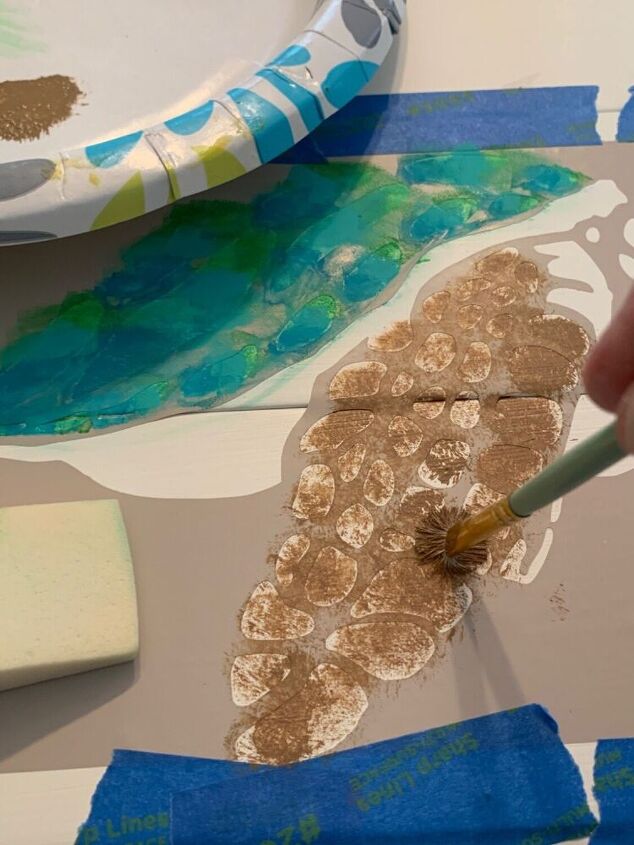
Using a chip brush and watered down blue paint I added the color of the sea. I wet the brush and then ran it across a paper towel first. When I added it to the tray I even lightly went over the sea turtle. Doesn’t she look wonderful!
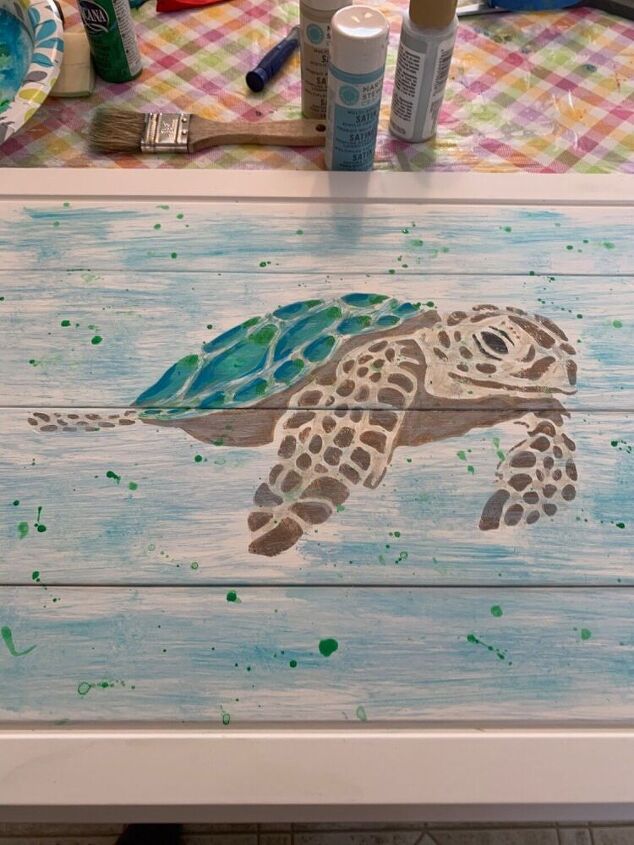
I decided to splatter on a little green paint here and there. I thought it gave it an interesting look.
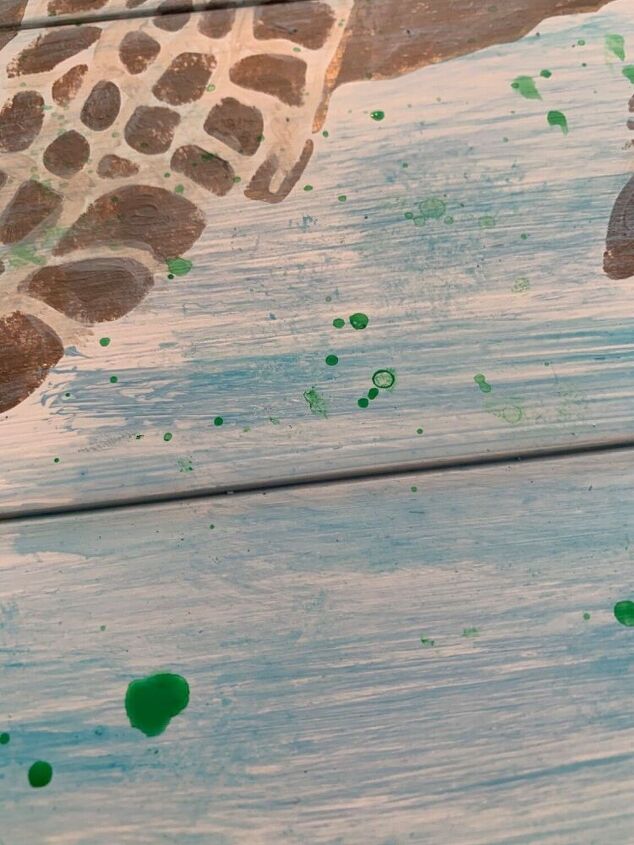
In some cases I dabbed the green splatter with a paper towel. After it dries completely I added a clear sealer to protect the project. I also added the clear sealer to the top side of the two small pieces of wood.

The two smaller pieces of wood are going to be attached to the tray on either side from top to bottom. But first we are going to add the handles. I used a marker to put black ink on the bottom of the handles on the screw holes. When I placed the handles in the exact location where they belong it left to black circles. I now know where to drill the pilot holes for the screws that go into the handles!
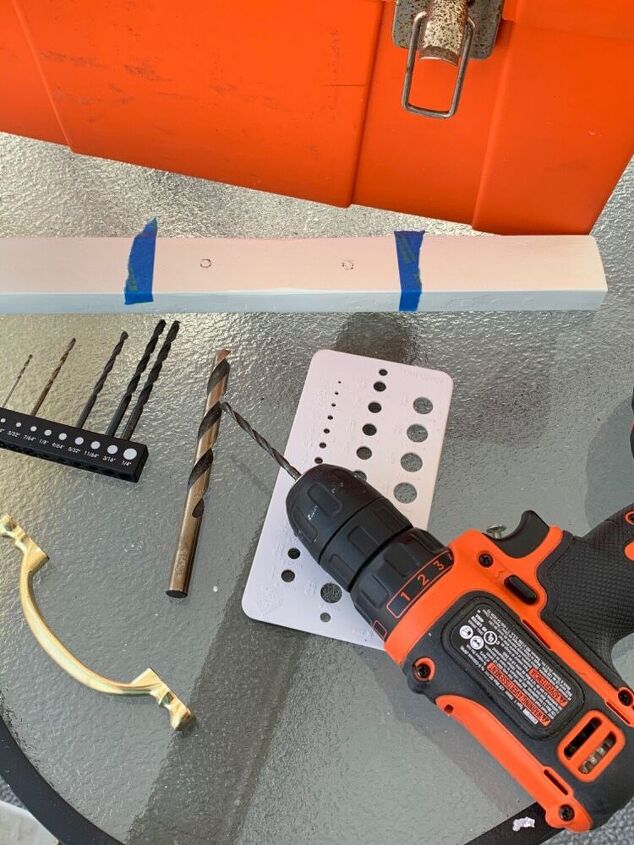
Another tip is that before adding the ink to the handles I measured and placed the handles where they belong. Then I put painters tape either side. This was very helpful to put the handles down when creating the two black guide circles. I used one very small drillbit for the pilot hole. Then I used a larger drill bit to add a partial larger whole for the screw head to sink in.
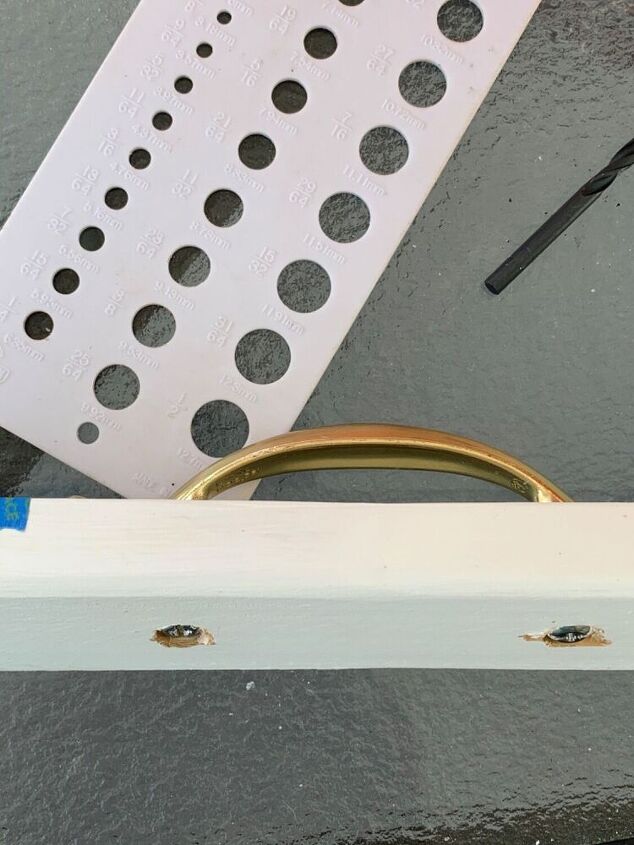
i used the drill bit guide to figure out what size bits to use. Here is a picture showing the handle screwed on. You can see the bottom side where the screw head sinks into the wood. Now they are ready to be added to the tray.
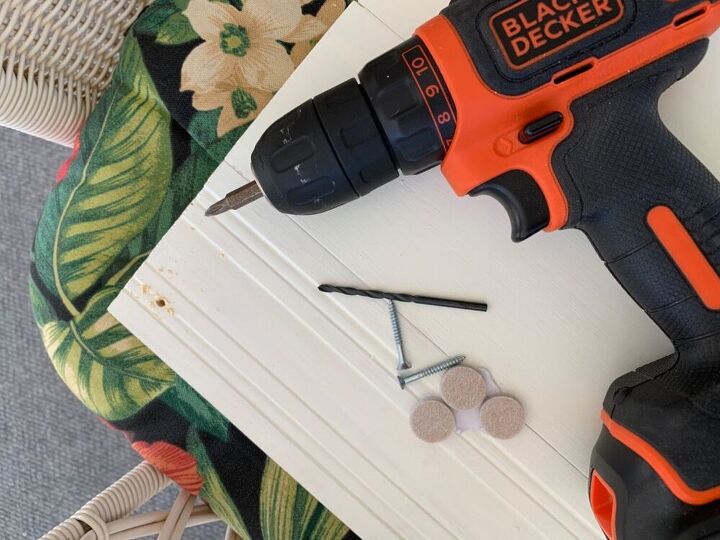
This is a view of the bottom of the tray. I’m going to screw on the smaller pieces of wood with the handles from the bottom of the tray. Once again I drilled a tiny guide hole. Then I use the drill to set the screw. The four round pads are to hide the screws and at the same time add an extra cushion on the bottom of the tray.
Not bad for my first attempt at something like this. And now it’s ready to be dropped off at the consignment shop.
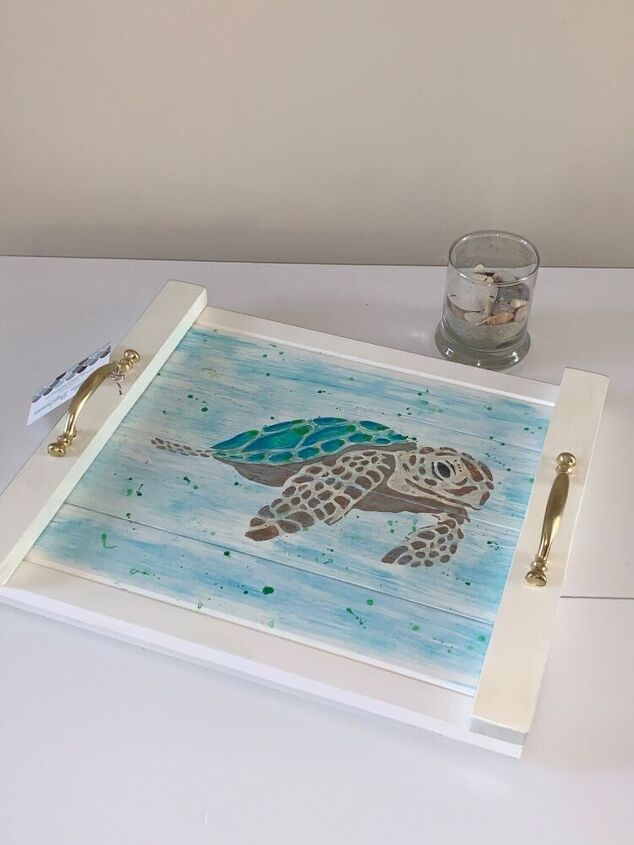
Wouldn’t you love to have this mama sea turtle tray in your house? I’m sure somebody’s going to really enjoy this. It’s a functional tray or a decorative piece. Either way it’s a win-win!


Comments
Join the conversation
-
WOW!! What a beautiful tray! It turned out lovely- can hardly believe it’s your first try Lauralee! I do not have a Cameo but would love to create a tray with a beautiful design like that sea turtle! Thank you for sharing!! Beth
-
Fabulous! Thanks! I am a follower now!


Frequently asked questions
Have a question about this project?
Can you link your turtle stencil?
I love this and would love to make it, but I don’t have a stencil or a stencil maker, so what should I do?