


How to Build a DIY Chaise Lounge With 2x4s & Memory Foam

Creating your own DIY chaise lounge can be a rewarding and cost-effective project, providing you with a comfortable and stylish piece of furniture for your home.
In this step-by-step tutorial, I'll guide you through the process of my DIY chaise lounge plan using 2x4s as the base. Get ready to unleash your inner craftsman and transform your space into a cozy retreat.
Tools and Materials
- 2x4 lumber
- Stainable wood filler
- Sandpaper (various grits)
- Wood stain in your desired color
- Old memory foam mattress
- Fast tack adhesive spray
- Batting
- Fabric (preferably stretchy)
- Staple gun
- Wood screws
- Kreg screws
- Hardware for the legs
- Screwdriver
How to build a chaise lounge
- Step 1: Building the Base
- Step 2: Fill Cracks
- Step 3: Sand the Base
- Step 4: Stain the Base
- Step 5: Cut Memory Foam
- Step 6: Attach Foam to the Base
- Step 7: Cover with Batting
- Step 8: Apply Fabric
- Step 9: Attach Wood Base to Foam Base
- Step 10: Repeat Process for the Backrest
- Step 11: Cover the Backrest
- Step 12: Attach Hardware
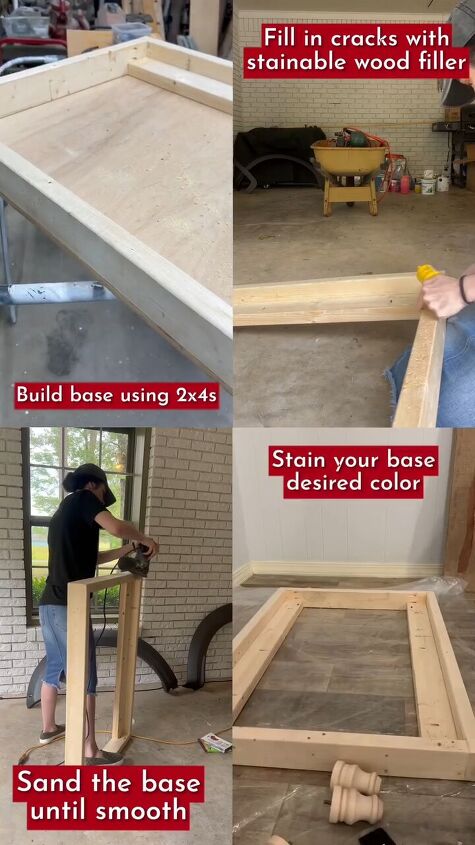
Step 1: Building the Base Using 2x4s
Begin by constructing the base of your chaise lounge using 2x4 lumber. Create a sturdy frame that provides ample support. Ensure the dimensions align with your desired chaise lounge size.
Step 2: Fill Cracks with Stainable Wood Filler
Apply stainable wood filler to any cracks or imperfections in the wood. Smooth the filler with a putty knife and allow it to dry thoroughly.
Step 3: Sand the Base Until Smooth
Use sandpaper with various grits to sand the entire base until it's smooth to the touch. This step ensures a polished and professional finish.
Step 4: Stain the Base with the Desired Color
Apply your chosen wood stain to the base, following the manufacturer's instructions. Allow the stain to dry completely before moving on to the next step.
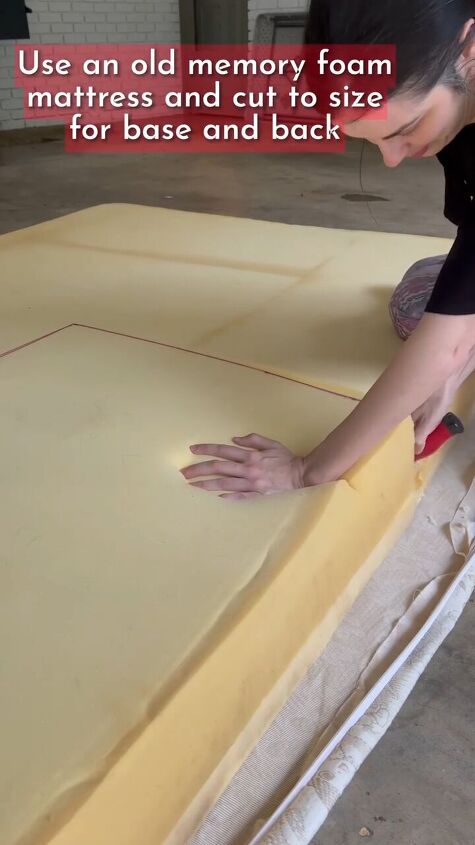
Step 5: Cut Memory Foam for the Base and Back
Trim an old memory foam mattress to fit the dimensions of both the base and backrest. Precision is key to achieving a comfortable and customized fit.
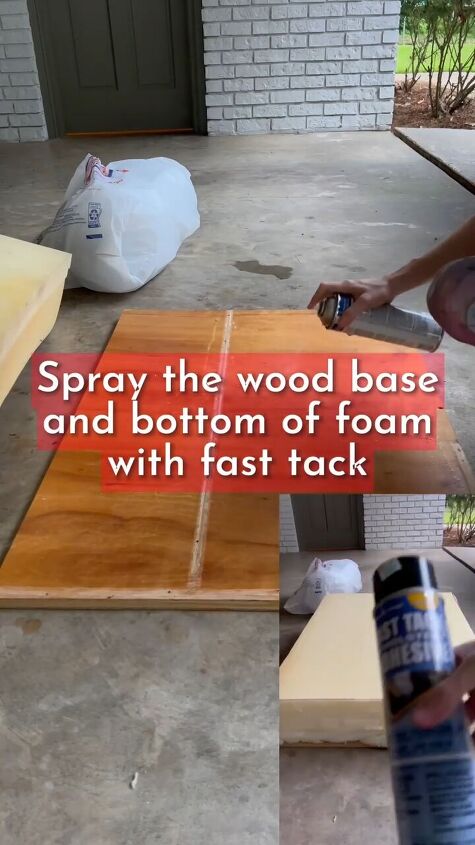
Step 6: Attach Foam to the Base
Spray the wood base and the bottom of the memory foam with fast tack adhesive.
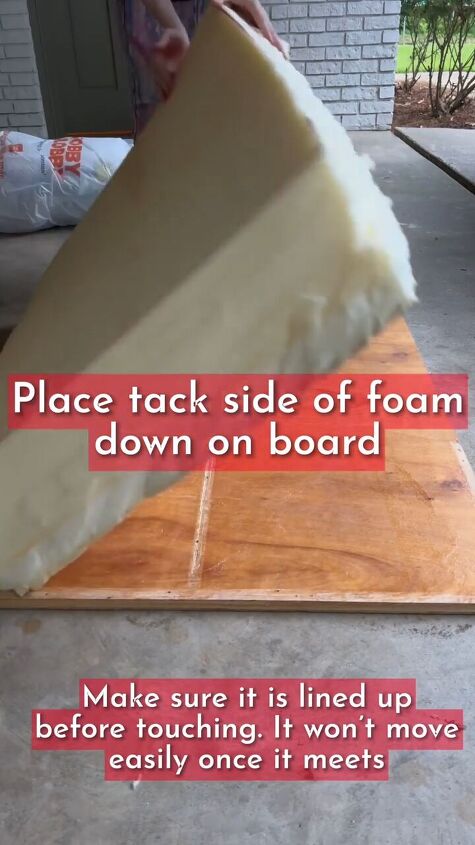
Carefully align the foam with the base, ensuring it's centered before pressing down. The tack will secure it in place.
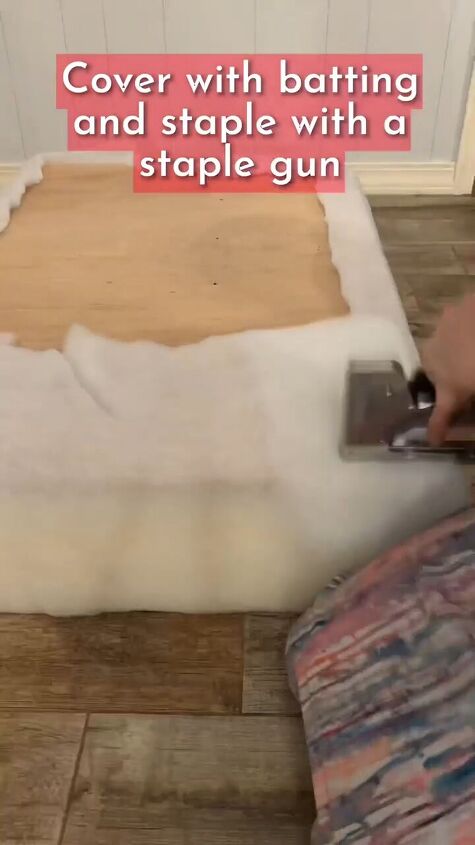
Step 7: Cover with Batting and Staple
Cover the foam with batting and use a staple gun to secure it to the wood base. This step provides additional comfort and a smooth surface for the fabric.

Step 8: Apply Fabric Using a Staple Gun
Stretch your chosen fabric over the batting-covered foam and staple it in place. Stretchy fabrics work best for a snug and professional finish.
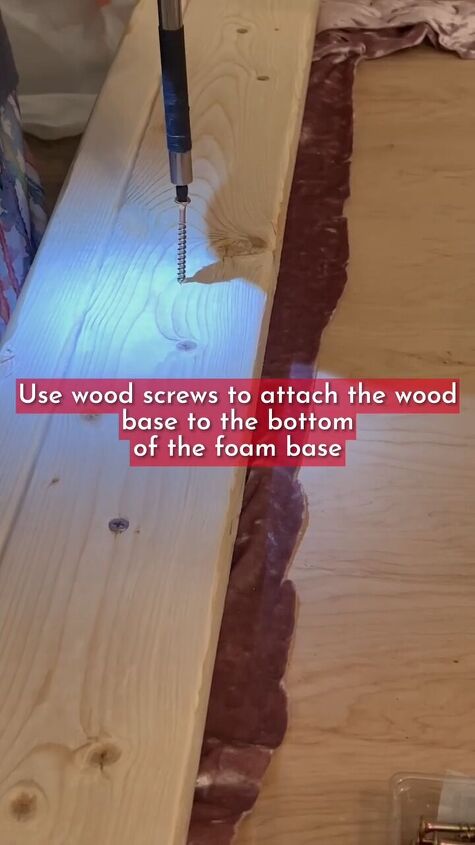
Step 9: Attach Wood Base to Foam Base with Wood Screws
Secure the wood base to the bottom of the foam base using wood screws. This ensures a stable foundation for your chaise lounge.
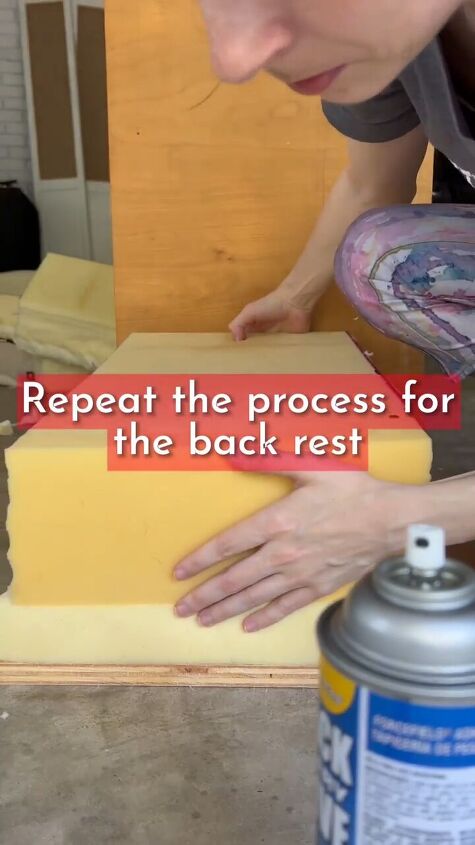
Step 10: Repeat Process for the Backrest
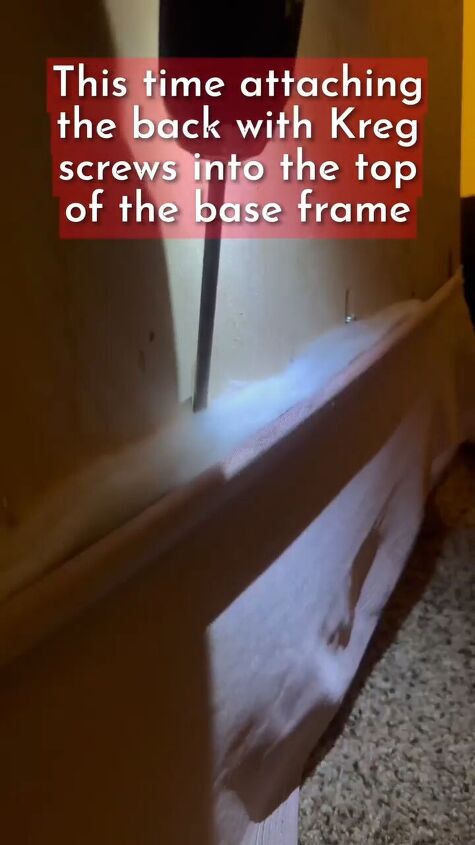
Follow the same process for the backrest, but this time attach it using Kreg screws into the top of the base frame for added stability.
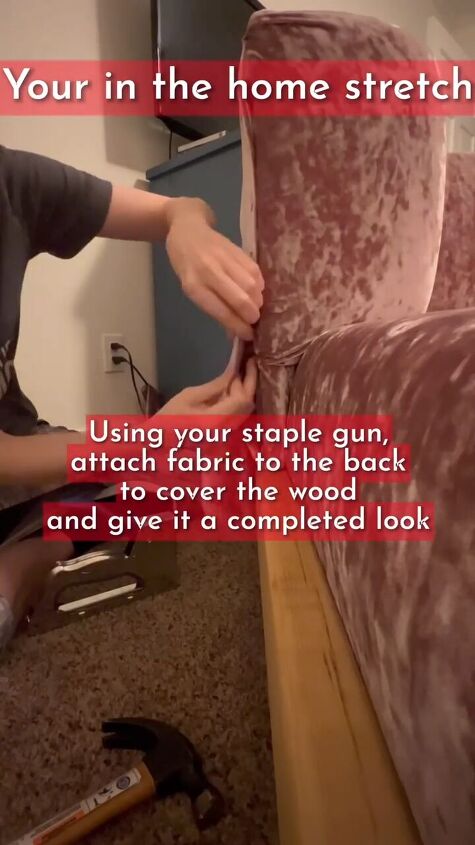
Step 11: Cover the Backrest with Fabric
Use the staple gun to attach fabric to the backrest, covering the wood and providing a polished appearance.
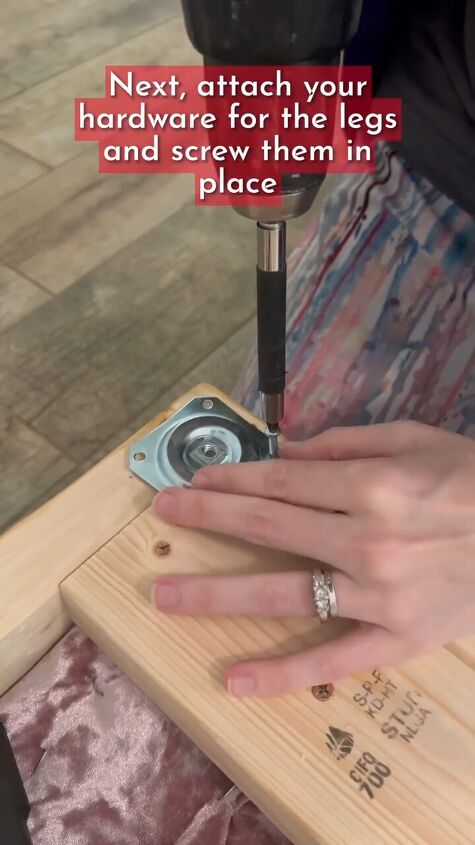
Step 12: Attach Hardware for the Legs
Attach the hardware for the legs to your chaise lounge. Use a screwdriver to securely fasten them in place. Attach the legs and you’re done!
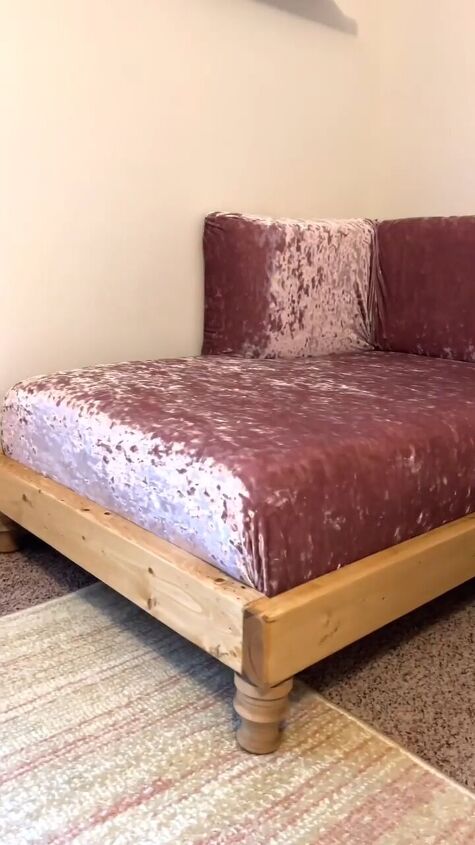
DIY chaise lounge
You've successfully created your own DIY chaise lounge. Now, sit back, relax, and enjoy the fruits of your craftsmanship.
I hope you enjoyed this tutorial on how to build a chaise lounge. Building your own chaise lounge is a fulfilling endeavor that allows you to customize a piece of furniture to suit your style and comfort preferences.
With this step-by-step tutorial, you've mastered the art of crafting a DIY chaise lounge using a sturdy 2x4 base. Whether you're an experienced DIY enthusiast or a novice, this project is sure to add a touch of relaxation to your home.
Leave me a comment and let me know how your chaise lounge turned out.
Follow @hannah.is.home on Instagram for more DIY ideas.


Frequently asked questions
Have a question about this project?