How do I put up shelves that won't pull off the sheetrock wall?
by
Barbara
+3
Related Discussions
Suggested Project Book

What type of shelves are you trying to hang? You need to screw the brackets into the studs.
Hi Barbara. I'm Cindy. Sheetrock is not sturdy enough to insure that the shelves can't be pulled down. You need to anchor your shelves into the studs inside your wall. This will give extra support to hold your shelves securely.
Hello Barbara, Use Butterfly fixings for Plasterboard. They open up when inside to hold and not pull out. Hope that helps....
If you can't hit a stud you need to use drywall anchors.
I presume you have attempted to use 'Shelf hangers' once before, and failed enough to come up with a clever name for these, like: 'Chef Bangers'? So, you are likely not up on that option but prefer something that looks nicer than 2 hooks hanging off of a broken wall.
You live and you learn a general rule of thumb: Never use cheap wood to store expensive stuff.
[Before you do this job, you should download a Stud Finder App for your phone.
For fun, after hours, you may want to run this by the belt buckle of any guy you like, and say: 'Oooh Stud Found' when you do have spare time].
To actually do this you need to do it just like you would do a Flower Box for outside any window or any Cabinet.
Step 1: Design
Step 2: Get materials cut to order at Lowes or Home Depot.
Step 3: You gotta paint or stain before you predrill holes in everything listed below.
60 inch oak shelf (Materials)
A. 1 qty 2"×4"×48" pine or whitewood, as is.
B. 1 qty .75"×4"×72" oak, cut to 48", 2.75" @2 and remains for bookends, crafts, etcs.
C. 1 qty .75" × 8" × 60" oak, as is.
D. Hardwares of Choice, including a package of 4 inch Long Screws and 4 qty 3 inch Bolts with Nuts
E. Stain or paint of Choice
F. Wood Glue
G. 3/4 inch hole saw bit.
Instructions:
After using the hole saw to predrill 4 Holes into the Middle of Board A, [so you can easily Tighten 4 qty 3 inch Bolts with Nuts], Connect board A to the studs behind the wall, with Very large Screws available in mostly any Hardware Section, Lowes, Home Depot or any other.
Level it out before overtightening the Left Top Screw and before planting the Right End Bottom Screw.
After those two are in, you can screw into the other studs between those two screws, and place more easily the Right Top and Left Bottom Screw.
You should not need more than 16 Screws: 8 at top, 8 at Bottom, all sunk into studs.
Once you do that, and get this board level, this 2×4 serves as a model for mostly anything you want to attach, yes, even a llama.
As few desire a llama on the wall, If you instead want an indoor on-wall herb garden, it will hold.
Usually, small boards [the 2 small Board B pieces] around the 2×4, to hide the ugly nasty 2×4 with something nice, like oak, is the first thing anybody wants to attach, so you do that next and
As with any Connection or joint you want to abide the 'use the glue before the screw' rule of Thumb.
Then, you bolt the shelf into the top of the 2×4 aligning with the Holes you drilled with the hole saw.
As soon as you do that you can place the Front piece, [Board B, the 48" piece] over the 2×4.
I know this works.
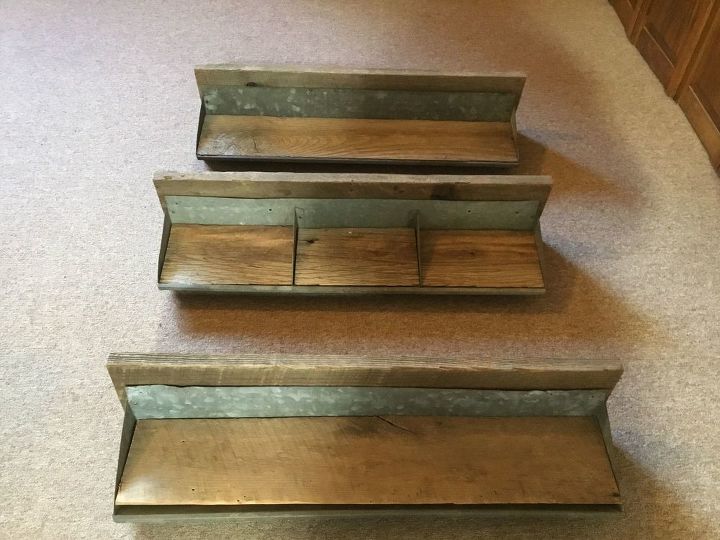
Make self supporting shelving and place against the wall!