


3 Quick and Easy Decorative Taper Candle Projects
Are you looking for ways to decorate your home with candles? Check out these three, decorative taper candle ideas that will add a fun graphic element anywhere you place them.
This post was transcribed by a member of the Hometalk editorial team from the original HometalkTV episode.
Hometalk Recommends!
1. Patterned taper candles
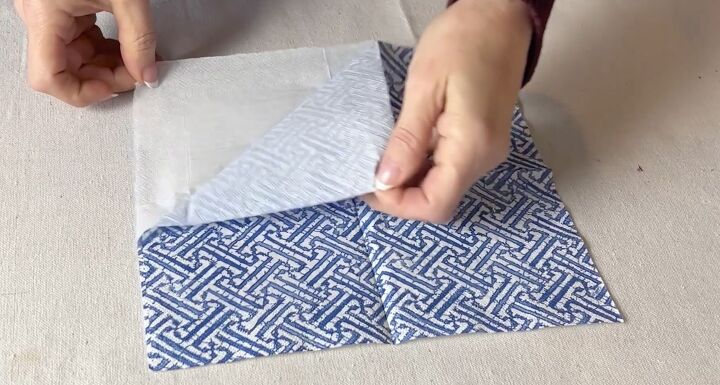
To start this DIY, separate the layers of a patterned paper napkin.
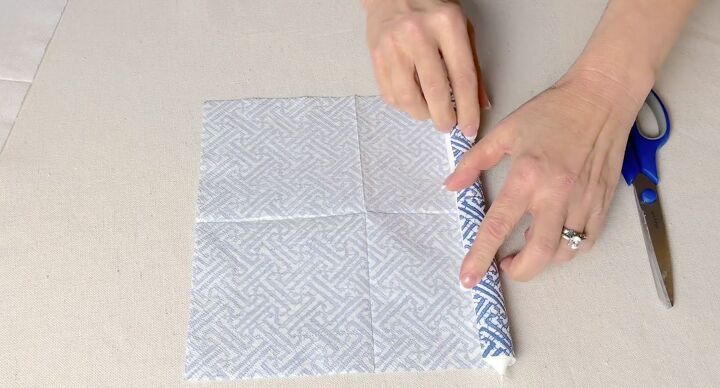
Once separated, measure out and cut the paper napkin as needed to fit the length of your taper candle.
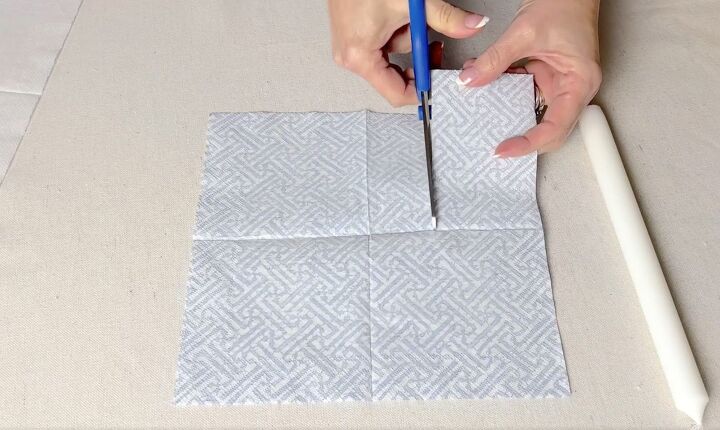
Then cut the napkin to fit the diameter of your candle.
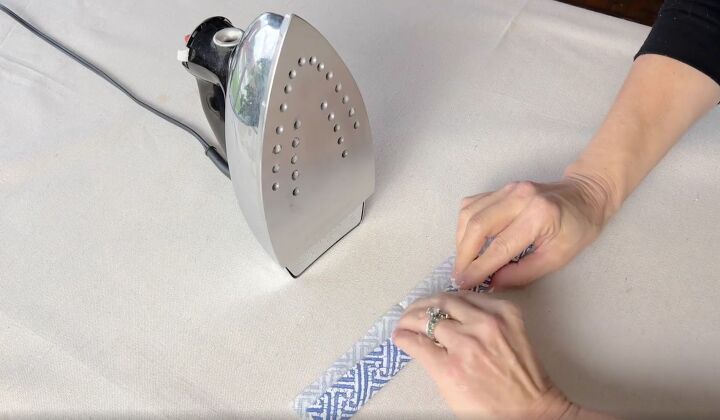
Now we are going to iron the paper napkin onto the taper.
Heat the iron to medium-low heat, not too hot.
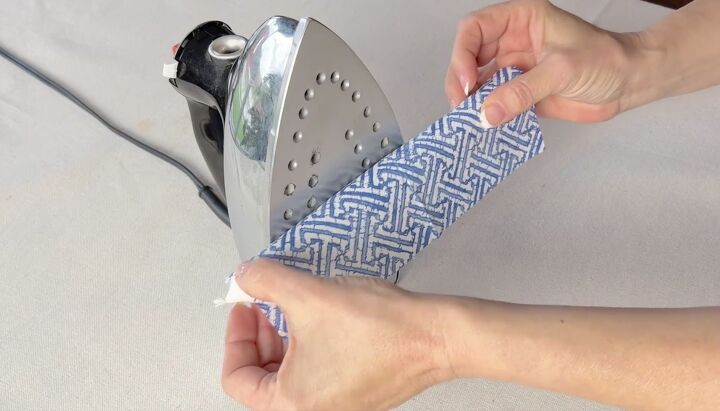
Wrap the napkin around the candle and gently press it against the iron plate. Emphasis on gently. Don't press too hard or you might have a waxy mess on your hands.
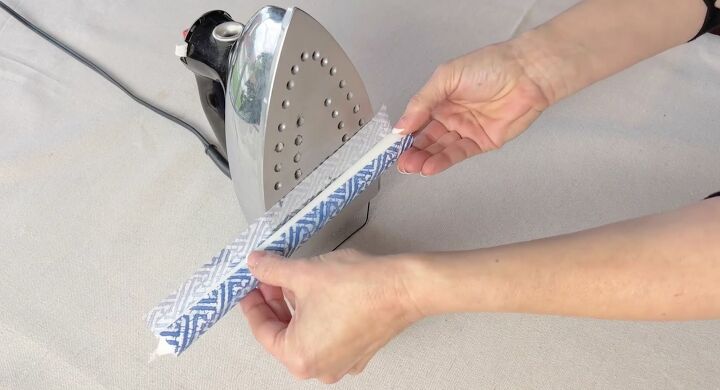
Keep rolling until the candle is completely wrapped in the napkin.
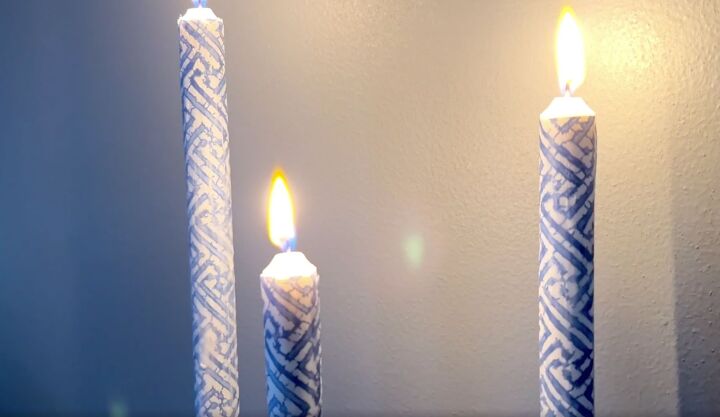
Let the candle cool. It doesn't take very long and then you can use them to decorate your home.
Remember, have fun choosing your favorite colors and patterns in the paper napkins that you use.
2. Twisted taper candle
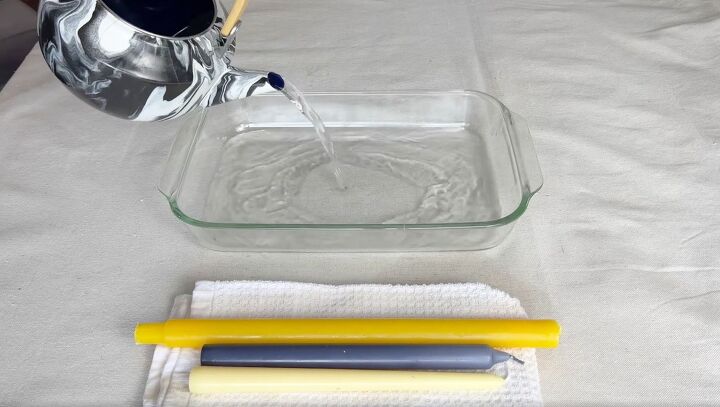
Another way to spruce up a taper candle is to give it a little twist. Fill a heat-safe container with hot water.
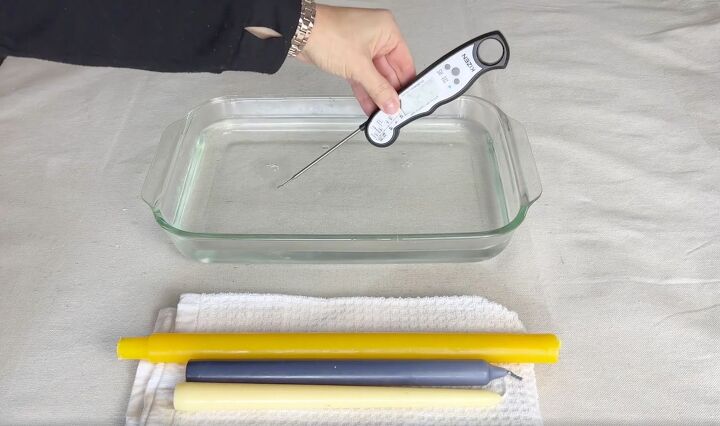
The temperature should be between 100 and 110 degrees.
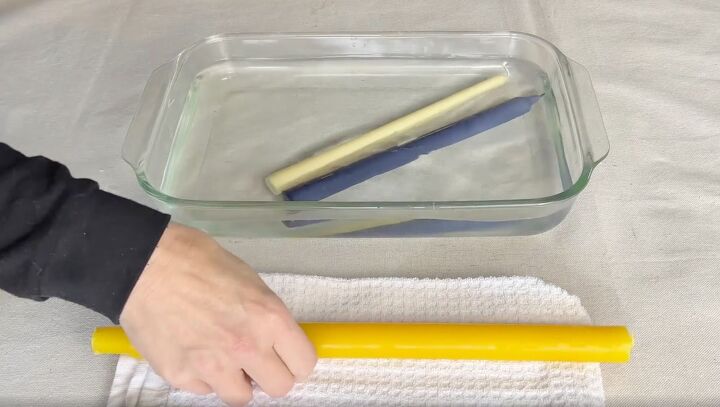
Place the taper candles in the hot water and let them sit for ten minutes. Paraffin candles work best.
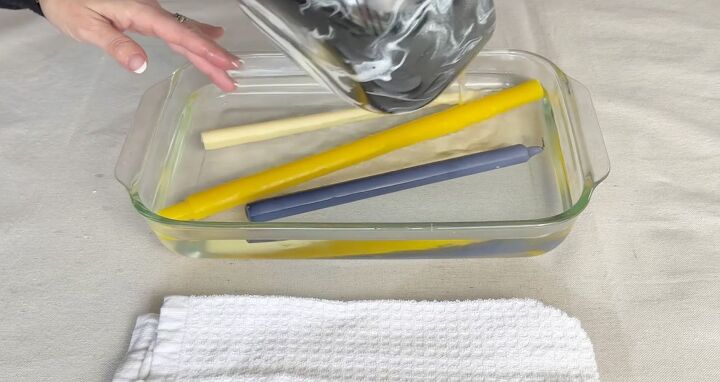
Periodically roll the candles in the water so that the heat is evenly distributed. You can also add more hot water if needed.
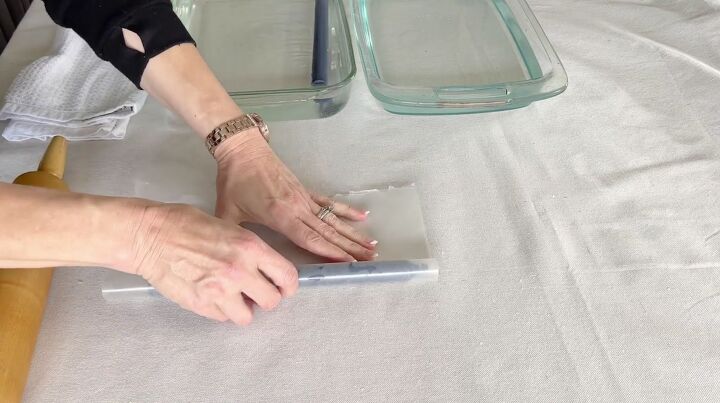
After ten minutes, pull a candle from the water and dry it off with a towel, then wrap the candle in some wax paper.
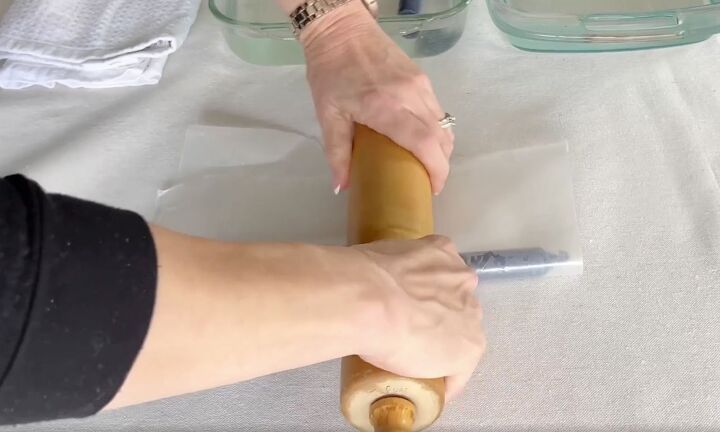
Take a rolling pin and press down on the middle of the candle. Using some strong and consistent pressure, flatten the middle part of the candle.
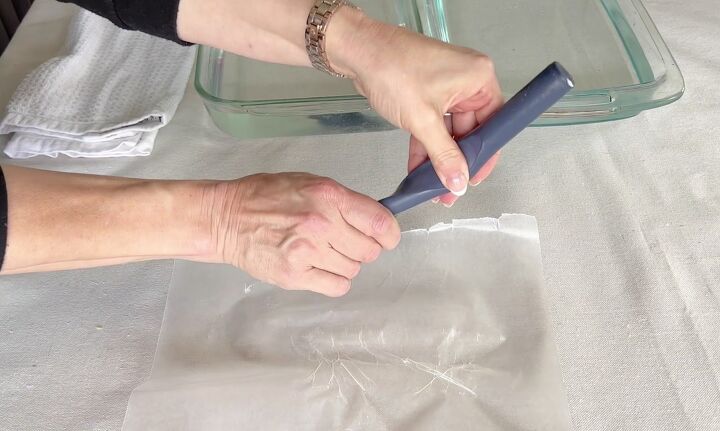
Once the middle section is flattened, take the candle and gently twist it into the shape that you want. With a larger candle, I like to get two or three twists in the center, but have fun and create your own twisted pattern.
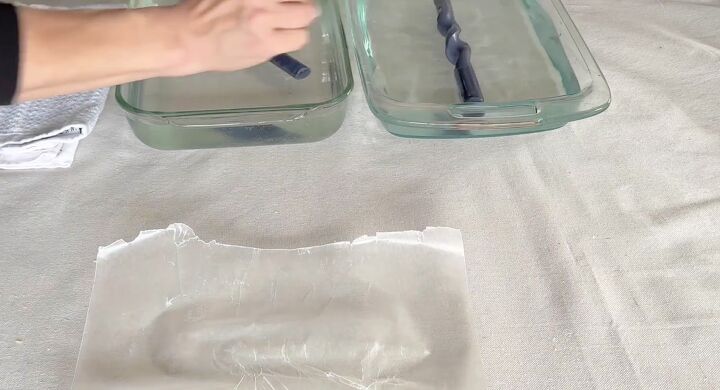
Once you have the desired twist, place the candle in cold water to set it.
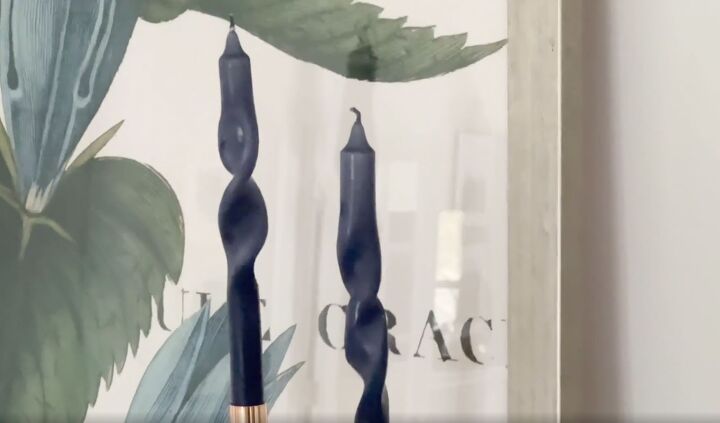
Then have fun displaying your new twisted taper candles.
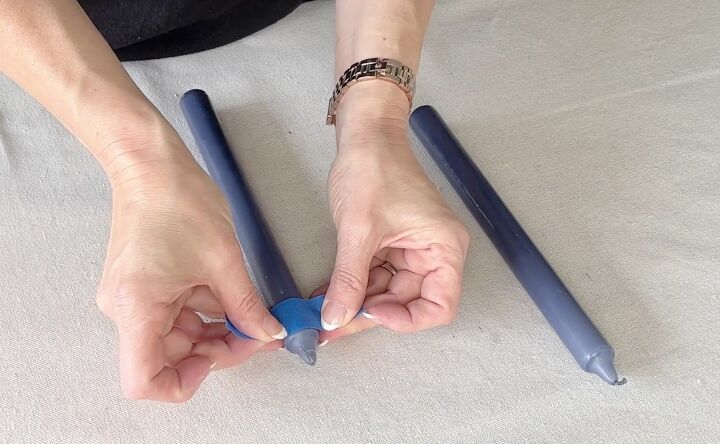
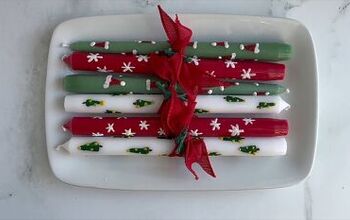
3. DIY striped taper candles
For the last project, tape off sections or stripes on a taper candle with painter's tape. Ensure that the edges of the tape are securely attached to the candle's surface.
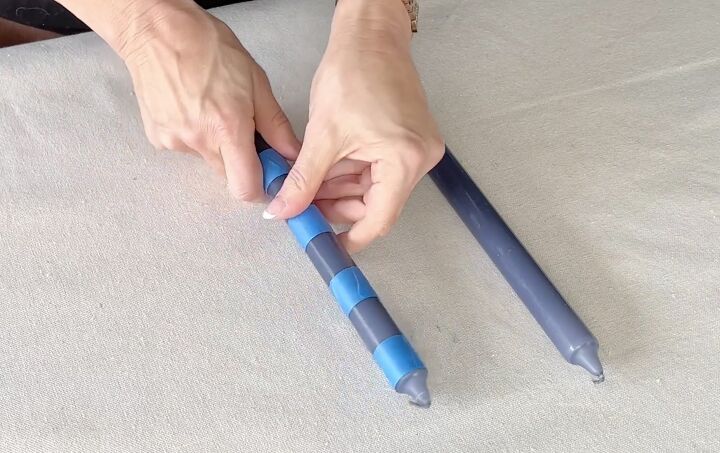
Go with skinny stripes or wide stripes, evenly measured stripes, or go crazy with different widths in your stripes.
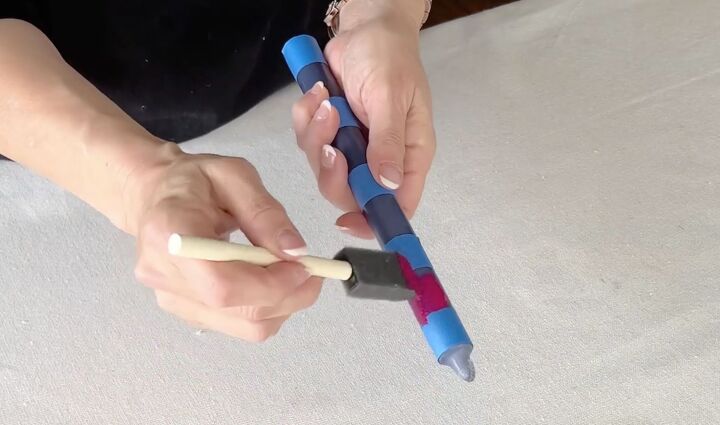
Once taped off, paint light coats of acrylic paint in the open sections of the candle in the color or colors of your choice.
Continue to paint light layers until you get the desired color. The key is in going with light layers instead of trying to paint heavily the first time.
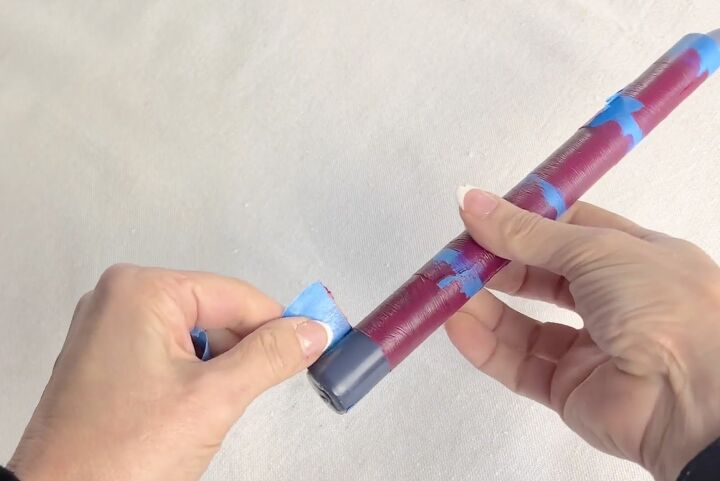
When they are completely dry, slowly peel off the tape.
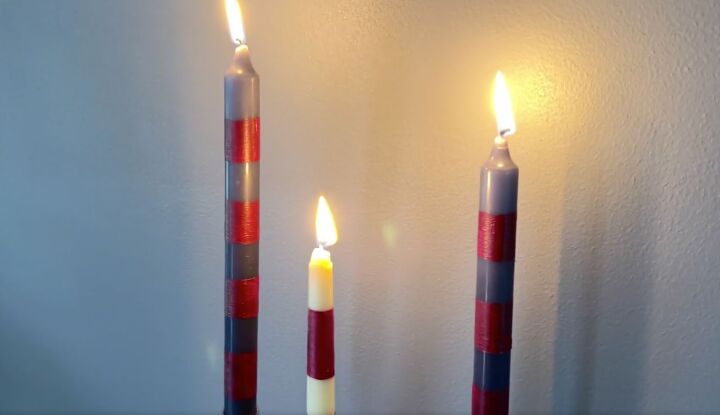
A taper candle is beautiful by itself but can have a great impact when combined with other tapers. Try displaying them in odd-numbered groupings and vary the height of your candlesticks.

A variety of colors, textures, and patterns make the display even more interesting and unique.
Quick and Easy Decorative Taper Candle Projects
I hope these projects inspired you to make your own decorative taper candles. Tell me how yours turned out in the comments, I'd love to see them.
Resources for this project:
See all materials


Comments
Join the conversation
-
WHOOPS!!! 🫣 looks like this slipped through from 2022.
Despite, the more fire concerns, comments/failed tries. Then, success rates 🤦♀️ 🤷♀️
-
So many wonderful💡here over all 😉 ❤️ From talented crafters ! Keep inspired 👍


Frequently asked questions
Have a question about this project?
Excuse my ignorance, but does the wax melt around and into the paper preventing it from catching fire when burning? Does paint need to be non-flammable? I think these are fantastic ideas, just don't want to burn the house down. 😂
Love the customization with napkins and paint. Might give it a shot on my battery-operated candles. Good old ModPodge would probably work on them.
Thanks for sharing the super ideas!
I’m with S what keeps the paper or paint from igniting?