


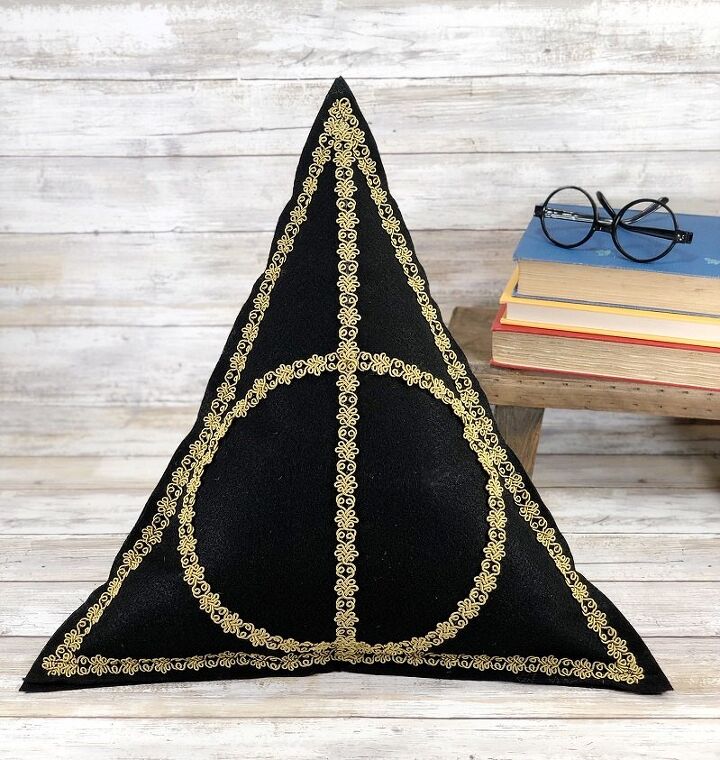
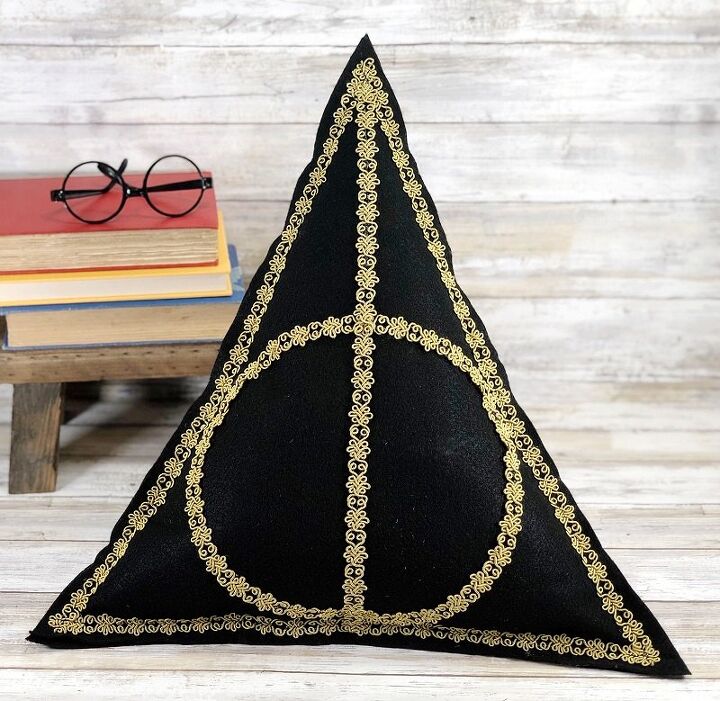
DIY Harry Potter Deathly Hallows Pillow
When I asked my favorite Harry Potter fan (aka my niece Josie) what craft we could make for her bedroom, she said a Harry Potter Deathly Hallows Pillow. Created with Kunin® Classic™ Felt, some Poly-Fil from Fairfield World, and fun antique gold trim in about an hour.
Hometalk Recommends!
DIY Harry Potter Deathly Hallows Pillow
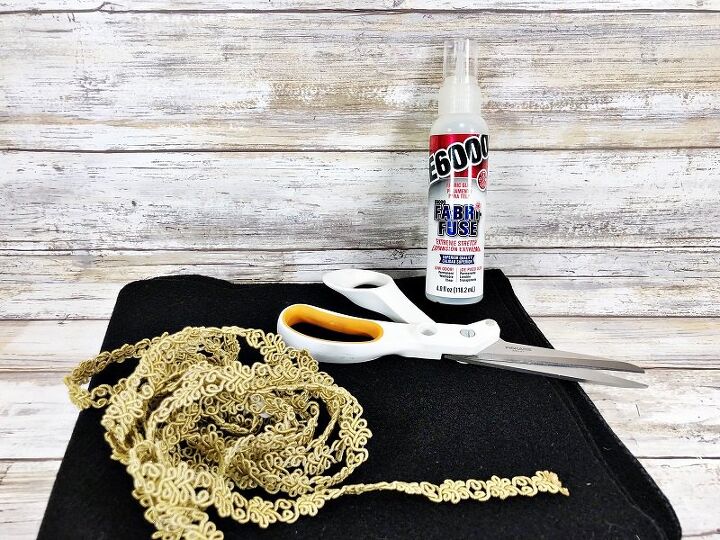
Here’s what you need to Sew a Harry Potter Pillow:
- Kunin® Classic™ Felt Yardage – 1 Yard, Black
- Poly-Fil® from Fairfield World™
- E6000 Fabri-Fuse Fabric Glue by Eclectic Products
- Fancy Gimp Trim – 1 Yard, Antique Gold
- Sewing Machine
- Thread with Bobbin
- Straight Pins
- Fabric Scissors – I love my Amplify Mixed Media Fiskars!
- Metal Ruler or Yardstick
- White Chalk Pencil
How to Sew a DIY Deathly Hallows Pillow:
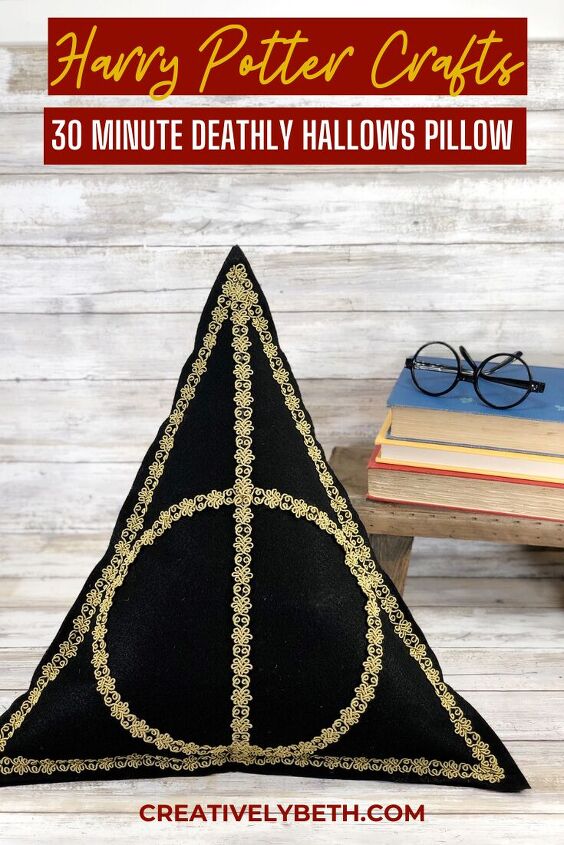
The Sign of the Deathly Hallows was a triangular mark used as a representation of the Deathly Hallows, three legendary objects that allegedly if united, would make one the “Master of Death”, also known as the “Vanquisher of Death” and the “Conqueror of Death”. The sign was actually composed of three separate marks that, united, make up the sign. The Elder Wand was represented by the straight vertical line, the Resurrection Stone by the circle surrounding it, and finally, a triangle enclosing them both to represent the Cloak of Invisibility. Shared from the Harry Potter Wiki site.
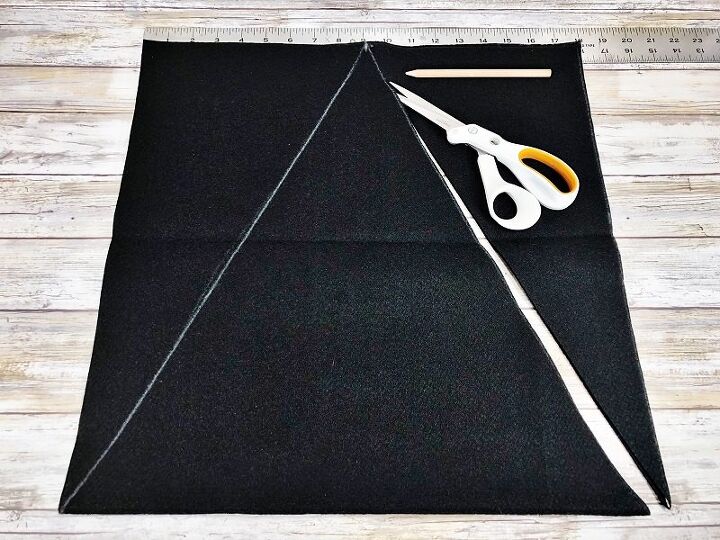
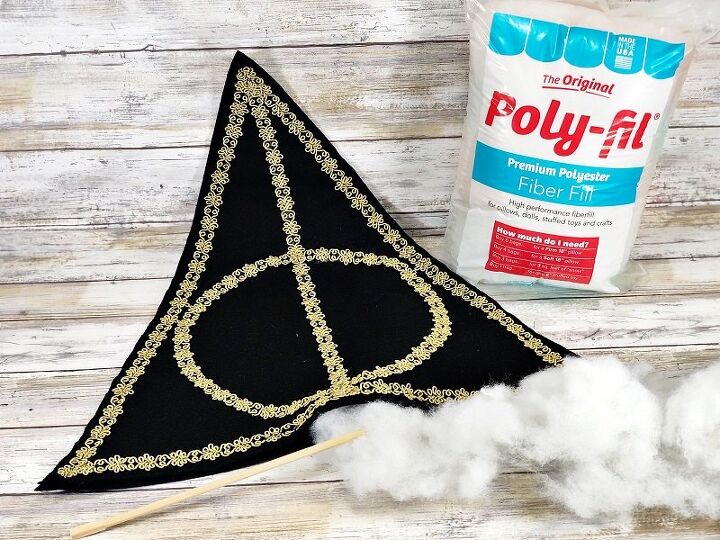
STEP ONE
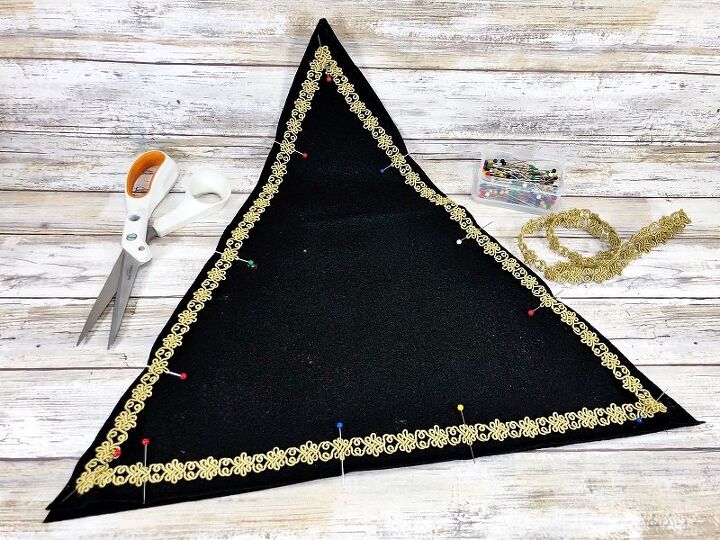
To begin the Harry Potter Deathly Hallows Pillow, gather all supplies. Measure and mark two 18″ by 18″ squares from one yard of Black Kunin® Classic™ Felt using a yardstick and a white chalk pencil. Cut out with scissors. I love my Amplify Mixed Media Fiskars for heavier materials like a double weight of felt or corded gold trim. Measure and mark the top center of the square, and then create a triangle by drawing a line to both bottom corners. Cut out with scissors.
STEP TWO
Place both layers of Black Kunin® Classic™ Felt on your work surface, then carefully cut and attach the gold gimp trim to each edge of the triangle with straight pins.
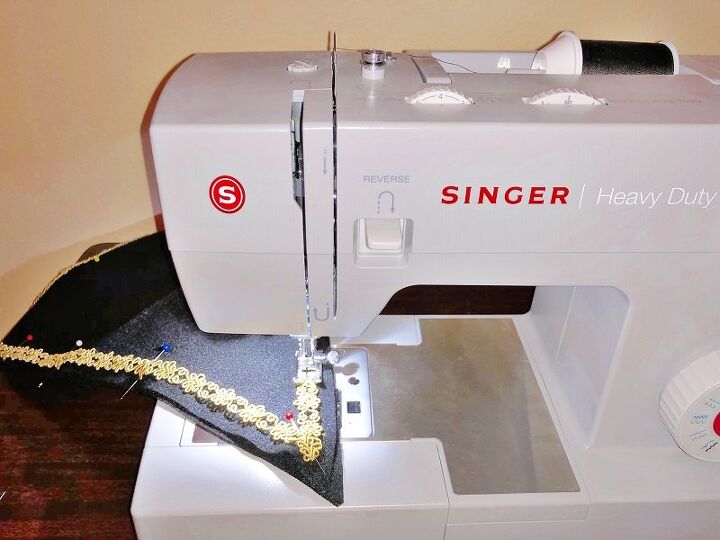
Sew all three sides of the pillow through the trim and both layers of felt, leaving a four-inch opening at the bottom for stuffing. Make sure to backstitch all three corners.
STEP THREE
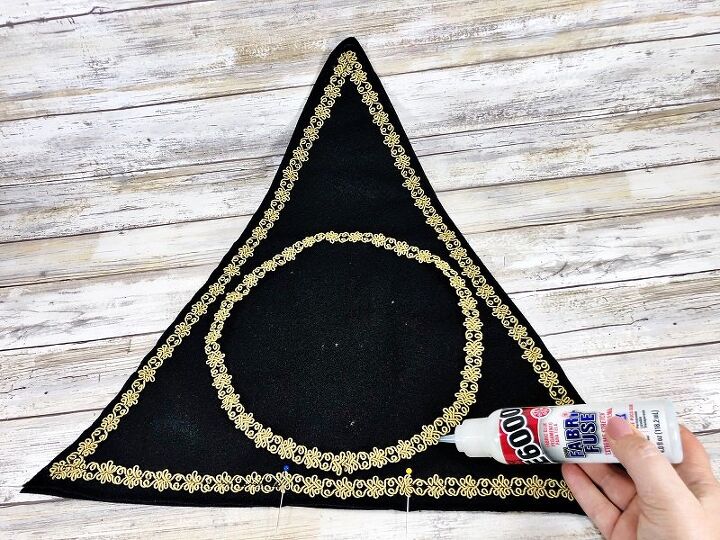
Lay the gold trim out in a circle, just a bit smaller than the triangle, and then secure with E6000 Fabri-Fuse Fabric Glue.
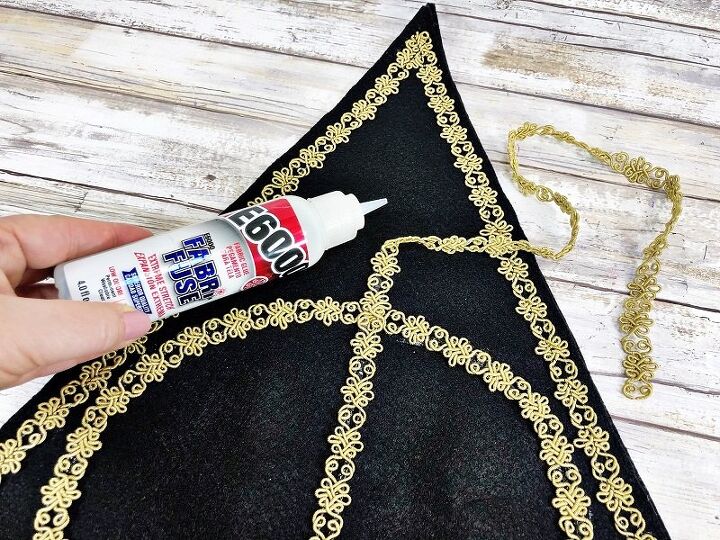
Repeat with a straight line of gold trim from the top point to the center bottom of the triangle. Attach trim to felt with E6000 Fabri-Fuse Fabric Glue which goes on a milky white and dries clear. Set aside to dry.
STEP FOUR
Once all of the glue has dried, stuff the pillow with the original Poly-Fil® from Fairfield World™ making sure to get into the corners of the triangle with a stuffing tool like a chopstick.
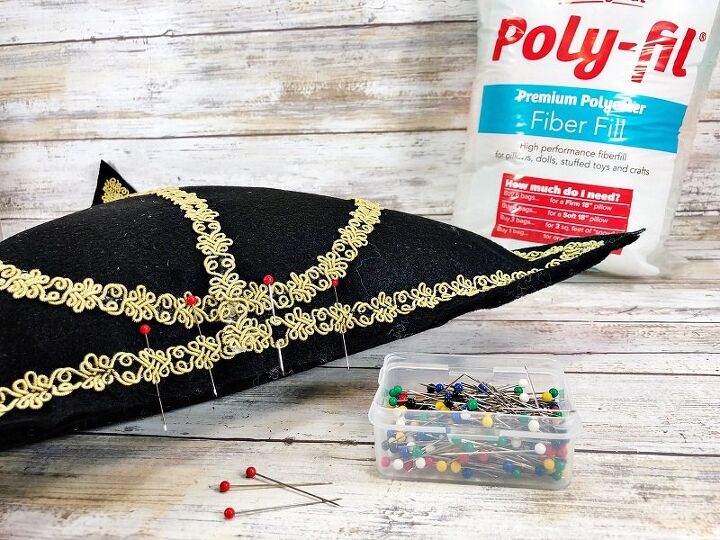
Once stuffed, secure the opening at the bottom with straight pins and stitch closed with your sewing machine. Make sure to backstitch where the stitching overlaps.
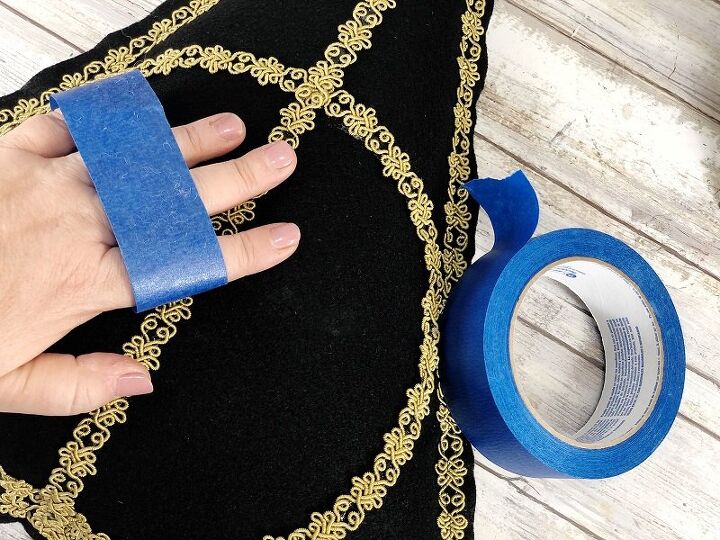
To finish the Harry Potter Deathly Hallows Pillow, use tape to remove any Poly-Fil fuzz from the black Kunin Felt pillow.
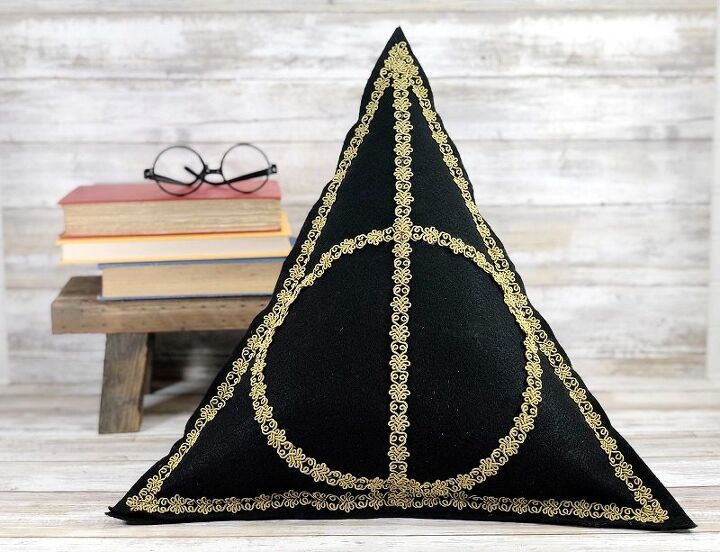
I hope you will use my Harry Potter Deathly Hallows Pillow as a jumping-off point to showcase YOUR Muggle craftiness. This is a quick and easy pillow that is the perfect beginner sewing project that the kiddos can help you with. Change up the colors and theme to create a Hedwig Owl pillow or even a Lightning Bolt pillow. Poly-Fil® from Fairfield World™ is the perfect stuffing for all your plush pillow projects! Features 100% premium polyester fiber, superior resiliency, and smooth consistency.
Thanks for stopping by!
Creatively, Beth

Comments
Join the conversation
-
Cute pillow, I love Harry Potter ⚡
-
Thanks Christy! This one is so easy because it is made with felt!


Frequently asked questions
Have a question about this project?