


Upcycled Rocks Painted for Valentines
Making painted rocks for Valentines is a fun way to create a tool for spreading kindness. The painted rocks also make adorable little gifts to give to friends and family. I love that the Multi-Surface paints from DecoArt don’t require any topcoat so once the rocks are painted, they are ready to go.
What is the Explanation of Kindness Rocks
Painting rocks and hiding them is a fun way to spread kindness and joy while creating connection. Popular places to hide rocks include parks, playgrounds and family-friendly walking trails. Some people paint rocks and hide them as a way to give only. Others sometimes participate in creating painted rocks, hiding them and hunting them. There are LOTS of Facebook groups that share where rocks are hidden and a way to show your masterpieces. If you find a rock, you can either leave it, re-hide it or keep it.
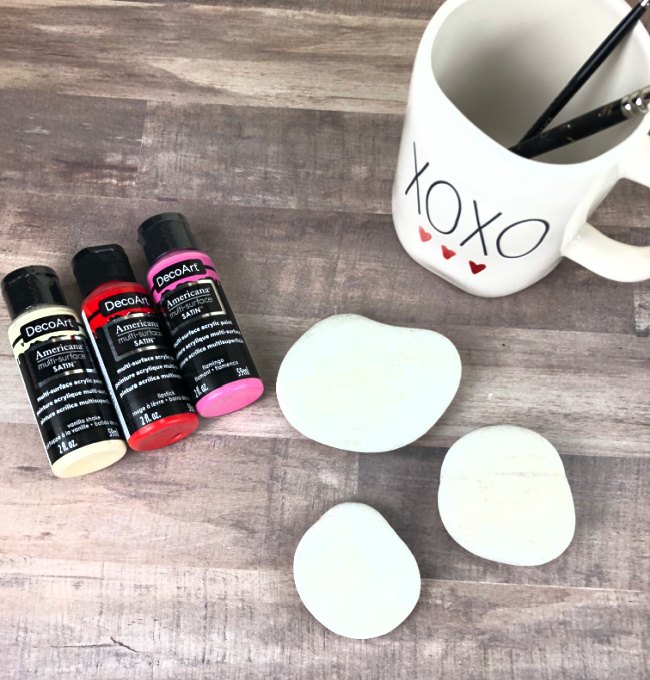
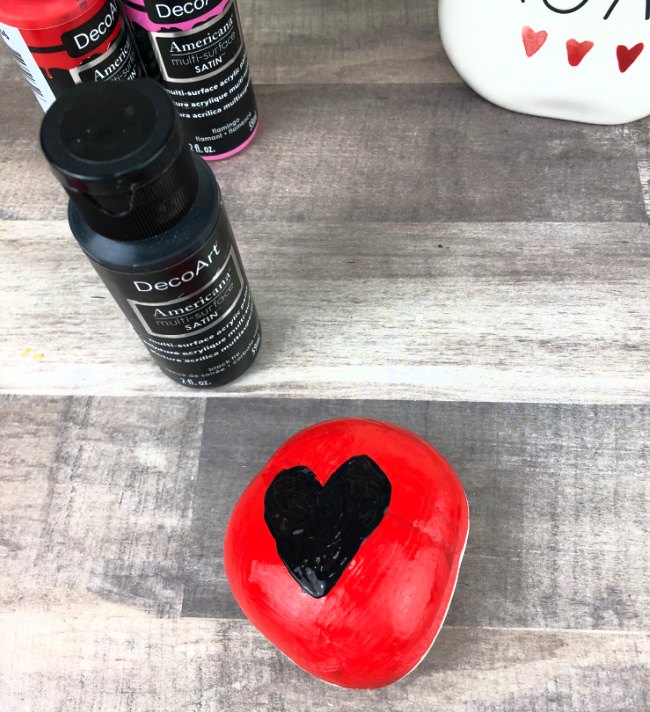
Material Needed for Painted Rocks
- Smooth, Clean Rocks
- Paint – DecoArt Multi-Surface is great because it doesn’t require a top coat to seal.
- DecouPage – This is a great top coat if basic acrylic paints are used.
- Paint Brushes
- Water
- Paper Towels
Steps for Painting Rocks
If you are painting a base coat color, do that first and let it dry completely.
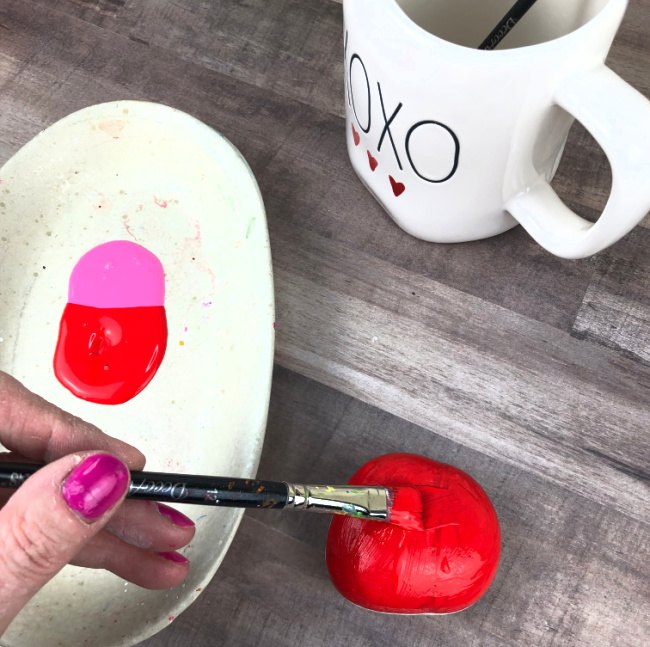
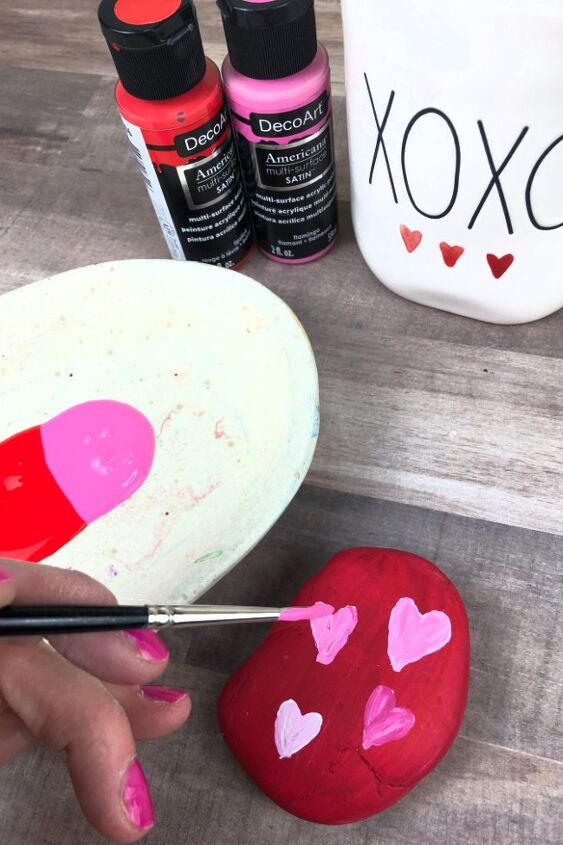
Paint your designs on top of the base coat.
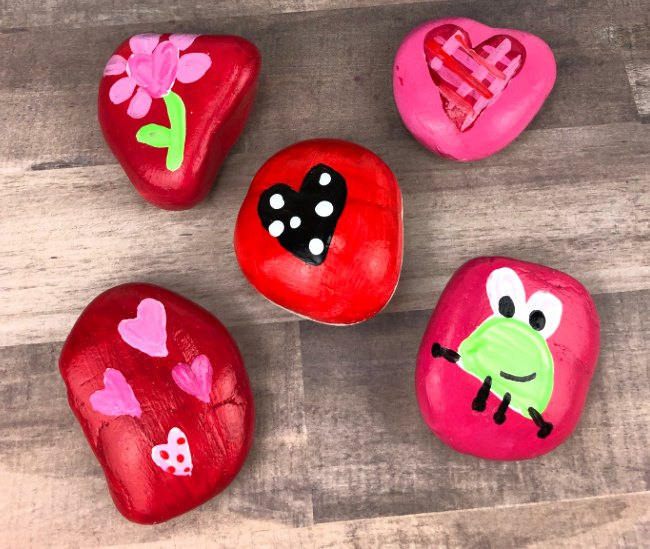
When they are all done, I love the way they look in a group. This is sometimes the last time they are all seen together before being hidden around town.

More Valentine Ideas with DecoArt Paint
While the paints are out, go ahead and paint some decorations. Here are some adorable signs that use the same steps as the rock painting.
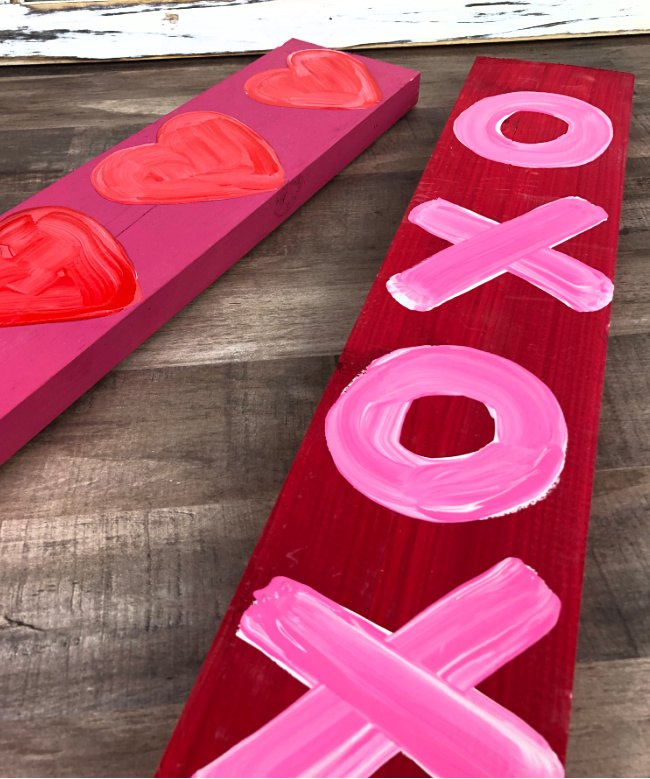
To get the mix of pink and white, I dip the brush in both colors but don’t mix before brushing onto the dry basecoat.
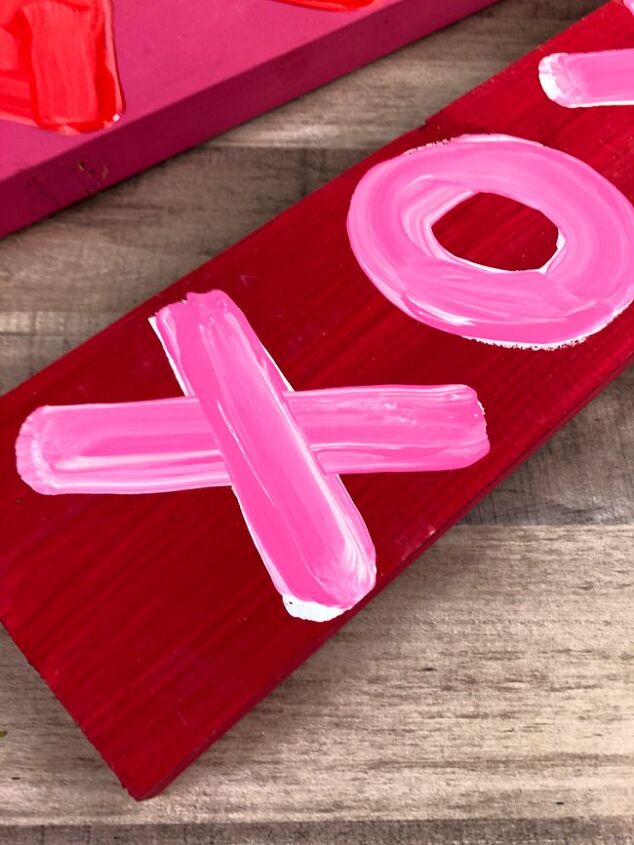
Here are more directions for painting signs for Valentine’s Day!
MORE Painted Rock Ideas
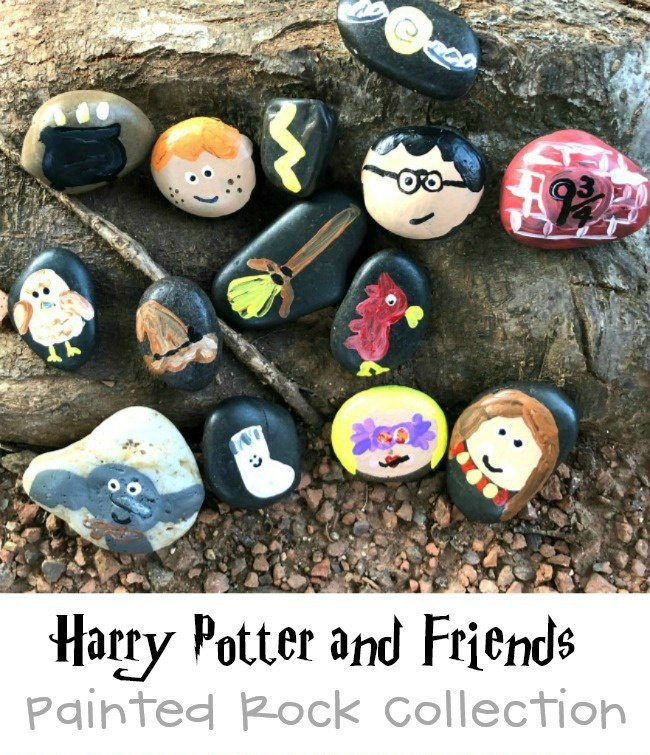
Harry Potter Themed Painted Rocks
These Harry Potter themed rocks are so much fun. The post that tells you much more about them show how sometimes sketching the ideas and designs first can be super helpful. Much like Harry Potter and the vast array of ideas that come with the wizarding world, there are so many more themed ideas that can be done. I suggest picking a theme that you love and totally going all in with in to create and make a really fun collection to go out and hide for others to find.
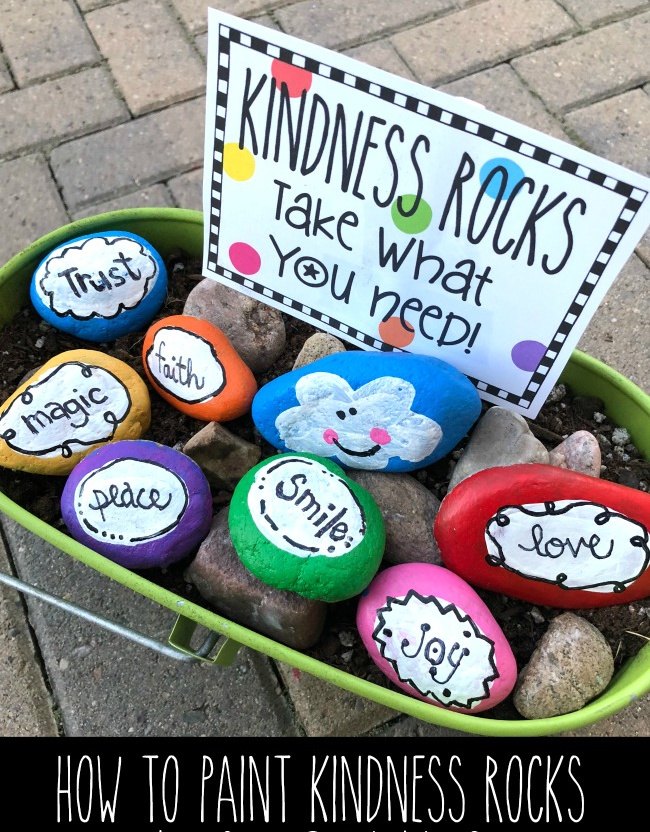
Kindness Rocks With Free Printable
these kindness rocks with words of empowerment are really simple and so much fun. This post has the free printable too so it is easy to create a bucket of rocks to put all together in one place.. The finder of the bucket can then choose a rock that they most need to empower themselves to be amazing. Which rock would you pick from the green bucket. I know on most days I could certainly use a few of these in my life.
15 Places to Hide Painted Rocks
There are tons and tons of places to hide rocks. I am happy to share some of the places that are my go-to hiding spots. We have even found some in these same kind of places around town and even when I am traveling. I LOVE when I find one at at road trip travel stop.
- Around Tree Trunks
- In Low Tree Branches
- At the Library
- Window Ledges of Shops
- Top of the Slide
- Along Walkway in Park
- Throughout a Nature Trail
- In a Rock Garden
- On Top of Low Walls
- In Between Fence Slats
- Under the Benches at the Park
- Front Porches of Friends
- Teacher’s Desk
- Breakroom at Work
- Airport
- Travel Stops Along the Road
- Gas Stations on the Pump
Random acts of intentional kindness make a huge difference for everyone involved. The process of creating and making the rocks is a kind of crafting that can cause relaxation which is good for the body and mind. The process of hiding the rocks gets one outdoors and into the world with a wholesome purpose to do and spread goodness. The excitement of finding a hidden rock bring so much joy. Whether that person chooses to keep the rock, leave it for another or re-hide it is really up to them. Regardless of what they choose to do with it, the connection that created the initial joy for that human is a forever feeling.
Happy Spreading LOVE and KINDNESS,
Laura
PS: Share your rocks on social media and tag me! @laurakellydesigns – I can’t wait to see them all!


Frequently asked questions
Have a question about this project?