


How To Make Heart Shaped Dollar Origami For Valentine's Day

by
Maura White
2 Materials
$1
5 Minutes
Easy
Here is a really easy way to fold a dollar bill into heart shaped dollar origami. This is perfect to use as a cute little gift with a Valentine card - great for kids or grand kids!

The only material you need for your heart shaped origami dollar is a crisp one dollar bill!
Here are the easy steps to fold it into a heart:
1. Fold the bottom edge of the dollar bill to the back side about 1/4 inch, or at the top of the words “one dollar.” Make a sharp crease.

2. Then fold it in half - "hamburger bun" fold rather than "hotdog bun"
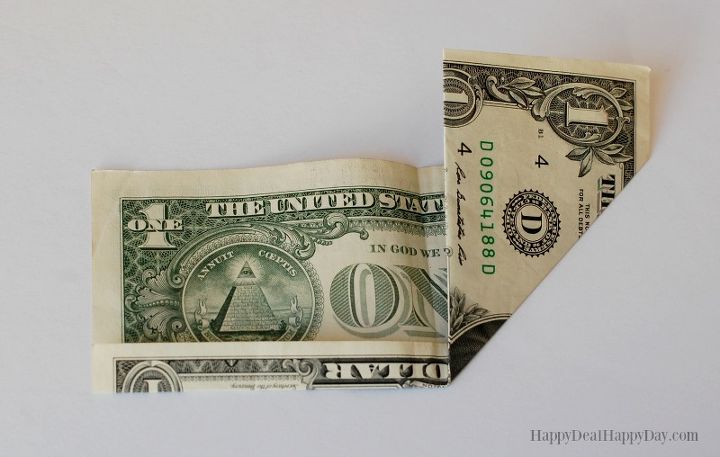
3. Open the dollar back up and fold the bottom edge of one half of the dollar to the center fold line.
4. Do the same on the other side and make sharp creases.
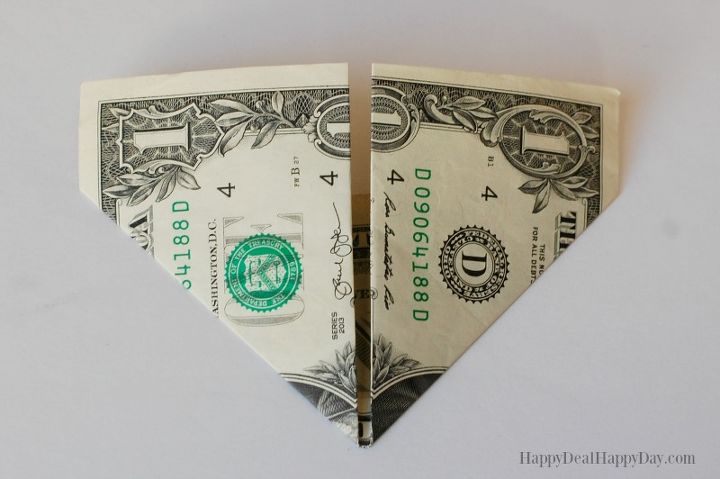
5. Turn the bill over so George is facing you. Fold the center corner of both back sides down to meet the edge.

5. Turn the bill over so George is facing you. Fold the center corner of both back sides down to meet the edge.
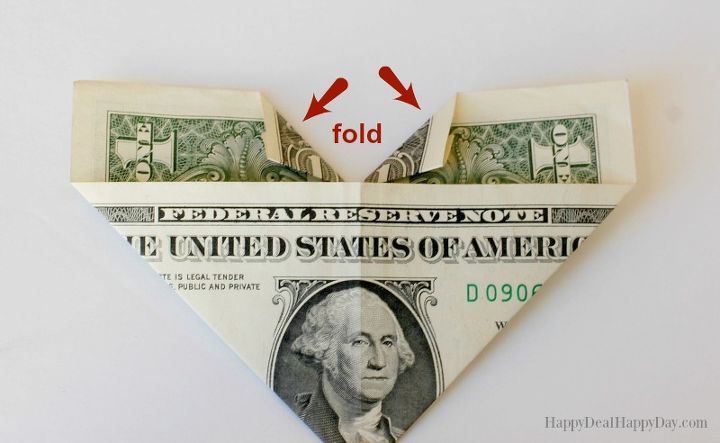
6. Then fold each outer corner in to meet the edge.
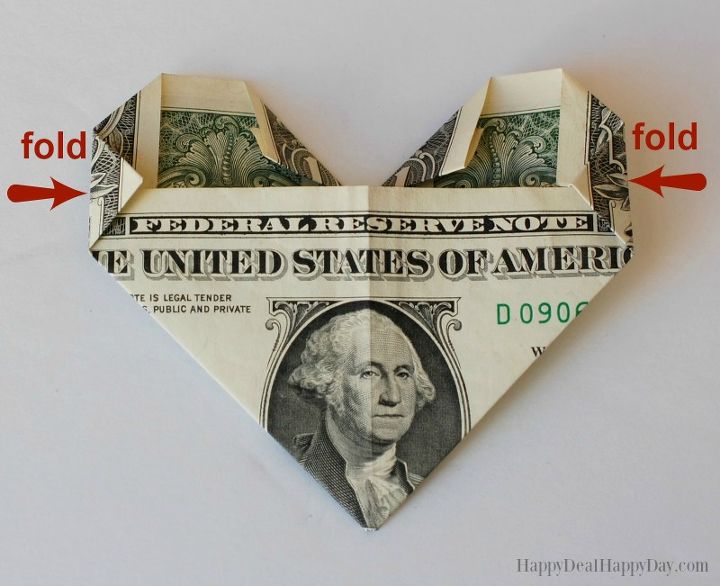
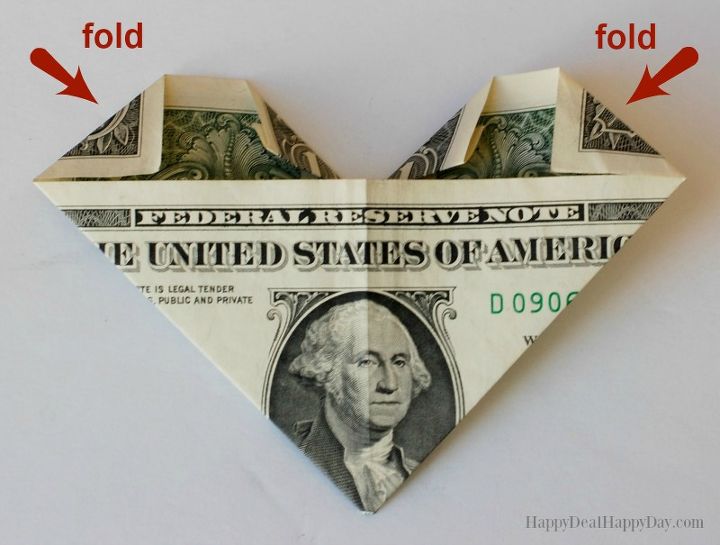
7. Fold in a small part of each corner that sticks out on the sides. Now your heart shape is complete!

Turn it over to see the heart shaped dollar bill origami!

Here is what it looks like if you start with George facing you at the beginning.
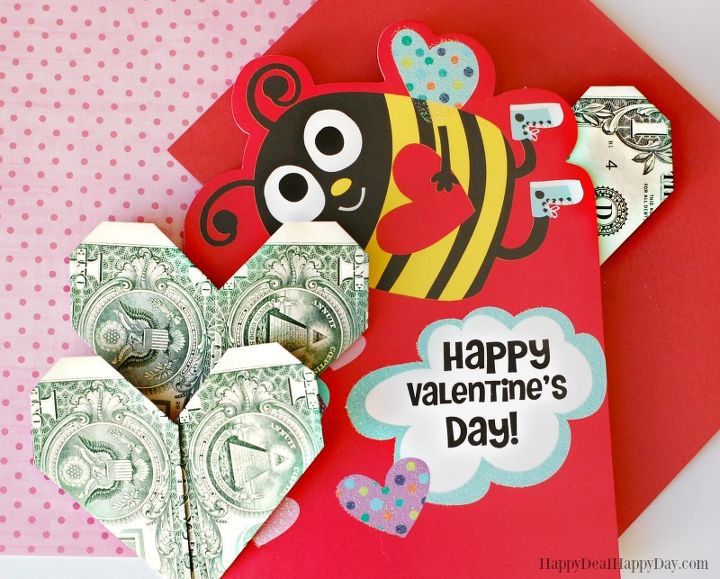
Now you can use these heart shaped dollar bills and place them inside valentine cards! I know my girls will love it when they get a few dollars this year shaped like a heart! Maybe even the tooth fairy could fold her money into a heart as well. ;)
Looking for more cute kids valentine's ideas? Check out this Glow Sticks Free Printable Valentine Cards: “You Light Up My Life Valentine”
And if you want to know how to fold dollar bills into a flower - read how to fold them OVER HERE!
{
"id": "4601196",
"alt": "",
"title": "",
"video_library_id": "7218",
"thumbnail": "https://cdn-fastly.hometalk.com/media/2018/01/16/4601196/how-to-make-heart-shaped-dollar-origami-for-valentine-s.jpg"
}
{
"width": 634,
"height": 357,
"showRelated": true,
"noautoplay": ""
}


Any price and availability information displayed on [relevant Amazon Site(s), as applicable] at the time of purchase will apply to the purchase of this product.
Hometalk may collect a small share of sales from the links on this page.More info
Want more details about this and other DIY projects? Check out my blog post!


Frequently asked questions
Have a question about this project?