


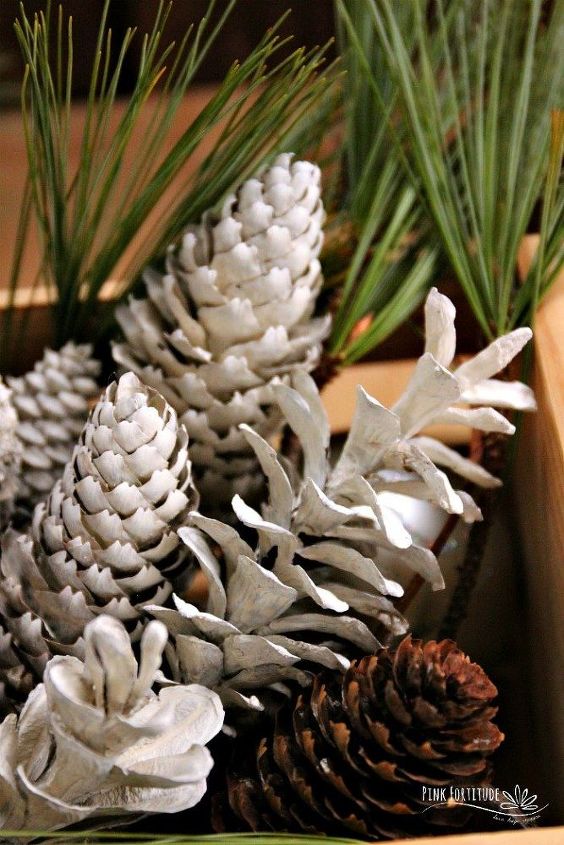
How to Make “Bleached” Pinecones Without Bleach
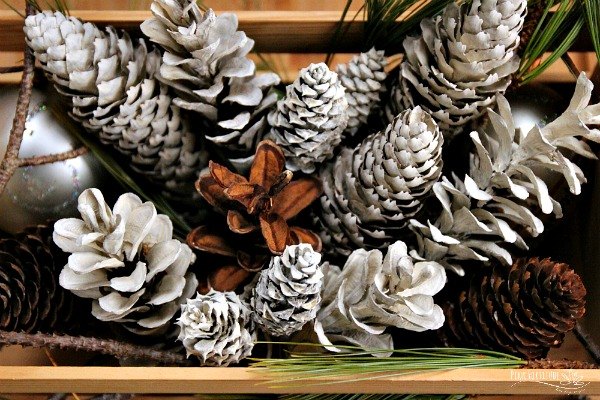
Do you love the gorgeous look of bleached pinecones? They have a farmhouse look and feel and are perfect for any Christmas decor. I wanted to recreate this look without the use of toxic bleach. Check out this quick and easy DIY and learn how to make bleached pine cones without the bleach. The method is all-natural and only takes a few minutes of hands-on time.

Bleach is a toxic substance and one that I do not allow in my home. I use all-natural alternatives for my laundry and to remove mold, which is two of the primary reasons that people purchase bleach. Bleached pinecones are all the rage on Pinterest. I was on a mission to figure out how to get the same look without using bleach.
I was able to recreate the look with white-washed chalk paint. Look for chalk paint that is non-toxic, zero VOCs, and zero emissions. You can use any color that is cream, ivory, buttermilk, or anything along that color line. Chalk paints can be purchased on Amazon or at your favorite craft store.
Enjoying a walk in the woods was a perfect bonus for this project.
Many of the tutorials that I saw tell you to thoroughly wash and dry your pinecones before using. As someone who only has so much time and energy on any given day, I’m always looking for shortcuts that produce the same results. My thought process was that by washing the pinecones, you remove bugs and dirt. But the way I look at it, you’re dipping them into paint mixed with water. Is it me or does that seem to be double the work?
Bleached Pinecones DIY
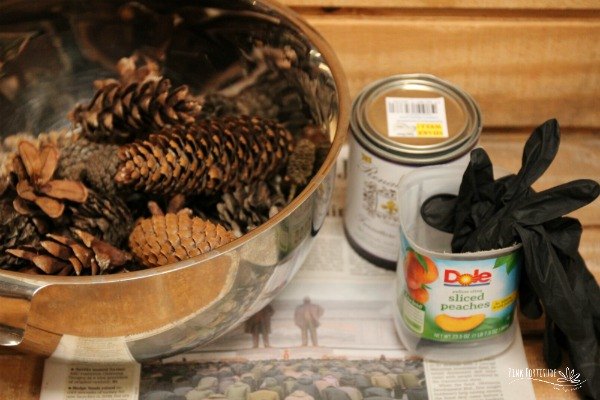
1. Lay out all of your supplies.
2. Spread out the newspaper in thick enough layers that if the paint spills, your surface underneath is protected.
3. In one spot of the newspaper, place your parchment paper for the wet pinecones.
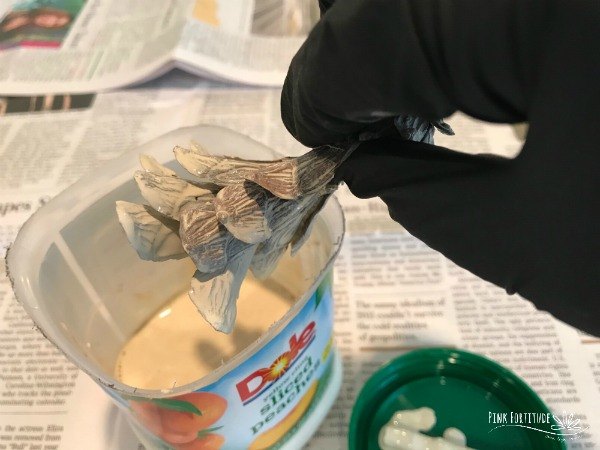
4. Put your gloves on. I tried to use my dominant hand as the “wet” hand and my non-dominant hand as the “dry” hand to minimize the mess.
5. Mix the paint with water in a disposable container with one part paint to one part water. You can be approximate – you don’t need to measure. This isn’t an exact science. Stir.
6. Dip the pinecones in the paint on all ends and sides and swirl around to ensure you get all of the nooks and crannies.
7. Shake a little – enough to shake off the paint but not enough to make a mess – and let it drip for a moment.
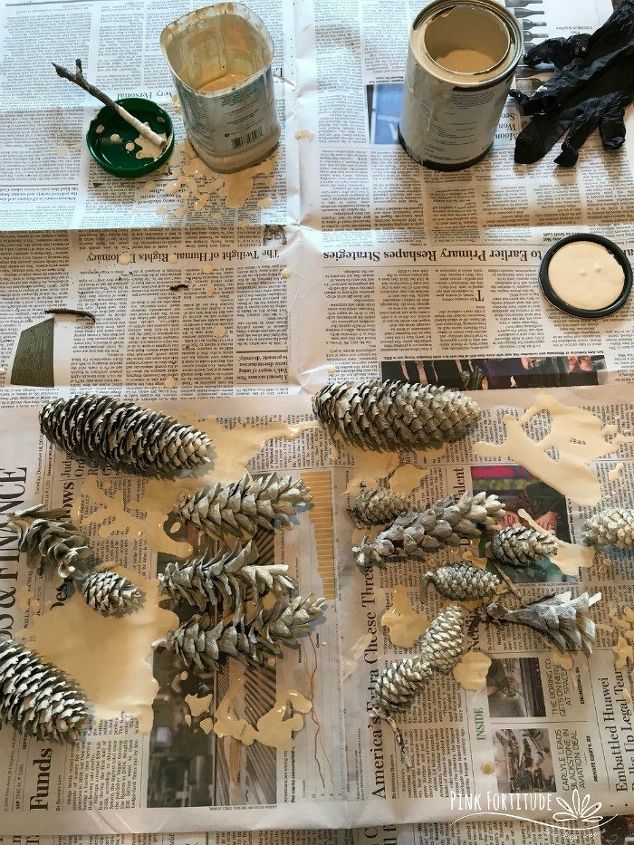
8. Place on parchment paper to dry.
9. After an hour or so, rotate the pinecones around and to a dry spot.
10. Repeat the rotation at another hour interval. The pinecones should be thoroughly dry after 2-4 hours.
Enjoy your new all-natural Christmas decorations!
Want to see the entire DIY and all of the photos? Be sure to click on the link below and head over to the blog post. I would love for you to stop by and say hello!
PS - we have some super cool free printables for you too!

Comments
Join the conversation
-
I had never heard of bleaching pinecones before today! I read someone's 'blog' or whatever and thought, hmmm seems like a lot of work, and it destroys the natural fragrance ! I like your idea of kind of 'frosting' them better. We just moved into our house and even though it's not actually on our property, the neighbor's pinetree drops a lot of them in our yard. Big ones! my 74 year young(er) sister and I were just talking about them the other day. I am going to try your idea. Thanks.😸🐈️🙂


Frequently asked questions
Have a question about this project?
Does anyone know if it is possible to open up pedals on closed pine cones? I am not able to find the large pine cones here in Baton Rouge. I would love to have someone ship me a box full and I will pay for shipping. They need to be at least 7 inches tall w/ pedals open