Origami Paper Seedling Pots From Newspaper

Wallace Gardens
by Wallace Gardens
These newspaper pots can be planted directly into the ground once seeds have sprouted and are ready for transplanting outdoors. The ink and the newspaper itself are nontoxic and biodegradable.
Further reading about Soy Newspaper Ink: Myth vs. Reality
http://www.triplepundit.com/2013/01/soy-ink-myth-reality/
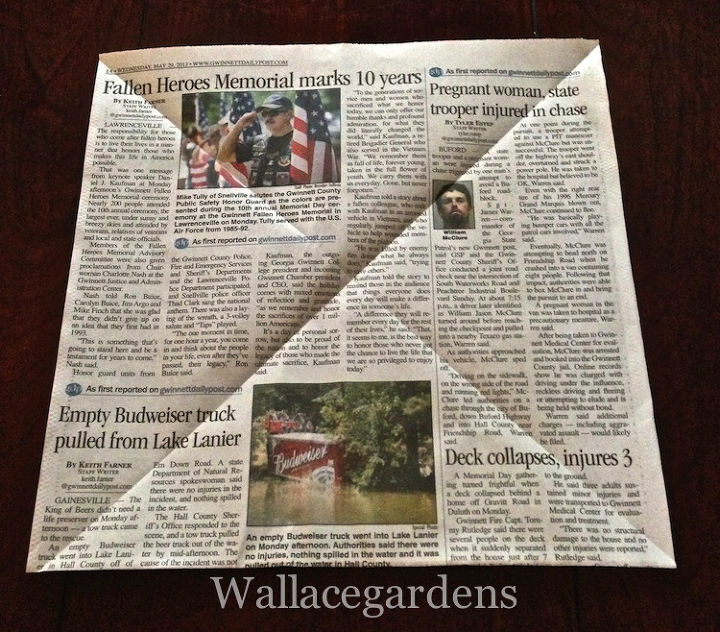
Open a double newspaper sheet and cut it down the middle. Fold each of these 2 pieces in half and cut again, to make a total of 4 square sheets. Take one square sheet (above) and fold it diagonally to mark the center point.
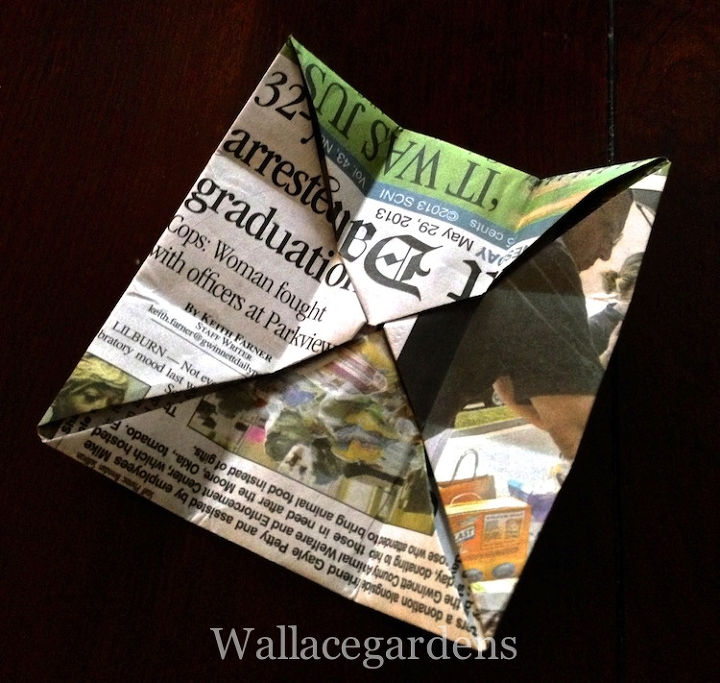
Fold each corner so that the points meet in the center (above).
Now repeat the process again: fold each corner so that the points meet in the center.
Next, fold into thirds, evenly, making crisp creases. Open it up and....
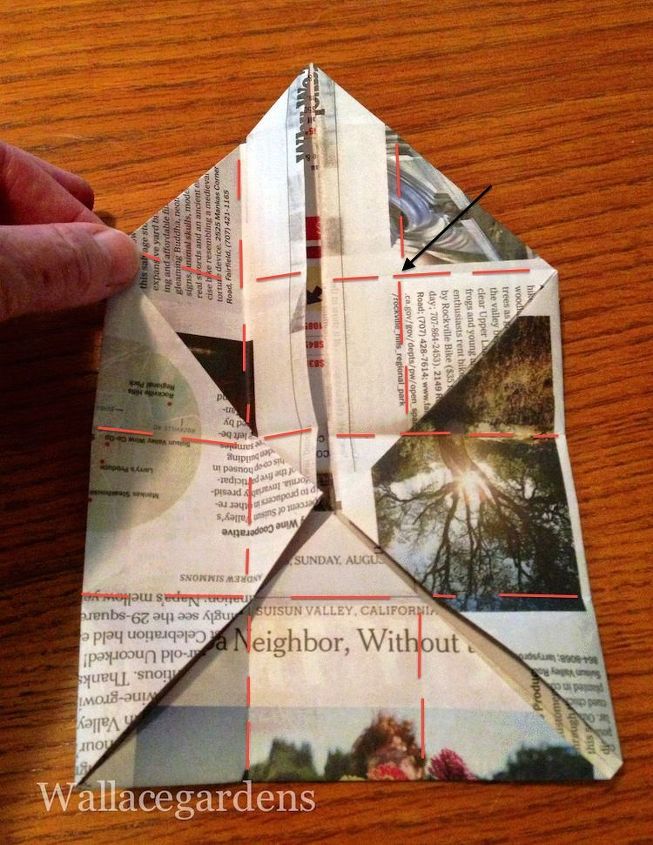
Fold into thirds again, making crisp creases. When unfolded, the fold lines will resemble a tic-tac-toe grid.
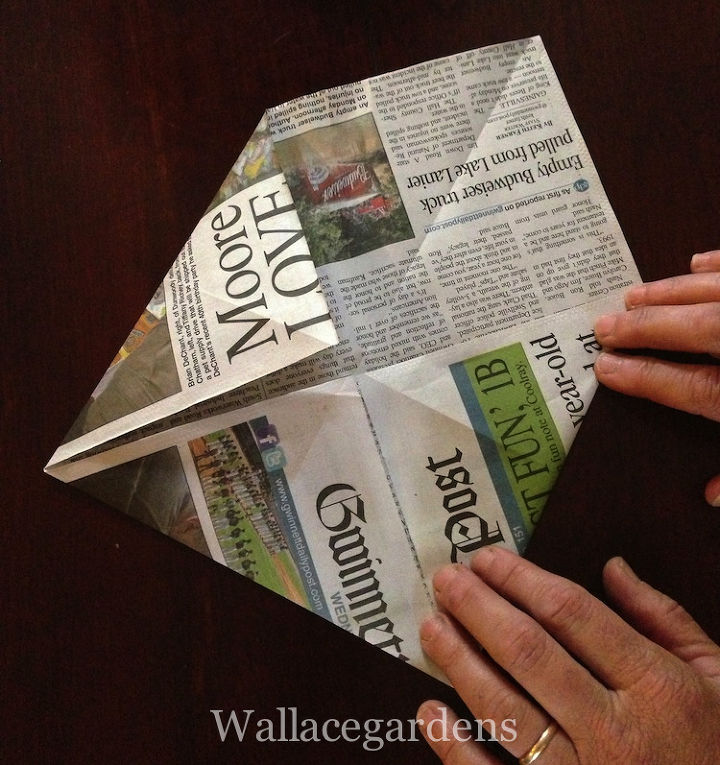
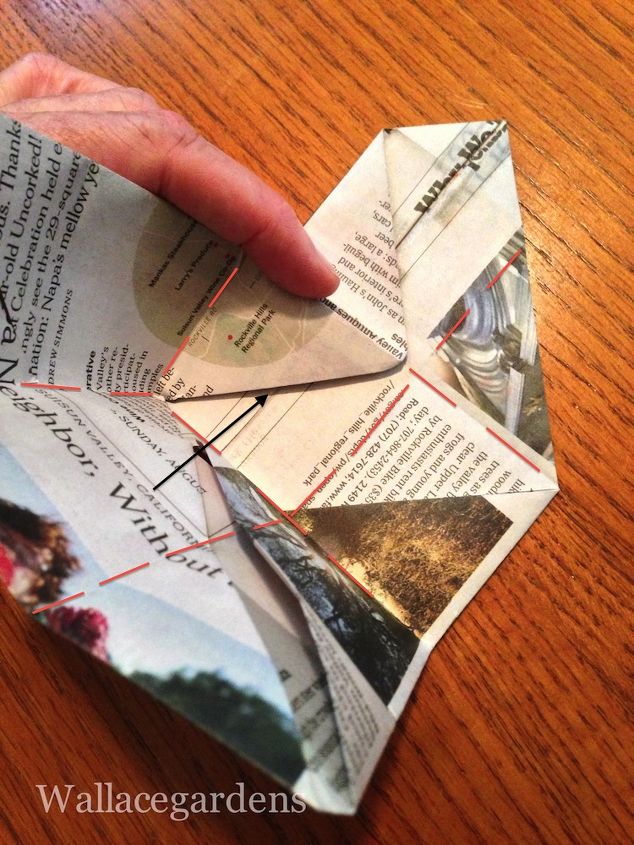
Open up one point of the square and take hold of the left corner as shown. NOTE: red lines show the tic-tac-toe fold-line grid. These are essential guidelines, so make sure creases are crisp.
Take the upper left corner and fold it straight across to meet the fold line half way (above). See black arrow in previous photo.
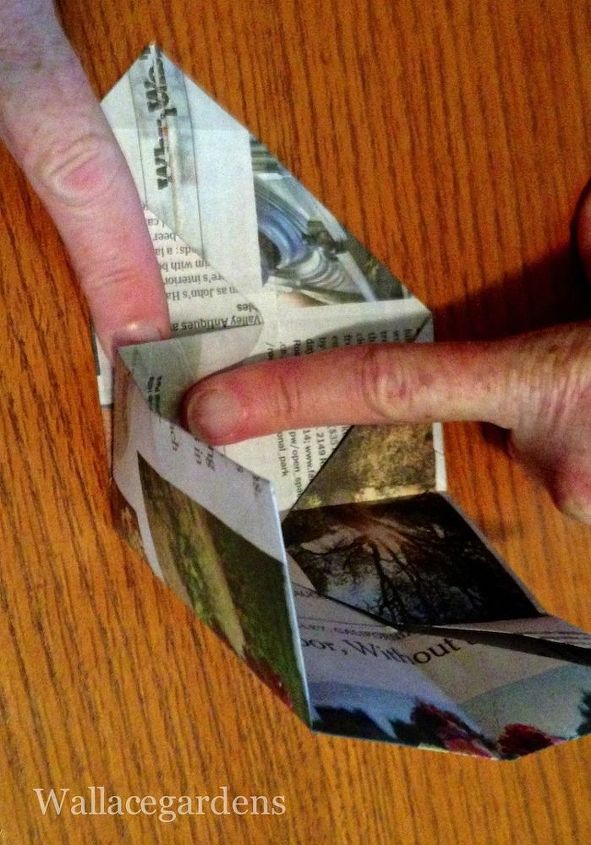
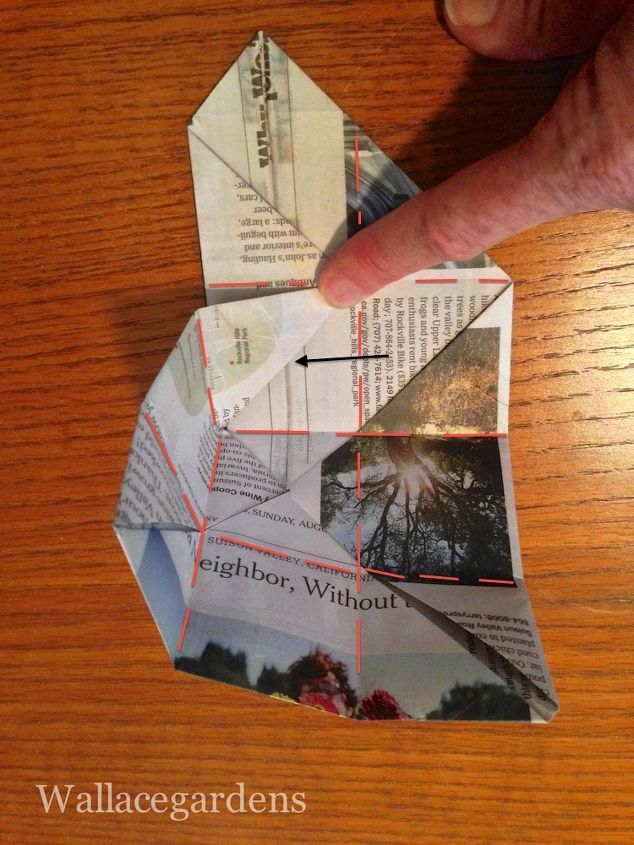
Now, reverse the fold line, using crease as a guideline. Vertical finger is holding down the pot, while horizontal finger is reversing the crease. As you do this, the "box" will be begin to fold up naturally.
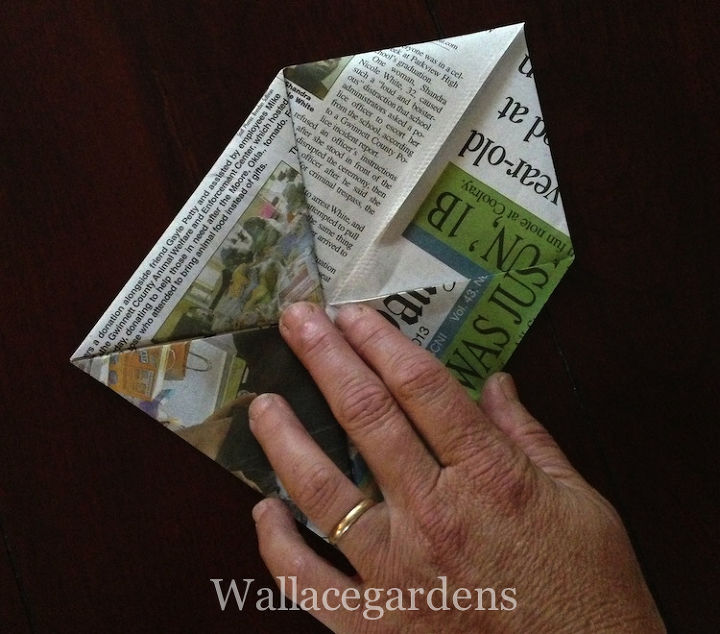
Press creases firmly. You have just created one square point for the bottom of the pot. See tic-tac-toe grid for guidelines. Black arrow shows the "reversed" crease line from previous step.
The first corner of the box, with black arrow pointing to the reversed crease line. Note tic-tac-toe fold line grid. These lines will guide you through the construction of the box.
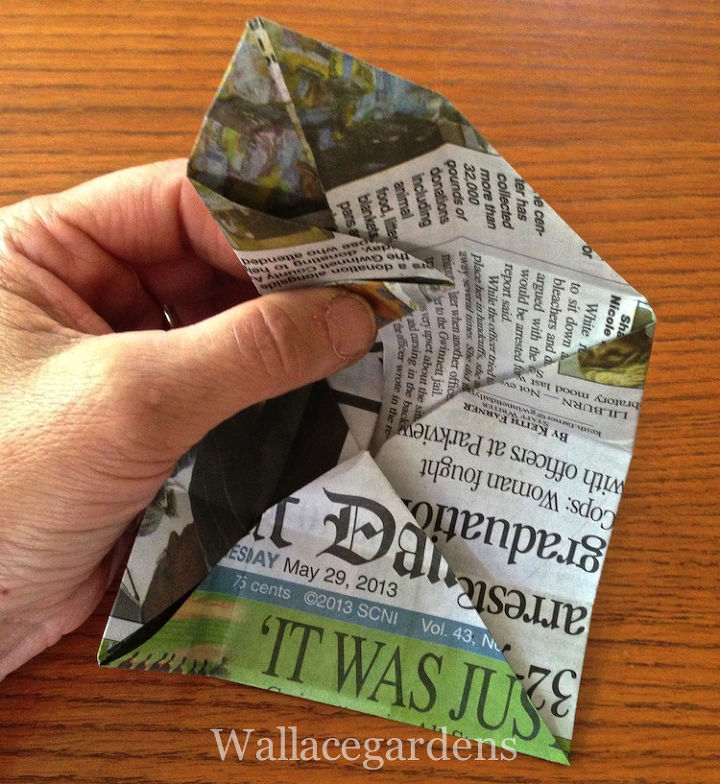
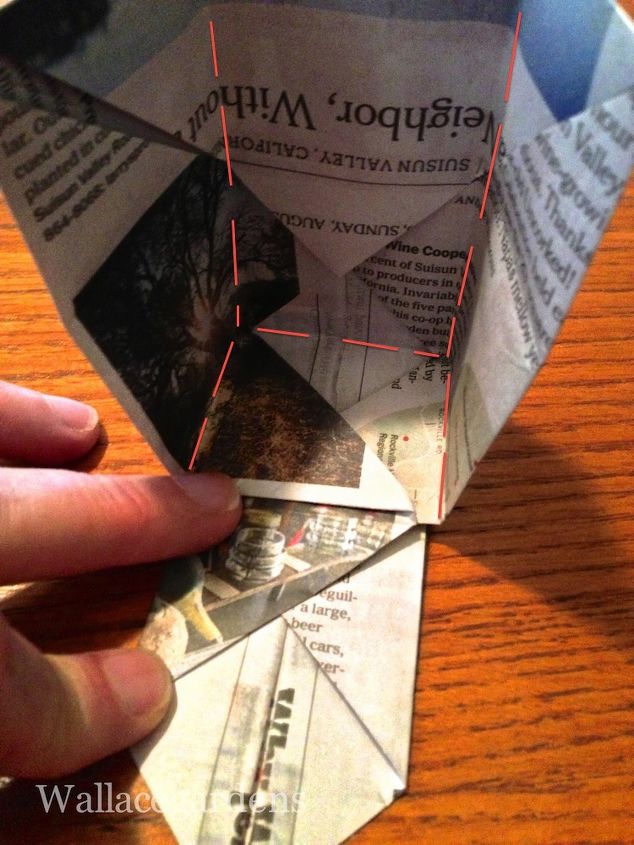
Do the same thing on the right side, folding the right corner across as show, and reverse the crease line again. You now have a pointed tab at the top, and two corners to the box.
Another view of the box so far.
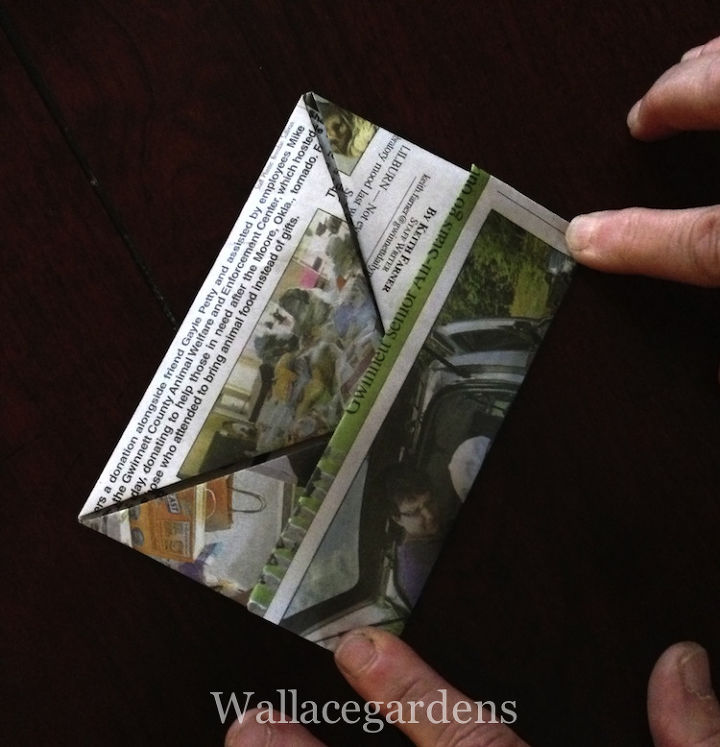
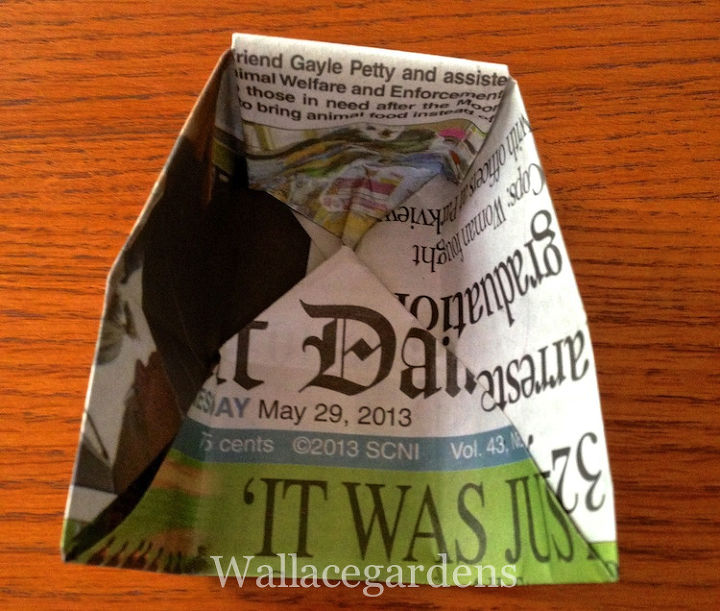
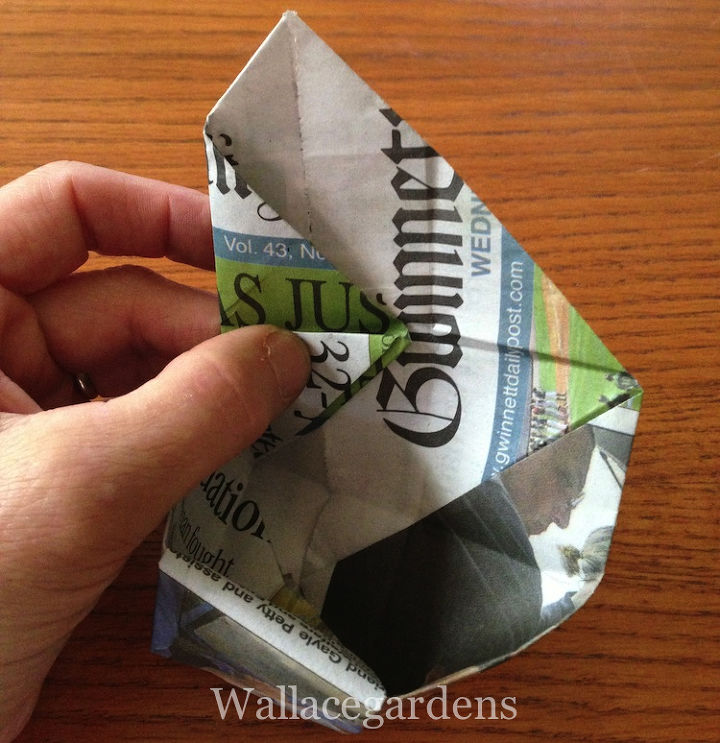
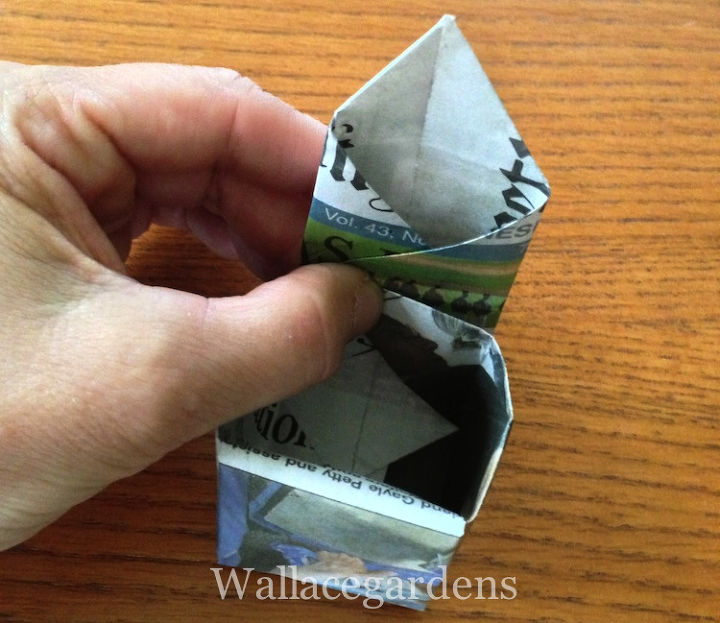
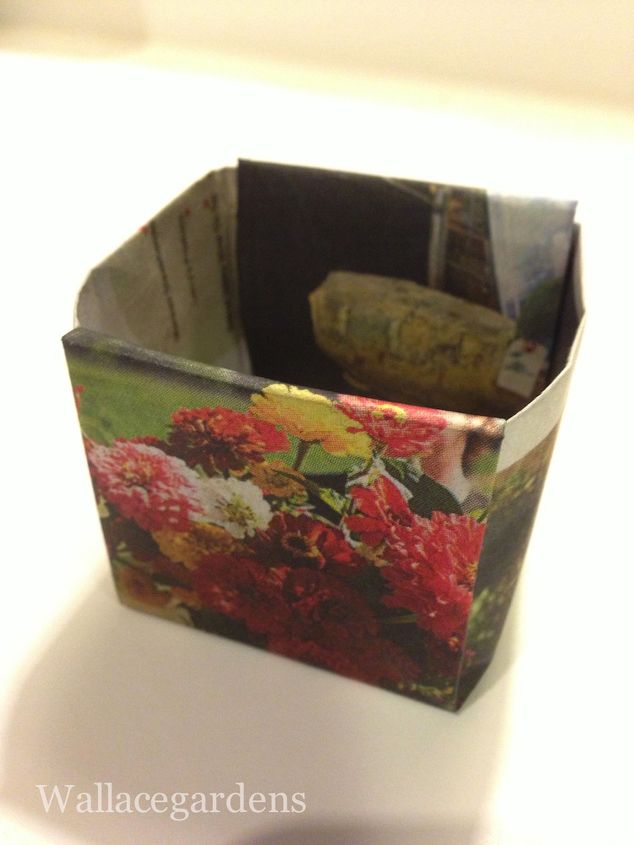
Fold the pointed tab down into the center of the pot and tuck the point in. One side of the pot is complete.
Do the same thing on the opposite side: open one point of the square and take the upper left corner and fold it straight across to meet the fold line, reversing the crease.
Then do the same thing on the right side, reversing the crease. You now have a pointed tab on top, which you will fold into the center, tucking the point into the bottom of the pot.
I love these pots because there are no staples or tape, and they do not fall apart. The "reverse crease" is the most difficult to explain. Someone suggested I do a video, so I may do that next.
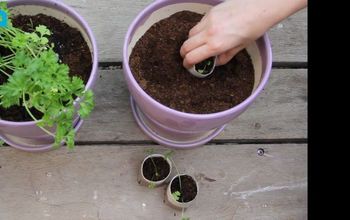
Fill the pots two-thirds with soil in preparation for seed planting.
Step-by-Step instructions for Origami Paper Seedling Pots.
Frequently asked questions
Have a question about this project?
  1 question
  • Mary-Louise Griffin Mary-Louise Griffin on Aug 12, 2020

    Thank you thank you thank you! I’d been trying to develop something like this and had been unsuccessful. Now I’ve got it! Do you think I could use brown paper bags instead of newsprint? Thanks so much.

Comments
Join the conversation
2 of 33 comments
  • Catherine Smith Catherine Smith on Jan 02, 2019

    Interesting article on soy inks. However, I still would not use newspaper with colored pictures nor colored inserts. Soy is not perfect, but the lead used to make most colors is far more toxic.

  • Teresa Poole Teresa Poole on Mar 16, 2019

    I will be using these boxes in the upcoming weeks . thanks you

Next