


Up-Cycle A Vintage Letter Holder
6 Materials
$5
1 Day
Easy
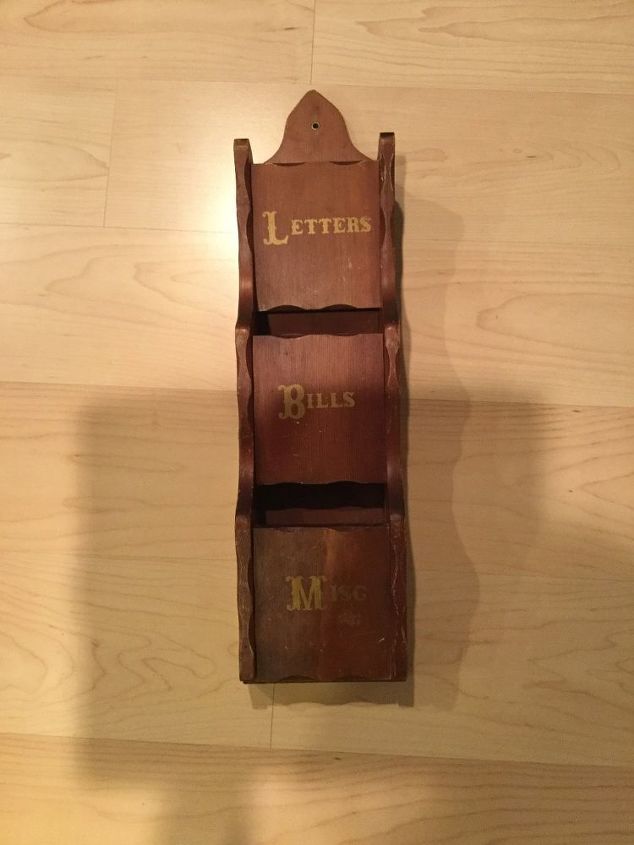
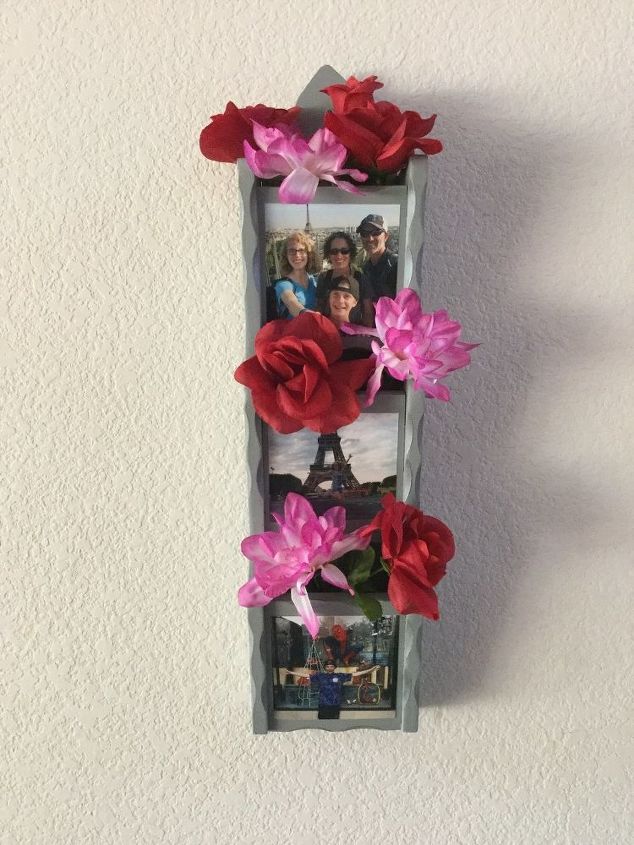
I found this vintage letter holder at Good Will for $2! I knew I wanted to up-cycle it just in time for Valentine’s Day (and I will be able to use it all year).
I’ll be using the following materials:
White Lighting Cleaner
Dixie Belle Boss
Dixie Belle Manatee Gray
Family Photos
Dixie Belle Clear Coat Satin
Dixie Belle Silver Gilding Wax
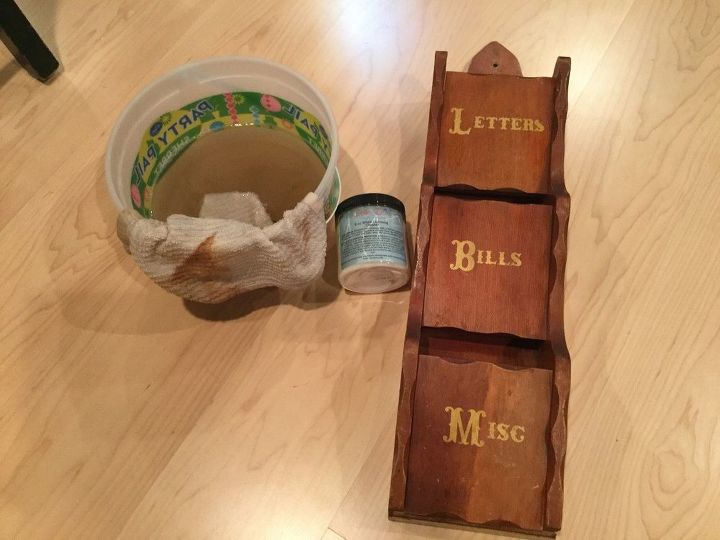
I started by cleaning the piece with White Lighting Cleaner and then rinse wiping it off with clean water.
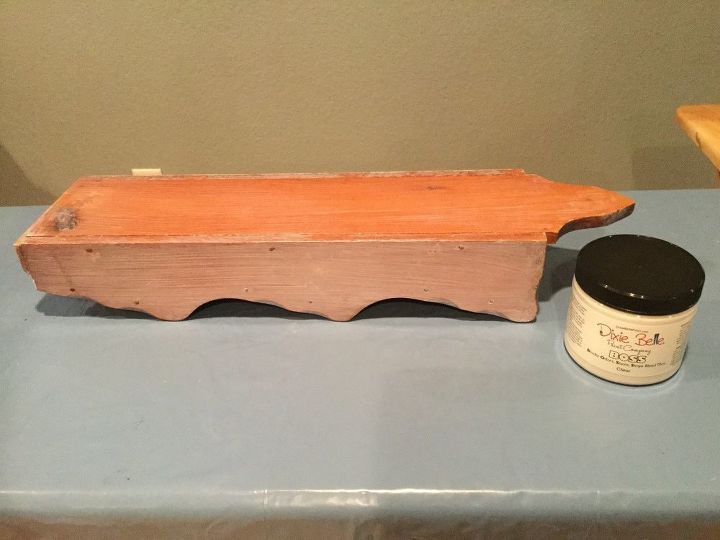
After seeing all of the stain come off of this letter holder while cleaning it, I realized I’d have to use Dixie Belle Boss. Boss is an amazing sealer that stops old stains, odors, etc from bleeding through new paint. You don’t want to do all that work and then have the old stain leak through.
I painted with 2 coats of Boss as per the instructions.
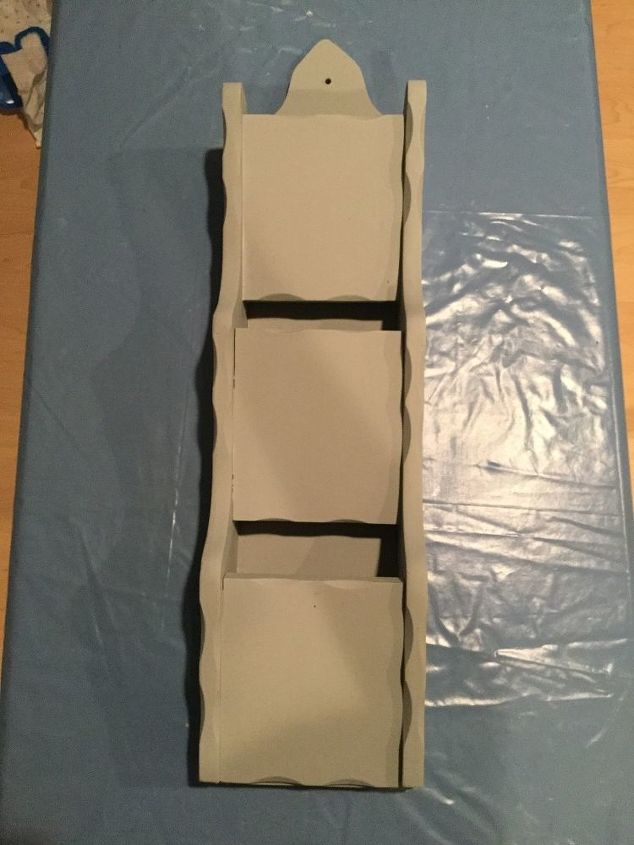
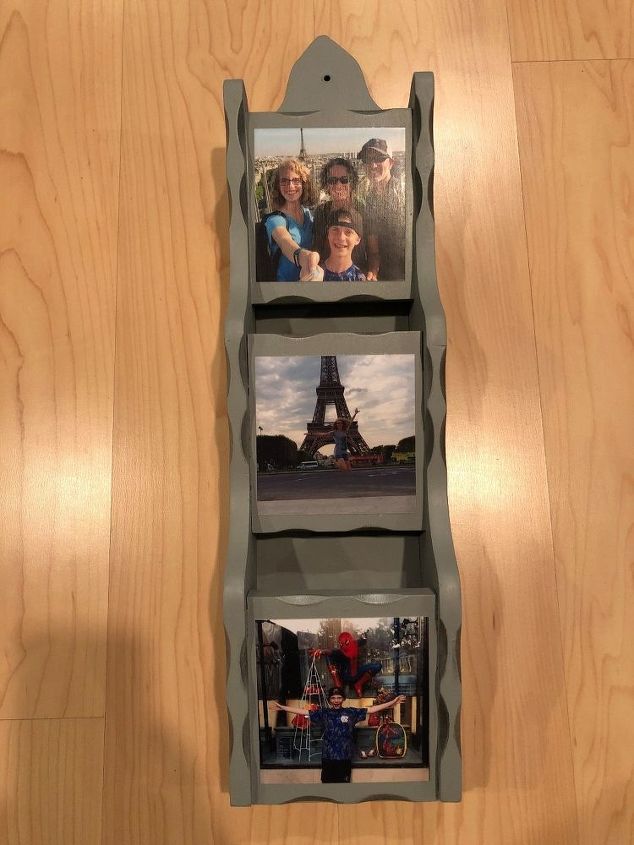
I painted the whole piece with Dixie Belle Manatee Gray.
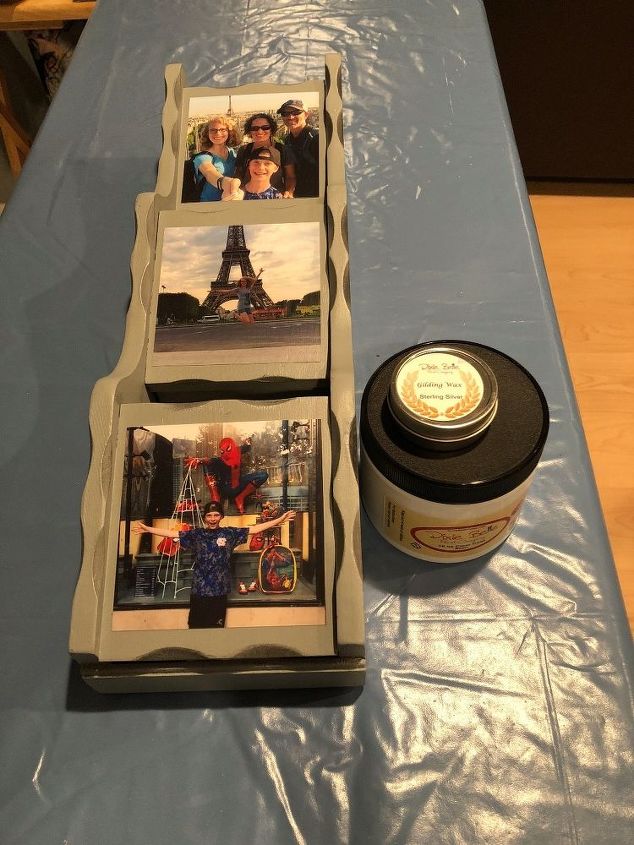
I ordered photo prints of my family to put on the surface of the piece.
You can achieve this by painting on the clear coat onto the letter holder, place the photo on top, and then place another coat of the clear coat on top of the photos to seal them. Let dry completely.
I decided to add some silver gilding wax to bring out the indents on the the piece subtly.
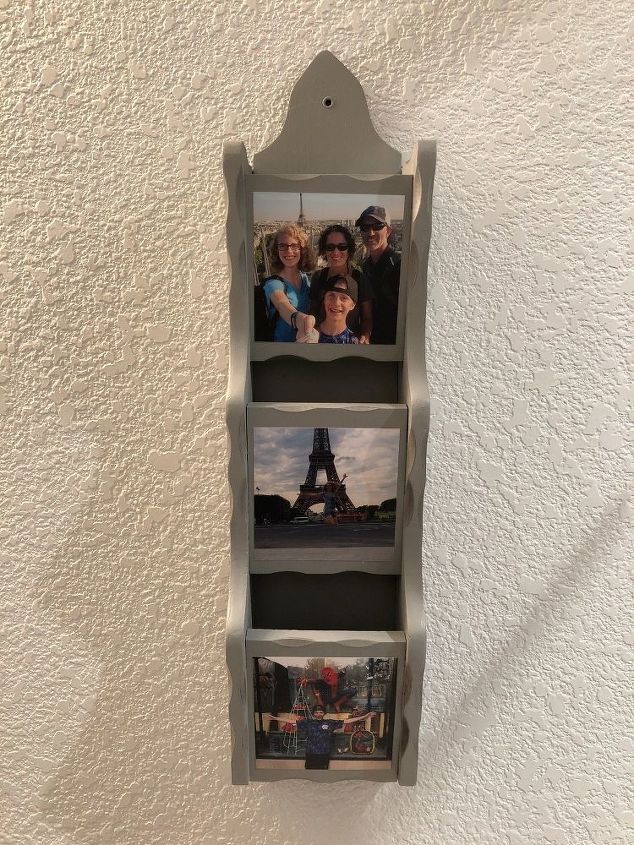
Here is the finished piece, and I love how it turned out. We’ll be using it during Valentine’s Day to put our Valentine cards in and any other love notes we want to write each other up until the day. It has room for small treats too.
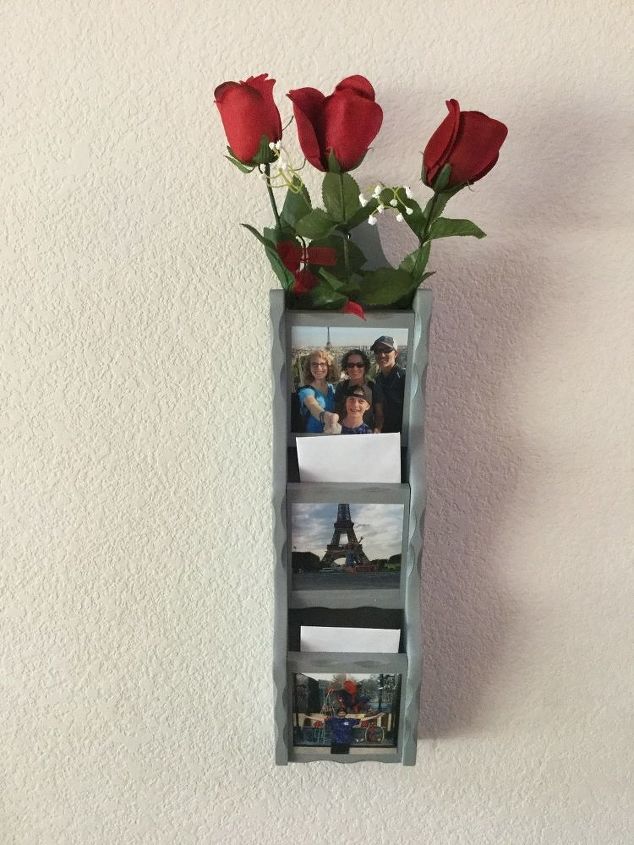
Because I painted it in a neutral tone, I can leave it up all year and the possibilities are endless – put flowers in it for spring and summer, use it for reminders, leaves for the fall, Birthday & Christmas cards, …
I would love to have you stop by my blog Chas' Crazy Creations for the full tutorial as well as sign up for my latest creations, posts, recipes, exclusives, and more...
I would love for you to subscribe to my YouTube channel to see more of my crazy creations - https://www.youtube.com/channel/UCIOsMN7hycVRco-MROXwmXg
{
"id": "4672894",
"alt": "",
"title": "",
"video_link": "https://www.youtube.com/embed/Gby_6oM4iSM",
"youtube_video_id": "Gby_6oM4iSM"
}
{
"width": 634,
"height": 357,
"showRelated": true
}
Here is part one of a 3 step tutorial. I would love for you to subscribe to my YouTube channel to see more of my crazy creations - http://bit.ly/2nWB9zX
Resources for this project:
See all materials


Any price and availability information displayed on [relevant Amazon Site(s), as applicable] at the time of purchase will apply to the purchase of this product.
Hometalk may collect a small share of sales from the links on this page.More info

Want more details about this and other DIY projects? Check out my blog post!


Frequently asked questions
Have a question about this project?