


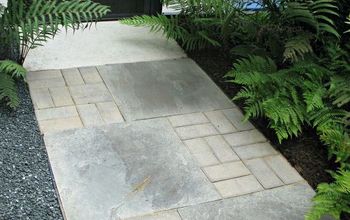
Front Walkway Redo

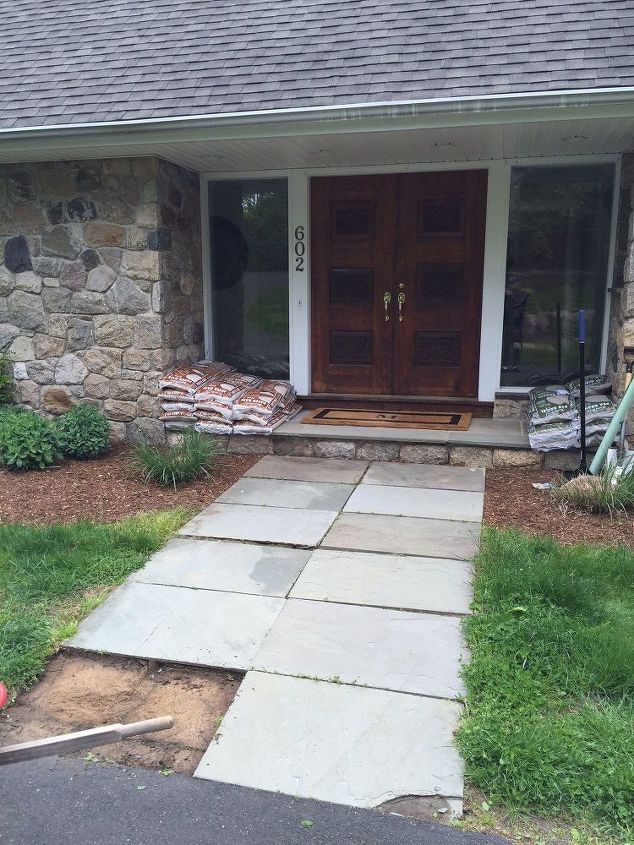
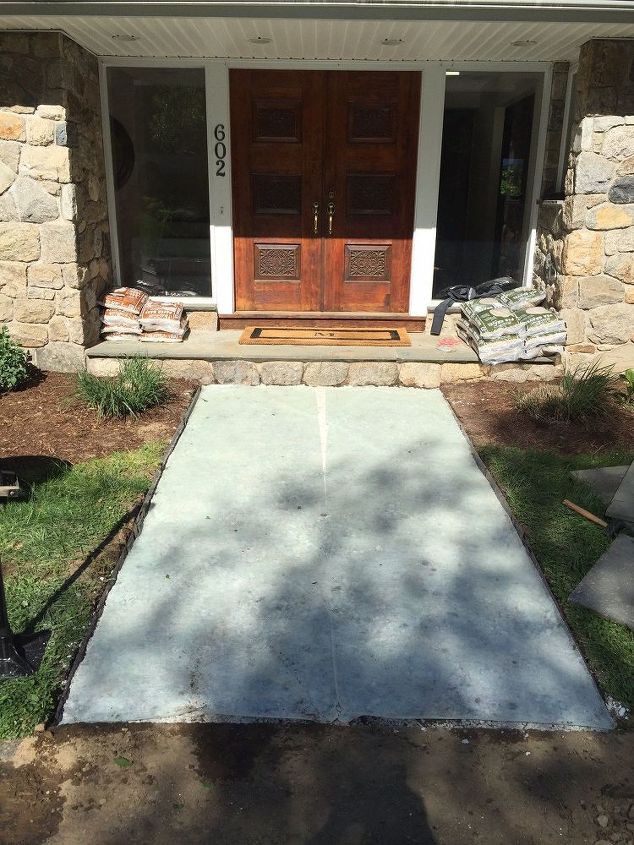
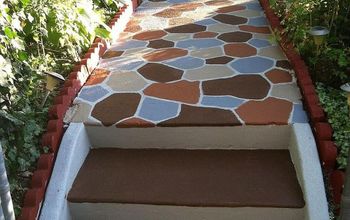
Our slate front walkway was in need of an update. The 2' x 3' slate flagstones had cracked in places and had shifted over the years, allowing weeds to invade. Fortunately, the stones were not mortared in so we were able to do this update on our own and much more quickly than I thought!
Best natural weed killer!
I measured the area of the total walkway and the area that the flagstones would cover to calculate the amount of paver base and pea gravel we'd need. First thing in the morning, we picked up our supplies from Lowe's and then started by selecting the five best stones and hauling the cracked ones away.
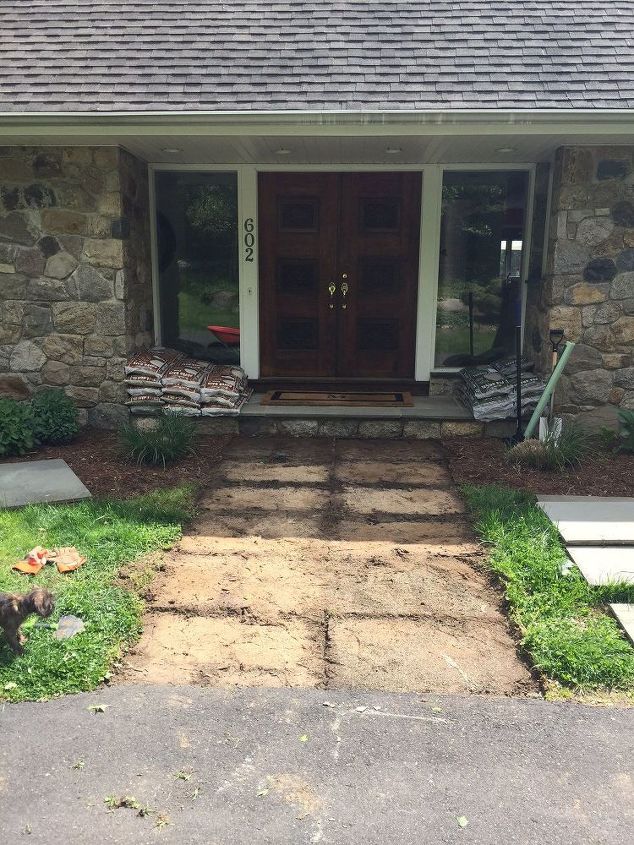
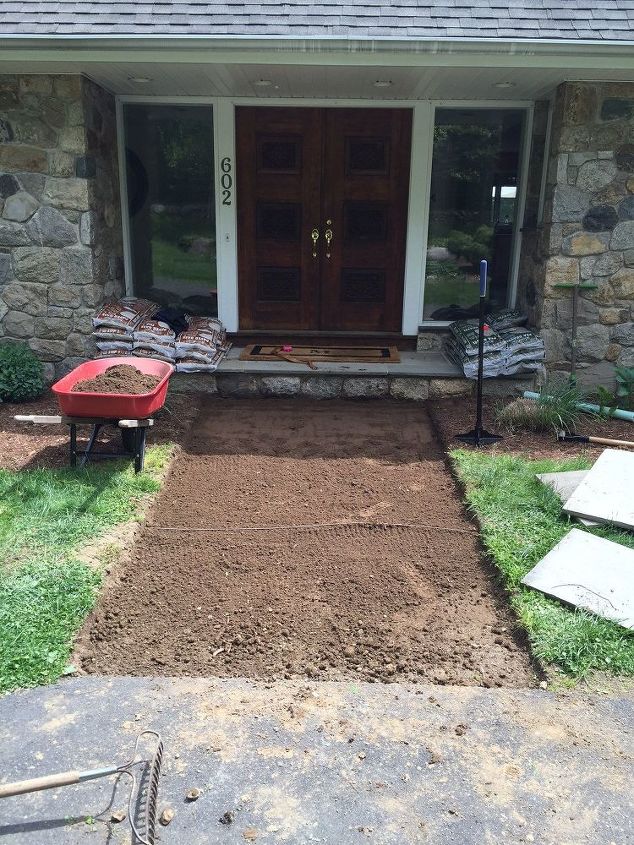
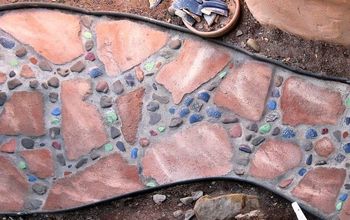
Once the stones were removed, we used an edger and a flat spade to excavate the dirt down a few inches (approx. 2" for the paver base and 1.5" for the flagstones and pea gravel). We then added metal edging, which by sheer luck came in 8' and 4' lengths which we combined for our 12' walkway.
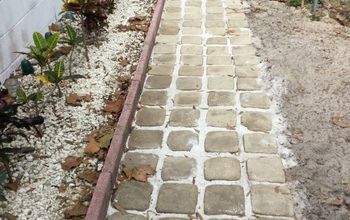
To distribute the paver base, we placed the bags in a grid over the whole walkway area and then cut open the bags with the edger and dumped the base out.
We used a 10" x 10" tamper to pack down the base layer, then unrolled landscape fabric over the whole surface and used landscape staples to hold it in place. We used a recycled fabric made from soda bottles.
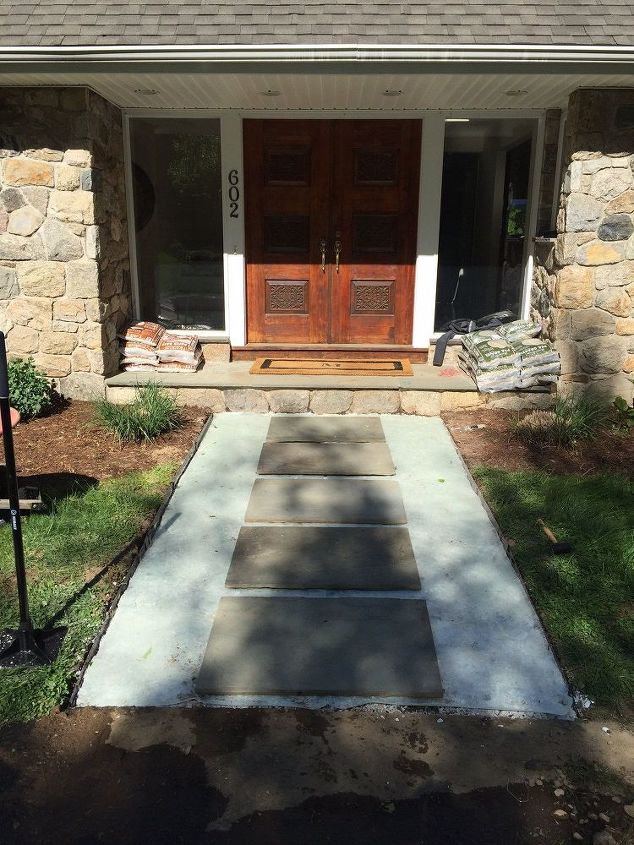
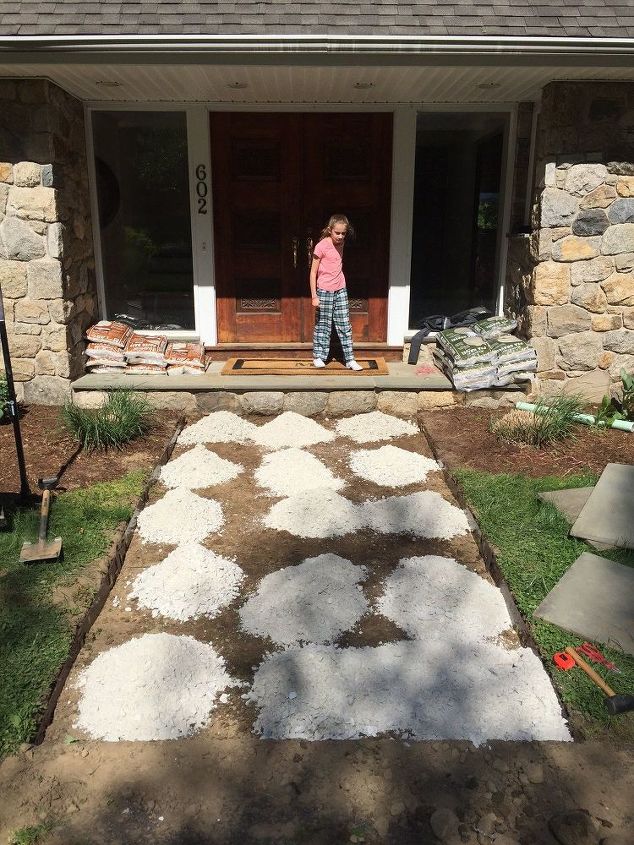
We placed and nudged the flagstones till they looked evenly distributed.
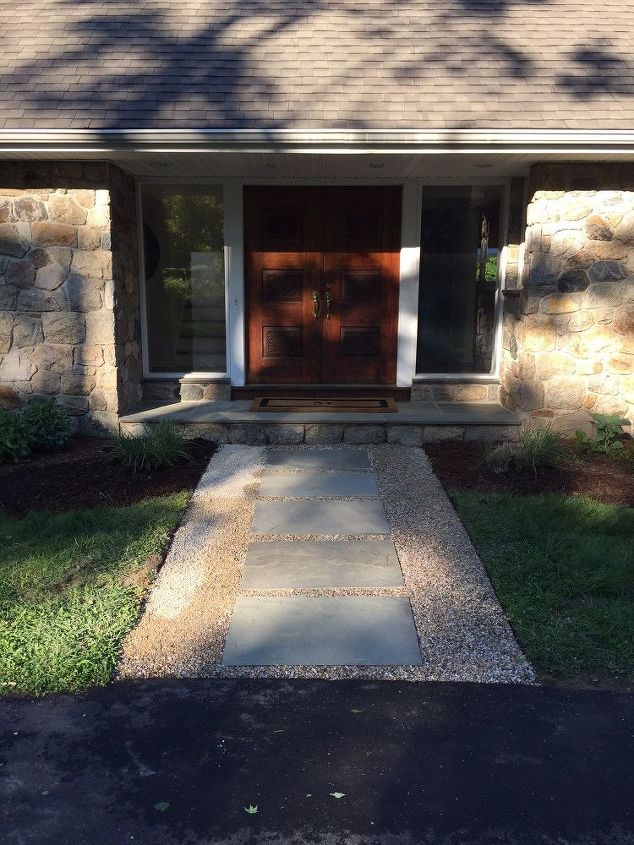
We filled in around the flagstones with pea gravel, hauled off the unused materials, replaced the mulch in adjoining beds, hosed the whole thing off and went and had a beer to celebrate!
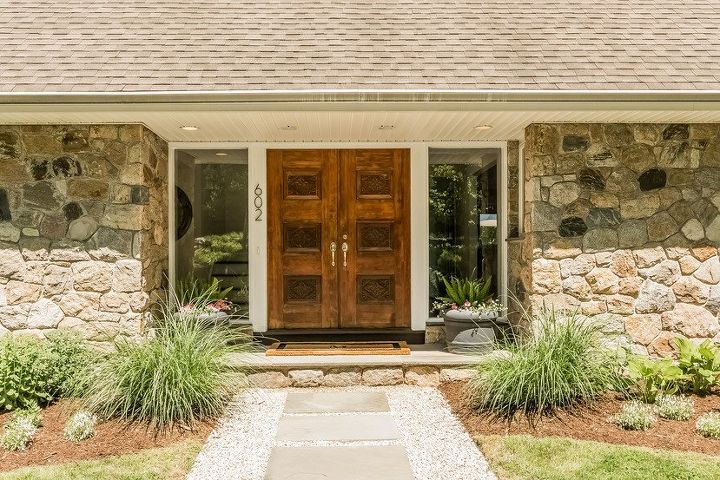
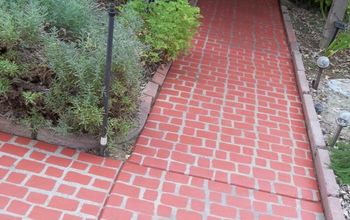
UPDATE: It's a month later and I just wanted to report on how the pea gravel has worked for us. It has gotten on the flagstones a bit here and there, and the walkway overall was not practical when we had a new refrigerator delivered. But other than that we're very happy with the look and materials! Here's an updated photo where the landscaping has grown in, the trim has been painted and we've added planted pots and new house numbers.
Resources for this project:
See all materials


Comments
Join the conversation
-
100% improvement. Inviting and appropriate to surroundings. Isn’t it amazing, couple days of hard work and really not much money made a wonderful impact that will last for years to come
-
I love it! In our old house we did the exact same thing going towards the back yard to our pool area. We used concrete powder and wet it to hold the peas into place. It didn’t make it look like solid concrete either. Although, I must say it took a lot of bags of concrete because we had dug out to much dirt and it took a lot of pea gravel to fill in. But it turned out great and we had lots of compliments! You did an awesome job!


Frequently asked questions
Have a question about this project?
Why didn't you use two rows of pavers instead of one?
What brand of weed block fabric did you use?
Kristen, first your picture, is it from about 8 years old? It's so cute, I may have to borrow your idea for my bio.
I'm wondering if you are still happy with the pea gravel or did you switch to something else? Pea gravel just never seems to settle in.
There's something new to me called polymeric sand. You sweep it into the cracks between the your slate and into the pea gravel and gently mist it with a garden hose. The polymers set up like grout to hold those wiggly peas in place. Just a thought. I'm redoing my sidewalk and I want it to have a loose stone edging like yours. It's gorgeous!