


Accent Walls Move Aside, It's Accent Ceilings Now

I'm always a sucker for a good accent wall. They draw your eye in and give you something interesting to look at. However it is the ceiling's turn to be the center of attention. Lift your gaze up and start designing! I did just this recently in my husband's home office renovation that I am doing for the One Room Challenge on Instagram.
Hometalk Recommends!
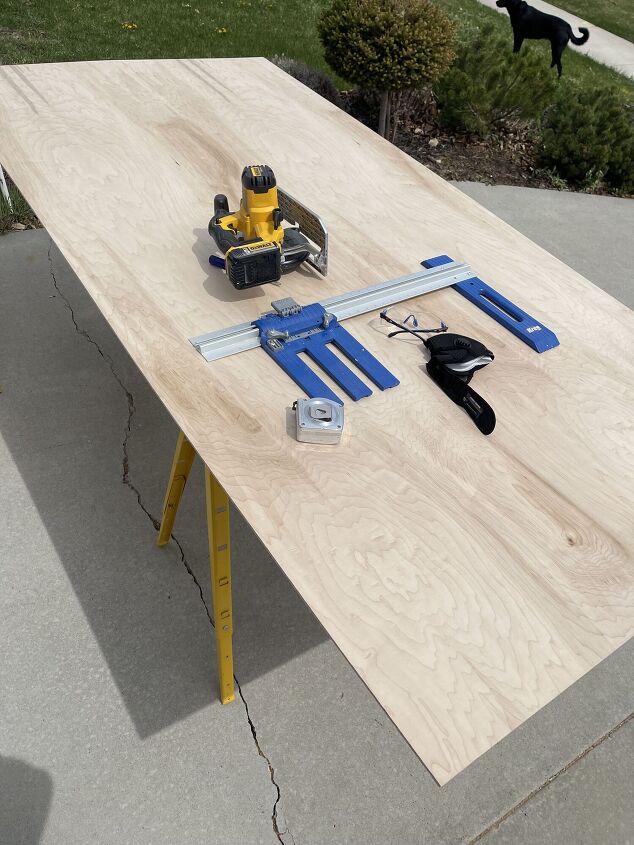
I started my project by calculating the area of the ceiling, a simple length x width. Then I figured out how much plywood I would need to cover the area. I used a 1/4" thick 4' x 8' birch plywood. I used my Kreg jig attached to my circular saw to rip down the plywood into 6" wide strips.
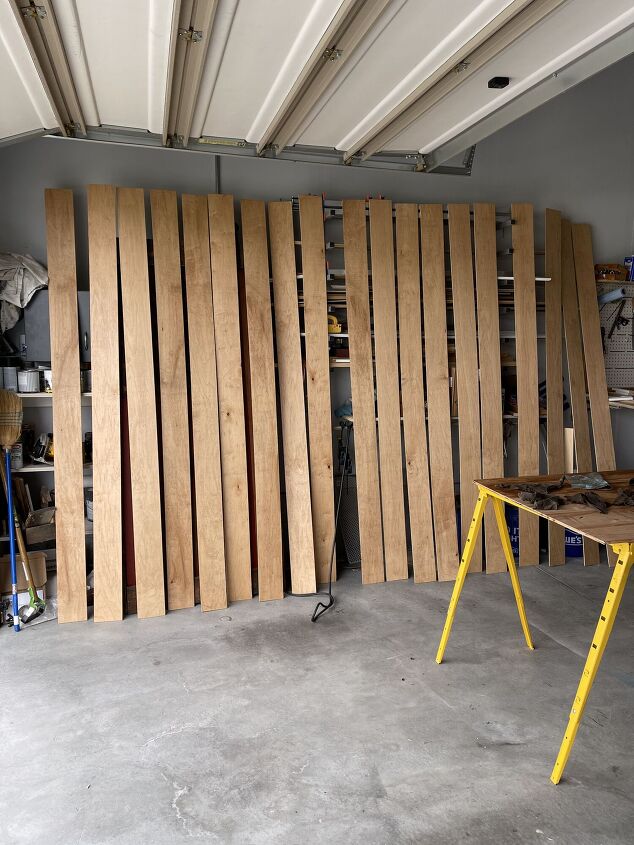
After ripping down my sheets of plywood I sanded one side of each piece, wiped them each down, sprayed them with a coat of shellac, and then stained them with a simple walnut stain. The shellac adds a barrier to the grain of the wood allowing the stain application to be more consistent.
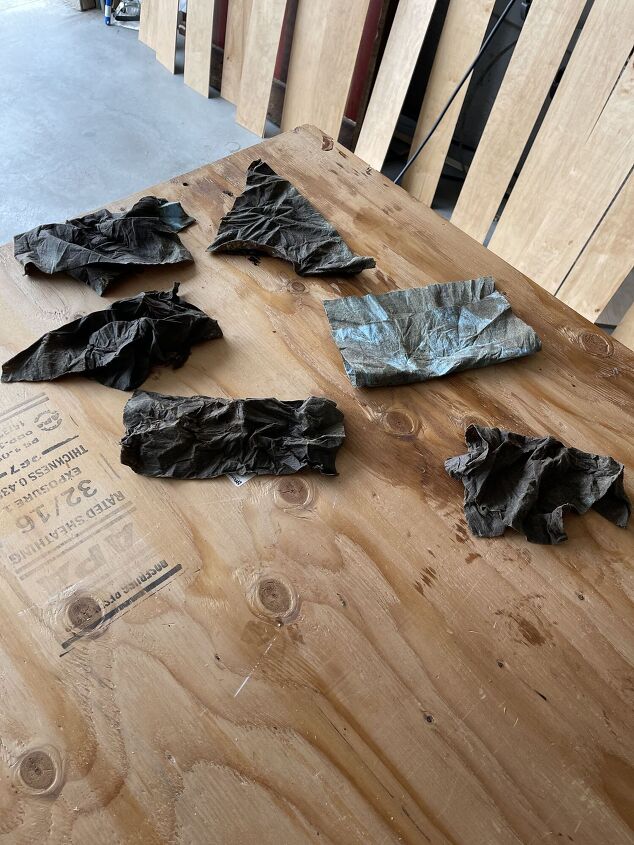
One side tip-be sure to lay out your stain rags to dry. Wadding them up and throwing them in the trash can allow them to catch fire.
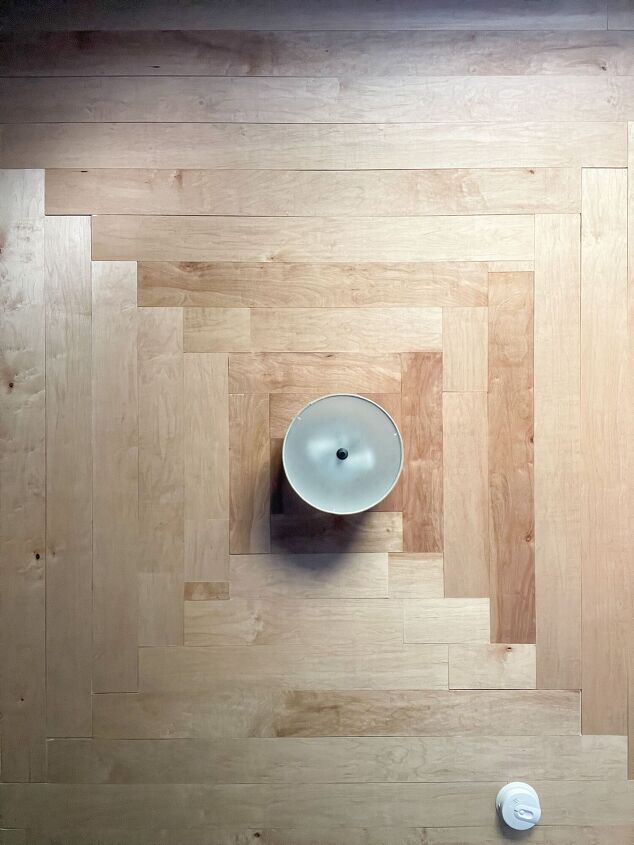
After the boards dried overnight it was time to start installing them. I used my 18 gauge DeWalt brad nailer with 1" long nails. I nailed them in at crossing angles to ensure the wood will stay put without destroying the ceiling with glue. My pattern was a simple square. I started on the outer edges of the room and worked my way in ward making cuts for my fire alarm as well as the light fixture in the middle of the room.
Once I was done adding all the plywood strips to the ceiling the only thing that was left to do was replacing the ugly boob light!
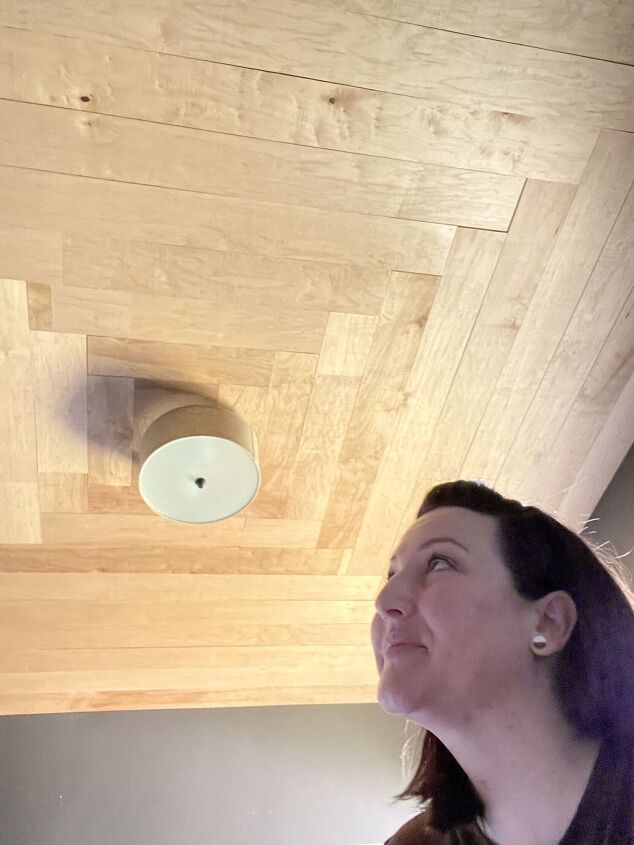
And just like that, a beautiful custom accent ceiling! I love how this ceiling warms up the space in this office. It adds a masculine tone being mixed with the dark grey wall color. Now on to the other projects to complete this office renovation!
0 views0 commentsPost not marked as liked


Comments
Join the conversation
-
I like it. At definitely draws your eyes in. Thanks for sharing. Now I have a great idea for my home office.
-
I love it. Very original.


Frequently asked questions
Have a question about this project?
Was there a special reason you would have used oil based stain, (in reference to your Tip on not wading up used rags as being a fire hazard?) Wouldn’t a water based stain been sufficient & same for a sealer?
Absolutely love this. However, in the picture of all the boards standing upright, they are all the same length. Can you provide some insight on how you measured and cut them as you worked from the outside to the inside? I noticed the boards get smaller as they go inward. Also, one 8 foot board will not stretch to the length of one side of the ceiling, so how did you connect the boards end to end to do one side? For example, I have a 10 x 10 room, so 8 feet Will leave some space to fill on that side of the wall. Please let me know how you connected the boards end to end as to not show seams. Thanks so much!
How did you attach the boards to the ceiling? What was the jig used for? I’m confused , it looks great but I’d like to know if you used glue or firring strips , you can’t just nail into plaster ceiling…